First off, why do you think you have blown head gaskets?
Pressure testing/combustion gas tests?
Does it still run?
Next, you say "little knowledge" how little? What tools do you have? Do you have a clean dry place to work?
You will need more than just head gaskets as well, you need a full top end gasket set, timing belt set, new coolant and oil at the very least.
These are the instructions for head removal. Read them and ask questions. If it looks like you want to tackle the job, get a subscription to either Alldata or so you have a good source of information in front of you. This isn't an easy job if you have not done it before.
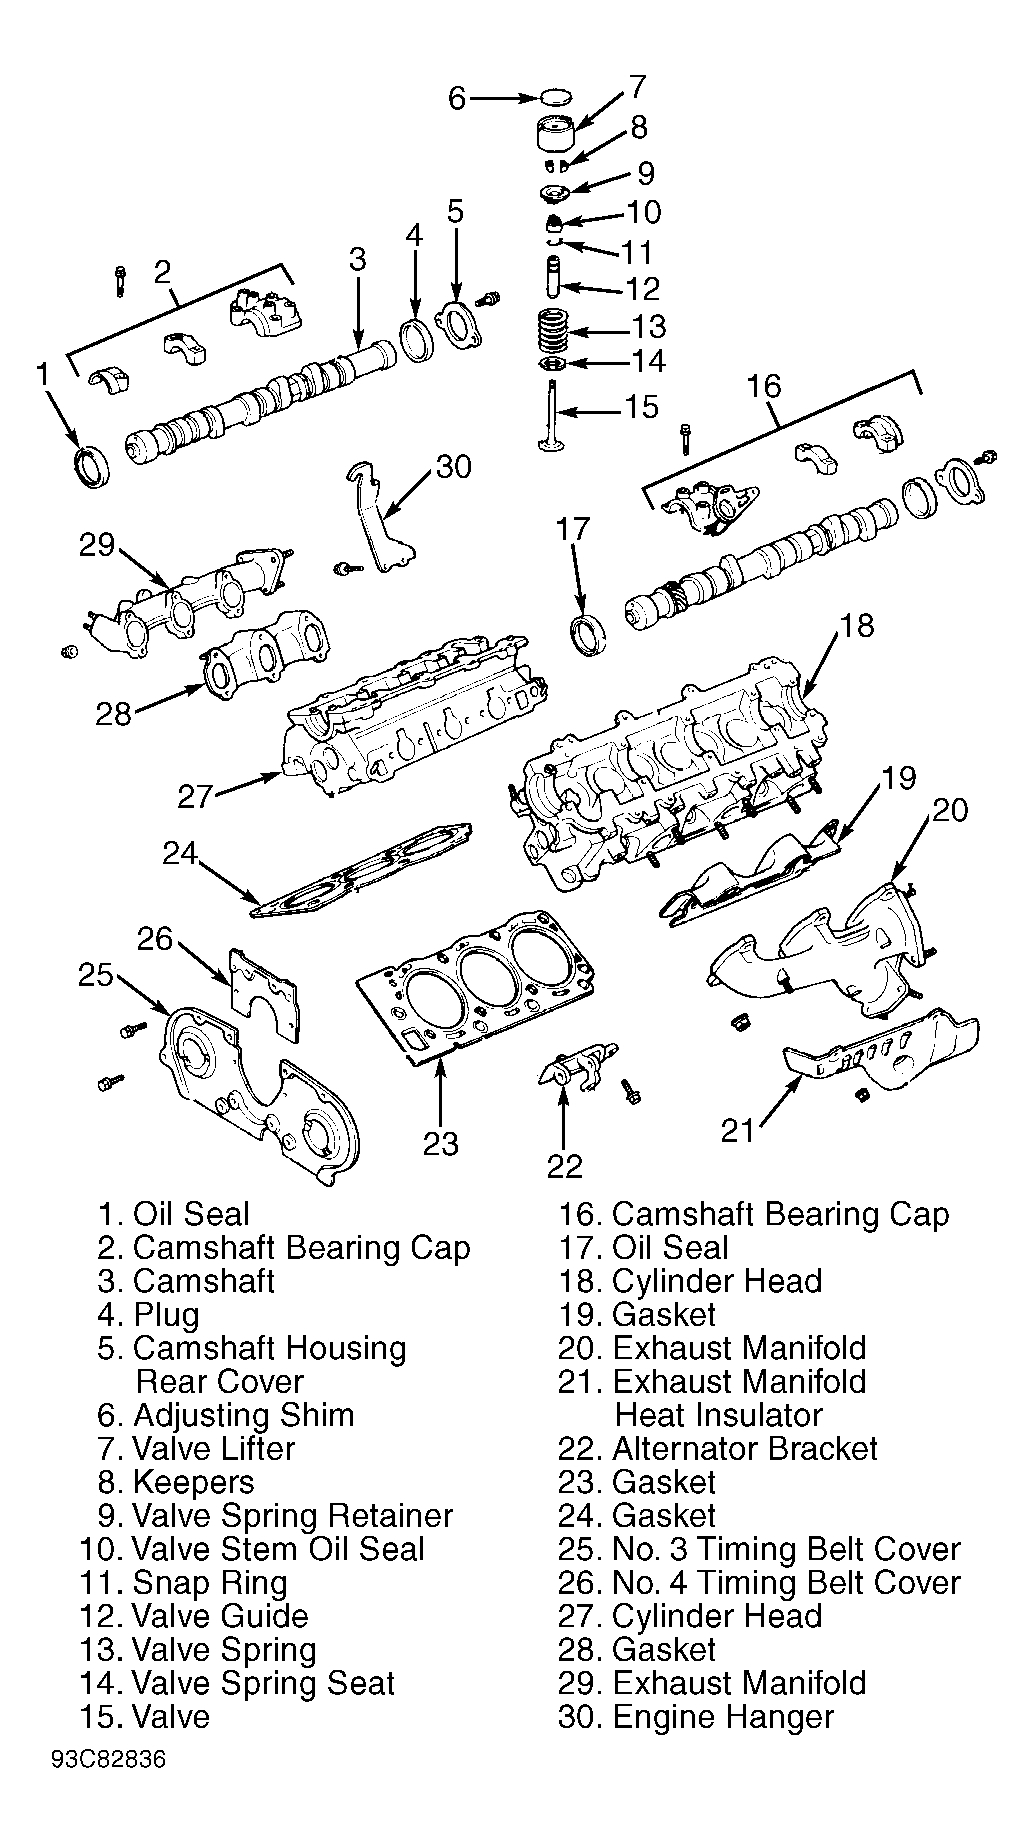
REMOVAL - CYLINDER HEAD and MANIFOLDS
Disconnect negative battery cable.
Drain cooling system.
Remove air cleaner and hose.
Remove radiator and fan.
Remove A/C compressor drive belt (if equipped).
Remove power steering pump with hoses attached and secure aside (if equipped).
Disconnect control cables at throttle body.
Disconnect cruise control cable (if equipped).
Release fuel pressure. See FUEL PRESSURE RELEASE.
Disconnect necessary electrical connections, coolant hoses, fuel lines and vacuum hoses.
Disconnect oxygen sensor connector. Remove front exhaust pipe, located between exhaust manifold and catalytic converter.
Remove timing belt. See TIMING BELT.
Disconnect spark plug wires.
Remove distributor.
Remove union bolt, gaskets and cold start injector fuel pipe.
Remove power steering pump bracket.
Disconnect hose from PAIR valve. See Fig 1.
Remove support for air intake chamber.
Remove EGR valve assembly.
Remove bolts/nuts, air intake chamber and gasket.
Disconnect electrical connectors for removal of wiring assembly, located across engine, in front of valve cover.
Remove bolts and wiring assembly.
Remove No. 2 and 3 fuel pipes. See Fig 1.
Remove No. 4 timing belt cover, No. 2 idler pulley and No. 3 timing belt cover. See Fig 2 and Fig 3.
CAUTION: DO NOT allow injectors to fall from delivery pipe when removing delivery pipe from intake manifold.
Remove PAIR valve. See Fig 1.
Remove delivery pipes, injectors, insulators, spacers and "O" rings.
Remove coolant by-pass outlet. See Fig 1.
Remove bolts/nuts, intake manifold and gaskets.
Remove crossover pipe between exhaust manifolds.
For right cylinder head removal, remove coolant by-pass pipe bolt.
For left cylinder head removal, remove dipstick tube and alternator.
For all cylinder head applications, remove valve covers and gaskets.
Remove camshafts. See CAMSHAFT under REMOVAL & INSTALLATION.
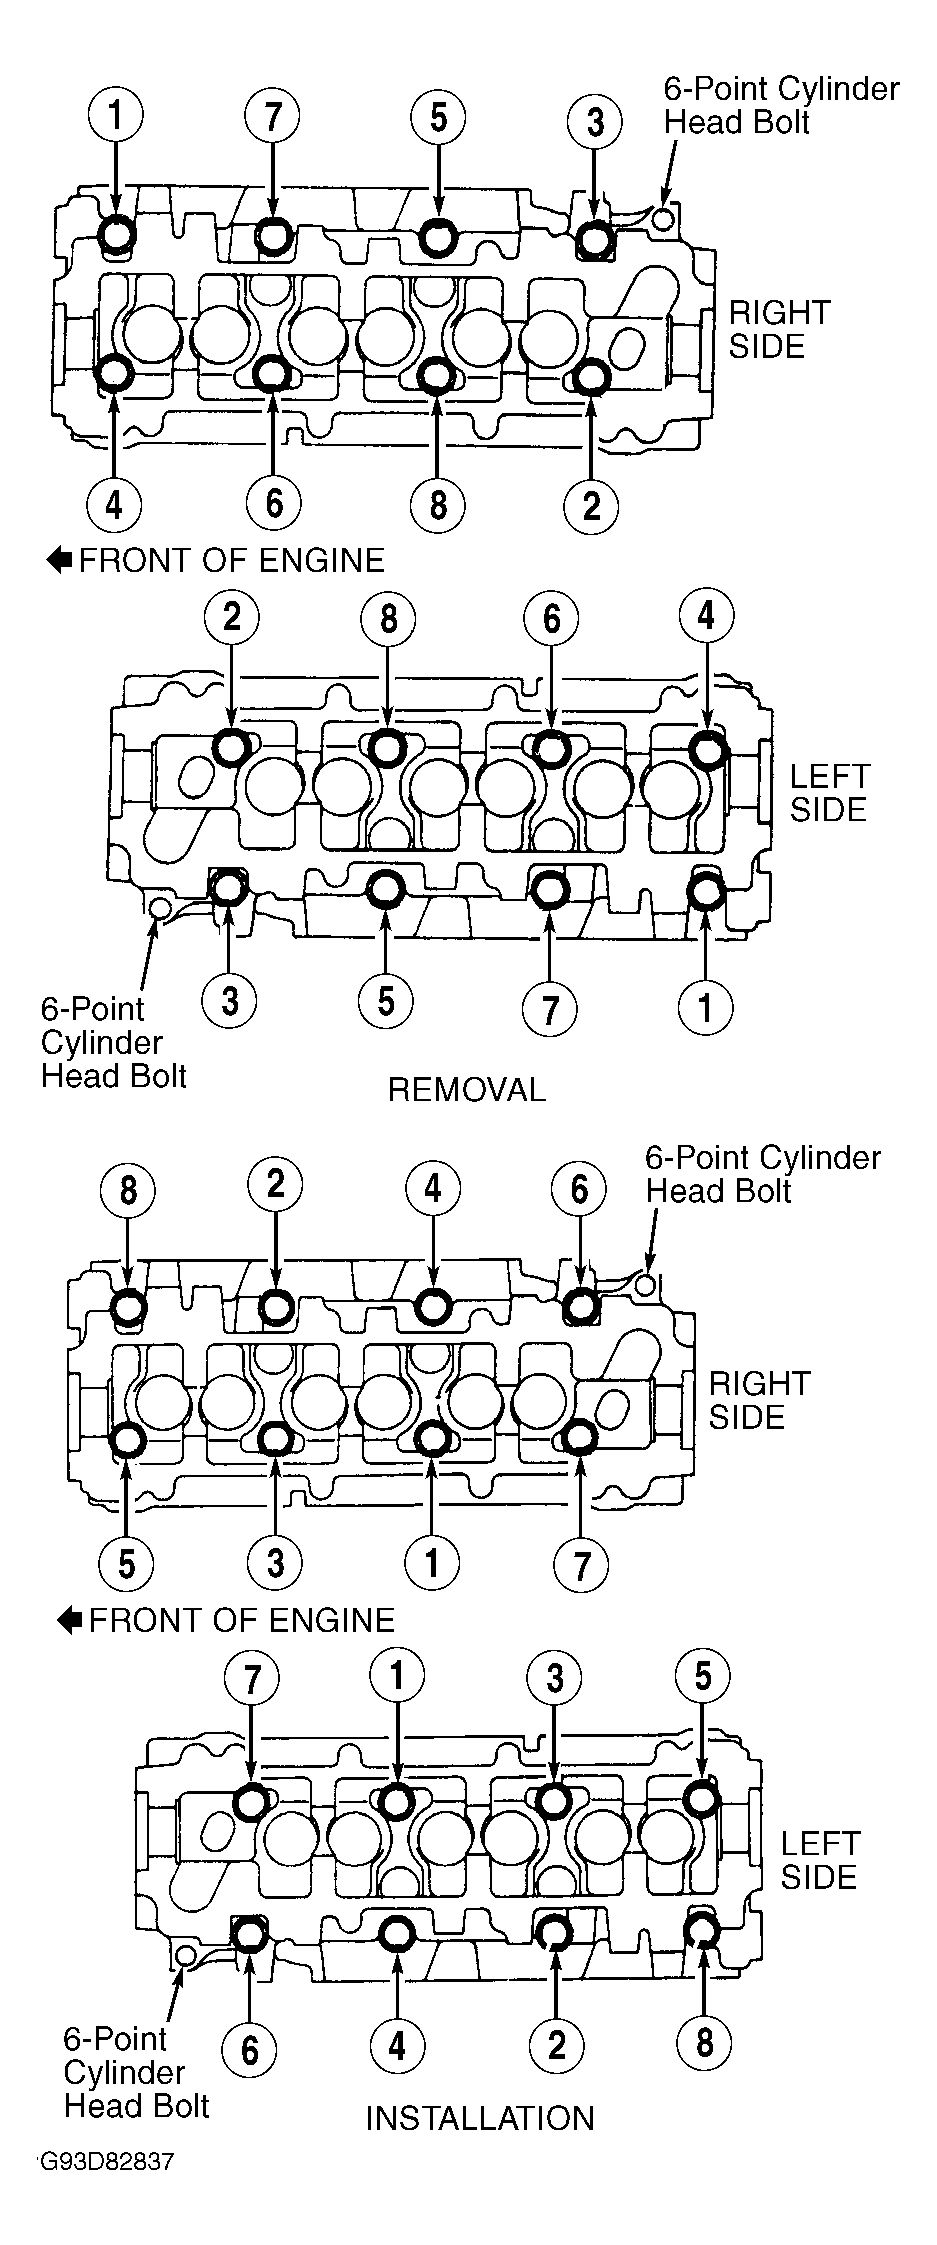
CAUTION: A 6-point cylinder head bolt is located on each cylinder head. All other cylinder head bolts are 12-point bolts. See Fig 4. Cylinder head bolts must be loosened in proper sequence to prevent cylinder head warpage.
Remove 6-point cylinder head bolt from cylinder head. See Fig 4. Loosen remaining 12-point cylinder head bolts in sequence using several steps. See Fig 4.
Remove cylinder head bolts with washers, cylinder head and gasket. Remove exhaust manifold and gasket. If removing valve lifters and adjusting shims from cylinder head, ensure component location is marked for reassembly reference.
Images (Click to make bigger)
SPONSORED LINKS
Wednesday, August 16th, 2017 AT 4:48 PM