Hi and thanks for using 2CarPros.
I have a feeling you didn't get the push rod properly installed. With that, I am going to provide all the steps for replacing the part. Read through them to confirm you did it correctly. After that, I will provide the directions for bleeding the system. All attached pictures will correlate with these directions as indicated.
__________________________________________________
PROCEDURES
Clutch Master Cylinder Replacement
Removal Procedure
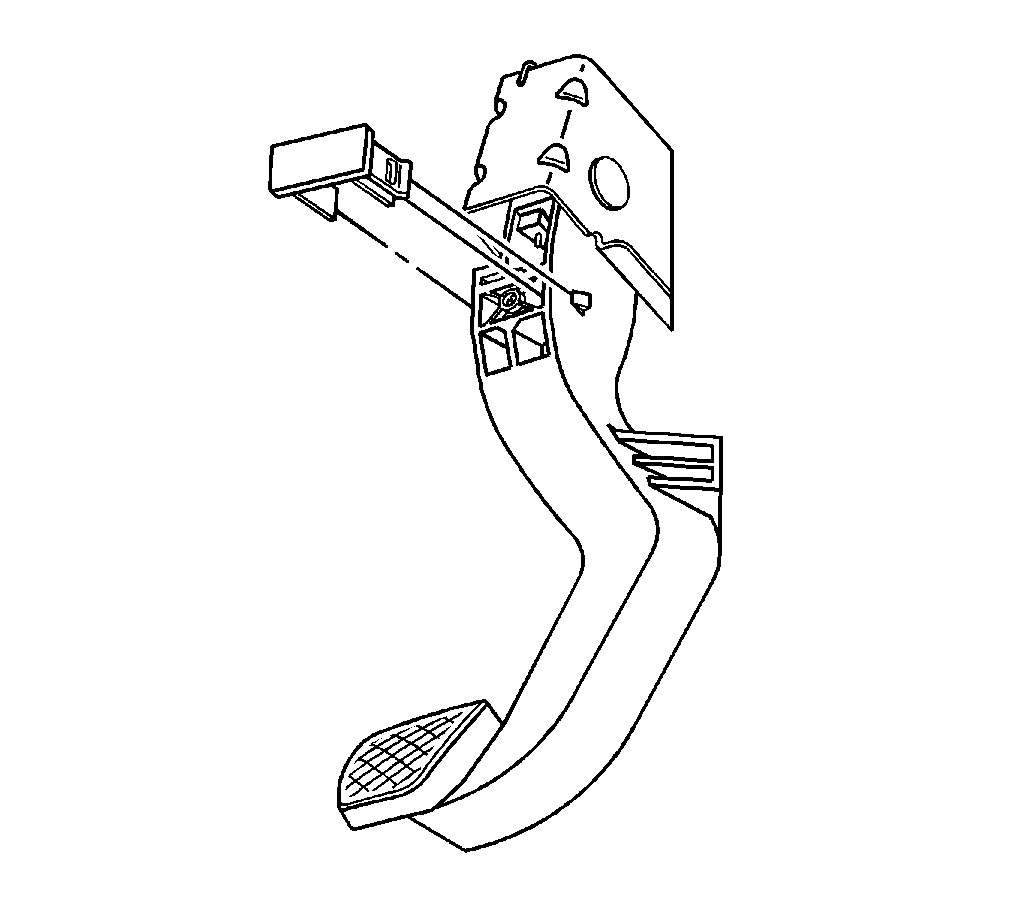
Picture 1
1. Remove the clutch pedal retainer from the front of the clutch pedal assembly.
2. Pull the clutch pedal upward in order to disengage the clutch master cylinder pushrod from the clutch pedal.
3. Remove the UBEC.
Picture 2
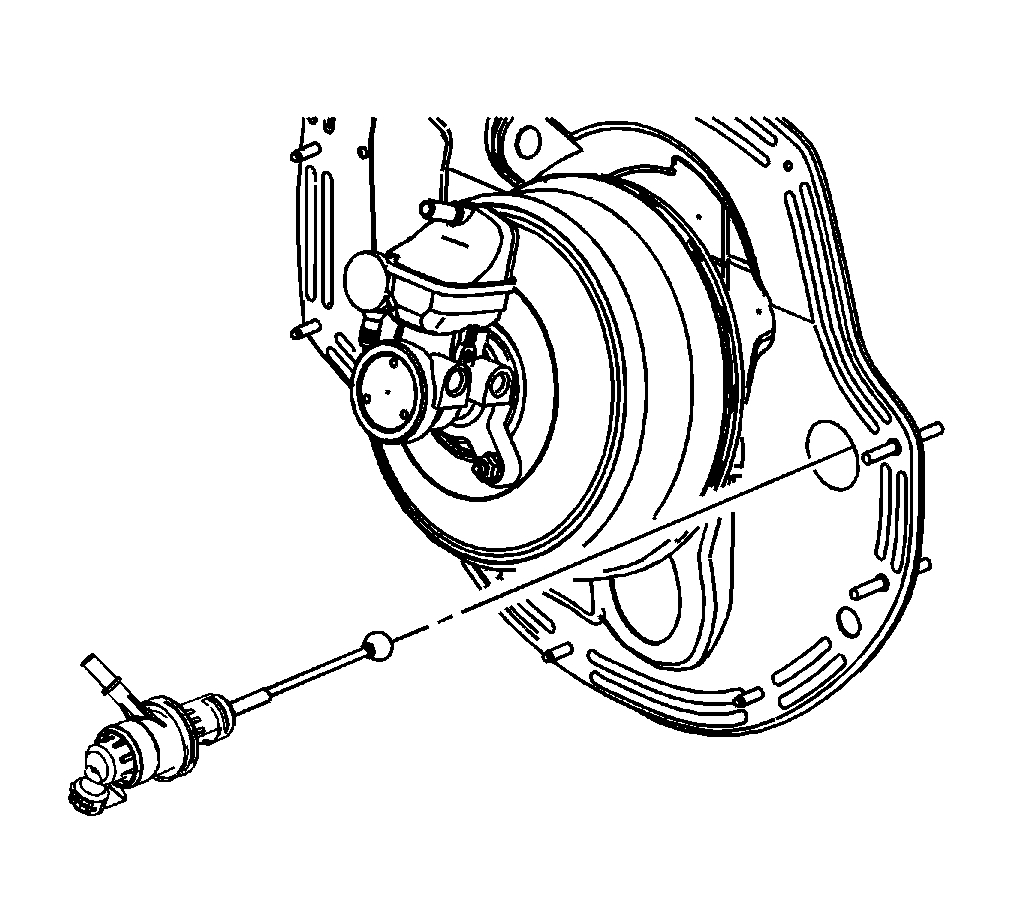
4. Place a shop towel under the clutch master cylinder in order to catch any fluid loss.
Notice: Refer to Brake Fluid Effects on Paint and Electrical Components Notice in Service Precautions.
5. Disconnect the clutch damper from the clutch master cylinder.
Picture 3
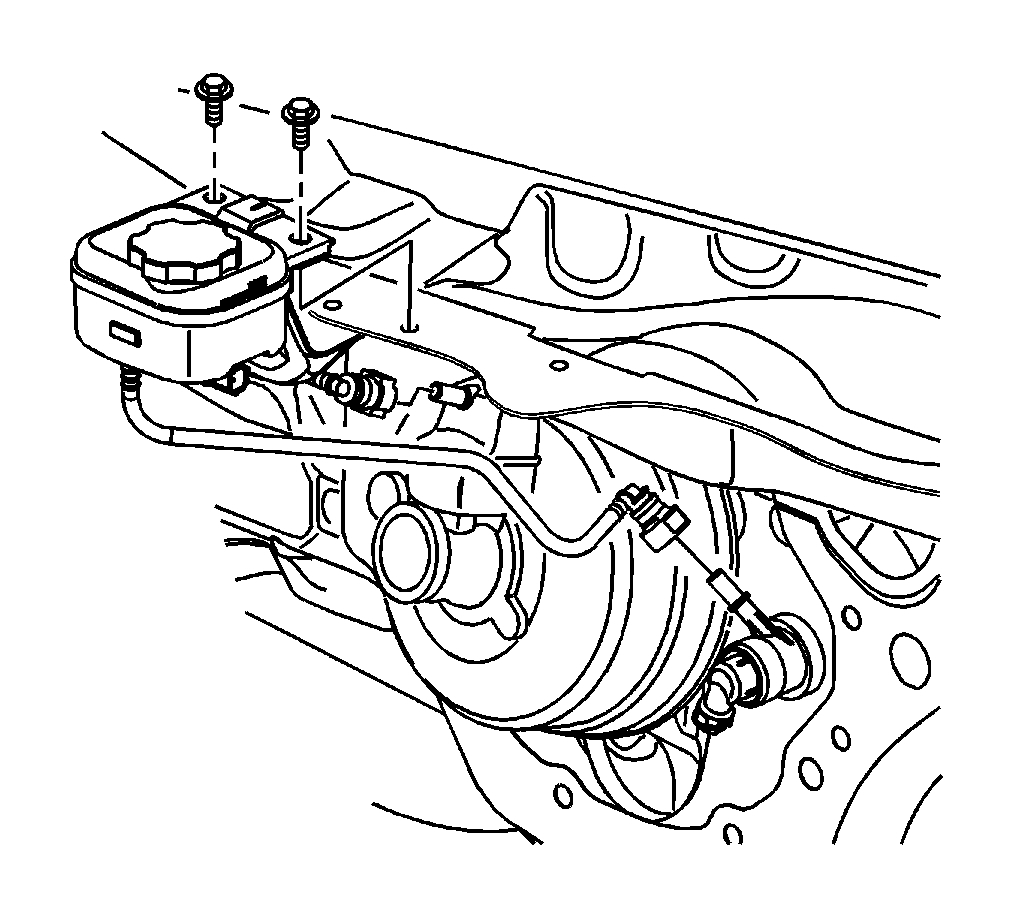
6. Disconnect the reservoir line from clutch master cylinder.
7. Cap the reservoir and hydraulic lines in order to prevent fluid loss and contamination.
Picture 4
8. Rotate the clutch master cylinder one 1/4 turn clockwise and remove the cylinder from the vehicle.
Installation Procedure
Picture 4 again
1. Install the clutch master cylinder while rotating 1/4 turn counterclockwise.
Important: While installing, ensure that the clutch master cylinder pushrod is aligned with he clutch pedal.
2. Uncap the reservoir and hydraulic lines.
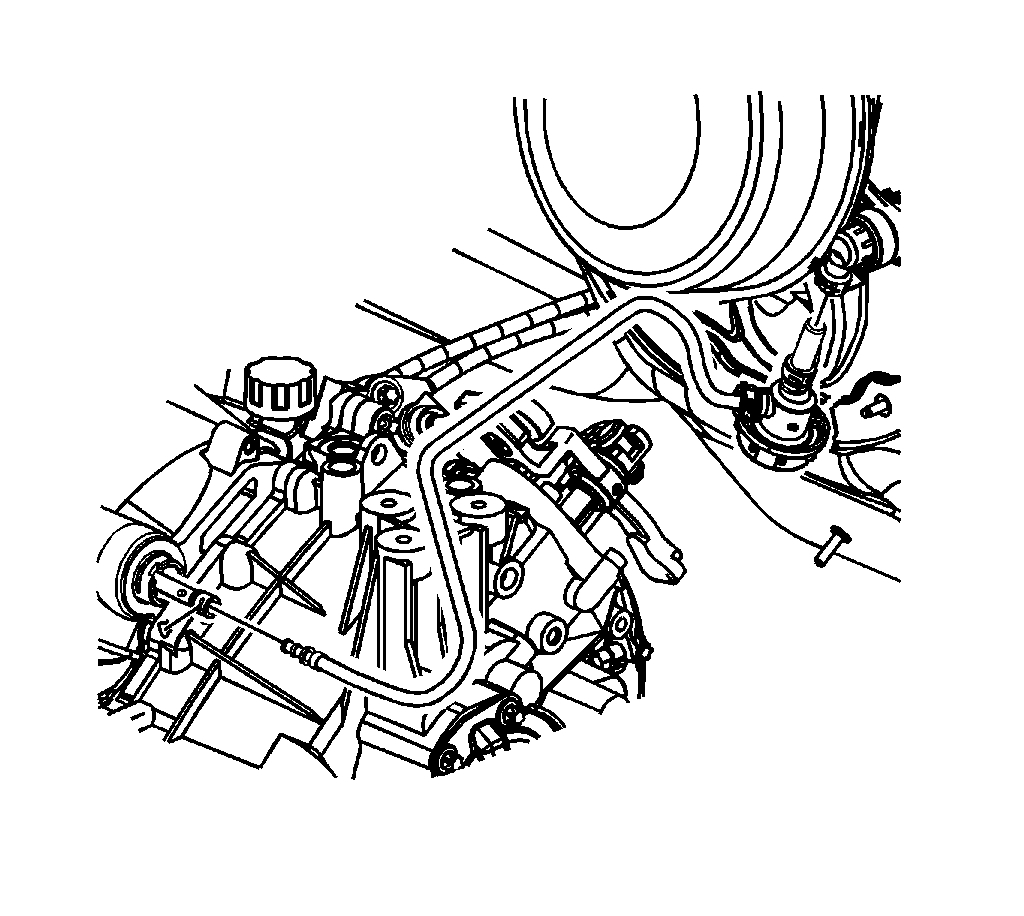
Picture 5
3. Connect the clutch damper to the clutch master cylinder.
4. Install the reservoir line in the clutch master cylinder.
Picture 6
5. Remove the shop towel and discard in a suitable container.
6. Install the UBEC. Refer to Underhood Electrical Center or Junction Block Bracket Replacement in Computers and Control Systems.
Picture 7
7. Connect the clutch master cylinder pushrod to the clutch pedal.
8. Install the clutch pedal retainer.
9. Bleed the clutch hydraulic system.
_________________________________________________________________
Bleeding Procedure
Hydraulic Clutch System Bleeding
Special Tools
J 35555 Metal Mityvac
J 43485 Power Steering Bleeder Adapter
1. Verify that all the lines and fittings are dry and secure.
2. Clean the dirt and grease from the reservoir cap in order to ensure that no foreign substances enter the system.
3. Remove the reservoir cap.
4. Fill the reservoir to the proper level with the required fluid.
Some manual transmission equipped vehicles have a combined brake and clutch fluid reservoir.
5. Attach the J 43485 to the J 35555, or equivalent.
Important: Brake fluid will deteriorate the rubber on the J 43485. Use a clean shop cloth to wipe away the fluid after each use.
6. Place and hold the adapter on the reservoir filler neck to ensure a tight fit. In some cases, the adapter will fit into the reservoir opening.
7. Apply a vacuum of 51-68 kPa (15-20 hg) and remove the adapter.
8. Refill the reservoir to the proper level.
9. Repeat steps 6 and 7.
10. If needed, refill the reservoir and continue to pull a vacuum until no more bubbles can be seen in the reservoir or until the fluid level no longer drops.
Caution: The vehicle will move if started in gear before the Actuator Cylinder is refilled and operational. Start the vehicle the first time in neutral to help prevent personal injury from vehicle movement and see if the transmission will shift easily into gear.
11. Pump the clutch pedal until firm (to refill actuator cylinder).
12. Add additional fluid if needed.
13. Test drive the vehicle to ensure proper operation.
Let me know if this helps or if you have other questions.
Take care,
Joe
Images (Click to make bigger)
Monday, February 11th, 2019 AT 2:02 PM
(Merged)