Hi and thanks for using 2CarPros.
Here are the directions for replacing shift solenoids and the TCC solenoid. Location is indicated in the directions.
___________________________________
Control Valve Solenoid Replacement
Removal Procedure
Important: Only remove the valvebody cover. The valvebody DOES NOT have to be removed from the transaxle to gain access to the solenoids.
1. Remove the valvebody cover. Refer to: See: Valve Body, A/T > Procedures > Valvebody Cover Replacement
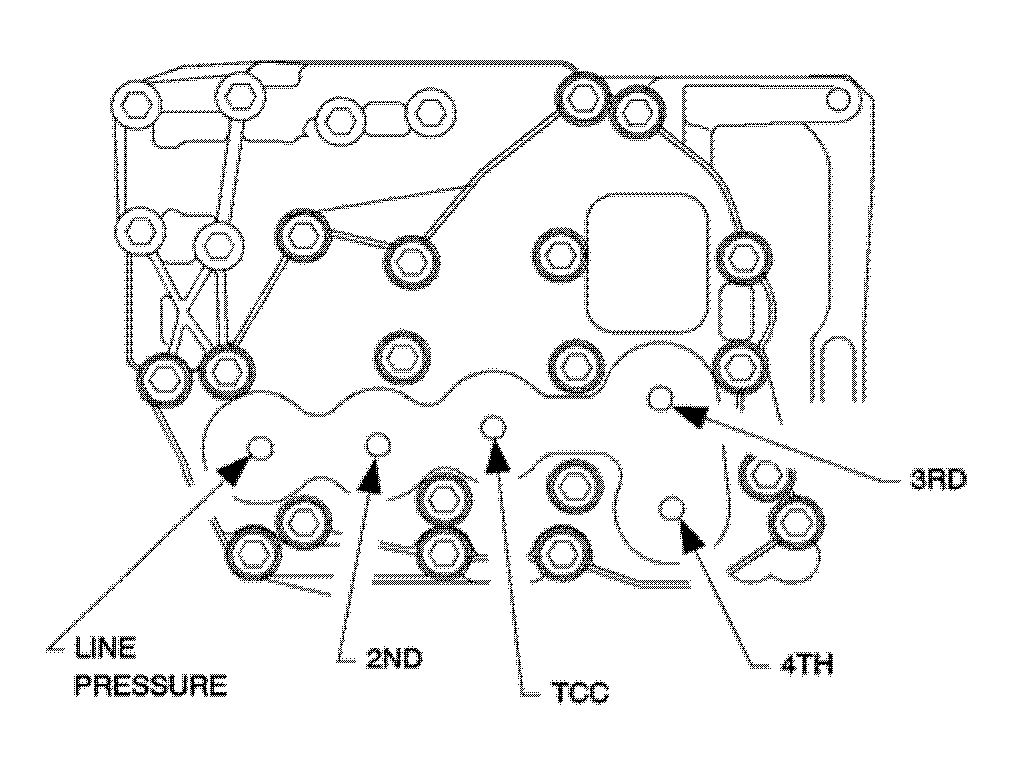
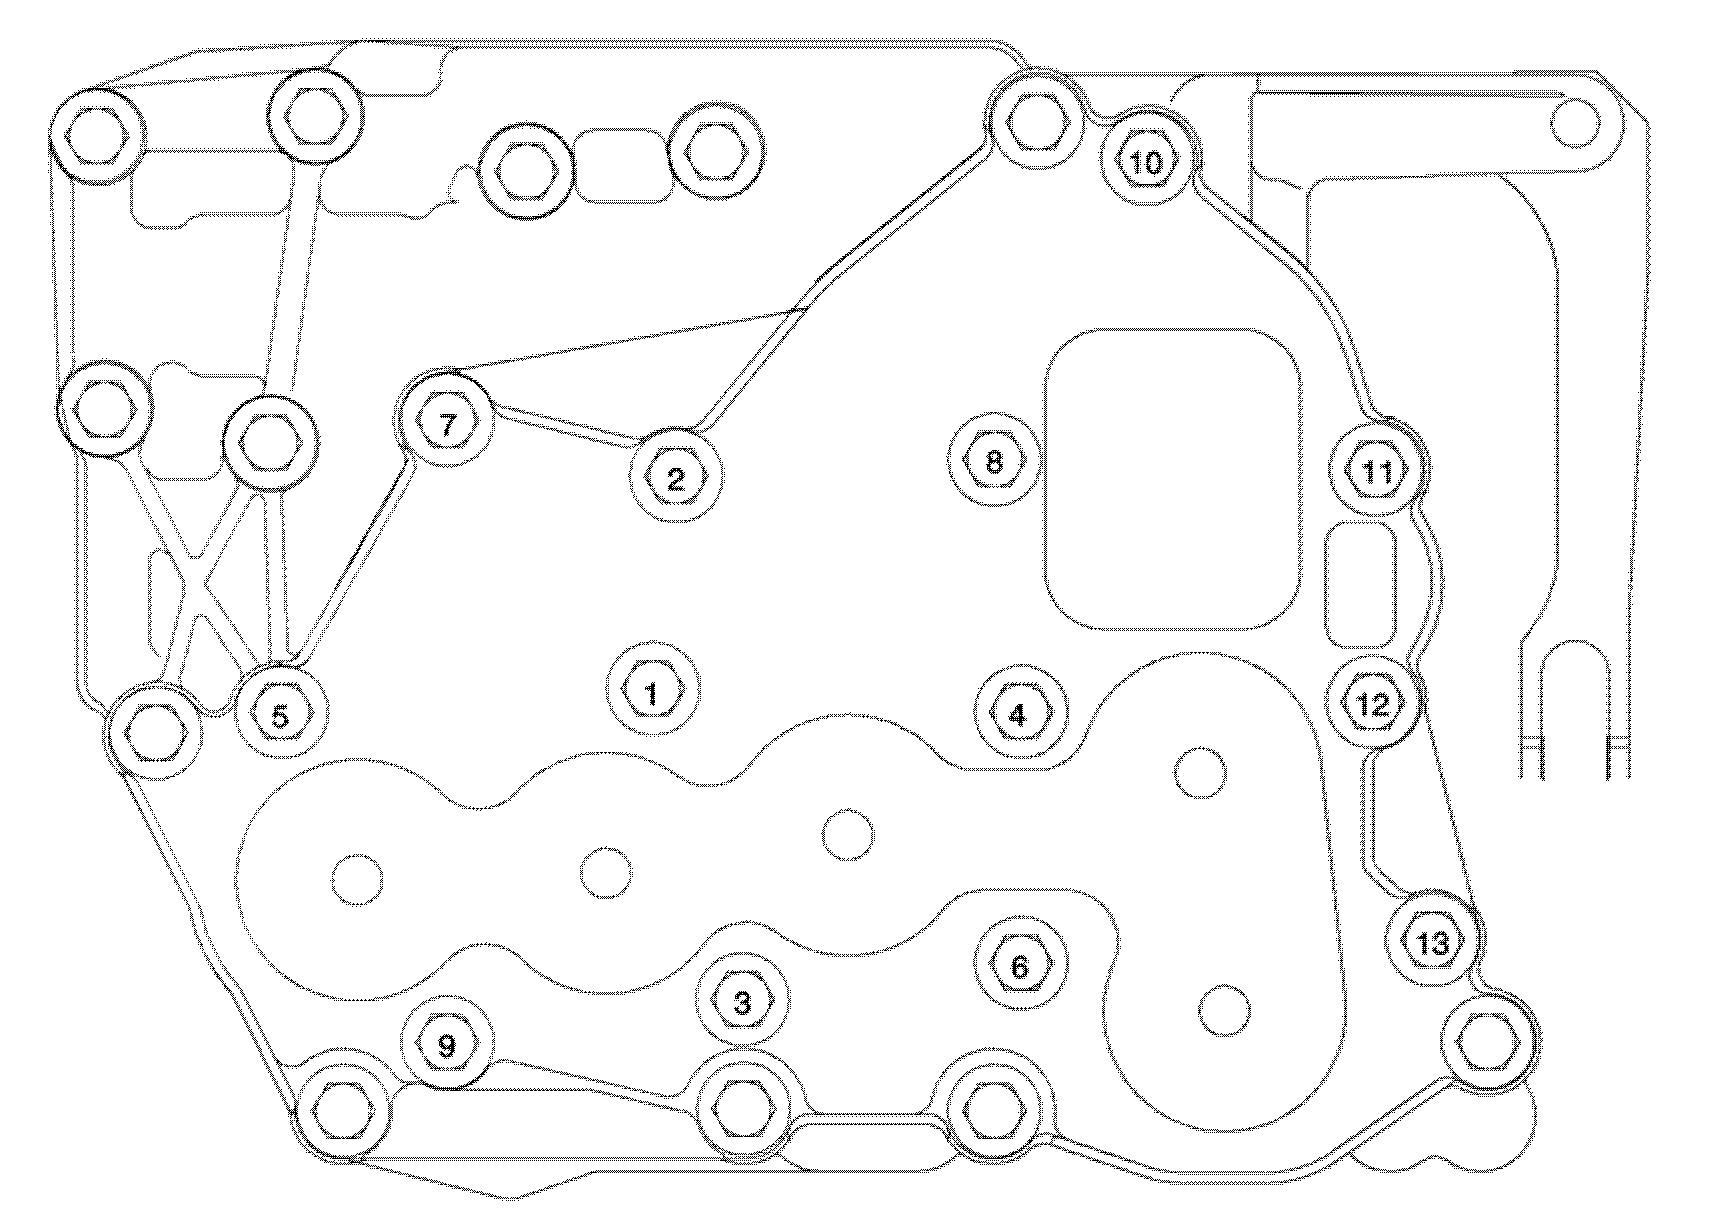
2. Remove the solenoid cover-to-valvebody bolts, identified by the heavy circles, and remove solenoid cover. The solenoids are identified below:
- The pressure control solenoid
- The shift solenoid 2
- The TCC solenoid
- The shift solenoid 4
- The shift solenoid 3
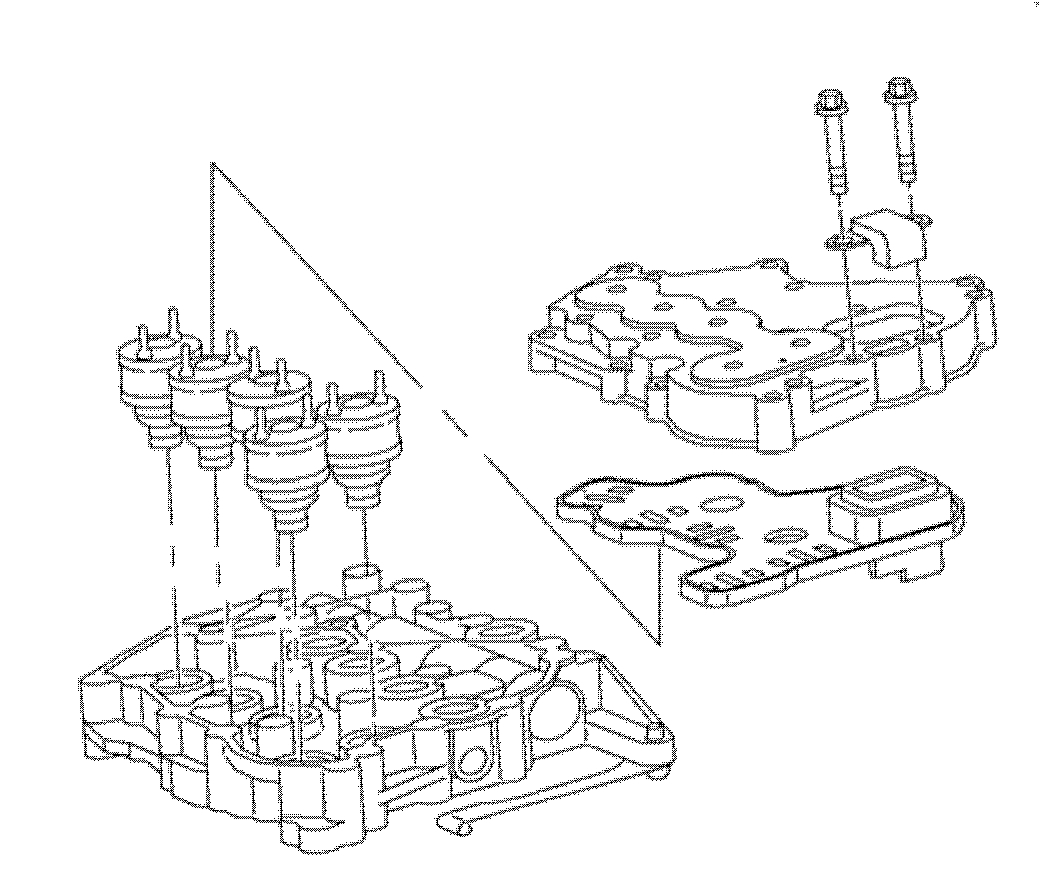
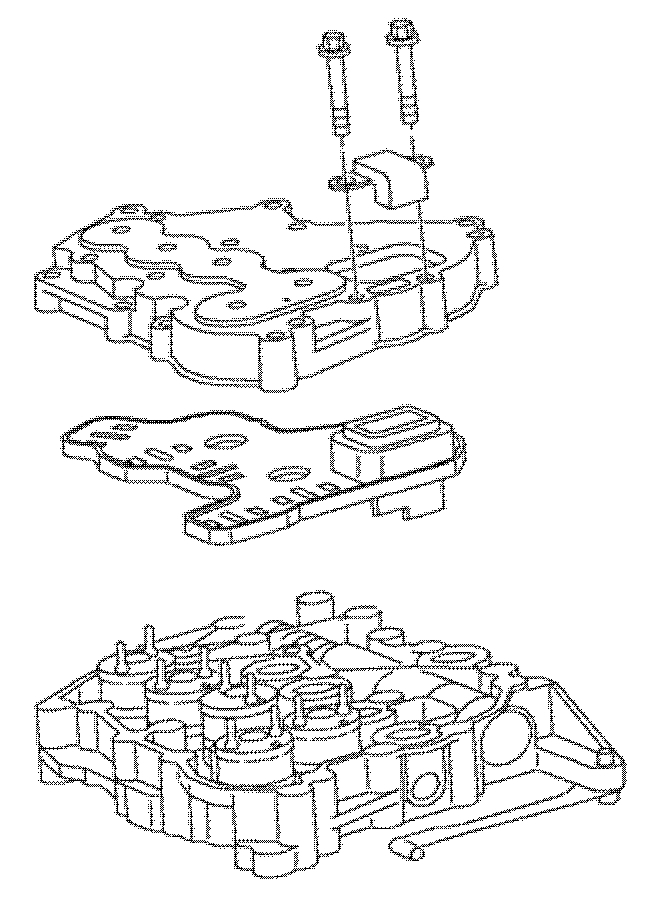
3. Lift the solenoid connector plate off the solenoid pins using care not to damage the connector plate.
Important: Note the position of the solenoid valves before removing.
4. Remove the solenoid by twisting as the solenoid is removed.
Installation Procedure
1. Lube the solenoid O-rings.
2. Install the solenoids with a twisting motion.
3. Check the connector plate terminals with a #43 (2.25 mm) drill bit. There should be a slight drag on the shank. If there is no drag replace the connector plate.
4. Align the solenoid pins to the connector plate.
5. Install the connector plate.
6. Install the solenoid cover.
Important: Clean and lubricate the fasteners with Saturn Transaxle Fluid. Wipe off excess fluid.
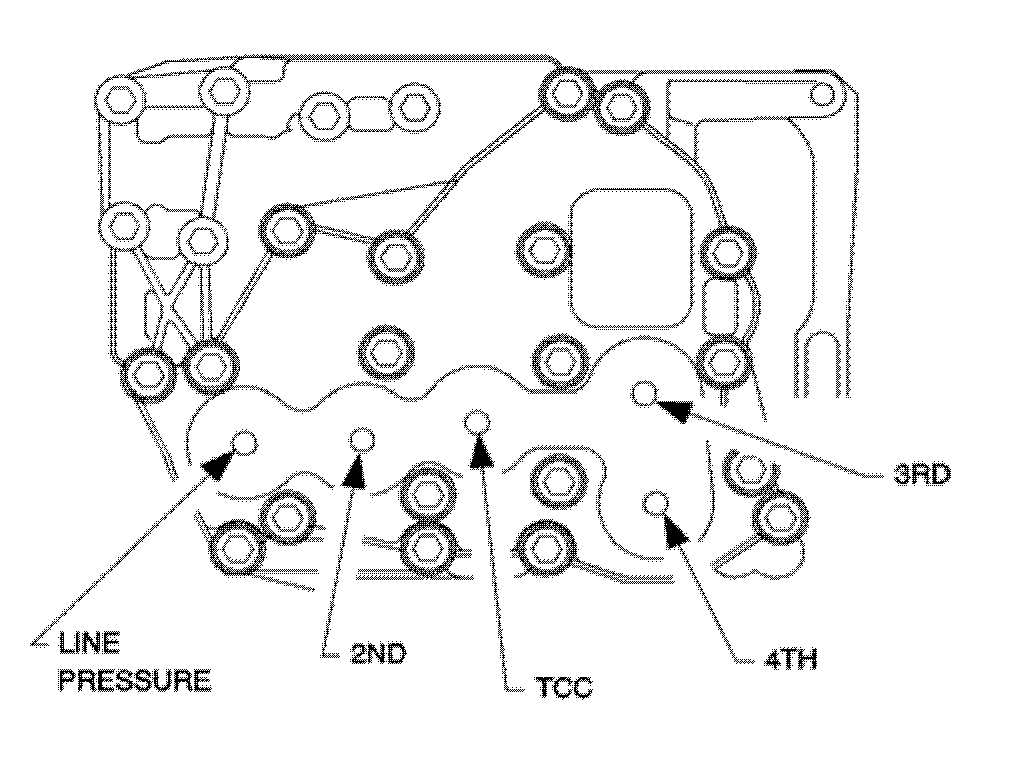
Important: The dowel bolts must be placed in the holes shown to align the upper valvebody to the lower valvebody. The solenoids are identified below.
7. Install the solenoid cover bolts and finger tighten.
- The pressure control solenoid
- The shift solenoid 2
- The TCC solenoid
- The shift Solenoid 4
- The shift Solenoid 3
Notice: Use the correct fastener in the correct location. Replacement fasteners must be the correct part number for that application. Fasteners requiring replacement or fasteners requiring the use of thread locking compound or sealant are identified in the service procedure. Do not use paints, lubricants, or corrosion inhibitors on fasteners or fastener joint surfaces unless specified. These coatings affect fastener torque and joint clamping force and may damage the fastener. Use the correct tightening sequence and specifications when installing fasteners in order to avoid damage to parts and systems.
Notice: Over-torqueing bolts can cause valves to bind.
8. Torque the solenoid cover bolts using the torque sequence shown in illustration.
Tighten
Tighten the valvebody assembly bolts to 11 Nm (8 lb ft)
Important: Using the Saturn Service Stall (SSS) system, reset the adapters before driving the vehicle if the pressure control solenoid was replaced.
9. Install the valvebody cover. Refer to: See: Valve Body, A/T > Procedures > Valvebody Cover Replacement
_________________________________
:Let me know if this helps.
Take care,
Joe
Images (Click to make bigger)
SPONSORED LINKS
Tuesday, November 27th, 2018 AT 7:13 PM