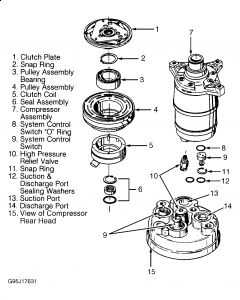
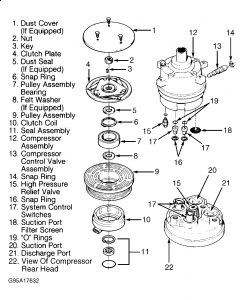
Check out the diagrams (Below). Please let us know what happens.
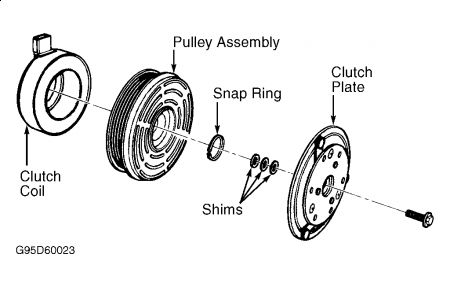
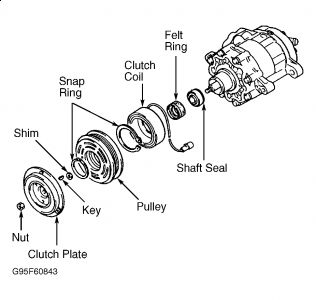
CLUTCH ASSEMBLY
CAUTION:DO NOT hammer on compressor shaft to remove clutch plate, as compressor damage will result.
Removal
Remove compressor from vehicle. Place compressor in Holding Fixture (HD6/HT6/HU6 and HD6/HR-6HE compressor use J-33026; on V5 or V7 compressor use J-34992 or J-41790). On V5 or V7 compressor, remove dust cover (if equipped). Use Clutch Plate Spanner (J-33027-A) to hold clutch plate and remove compressor shaft nut using Shaft Nut Socket (J-33022). See Fig. 1 or Fig. 2 .
On all compressors, using Clutch Plate Remover/Installer (J-33013-B), remove compressor clutch plate and hub. See Fig. 1 or Fig. 2 . Hold remover body and turn center screw into remover body to remove clutch plate and hub. Ensure forcing tip on remover/installer center screw is flat or end of shaft/axial plate will be damaged. Remove shaft key.
Remove snap ring. Install Puller Guide (J-33023-A) on front head. Position Pulley and Bearing Puller (J-41552 for HD6/HT6/HU6 and HD6/HR-6HE or J-33020 for V5 or V7 compressor) into inner circle of slots on pulley assembly. Turn puller clockwise in slots. Tighten puller and remove pulley assembly.
NOTE:On compressor with conventional mount, it is not necessary to remove staking in front of bearing before removing bearing. Bearing removal and installation for compressor with direct mount is not available from manufacturer.
If bearing is to be removed on compressor with conventional mount, remove forcing screw from puller. With puller still engaged in pulley slots, invert assembly onto a solid flat surface. Use a hammer and Bearing Remover (J-9398-A) to drive bearing from pulley. See Fig. 1 or Fig. 2 .
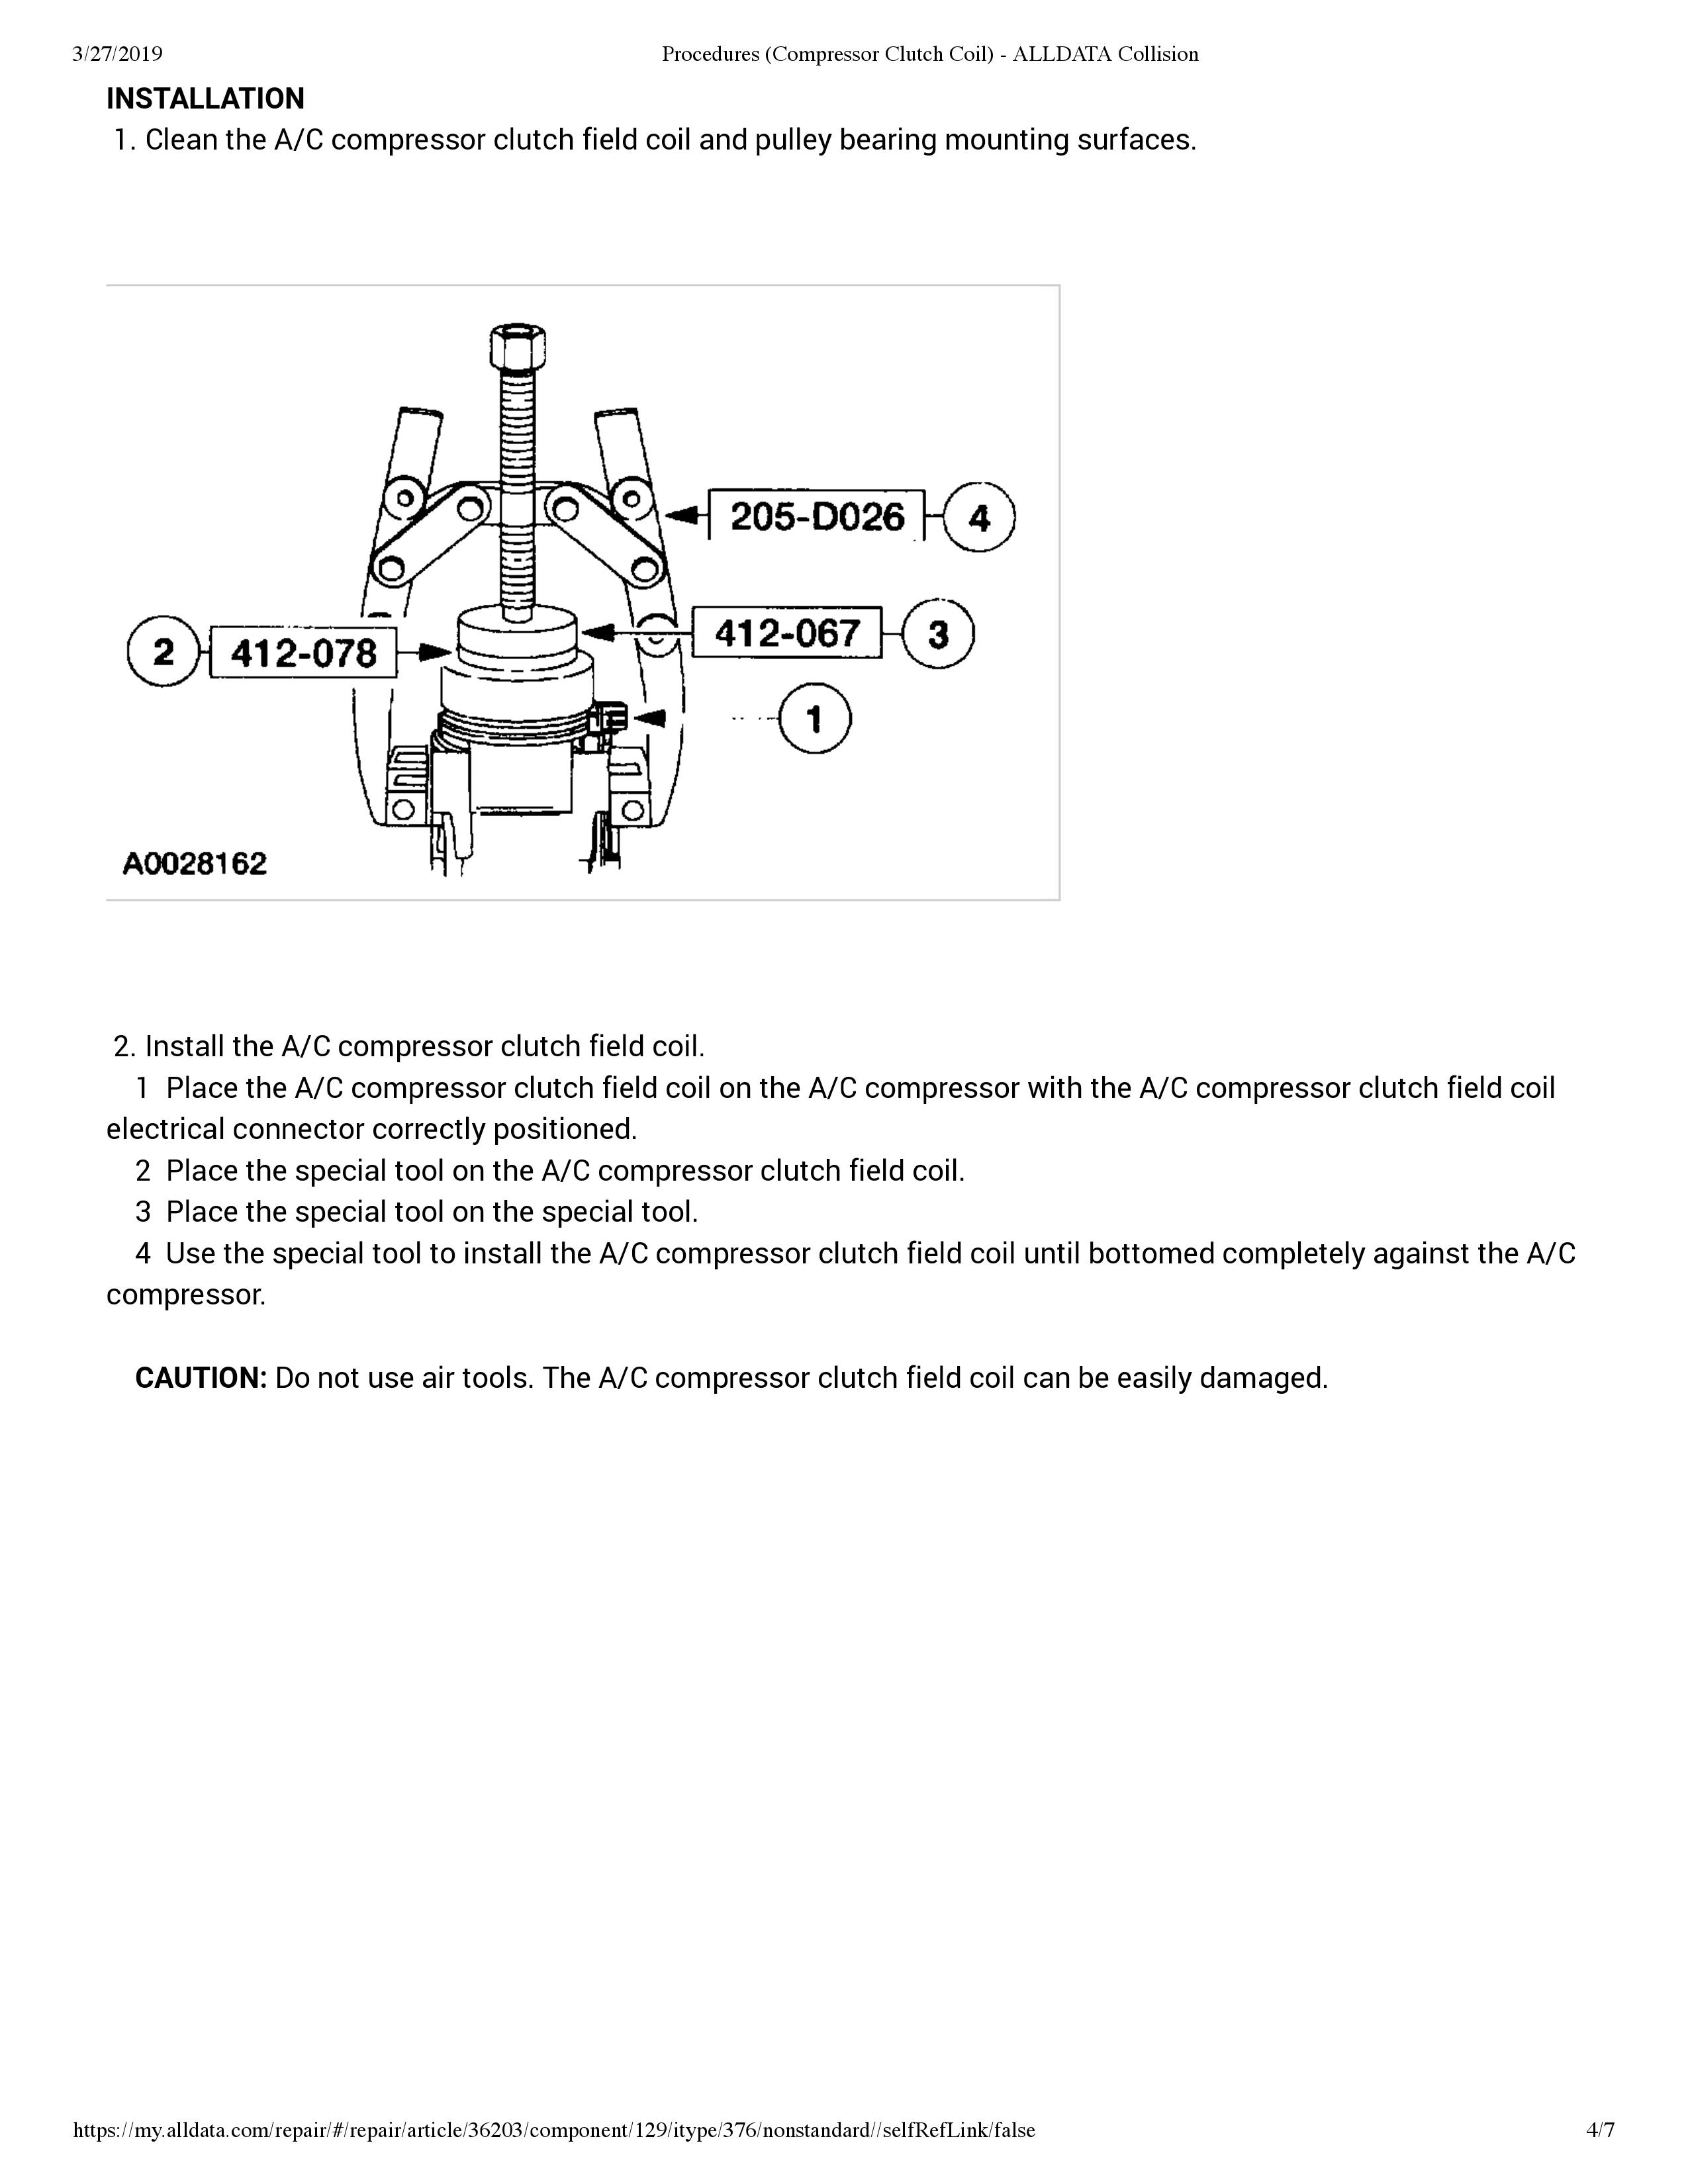
Disconnect clutch coil lead. Scribe marks on compressor and clutch coil for installation reference. Remove clutch coil using Puller Adapter (J-33023-A) and 2-jaw puller.
Installation
Align reference marks made during removal. Using Puller Adapter (J-33024) and Puller Bar (J-8433-1), press clutch coil onto compressor. Ensure clutch coil and installer stay lined up during installation. Using a 1/8" punch, stake clutch coil inner ring in 3 places, 120 degrees apart. Stake size should be 1/2 the area of punch tip and 0.010-0.015" (0.28-0.38 mm) deep.
NOTE:To ensure proper bearing clearance, it is necessary to remove old stake metal before installing new bearing.
To install pulley bearing, place pulley on Support (J-21352-A). DO NOT support pulley rim on flat surface, or pulley will be damaged. Install bearing in pulley using hammer, Bearing Installer (J-9481-A) and Handle (J-29886).
With pulley on support, use Bearing Staking Guide (J-33019-1) and Bearing Staking Pin (J-33019-2) to stake pulley in 3 places, 120 degrees apart. Reposition pulley on support to ensure full support under staking pin. Metal stake should be similar to original stake (down to, but not touching bearing). Position pulley on compressor.
Place Bearing Installer (J-33017) and Puller Guide (J-33023-A) over inner race of bearing. Using puller, press pulley onto compressor. Install snap ring. Install shaft key in clutch plate, allowing key to protrude about 1/8" from rear of clutch plate.
Install clutch plate on compressor shaft. Using clutch plate remover/installer, press clutch plate onto compressor. Ensure shaft key is still in keyway before installing clutch assembly.
Air gap between friction surfaces for HD6/HT6/HU6 and HD6/HR-6HE compressor is 0.020-0.030" (0.51-0.76 mm); for V5 and V7 compressor air gap is 0.015-0.020" (0.38-0.51 mm). On V5 and V7 compressor, using clutch plate spanner, install compressor shaft nut. Tighten shaft nut to 12.5 ft. lbs. (17 N.m). Check components for proper rotation.
Check out the diagrams (Below). Please let us know what happens.
SPONSORED LINKS
Wednesday, July 28th, 2021 AT 1:02 PM
(Merged)