haed gastet

2006 MITSUBISHI GALANT
4 CYL • 2WD • AUTOMATIC
Avatar
FRANKACEVEDO
  • MEMBER
  • 7 POSTS
haed gastet torque mitsubishi galent 06 v4
Jan 9, 2011 at 4:06 AM
Advertisement
Avatar
FRANKACEVEDO
  • MEMBER
  • 7 POSTS
mitsubishi galant 06 v4 torque haed gastet
Jan 9, 2011 at 4:19 AM
Avatar
FRANKACEVEDO
  • MEMBER
  • 7 POSTS
mitsubishi galant 06 v4 how much torque haed gastet
Jan 9, 2011 at 4:31 AM
Avatar
FRANKACEVEDO
  • MEMBER
  • 7 POSTS
mitsubishi galant 06 v4 how much torue head gastet
Jan 9, 2011 at 4:42 AM
Avatar
FRANKACEVEDO
  • MEMBER
  • 7 POSTS
i have not got a reply about my mitsubishi 06 v4 head gastet torque
Jan 9, 2011 at 4:56 AM
Avatar
KHLOW2008
  • CAR REPAIR CONTRIBUTOR
  • 41,814 POSTS
Sorry for the delay in replying.

CYLINDER HEAD BOLT INSTALLATION
CAUTION : Attach the head bolt washer in the direction shown in the/ figure.

1. Tighten the bolts in the illustrated sequence two or three steps.

Tightening torque: 108 +/- 5 N.m (80 +/- 4 ft-lb)

2. Back off the bolts once and tighten them again to the specified torque in step 1.

Jan 9, 2011 at 6:06 AM
Avatar
FRANKACEVEDO
  • MEMBER
  • 7 POSTS
mitsubishi galant 03 haed gastet torque v4
Jan 9, 2011 at 6:14 PM
Avatar
FRANKACEVEDO
  • MEMBER
  • 7 POSTS
sorry it was a mitsubisi galant 03 v4 head gastet torque
Jan 9, 2011 at 6:17 PM
Avatar
KHLOW2008
  • CAR REPAIR CONTRIBUTOR
  • 41,814 POSTS
It is a 4 cylinder 2.4 L engine specs that is shown here, hope it is the correct one as you indicated a V4 head gasket but for 4 cylinder there are no V engines.

CYLINDER HEAD BOLT INSTALLATION

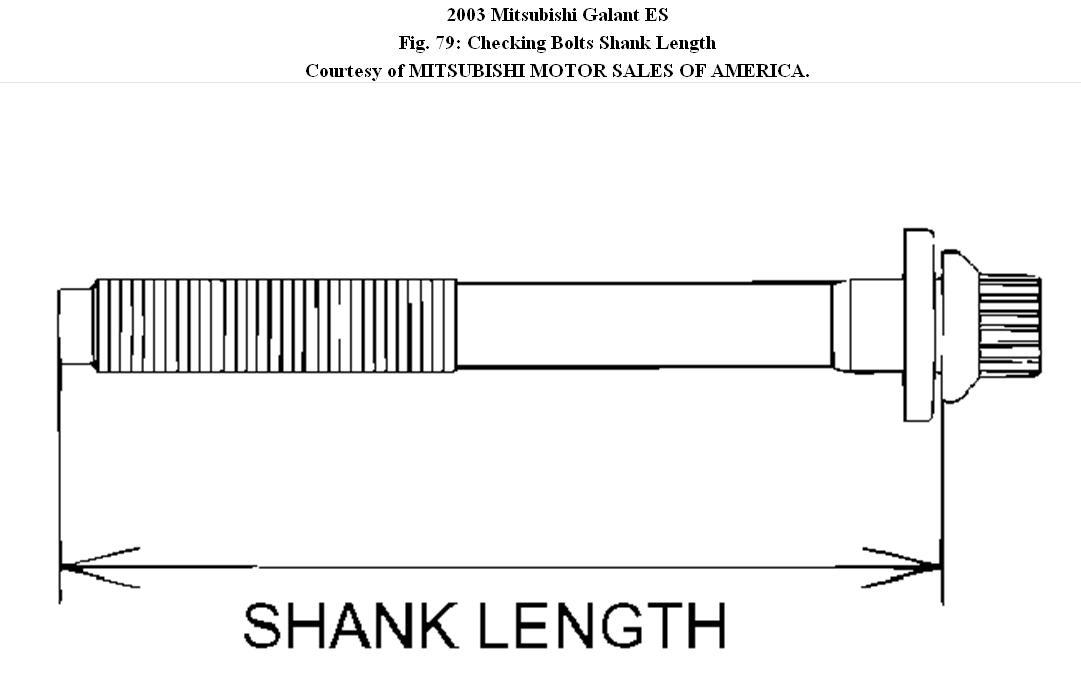
1. When the removed cylinder head bolts are to be reused, check that the shank length of each bolt meets the limit. If it exceeds the limit, replace the bolts.

Limit: 99.4 mm (3.91 inches)

2. Apply engine oil to the thread of the bolts and to the washers.

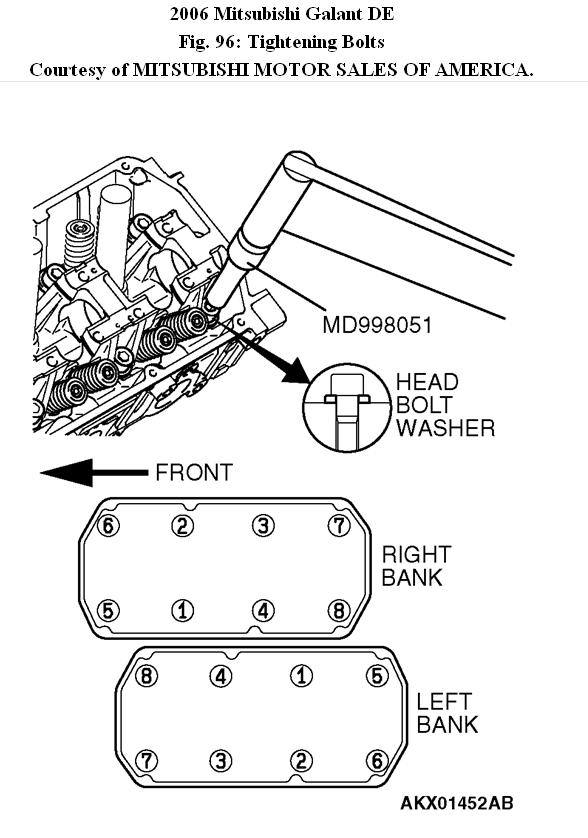
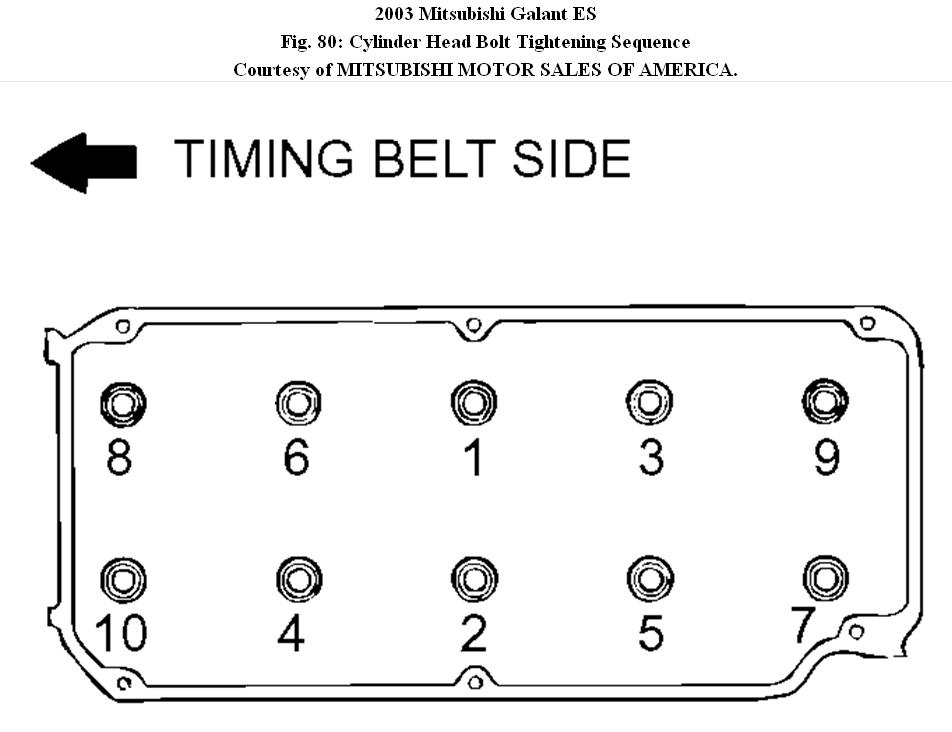
3. Using special tool MB991654 tighten the bolts to the specified torque 78 N.m (58 ft-lb), using the tightening sequence shown.

4. Loosen all bolts fully in the reverse order of tightening.

5. Retighten the loosened bolts to 20 N.m (14 ft-lb) in the tightening sequence shown.

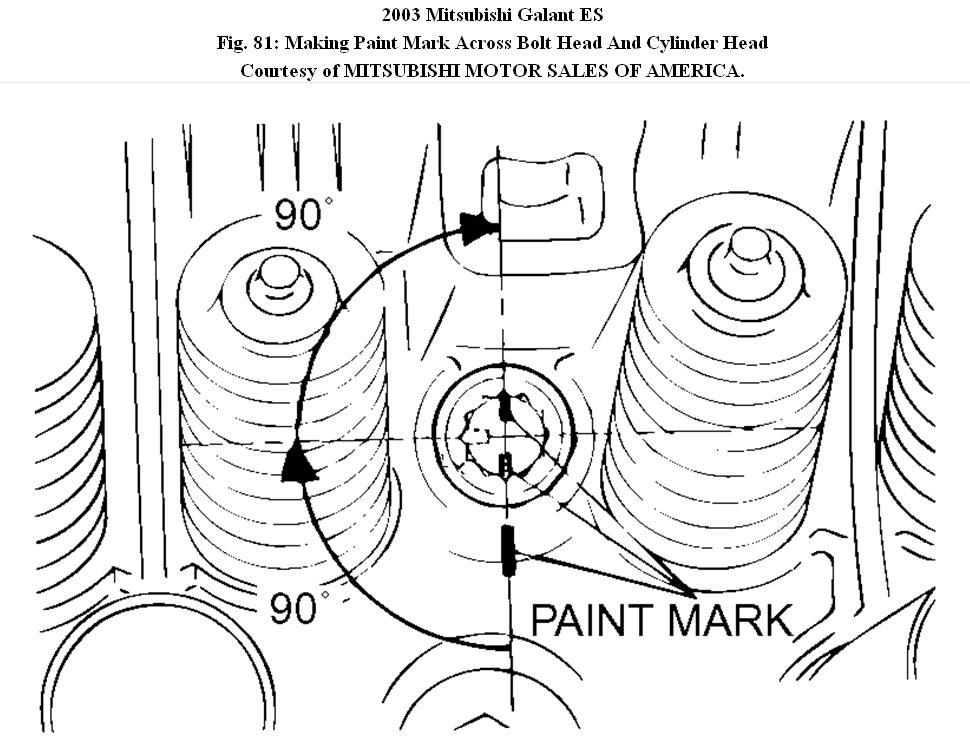
6. Make a paint mark across each bolt head and cylinder head.

7. Tighten the cylinder head bolts 90 degree angle in the specified order.

CAUTION:
• If the bolt is turned less than 90 degree angle, proper fastening performance may not be achieved. Be careful to turn each bolt exactly 90 degree angle.
• If the bolt is overtightened, loosen the bolt completely and then retighten it by repeating the tightening procedure from Step 1.

8. Tighten the bolts another 90 degree angle in the same order as in
Step 7, and check that the paint marks on the cylinder head bolt are aligned with the paint marks on the cylinder head.

© 2008 Mitchell Repair Information Co., LLC.
Jan 9, 2011 at 9:57 PM
Repair Safety Notice: This information is for general instructional purposes only. Vehicle repair can be dangerous. Verify all information, follow manufacturer service procedures, use proper tools and safety equipment, and consult a qualified repair shop when needed.