REPLACEMENT
1. DRAIN ENGINE COOLANT
2. REMOVE FRONT WHEEL RH
3. REMOVE FRONT FENDER APRON SEAL RH
4. REMOVE ENGINE MOVING CONTROL ROD W/BRACKET
5. REMOVE ENGINE MOUNTING STAY NO. 2 RH
6. REMOVE ENGINE MOUNTING BRACKET NO. 2 RH
7. REMOVE FAN AND GENERATOR V BELT
8. REMOVE GENERATOR ASSY
9. REMOVE WATER PUMP PULLEY
a. Using SST, remove the 4 bolts and pump pulley.
SST 09960-10010 (09962-01000, 09963-00700)
b. Disconnect the crankshaft position sensor wire harness clamp.
10. REMOVE WATER PUMP ASSY
a. Remove the 4 bolts, 2 nuts, bracket and water pump.
11. INSTALL WATER PUMP ASSY
a. Remove any old packing (FIPG) material and be careful not to drop any oil on the contacting surfaces of the water pump and cylinder block.
HINT:
i) Using a razor blade and gasket scraper, remove all the
old packing (FIPG) materials from the gasket surfaces and sealing grooves.
ii) Thoroughly clean all components to remove all loose material.
iii) Using a non-residue solvent, clean both sealing surfaces.
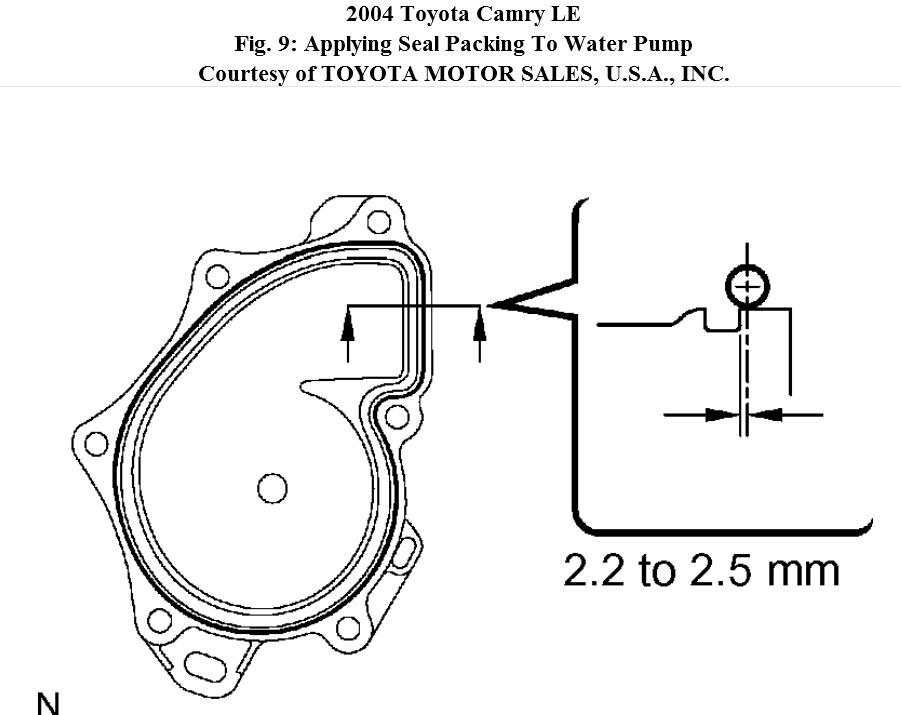
b. Apply seal packing to the water pump as shown.
Seal packing: Part No. 08826-00080 or equivalent
HINT:
i) Install a nozzle that has been cut to a 2.2 to 2.5 mm (0.09 to 0.10 in.) opening.
ii) Parts must be assembled within 5 minutes of application. Otherwise
the material must be removed and reapplied.
iii) Immediately remove the nozzle from the tube and reinstall cap.
c. Install the water pump and bracket with the 4 bolts and 2 nuts.
Torque: 9.0 N.m (92 kgf.cm, 80 in.lbf)
d. Connect the crankshaft position sensor wire harness clamp.
12. INSTALL WATER PUMP PULLEY
a. Using SST, install the pump pulley with the 4 bolts. SST 09960-10010 (09962-01000, 09963-00700)
Torque: 26 N.m (265 kgf.cm, 19 ft.lbf)
13. INSTALL GENERATOR ASSY
14. INSTALL FAN AND GENERATOR V BELT
15. INSTALL ENGINE MOUNTING BRACKET NO. 2 RH
16. INSTALL ENGINE MOVING CONTROL ROD W/BRACKET
17. INSTALL ENGINE MOUNTING STAY NO. 2 RH
18. INSTALL FRONT FENDER APRON SEAL RH
19. INSTALL FRONT WHEEL RH
20. ADD ENGINE COOLANT
21. CHECK FOR ENGINE COOLANT LEAKS
Aug 3, 2011 at 8:16 PM