Not really that simple. You need to remove some screws as well. Here are the procedures and you can skip any that is not relevant.
CENTER CONSOLE REMOVAL/INSTALLATION
NOTE:
� When prying with a flat-tip screwdriver, wrap it with protective
tape, and apply protective tape around the related parts to prevent damage.
� Take care not to scratch the front seat, dashboard, and related
parts.
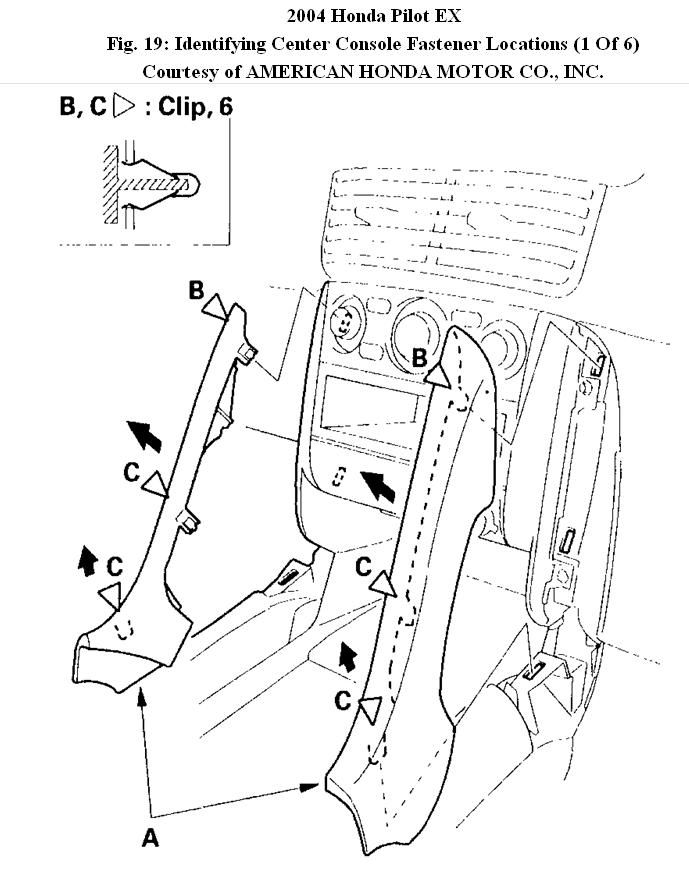
1. Starting at the top, gently pull the center front covers (A) out to detach the clips (B), then pull the cover out to detach the remaining clips (C), and remove the covers from both sides. Fig 19.
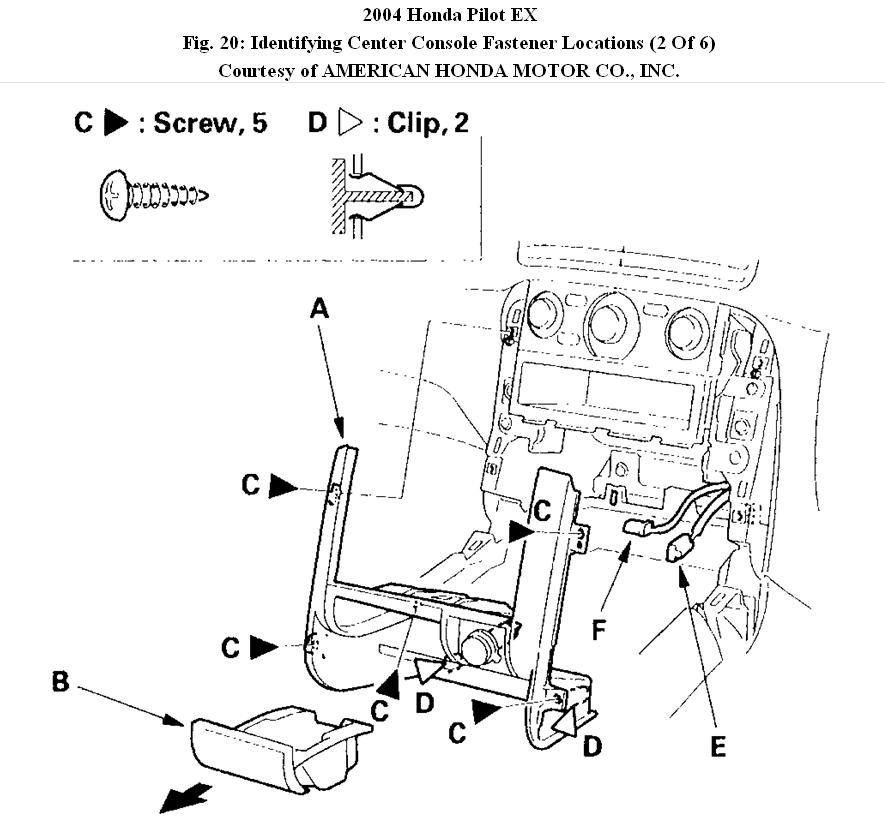
2. Remove the center lower cover (A).
A. Remove the coin pocket (B).
B. Remove the screws (C).
C. Pull the cover out to detach the clips (D).
D. Disconnect the accessory power socket connector (E) and console light connector (F).
Fig 20.
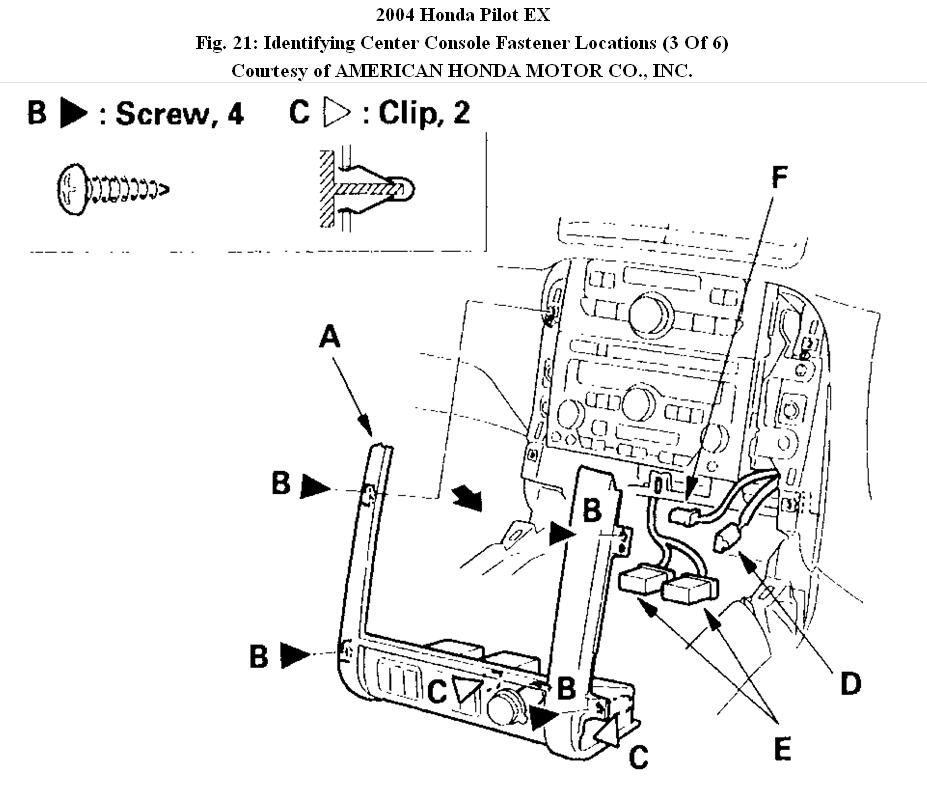
3. For some models: Remove the center lower cover (A) with the seat heater switches.
A. Remove the screws (B).
B. Pull the cover out to detach the clips (C).
C. Disconnect the accessory power socket connector (D), seat heater switch connectors (E), and console light connector (F).
Fig. 21
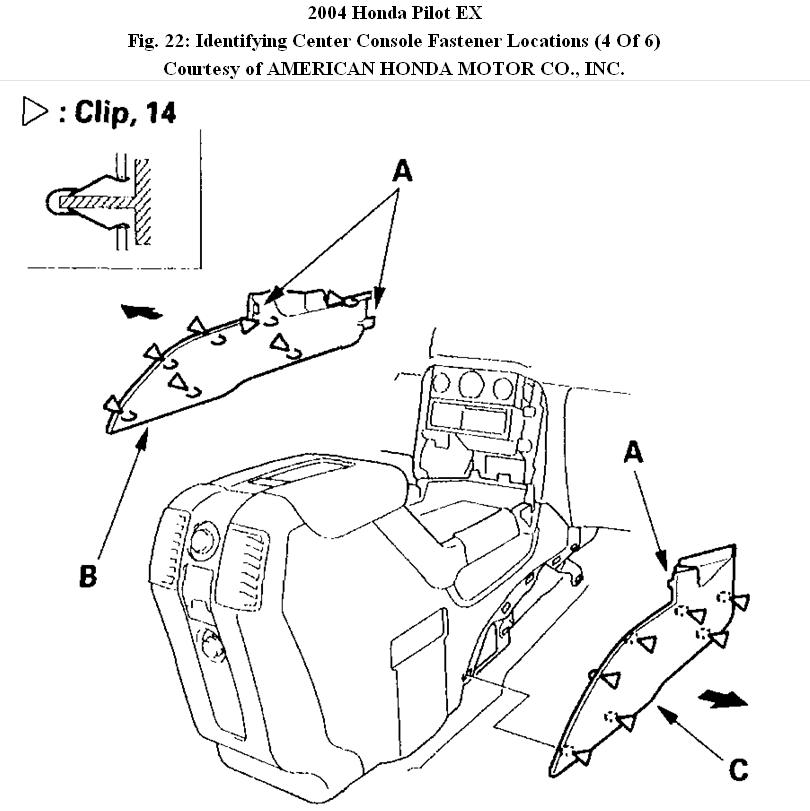
4. Detach the clips and release the hooks (A), then remove the driver's console side trim (B) and passenger's console side trim (C).
Fig. 22:
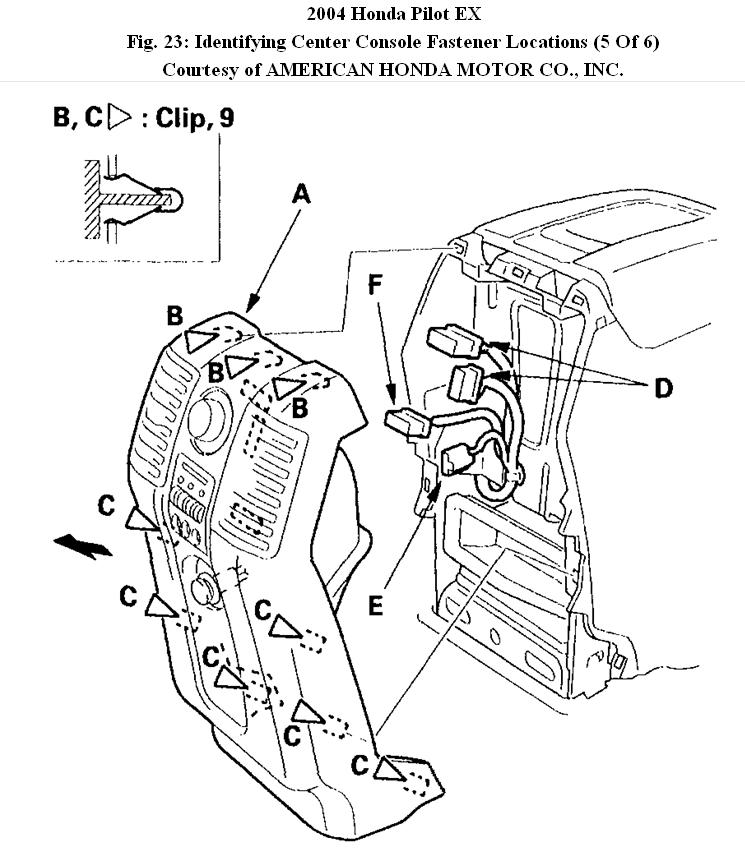
5. Starting at the top, gently pull out the console rear trim (A) to detach the clips (B), then pull out the trim to detach the remaining clips (C), and disconnect the rear heater-A/C passenger's control panel-unit connectors (D) and accessory power socket connector (E). If equipped with rear entertainment system, disconnect the rear entertainment system jack connector (F).
Fig. 23:
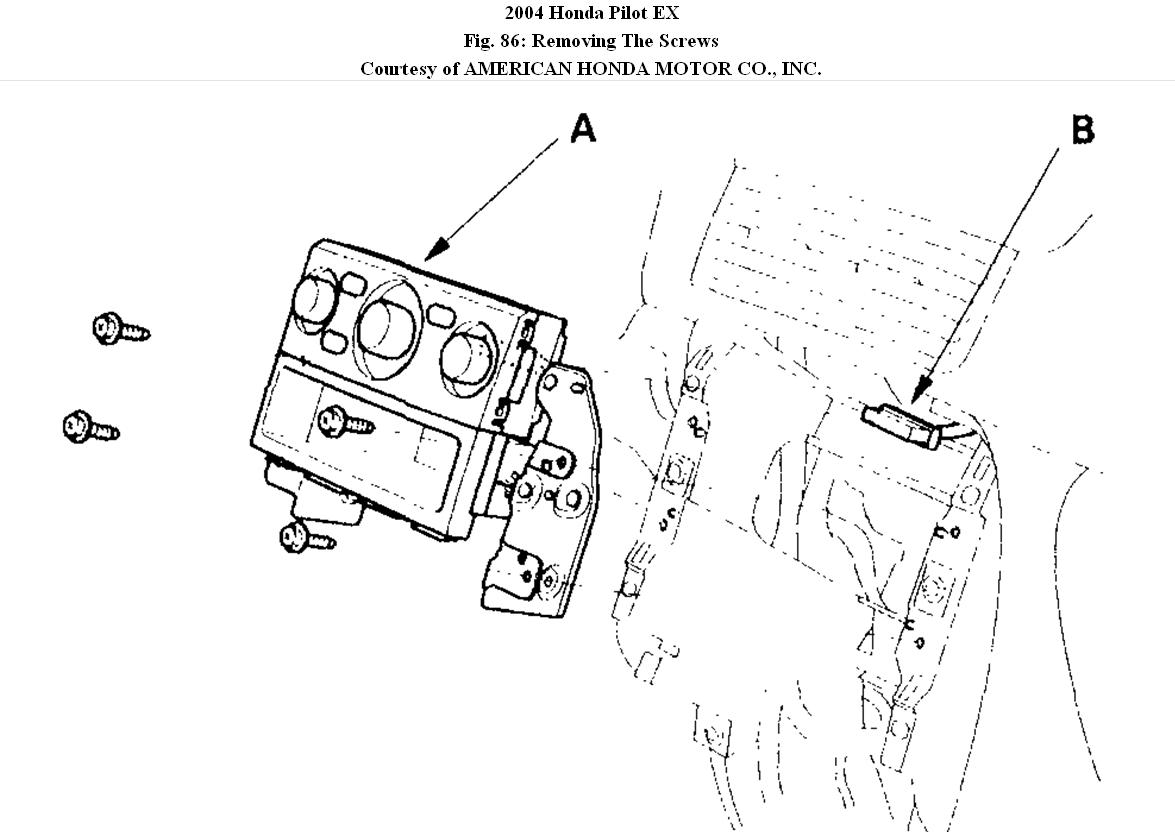
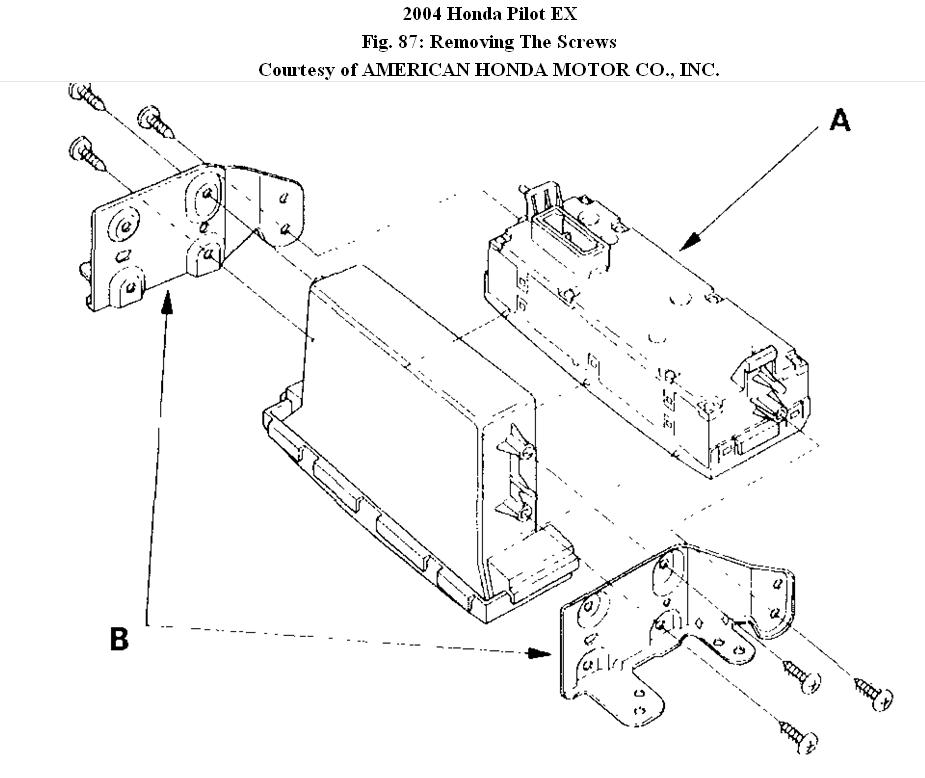
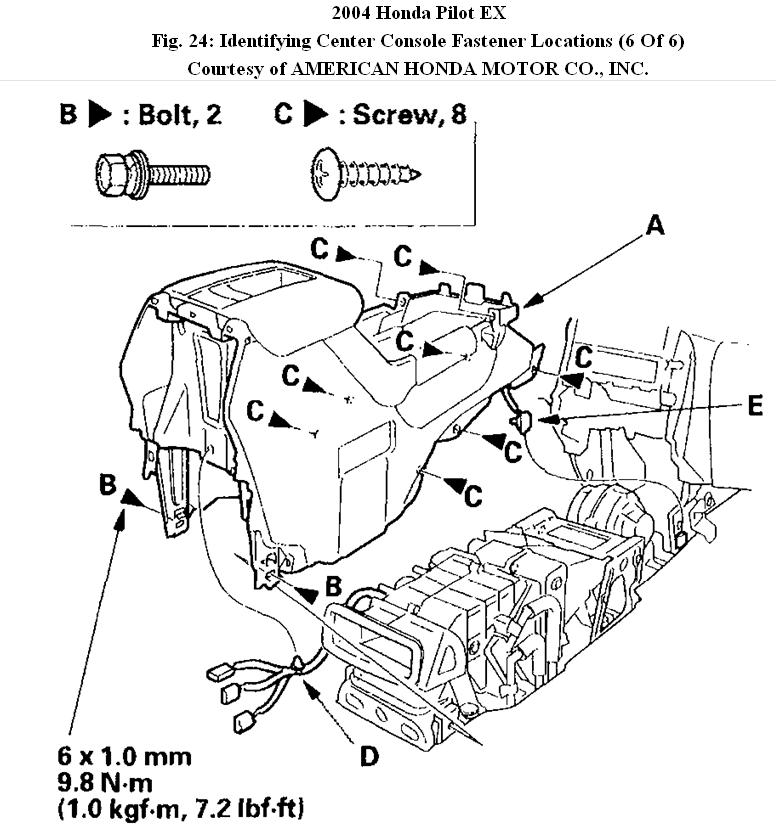
6. Remove the center console (A).
A. From both sides, remove the bolts (B) and screws (C).
B. Detach the harness clip (D).
C. Disconnect the accessory power socket connector (E), and detach it.
D. Lift the console up, then remove it.
Fig. 24:
7. Install the center console in the reverse order of removal, and note these items:
� Replace any damaged clips.
� Make sure all the connectors are plugged in properly.
� Push the clips into place securely.
Images (Click to make bigger)
Saturday, November 27th, 2010 AT 11:25 AM