Reconfirm that vhicle cannot be moved when shift lever is in PARK though the indicator is showing R.
The following procedure explains how to replace the transmission range switch. Use only applicable steps for adjustment.
TRANSMISSION RANGE SWITCH REPLACEMENT
1. Raise the vehicle, and make sure it is securely supported.
2. Shift to the N position.
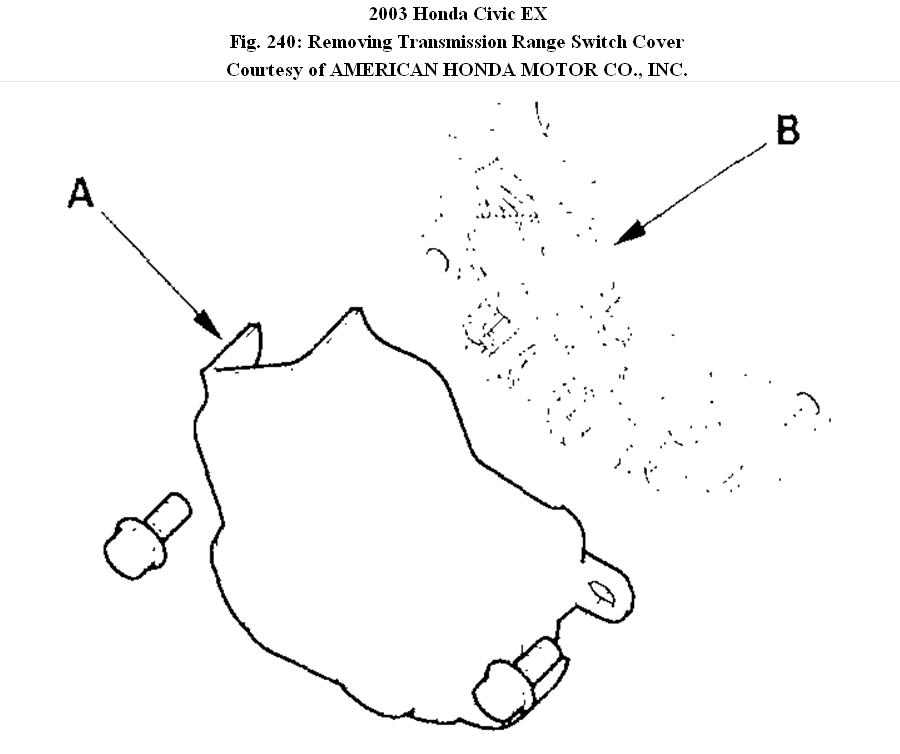
3. Remove the transmission range switch cover (A).
Fig. 240: Removing Transmission Range Switch Cover
4. Disconnect the transmission range switch connector (B).
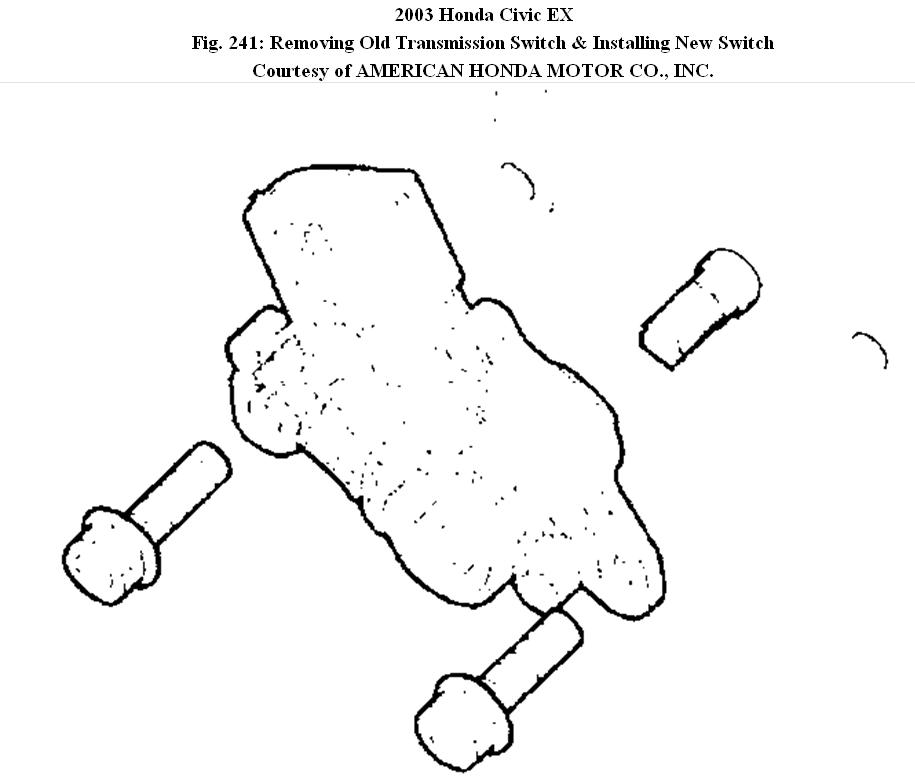
5. Remove the old transmission range switch, and install the new switch.
Fig. 241: Removing Old Transmission Switch & Installing New Switch
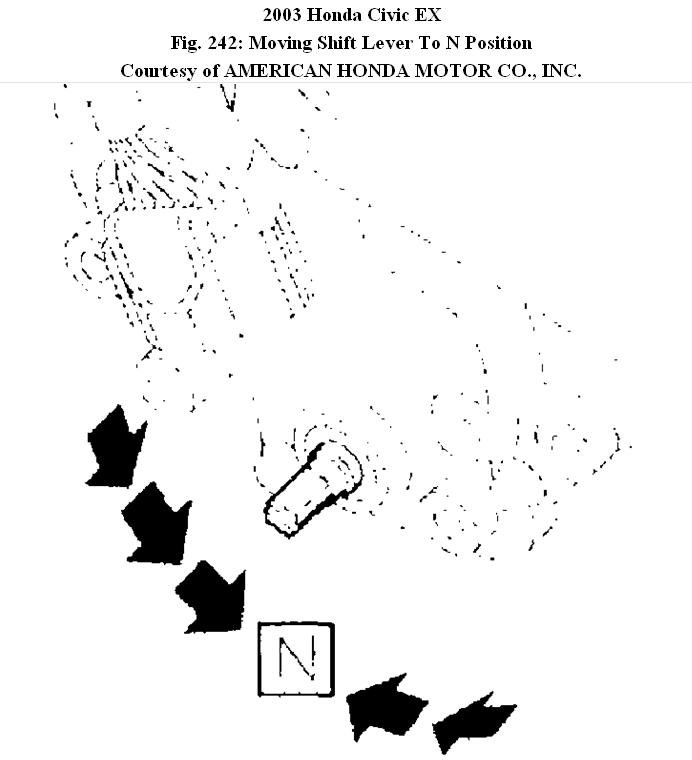
6. Make sure that the control shaft is in the N position. If necessary, move the shift lever to the N position.
Fig. 242: Moving Shift Lever To N Position
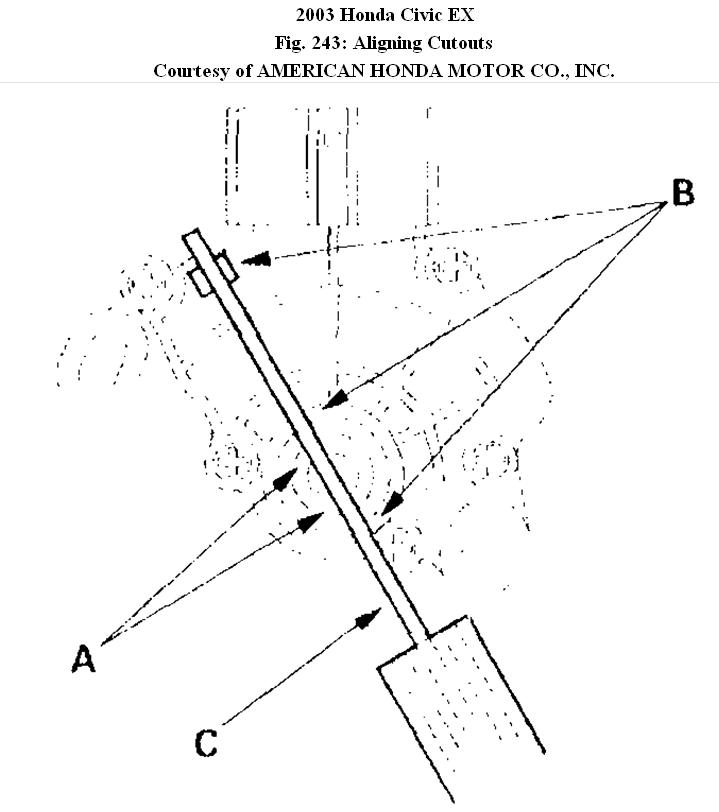
7. Align the cutouts (A) on the rotary-frame with the neutral positioning cutouts (B) on the transmission range switch, then put a 2.0 mm (0.08 in.) Feeler gauge blade (C) in the cutouts to hold it in the N position.
NOTE: Be sure to use a 2.0 mm (0.08 in.) Blade or equivalent to hold the switch in the N position.
Fig. 243: Aligning Cutouts
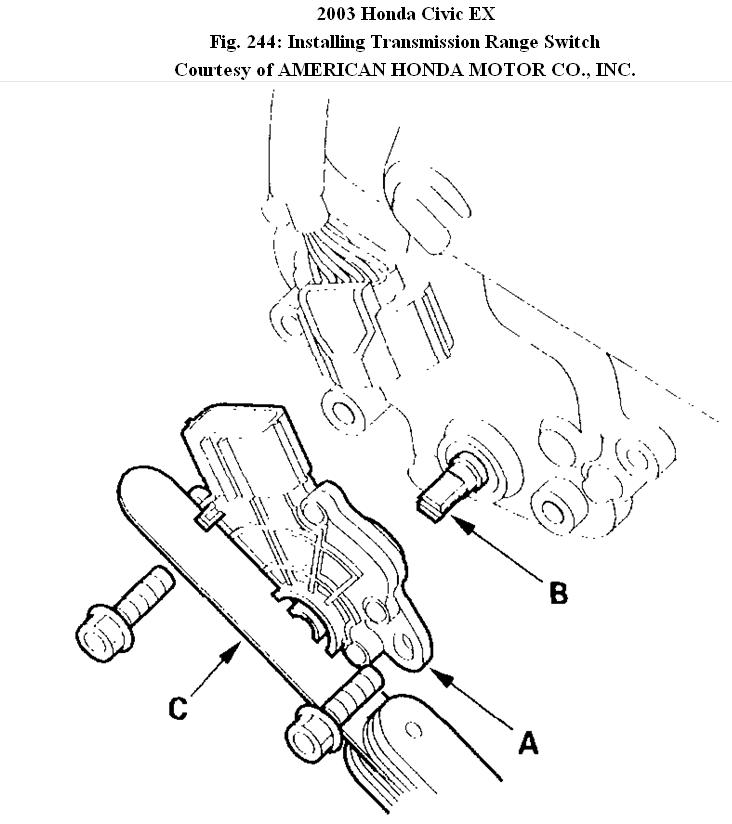
8. Install the transmission range switch (A) gently on the control shaft (B) with holding the N position with the 2.0 mm (0.08 in.) Blade (C).
Fig. 244: Installing Transmission Range Switch
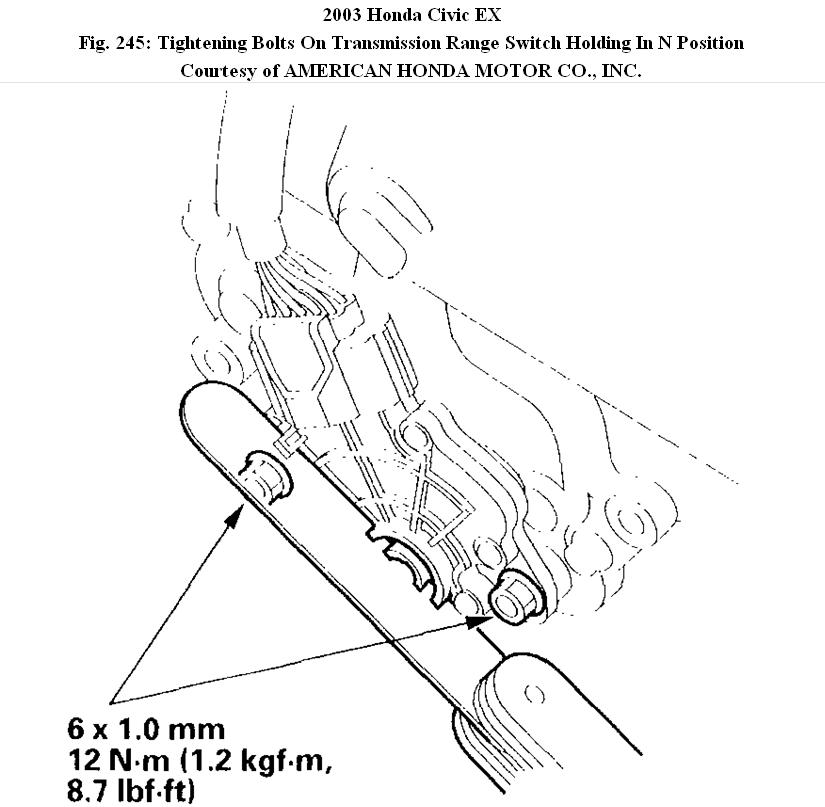
9. Tighten the bolts on the transmission range switch while you continue to hold it in the N position. Do not move the transmission range switch when tightening the bolts. Remove the feeler gauge.
Fig. 245: Tightening Bolts On Transmission Range Switch Holding In N Position
10. Connect the connector securely, then install the transmission range switch cover.
Fig. 246: Installing Transmission Range Switch Cover
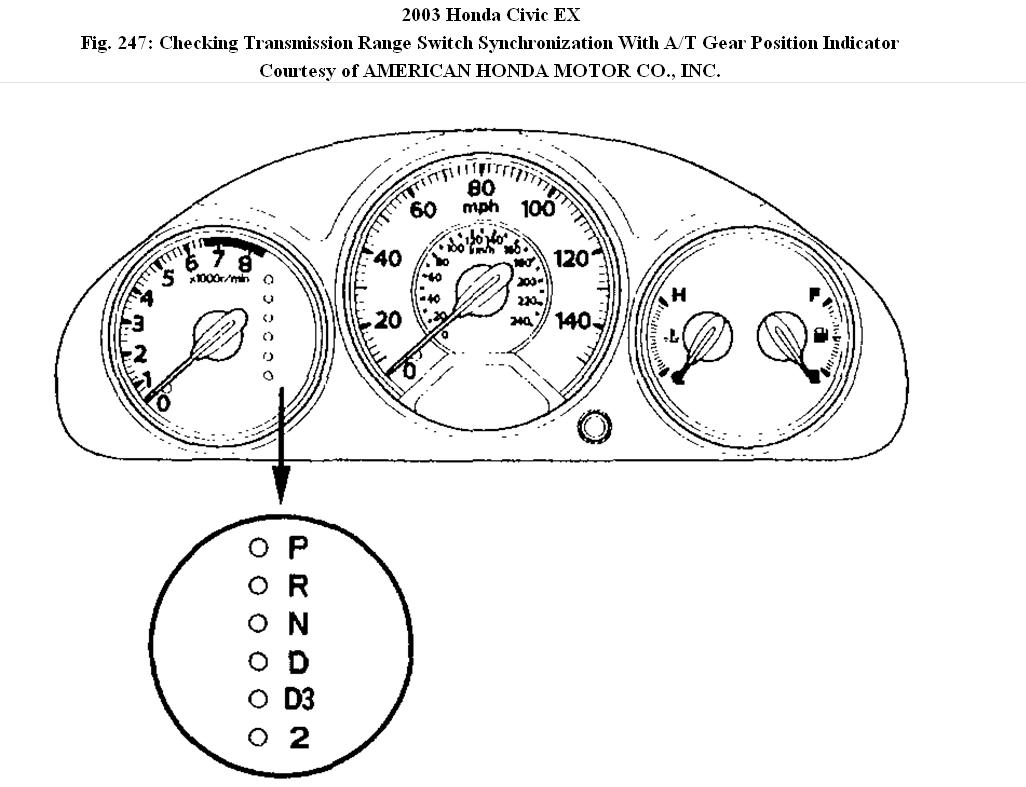
11. Turn the ignition switch ON (II). Move the shift lever through all gear positions, and check the transmission range switch synchronization with the A/T gear position indicator.
Fig. 247: Checking Transmission Range Switch Synchronization With A/T Gear Position Indicator
12. Allow the wheels to rotate freely, then start the engine.
13. Move the shift lever through all gear positions, and verify the following:
� The engine will not start in any position other than N or P.
� The back-up lights come on when the shift lever is in the R position.
Images (Click to make bigger)
Thursday, February 10th, 2011 AT 2:53 PM