Hi,
The blower motor isn't too hard to replace. First, here is a link that explains in general how it's replaced. You can use it to help guide you.
https://www.2carpros.com/articles/blower-fan-motor-works-on-high-speed-only
Here are the directions specific to your vehicle. The attached pics correlate with the directions.
___________________________________
2006 Chrysler Truck Town & Country V6-3.3L VIN R
Front Blower Motor
Vehicle Heating and Air Conditioning Blower Motor Service and Repair Removal and Replacement Front Blower Motor
FRONT BLOWER MOTOR
REMOVAL
Warning: on vehicles equipped with airbags, disable the airbag system before attempting any steering wheel, steering column, or instrument panel component diagnosis or service. Disconnect and isolate the battery negative (ground) cable, then wait two minutes for the airbag system capacitor to discharge before performing further diagnosis or service. This is the only sure way to disable the air-bag system. Failure to take the proper precautions could result in an accidental airbag deployment and possible personal injury or death
NOTE: The blower motor is located on the passenger side of the vehicle under the instrument panel. The blower motor can be removed from the vehicle without having to remove the HVAC housing.
1. Disconnect and isolate the negative battery cable.
2. Remove the passenger side cowl trim panel.
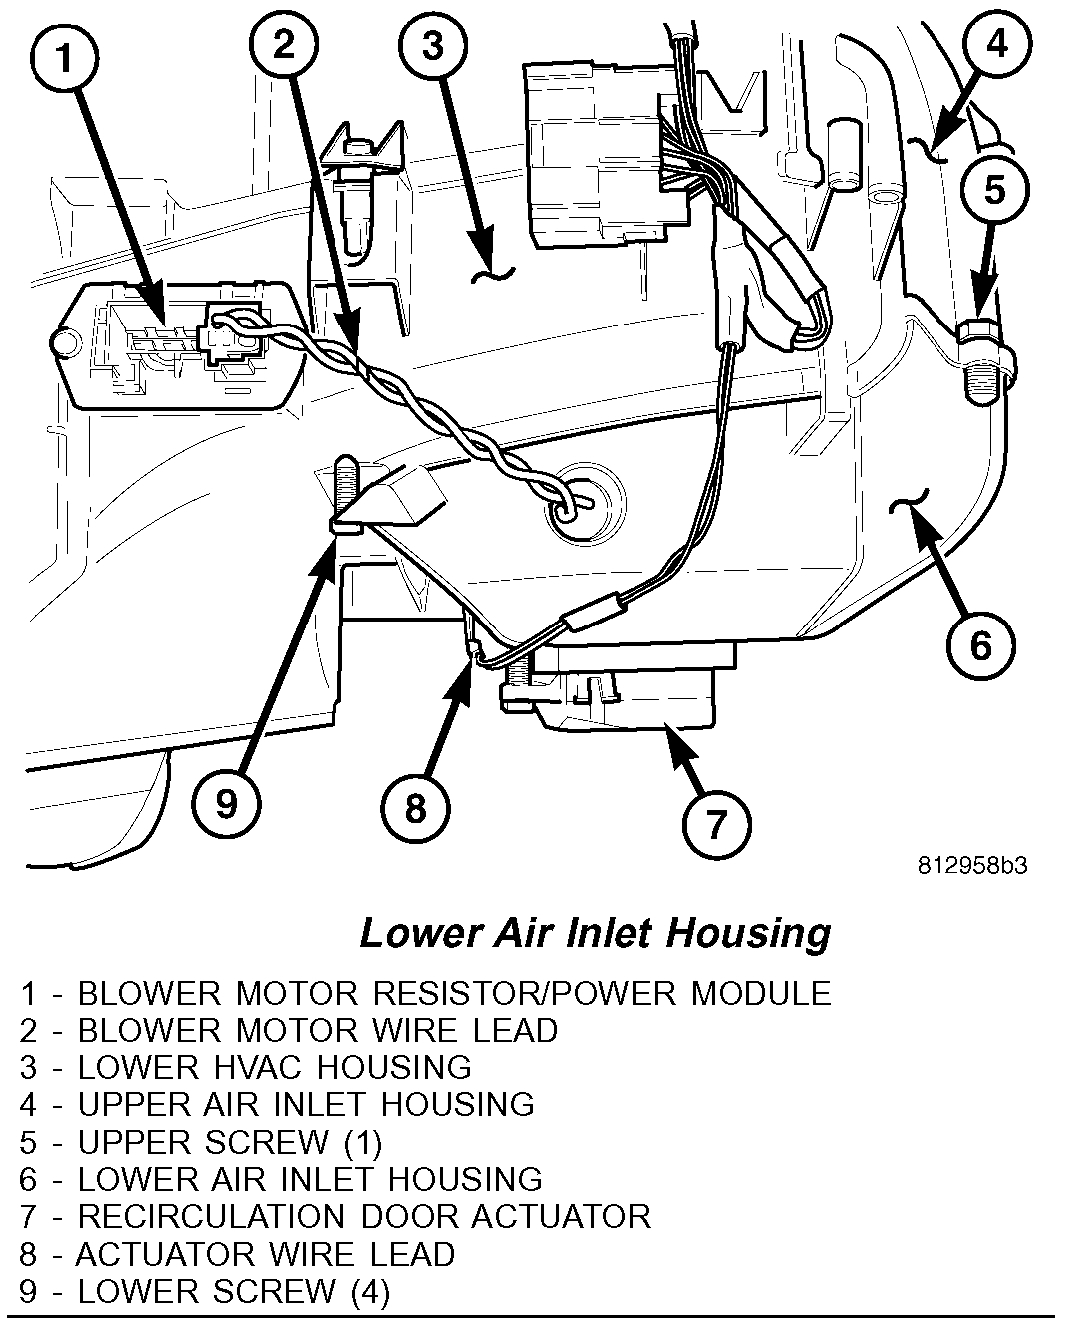
Lower Air Inlet Housing
pic 1
3. Position the carpet to access the front upper screw that secures the air inlet housing.
4. Remove the recirculation door actuator.
5. Disconnect the blower motor wire lead connector from the blower motor resistor or power module, depending on application.
6. Remove the one screw (from the top) that secures the lower air inlet housing to the upper air inlet housing.
7. Remove the four screws (from the bottom) that secure the lower air inlet housing to the upper air inlet housing and the lower HVAC housing.
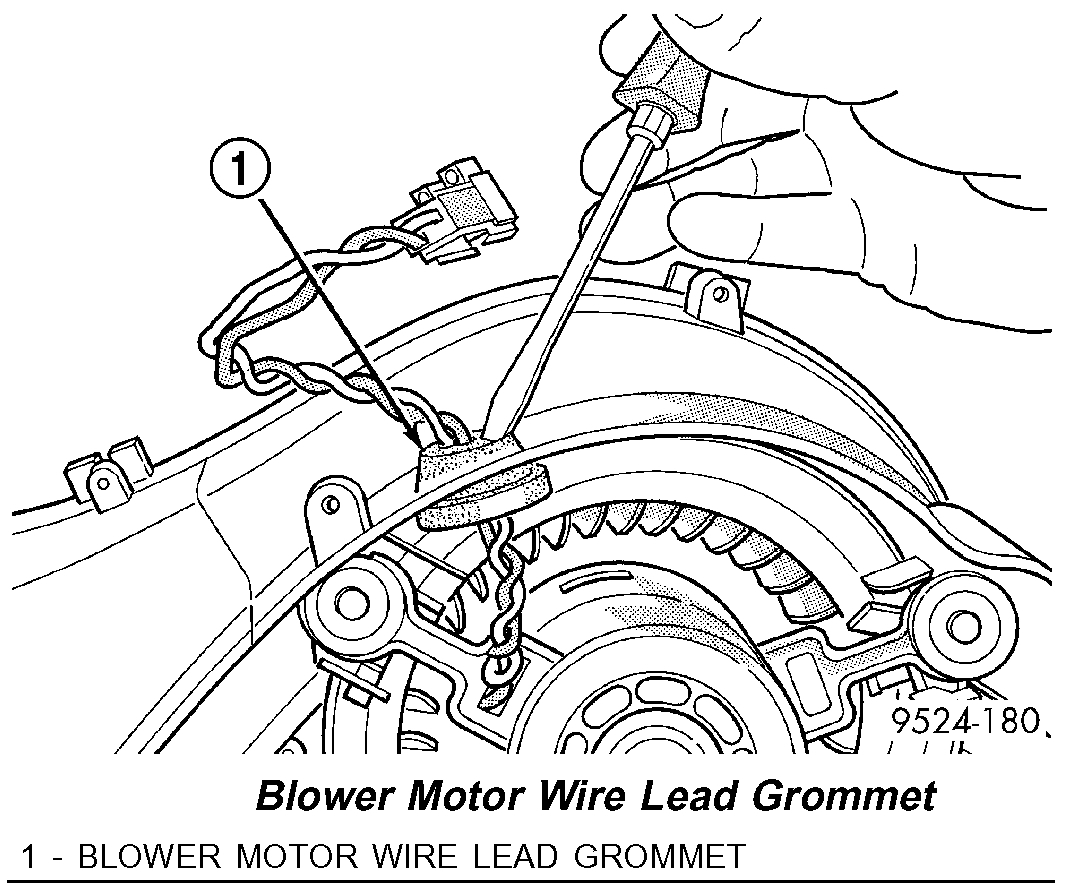
Blower Motor Wire Lead Grommet
pic 2
8. Push the rubber grommet through the opening in the lower air inlet housing.
9. Route the blower motor wire lead through the opening in the lower air inlet housing and remove the lower air inlet housing from the vehicle.
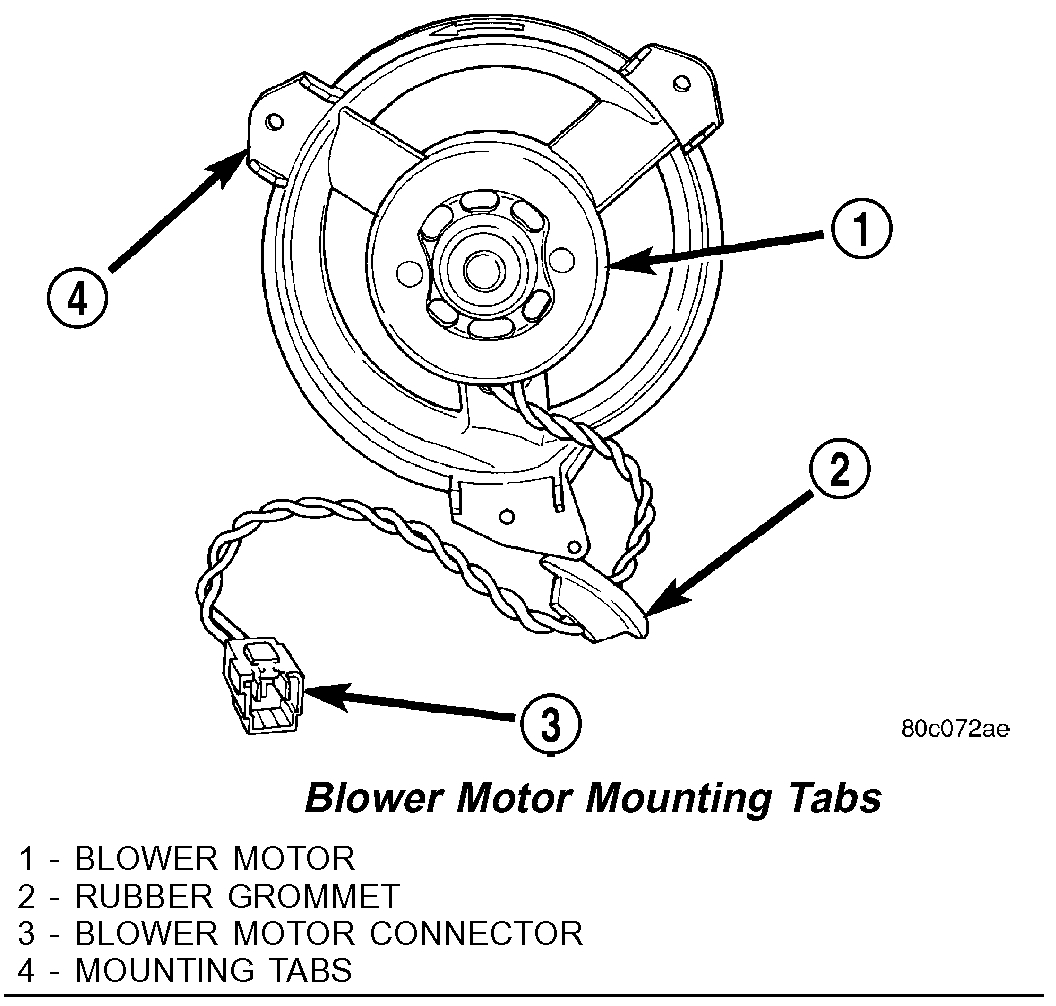
Blower Motor Mounting Tabs
pic 3
10. Position the recirculation-air door as necessary to access and remove the three screws that secure the blower motor to the lower half of the HVAC housing.
11. Gently flex the recirculation-air door downward to gain access to remove the blower motor from the HVAC housing.
NOTE: To aid in installation, note the position of the blower motor mounting tabs prior to removal.
12. Remove the blower motor from the HVAC housing by rotating and tilting the blower motor as necessary.
INSTALLATION
1. Gently flex the recirculation-air door downward to gain access to install the blower motor into the HVAC housing.
2. Position the blower motor to the HVAC housing and tilt and rotate the blower motor as necessary to install it into the HVAC housing.
3. Align the blower motor mounting tabs to the locations noted during removal and install the three screws that secure the blower motor to the HVAC housing. Tighten the screws to 2 N.m (17 in. lbs.).
4. Route the blower motor wire lead through the opening in the lower air inlet housing and seat the rubber grommet.
5. Position the recirculation door pivot shaft into the lower air inlet housing and install the inlet housing.
6. Install the four screws (from the bottom) that secure the lower air inlet housing to the upper air inlet housing and the lower HVAC housing. Tighten the screws to 2 N.m (17 in. lbs.).
7. Install the one screw (from the top) that secures the lower air inlet housing to the upper air inlet housing. Tighten the screw to 2 N.m (17 in. lbs.).
8. Connect the blower motor wire lead connector to the blower motor resistor or power module, depending on application.
9. Install the recirculation door actuator.
10. Reposition the carpet.
11. Install the passenger side cowl trim panel.
12. Reconnect the negative battery cable.
13. Perform the heater-A/C control calibration procedure.
___________________________________________
I hope this helps Let me know if you have other questions.
Take care and God Bless,
Joe
Images (Click to make bigger)
SPONSORED LINKS
Saturday, February 27th, 2021 AT 10:16 AM