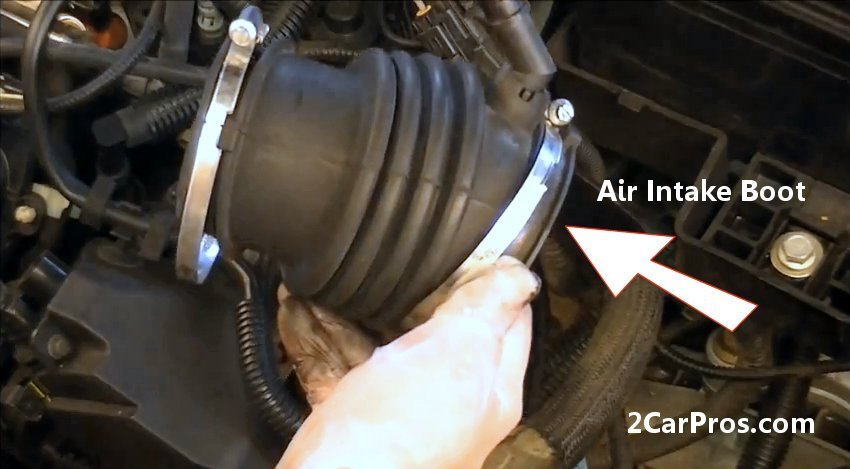
The air intake tube or boot is used to connect the air filter housing and mass air flow sensor (MAF) to the throttle actuator body which is mounted to the engine's intake manifold. This rubber like part is attached using simple hose clamps. Replacing the boot takes about 15 minutes using basic tools.
What Goes Wrong?
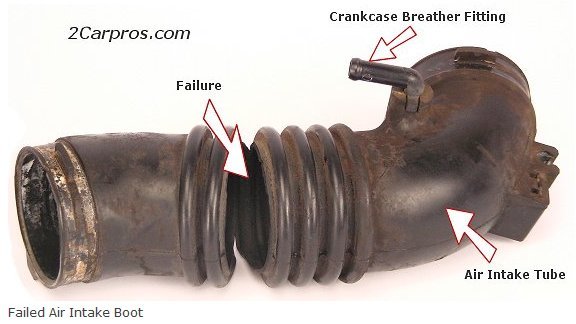
This boot is usually made of flexible rubber and over time the vibration created from the engine coupled with natural degradation of the rubber can cause cracks or tears which allow unmetered and unfiltered air to be pulled into the engine.
Unmetered engine air intake can cause:
- Extended crank time
- Hesitation
- Poor gas mileage
- High or low engine idle
- Check engine light
- Failed smog test
- Crank and not start (unless foot is on the gas pedal slightly)
- Stall while turning the vehicle right or left (as the engine moves inside the engine bay)
Let's Fix It!
Begin with the car on level ground, engine off, in park with the parking brake set. Raise the hood and allow the engine to cool before beginning.
Step 1: Air Intake Boot Removal
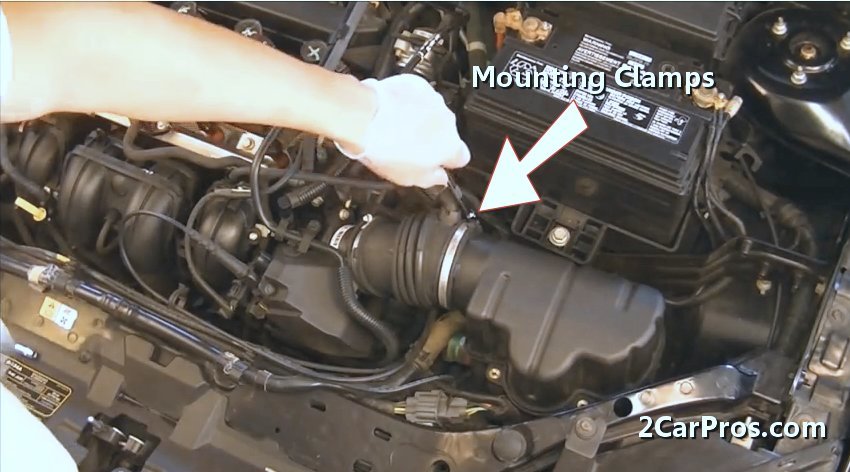
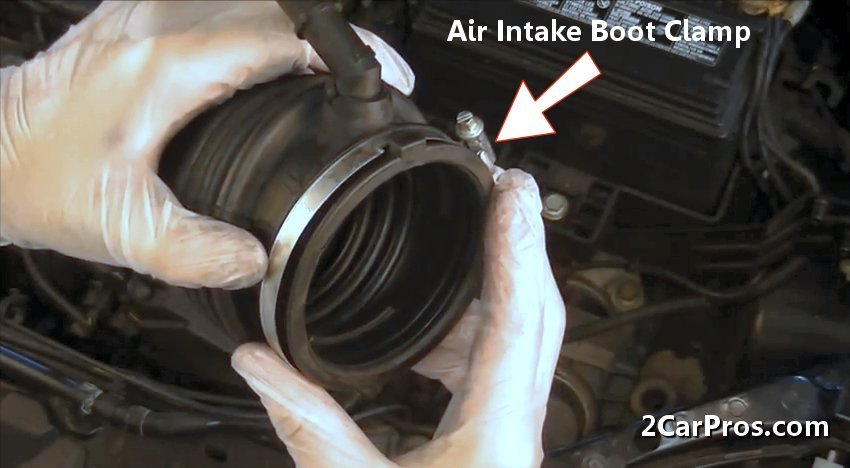
Using a screwdriver or a small socket and ratchet, loosen the clamps that secure the boot or tube to the air cleaner housing and the throttle body by turning the clamp screws counterclockwise. There may be an mass air flow sensor involved depending on the design of the engine, if so unplug the sensor
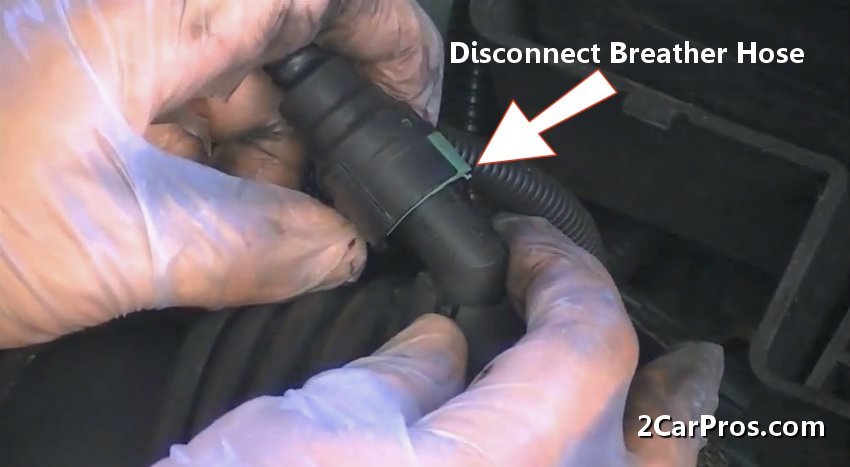
Engine breather tubes maybe connected to the boot/tube which is used to ventilate the engine crankcase gases into the intake system to be re-consumed by the engine combustion process. These tubes are held in place by a plastic clip. Use a small screwdriver or pick to lift upward the fastener which will enable you to remove this connection.
Sometimes the boot can be stuck on the intake tube or air cleaner housing due to heat from the engine and pressure from the clamp. Use a screwdriver or pick to help break the seal and while performing a twisting motion to help loosen the seal and remove one end of the boot.
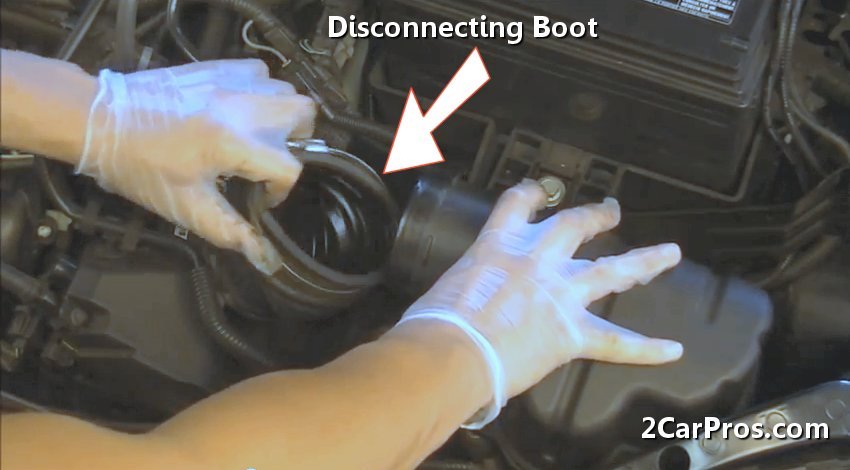
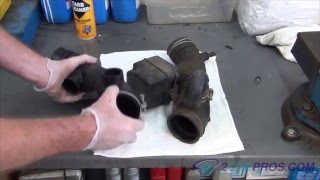
Once the mounting clamps and breather hoses are removed and loosened completely remove the boot or tube. Inspect the area between the ribs by flexing it and looking for signs of rips or tears. Keep track of all clamps, nuts and bolts in a container so they don't get misplaced.
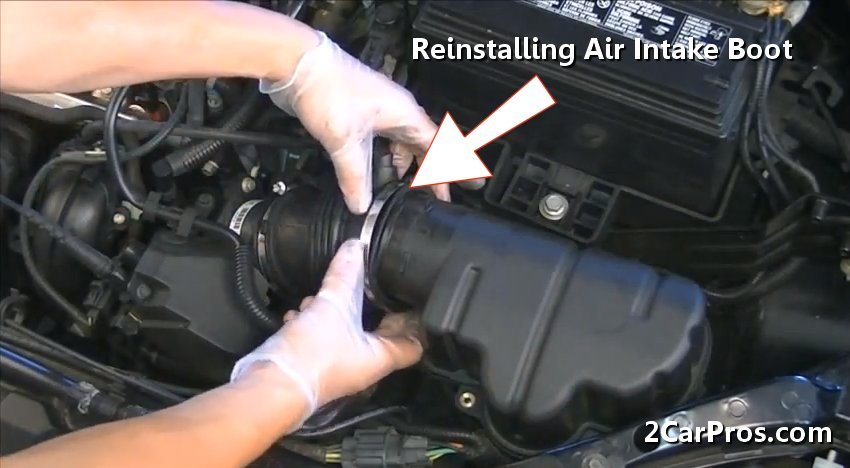
Step 2: New Intake Boot Installation
Match the new boot to the old unit, they should match up identically. Reinstall mounting clamps onto the new boot or tube. Take note of the clamps orientation which will make installation much easier.
While holding the new boot firmly with one hand while making sure the clamps do not fall off, reinstall the new air intake boot onto the throttle actuator first. Be sure not to get any dirt into the area during the installation process.
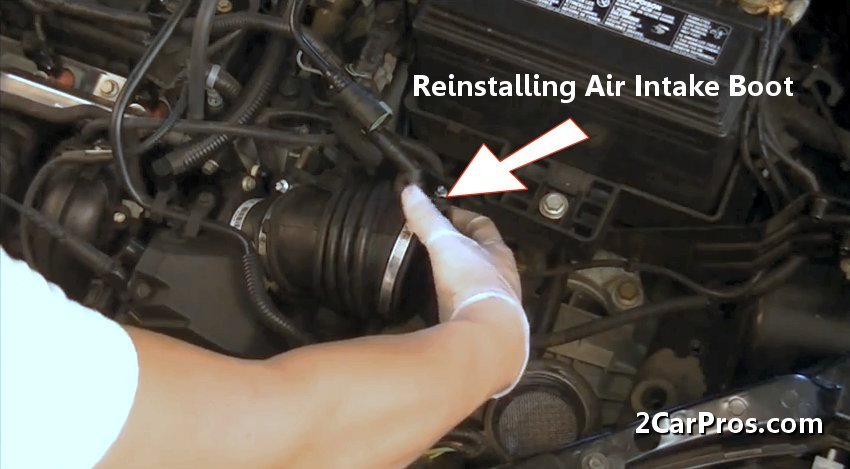
Finish by installing the air intake tube while fitting the boot end on the tube and onto the air filter housing or mass air flow sensor while tightening the clamps snugly, do not over tighten. Some tubes will have an orientation tab which must be fitted into its proper slot. Start the engine and listen for any vacuum leaks or hissing sounds which would be an indication of the boot lip being folded under either on the throttle actuator or the air filter housing.
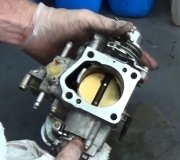
This is what a failed intake tube looks like. Please continue by watching both
videos below to get an idea on what you are in for when doing these kinds of repairs.
Thank you for reading through the guide please watch the videos below before you begin the repair.
Watch the Video!
Please watch this video of the job being done to glean additional helpful information.
Credits
This guide knowledge base was created by the 2CarPros Team, and by Ken Lavacot: Automobile repair shop owner and certified master automobile technician of over 30 years. If you have question or need help please ask one of our experts we are happy to help. Please visit our 2CarPros YouTube Channel.

Article published 2024-04-15