A sway bar link is used to control side to side movement or the amount of lean a vehicle is subject to when entering and driving through a corner.
How Does It Work?
A sway bar and link system uses a thick metal bar that spans the suspension at either the front or rear of the vehicle and is bolted to the frame using rubber bushings. At each end of the bar are links which are bolted to the upper or lower control arm. When the vehicle is at a stand still or being driven in a straight line the sway bar is at idle and not used, but when a curve is introduced the sway bar jumps into action by resisting the lean force and keeping the vehicle flat which improves the vehicle handling characteristics.
What Goes Wrong?
A sway bar rarely breaks, problems arise when the rubber bushings that connect the bar to the frame, and at either end where it attaches to the suspension components wear out and fall apart allowing the metal of the bar or link to contact the frame or control arm which generates unwanted noises and diminishes the sway bar's performance.
SPONSORED LINKS
What's the Cost?
A sway bar link or main bushing is not difficult to replace and should take between .8 and 1.0 hours for both sides with the cost of the parts ranging from $45.00 to $65.00 for the link kits, and about $10.00 for the main bar bushing set. If exact times or procedures are needed you can ask our experts to supply you with the information (free), or consult an online resource such as AllData DIY (pay) but this guide and video will be sufficient in most cases, the design of the links may vary slightly.
Lets Jump In!
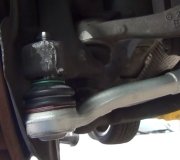
In most cases the car will
need to be lifted and supported using jack stands, inspect the rubber bushings
at each end and at both mounting points on the frame.

Here we are replacing the link bushings using a kit which is easily obtained,
begin by removing the link through-bolt by holding the top nut and turning the bolt
head at the bottom.

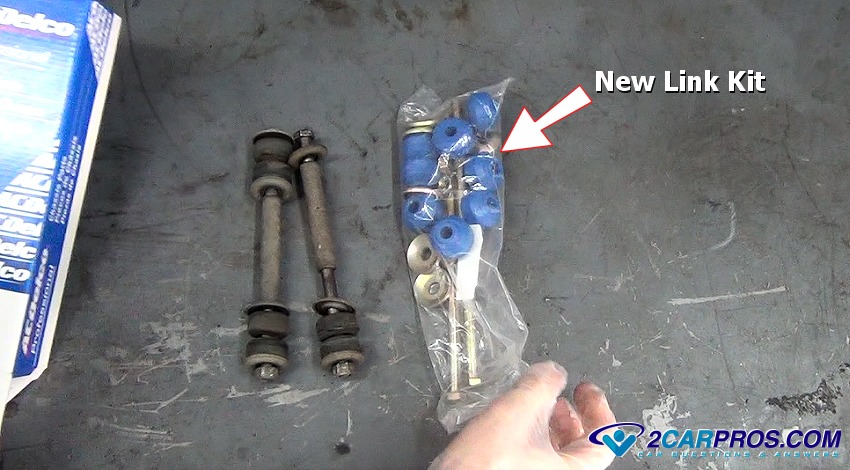
Once both links have been removed match the new link kit to the old parts to
ensure a proper installation.
Assemble the new link kit in the same configuration inserting the through bolt
with the washer and bottom bushing starting at the lower control arm.

SPONSORED LINKS
Complete the installation by stacking the washer on top of the spacer while inserting
the bushings, then tighten the nut to spec, in this case it is 23 foot pounds of
torque, it is best to replace both sides at the same time.

Watch the Video!
Please watch this video of the job being done, then continue down the guide to glean additional helpful information.
Additional Sway Bar Link Replacement Video
Questions?
Our certified technicians are ready to answer car repair questions for free. We hope you saved money and learned from this guide. We are creating a full set of car repair guides. Please subscribe to our 2CarPros YouTube channel and check back often for new videos which are uploaded regularly.
SPONSORED LINKS
Article published 2022-03-09
SPONSORED LINKS