Got a red battery warning light on? This most likely means the alternator has gone out and needs a replacement. To confirm the failure use a voltmeter to test the alternator before the replacement begins. This is a common problem for most vehicles, you can replace it in about an hour or two.
What Goes Wrong?
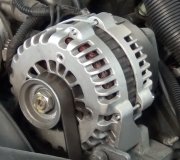
The alternator can fail in one of two ways, either the electrical section (charging) of the unit stops working due to heat and over usage, or the bearings can fail causing the alternator to make noise and eventually lock up. This is often accompanied by symptoms such as a battery warning light, low state of battery charge, poor or erratic performance from electrical components, and finally the engine will shut down.
Supplies Needed
- Replacement Alternator
- Tool set
- Protective glove and eyewear
- New serpentine belt (if needed)
- Hydraulic jack and jack stands (if needed)
- Show towel
Getting Started
Park your vehicle on level ground with the engine off with the emergency brake set. Locate the alternator under the hood, it will be near the front of the engine either on top or the bottom. If needed raise the vehicle using a floor jack and secure it with jack stands.
1. Loosen and remove the negative battery cable and then push the cable away from the terminal to avoid accidental connections. Sometimes the cable will want to wander back over to the terminal. This step is to remove electrical power from the vehicle to avoid short circuits when working with the main wiring harness. Record the radio presets if you want to re-enter them when the job is complete.
2. The serpentine belt will need to be removed. Locate the belt tensioner and hold reverse tension against it using a wrench, socket or breaker bar. This will allow the belt to be removed from the alternator pulley. Once the belt has been removed inspect it for cracks and glazing because now would be a good time to replace it with a new one.
Alternator Removal
This is a general outline, some steps can be done out of order depending on application.
1. Begin by removing the dust boot from the main power terminal to expose the main power wire. If the wiring is difficult to access you will be able to disconnect it once the alternator is loose from the engine. All alternators are designed with a main power cable (large gauge) that is connected directly to the battery or the under hood fuse panel for main charging purposes.
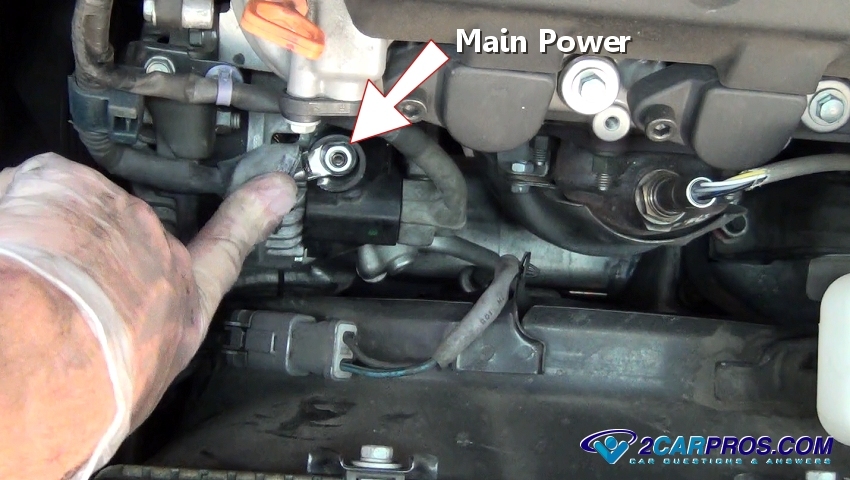
2. Use a socket or wrench to remove the nut by turning it counterclockwise. After the nut has been removed grasp the main power cable and lift it from the alternator charge terminal.

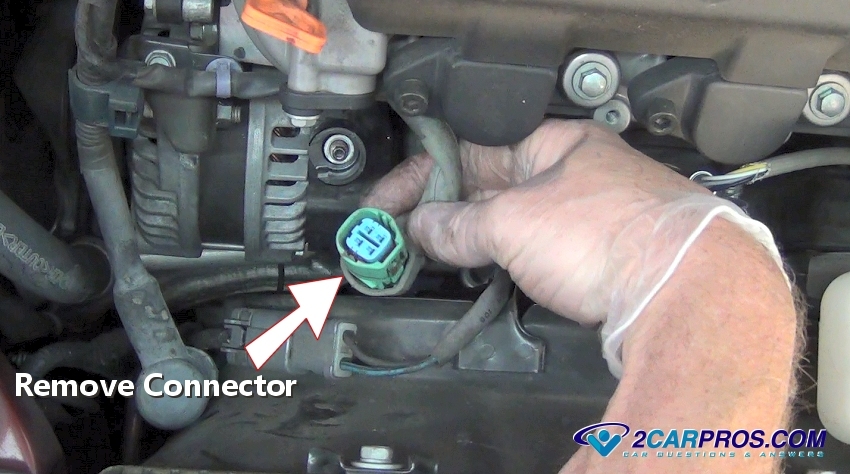
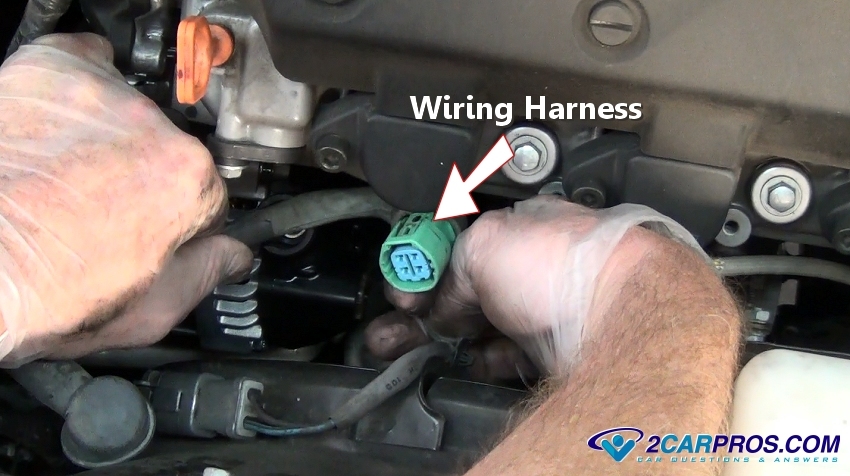
3. Locate the control and monitoring wiring harness connector. Grasp the dust boot and pull it back enough to access the connector safety clip. Some vehicles do not have a dust boot.

4. While releasing the safety clip on the side of the connector gently pull to outward to remove the wiring harness. These connectors can be a little stuck because of the weather seal which you might need to wiggle to help remove it.
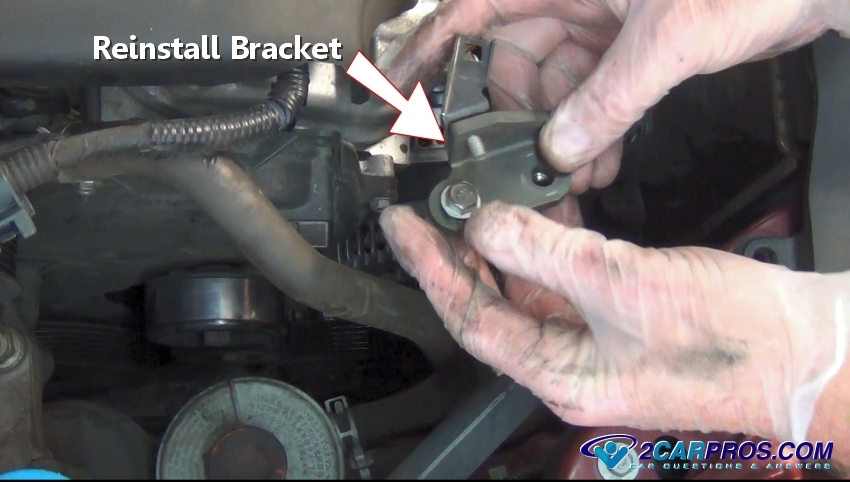
5. Clear any hoses or wiring by removing mounting bolts or screws. Once completed use a wrench or socket to remove the upper mounting bolt and bracket.

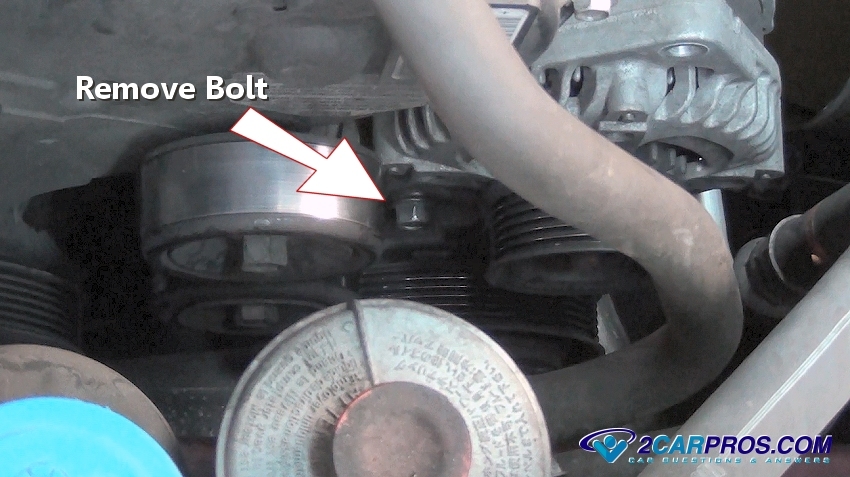
6. Locate and remove the lower alternator mounting bolt. This bolt can be tight so keep a good grip on the wrench or socket while placing the wrench or socket firmly on the head of the bolt to avoid rounding the bolt head.
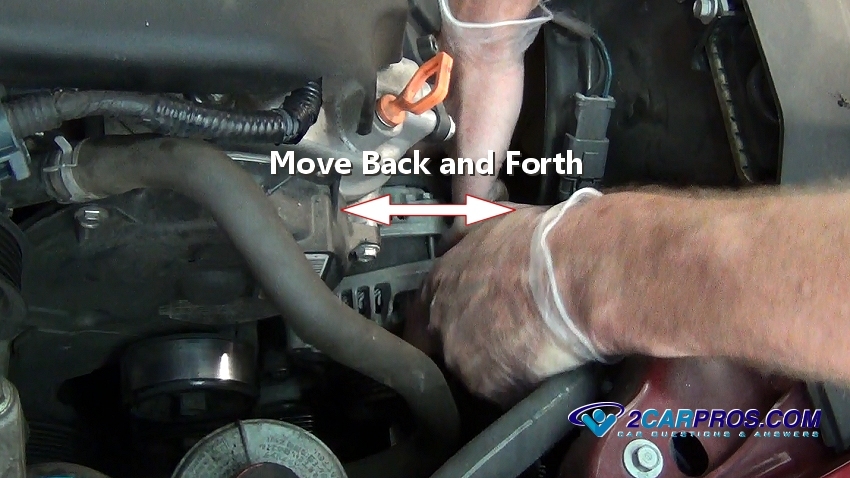
7. After the mounting bolt has been removed grasp the unit and move it back and forth while pulling upward. This will help release the press fit (lower mounting bracket) used to hold the alternator in place.
8. Once the old unit becomes loose in the engine bay get a good grip in on it to gently lift and remove it, this step can take some trial and error while rotating the unit. Also, you may need to loosening a fan shroud or radiator hose to finish the removal.
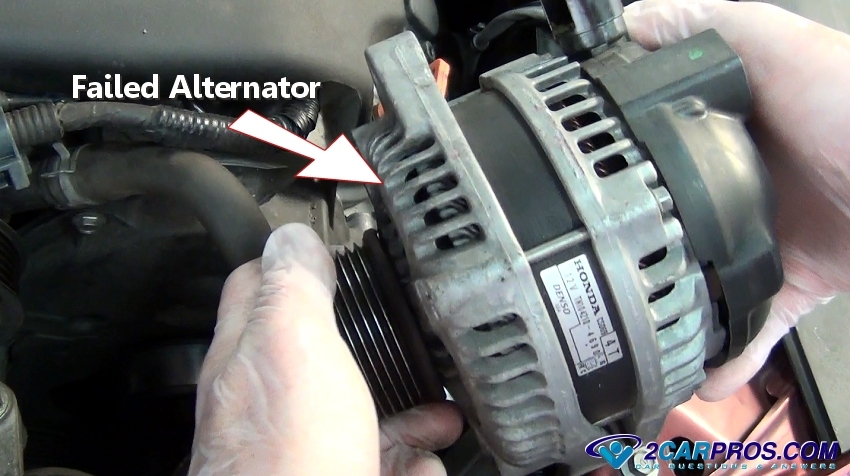
9. Once removed, check the old assembly to the replacement unit. Compare the electrical plug, mounting bolt locations and pulley size to ensure a proper installation. Also count the serpentine belt grooves on each of the pulleys, they should be the same.
Alternator Reinstallation
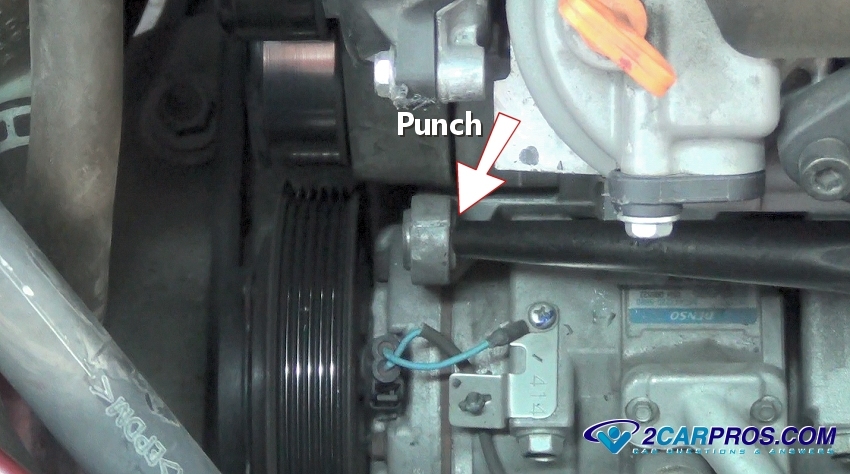
1. The lower mounting brackets include a press fit sleeve that must be forced slightly outward to make room for the replacement unit. This step is important because installing the new unit would be very difficult if not impossible without this step.
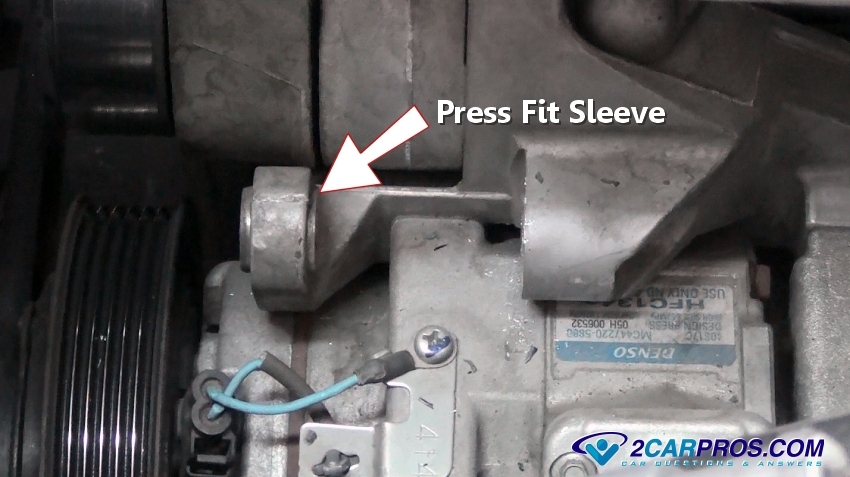
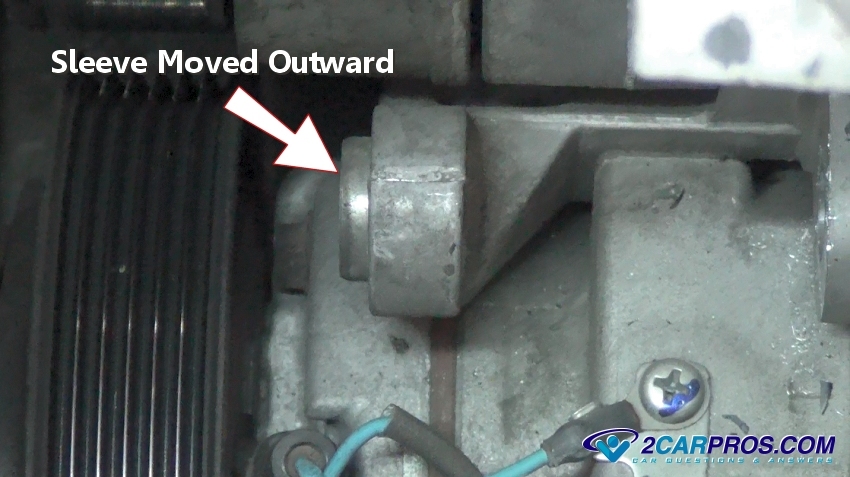
2. Use a large punch or metal bar to gently hammer the sleeve outward. This can take a little finesse, stay with it because it only needs to be moved a little bit to get new alternator installed.
Here is a close up shot of what the job should look like when completed. Now the lower boss of the alternator housing will slip onto position easily.
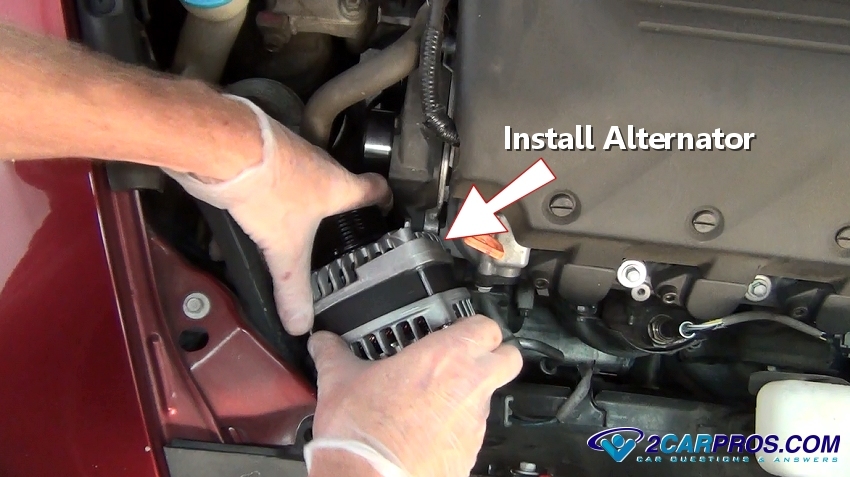
3. Gently lower the replacement alternator into the engine bay while being carefully not the damage any of the surrounding components such as the radiator. The radiator core is made of thin aluminum and it can be easily damaged which would take the fun out of the job if you cause a leak.
4. Once the alternator is in its lower mount, reinstall the lower mounting bolt. Leave the bolt hand tight until the installation of the upper bolt. If you tighten the lower bolt first the upper bolt might be difficult to install or it can bind which will cause the bolt to strip out.
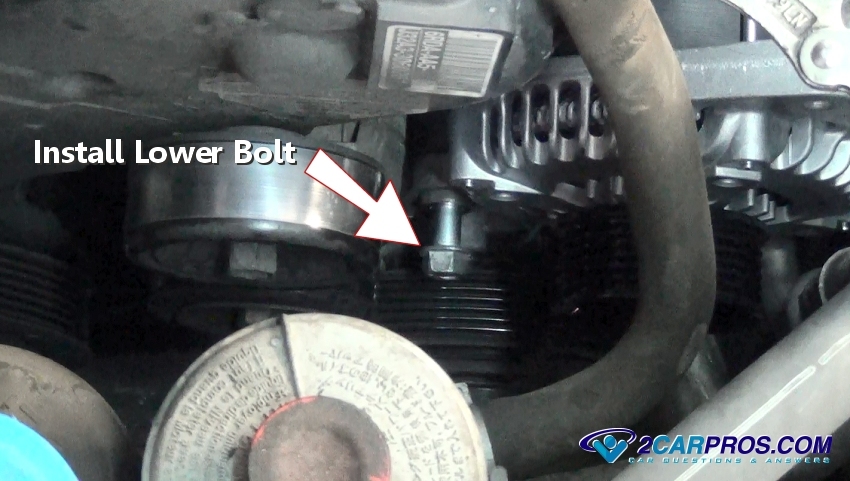
5. Hand thread in the upper mounting bolt and tighten, next tighten the lower bolt as well. These bolts need to be snug, but don't over tighten which can cause the bolts to strip out especially the upper mounting bolt because of its smaller size. Usually the lower bolt torque specification is 22-24 pounds while the upper bolt torque specification is 13-15 pounds.

6. After the mounting bolts are tightened reinstall the computer wiring harness that monitors and adjusts the voltage output along with the rubber weather boot. Be sure the connector is free from dirt and grease before reassembly.
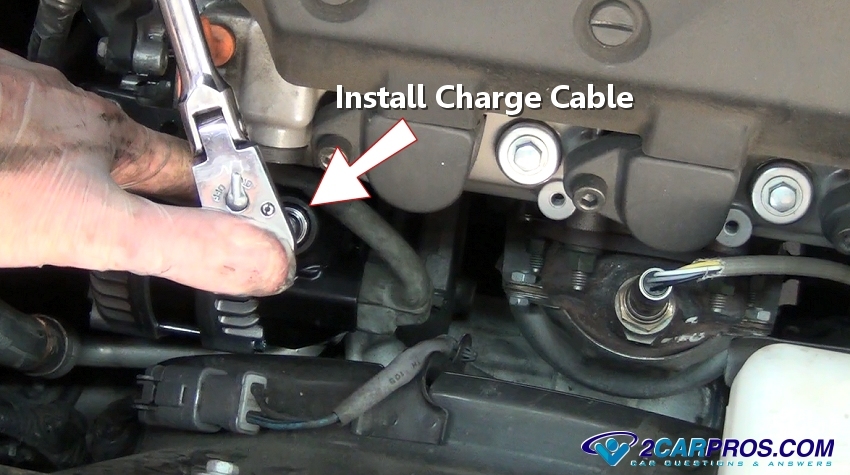
7. Reinstall the main charge cable and mounting nut, gently tighten the cable into place and do not over tighten. This electrical terminal this made of a hard plastic and is used as an insulator which can break causing an internal short hindering the charging operation. Reinstall the rubber weather boot to keep any moisture from entering the connection which will cause corrosion and more problems further down the line. If the wring harness has mounting clip reinstall them to keep the harness from wearing through and eventually connecting to ground which will blow the charging system fuse and possibly damage the new alternator.
8. Reinstall any hoses or brackets removed in the replacement process.
9. After the belt installation is complete use a flashlight to check the position of the belt on each one of the accessory pulleys to make sure all of the belt ribs are correctly positioned. Reconnect the battery negative cable back up by gently touching the cable to the battery post. There should be a very small spark while installing the cable end to the terminal which is normal. If a large spark is generated the alternator charge cable has grounded and needs to be rechecked. Do not reconnect the battery cable until this problem has been fixed. It doesn't happen very often but it's something you should know about.
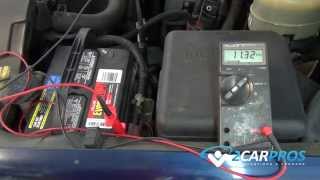
When the job has been completed start the engine and observe the battery warning light which should be out. It's also a good idea to check the new alternator's voltage output using a voltmeter.
Watch the Video!
Please watch this video of the job being done to glean additional helpful information.
Credits
This guide knowledge base was created by the 2CarPros Team, and by Ken Lavacot: Automobile repair shop owner and certified master automobile technician of over 30 years. If you have question or need help please ask one of our experts we are happy to help. Please visit our 2CarPros YouTube Channel.

Article published 2024-04-22