Hi,
Yes, the transmission needs removed to replace this. It is between the flywheel and the engine. Here are the directions for replacement:
_______________________________________
2009 Suzuki SX4 2WD L4-2.0L
Crankshaft Position (CKP) Sensor Removal and Installation
Vehicle Power-train Management Sensors and Switches - Power-train Management Sensors and Switches - Computers and Control Systems Crankshaft Position Sensor Service and Repair Removal and Replacement Crankshaft Position (CKP) Sensor Removal and Installation
CRANKSHAFT POSITION (CKP) SENSOR REMOVAL AND INSTALLATION
Crankshaft Position (CKP) Sensor Removal and Installation
Removal
1. Remove transmission assembly from vehicle referring to Automatic Trans-axle Unit Dismounting and Remounting or Manual Trans-axle Assembly Disassembly and Reassembly.
2. Remove drive plate or flywheel from crankshaft.
3. Disconnect connector from crankshaft position sensor.
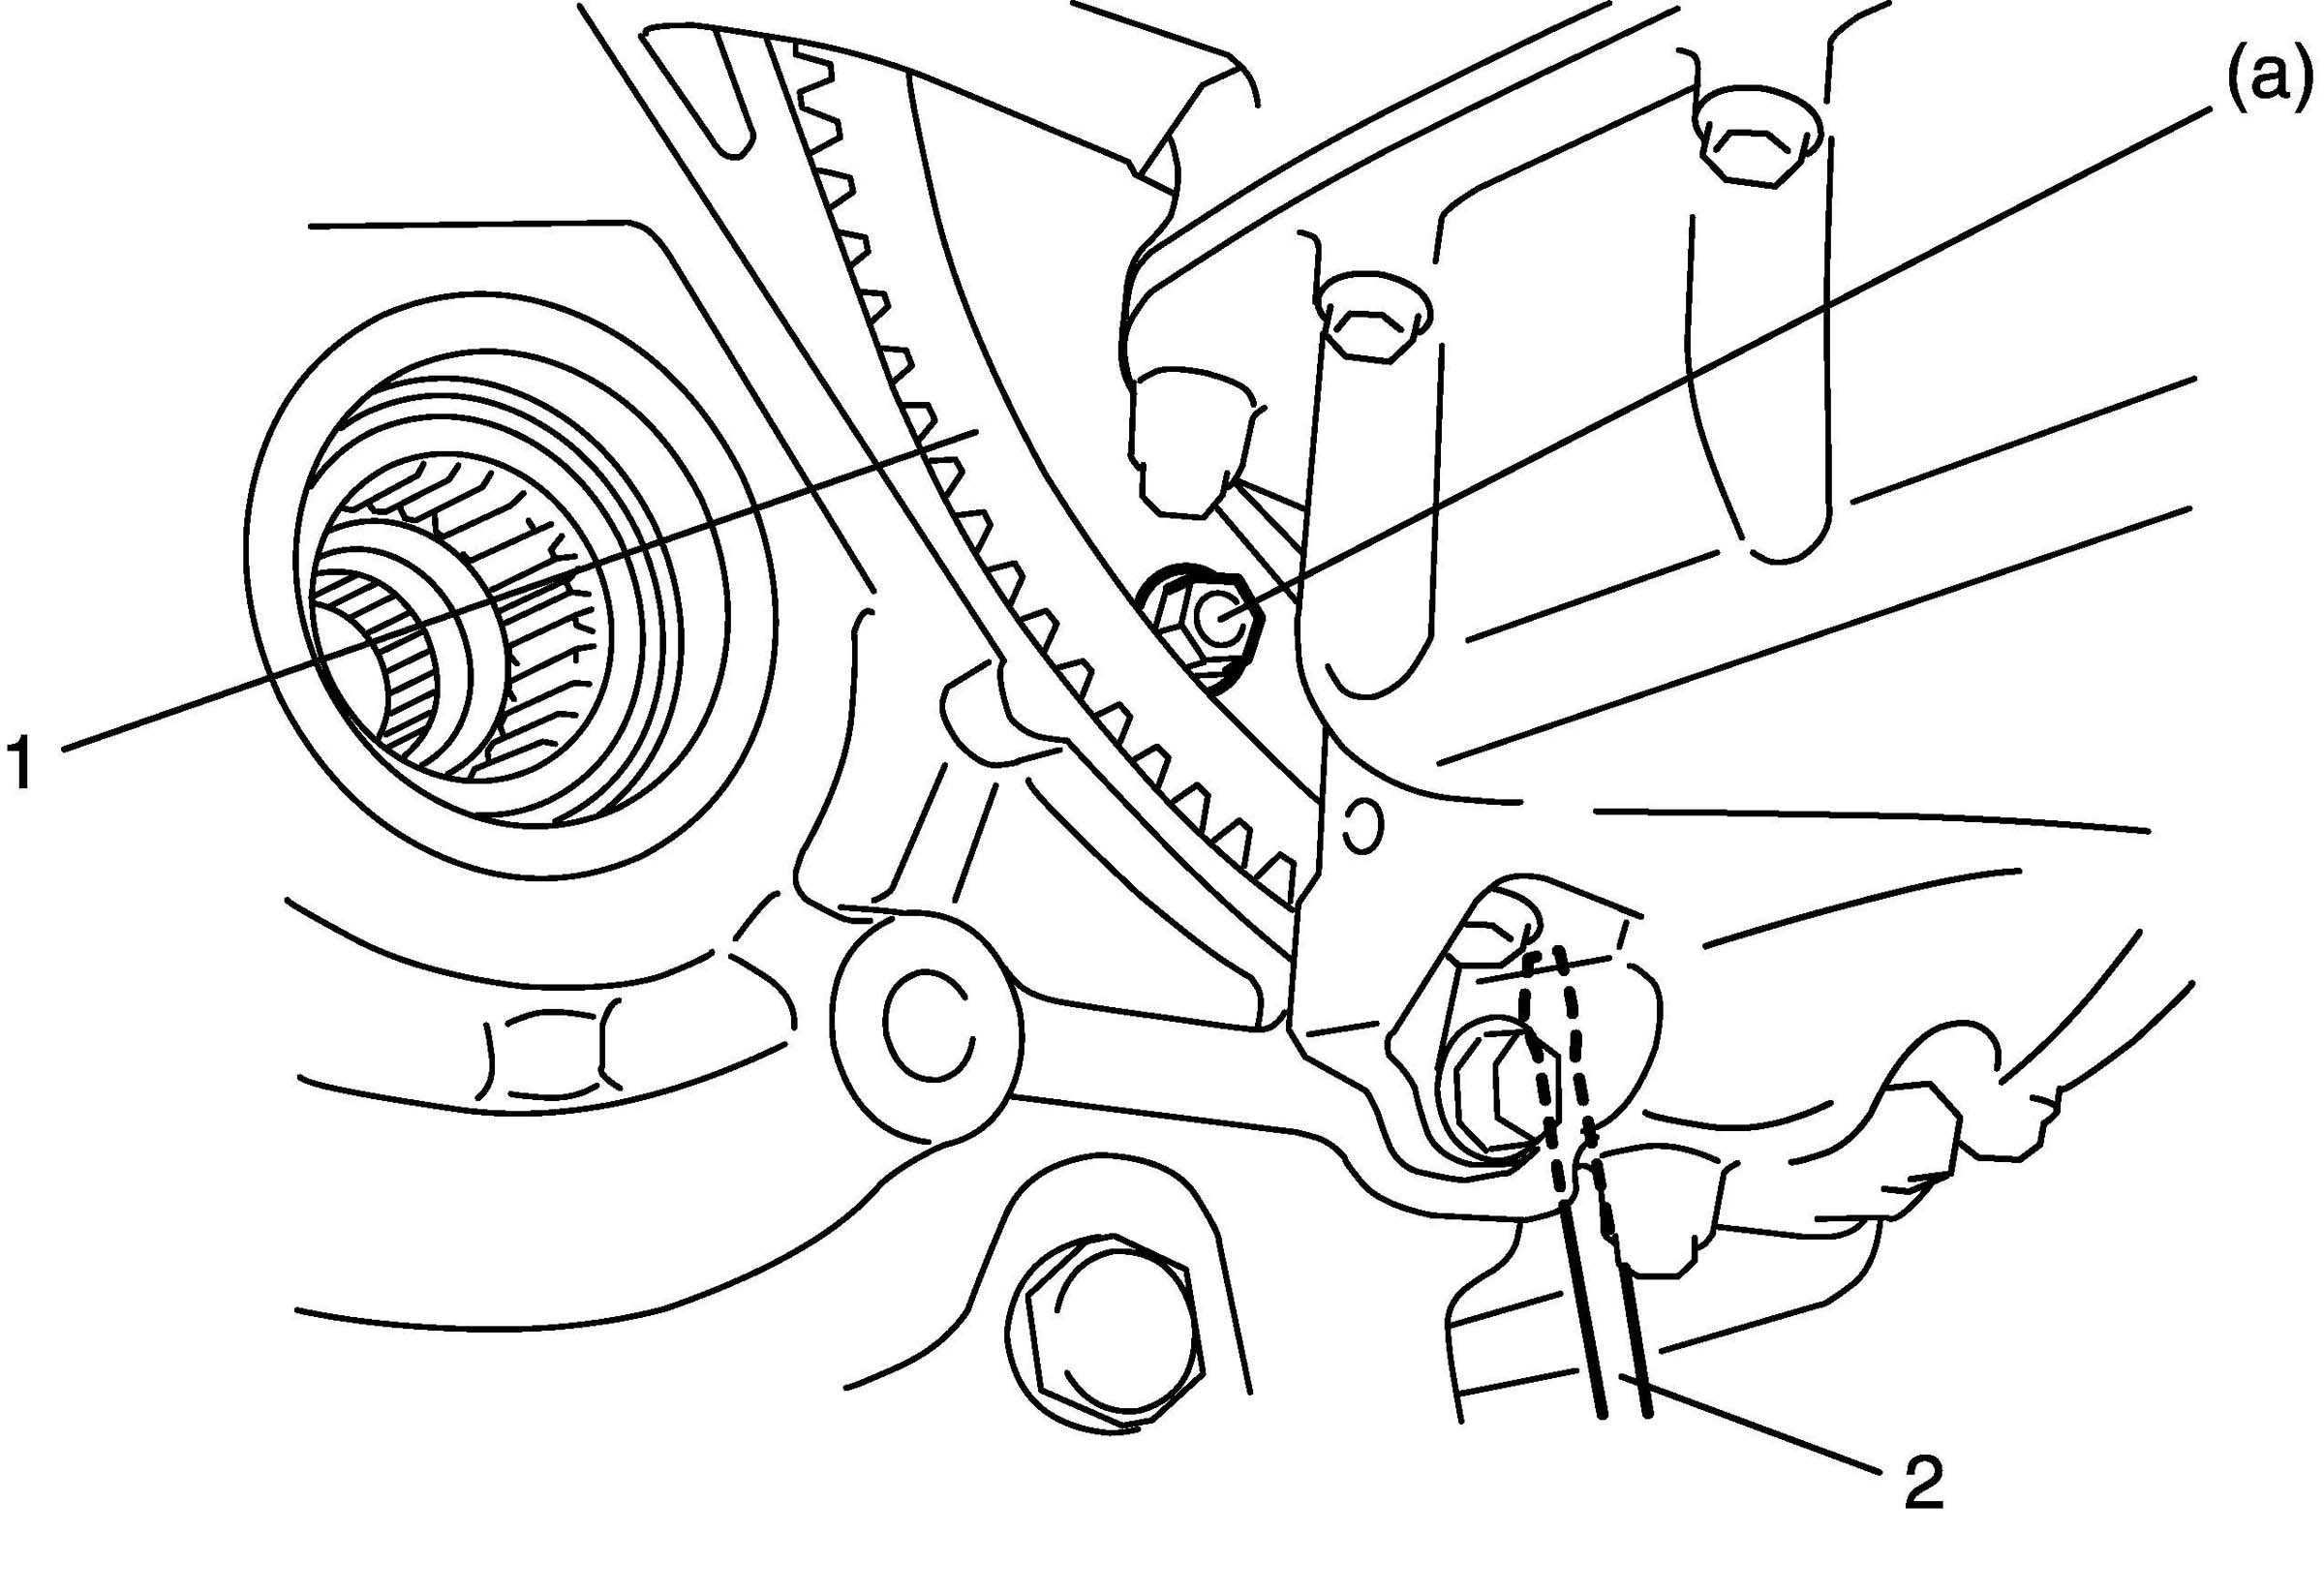
4. Remove CKP sensor (1) from cylinder block (2).
Installation
Reverse removal procedure noting the following.
Apply engine oil to O-ring of sensor.
Tighten CKP sensor bolt to specified torque.
Pic 1
Tightening torque
CKP sensor bolt a: 11 Nm (1.1 kg.M, 8.0 ft. Lbs.)
Connect connector and fix wire harness with clamp securely.
___________________________
If you need directions for transmission removal, here they are. The remaining pictures correlate with these directions.
__________________________
2009 Suzuki SX4 2WD L4-2.0L
Automatic Trans-axle Unit Dismounting and Remounting
Vehicle Transmission and Drive-train Automatic Transmission/Trans-axle Service and Repair Removal and Replacement Automatic Trans-axle Unit Dismounting and Remounting
AUTOMATIC TRANS-AXLE UNIT DISMOUNTING AND REMOUNTING
Automatic Trans-axle Unit Dismounting and Remounting
Dismounting
1. Take down trans-axle with engine.
2. Remove engine rear mounting No. 1 bracket and engine rear mounting No. 2 bracket with stiffener (for 2WD vehicle).
3. Remove transfer.
4. Remove center bearing support bolts (3) and remove center bearing support (2) with center shaft (1) from differential side gear (for 2WD vehicle).
Pic 2
5. Remove clutch housing plate (1).
Pic 3
6. Remove torque converter bolts.
To lock drive plate (1), engage a flat head rod or the like (2) with drive plate gear.
Pic 4
7. Remove starting motor.
8. Remove bolts and nut fastening engine and trans-axle, then detach trans-axle from engine.
NOTE: When detaching trans-axle from engine, move it in parallel with crankshaft and use care so as not to apply excessive force to drive plate and torque converter.
WARNING: Be sure to keep trans-axle with torque converter horizontal or facing up throughout the work. Should it be tilted with torque converter down, converter may fall off and cause personal injury.
Remounting
1. Make sure that torque converter is installed correctly to trans-axle.
2. Attach trans-axle to engine.
Tightening torque
Trans-axle to engine bolts and nut a: 85 Nm (8.5 kgf-m, 61.5 ft. Lbs.)
WARNING: Be sure to keep trans-axle with torque converter horizontal or facing up throughout the work. Should it be tilted with torque converter down, converter may fall off and cause personal injury.
Pic 5
3. Tighten drive plate-torque converter bolts.
Align drive plate bolt hole and torque converter through then tighten bolts through torque converter housing lower plate opening.
Lock drive plate (1) by engaging a flat head rod or the like (2) with drive plate gear.
Tightening torque
Drive plate to torque converter bolts a: 23 Nm (2.3 kgf-m, 16.5 ft. Lbs.)
pic 6
4. Install clutch housing plate.
Tighten clutch housing plate bolts (a) first and next (b) with specified torque.
Tightening torque
Clutch housing plate bolt (M6) a: 11 Nm (1.1 kgf-m, 8.0 ft. Lbs.)
Clutch housing plate bolt (M10) b: 30 Nm (3.0 kgf-m, 21.5 ft. Lbs.)
pic 7
5. Install starter motor.
6. Install center shaft (1) to differential gear (for 2WD vehicle). Tighten center bearing support bolts to specified torque.
CAUTION: Be careful not to scratch oil seal lip with center shaft while inserting.
7. Install engine rear mounting brackets and stiffener (for 2WD vehicle).
8. Install transfer.
9. Remount engine with trans-axle assembly to vehicle.
___________________________
Hope this helps. Let me know if you have other questions.
Joe
Images (Click to make bigger)
SPONSORED LINKS
Friday, August 21st, 2020 AT 9:53 AM