Yep, it sounds like the timing chain is broken or the engine was severely overheated, and it has lost compression, thanks for the video it really helps us see what's wrong. In either case it will be best if you get a new engine with that many miles on it. Here are the instructions on how to do the job and I have included a video of an engine being removed in a similar vehicle so you can get an idea of what needs to be done.
https://youtu.be/zy1CozLgWUQ
ENGINE - 3.7L
REMOVAL
1. Disconnect the battery negative cable.
2. Remove hood. Mark hood hinge location for reinstallation.
3. Remove air cleaner assembly.
4. Remove radiator core support bracket.
5. Remove fan shroud with electric fan assembly.
6. Remove mechanical cooling fan.
7. Remove drive belt.
NOTE: It is not necessary to discharge the A/C system to remove the engine.
8. Remove A/C compressor and secure away from engine with lines attached.
9. Remove generator and secure away from engine.
NOTE: Do NOT remove the phenolic pulley from the P/S pump. It is not required for P/S pump removal.
10. Remove power steering pump with lines attached and secure away from engine.
11. Drain cooling system.
12. Remove coolant bottle.
13. Disconnect the heater hoses from the engine.
14. Disconnect heater hoses from heater core and remove hose assembly.
15. Disconnect throttle and speed control cables.
16. Remove upper radiator hose from engine.
17. Remove lower radiator hose from engine.
18. Disconnect the engine to body ground straps at the left side of cowl.
19. Disconnect the engine wiring harness at the following points:
- Intake air temperature (IAT) sensor
- Fuel Injectors
- Throttle Position (TPS) Switch
- Idle Air Control (IAC) Motor
- Engine Oil Pressure Switch
- Engine Coolant Temperature (ECT) Sensor
- Manifold Absolute Pressure MAP) Sensor
- Camshaft Position (CMP) Sensor
- Coil Over Plugs
- Crankshaft Position Sensor
20. Remove coil over plugs.
21. Release fuel rail pressure.
22. Remove fuel rail and secure away from engine.
NOTE: It is not necessary to release the quick connect fitting from the fuel supply line for engine removal.
23. Remove the PCV hose.
24. Remove the breather hoses.
25. Remove the vacuum hose for the power brake booster.
26. Disconnect knock sensors.
27. Remove engine oil dipstick tube.
28. Remove intake manifold.
29. Install engine lift plate.
NOTE: Recheck bolt torque for engine lift plate before removing engine.
30. Secure the left and right engine wiring harnesses away from engine.
31. Raise vehicle.
32. Disconnect oxygen sensor wiring.
33. Disconnect crankshaft position sensor.
34. Disconnect the engine block heater power cable, if equipped.
35. Disconnect the front propshaft at the front differential and secure out of way.
NOTE: It is necessary to disconnect the front propshaft for access to the starter and left side exhaust flange.
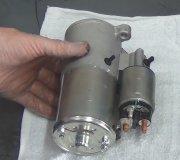
36. Remove the starter.
37. Remove the ground straps from the left and right side of the block.
38. Disconnect the right and left exhaust pipes at the manifolds and from the crossover, and remove from the vehicle.
NOTE: The exhaust clamps at the manifolds cannot be reused. New clamps must be used or leaks may occur.
NOTE: For manual transmission vehicles, the transmission must be removed from the vehicle, before the engine can be removed. The manual transmission will contact the floorpan before the engine clears the motor mounts, so it must be removed.
39. Remove the structural cover.
40. Remove torque converter bolts, and mark location for reassembly.
41. Remove transmission bellhousing to engine bolts.
42. Loosen left and right engine mount thru bolts.
NOTE: It is not necessary to completely remove engine mount thru bolts, for engine removal.
43. Lower the vehicle.
44. Support the transmission with a suitable jack.
45. Connect a suitable engine hoist to the engine lift plate.
46. Remove engine from vehicle.
INSTALLATION
1. Position the engine in the vehicle.
2. Install both left and right side engine mounts onto engine.
3. Raise the vehicle.
4. Install the transmission bellhousing to engine mounting bolts. Tighten the bolts to 41 Nm (30ft. lbs.).
5. Tighten the engine mount thru bolts.
6. Install the torque converter bolts.
7. Connect the ground straps on the left and right side of the engine.
8. Install the starter.
9. Connect the crankshaft position sensor.
10. Install the engine block heater power cable, if equipped.
CAUTION: The structural cover requires a specific torque sequence. Failure to follow this sequence may cause severe damage to the cover.
11. Install the structural cover.
NOTE: New clamps must be used on exhaust manifold flanges. Failure to use new clamps may result in exhaust leaks.
12. Install the left and right exhaust pipes.
13. Connect the left and right oxygen sensors.
14. Lower vehicle.
15. Remove the engine lift plate.
16. Connect the knock sensors.
17. Connect the engine to body ground straps at the left side of the cowl.
18. Install the intake manifold.
19. Install the engine oil dipstick tube.
20. Install the power brake booster vacuum hose.
21. Install the breather hoses.
22. Install the PCV hose.
23. Install the fuel rail.
24. Install the coil over plugs.
25. Connect the engine wiring harness at the following points:
- Intake air temperature (IAT) sensor
- Fuel Injectors
- Throttle Position (TPS) Switch
- Idle Air Control (IAC) Motor
- Engine Oil Pressure Switch
- Engine Coolant Temperature (ECT) Sensor
- Manifold Absolute Pressure MAP) Sensor
- Camshaft Position (CMP) Sensor
- Coil Over Plugs
- Crankshaft Position Sensor
26. Connect lower radiator hose.
27. Connect upper radiator hose.
28. Connect throttle and speed control cables.
29. Install the heater hose assembly
30. Install coolant recovery bottle.
31. Install the power steering pump.
32. Install the generator.
33. Install the A/C compressor.
34. Install the drive belt.
35. Install the mechanical cooling fan.
36. Install the fan shroud with the electric fan assembly.
37. Install the radiator core support bracket.
38. Install the air cleaner assembly.
39. Refill the engine cooling system.
40. Install the hood.
41. Check and fill engine oil.
42. Connect the battery negative cable.
43. Start the engine and check for leaks.
Please let us know if there is anything you need help with.
SPONSORED LINKS
Monday, January 30th, 2023 AT 5:19 PM