Engine Cooling problem
1997 Jeep Wrangler 6 cyl Four Wheel Drive Automatic
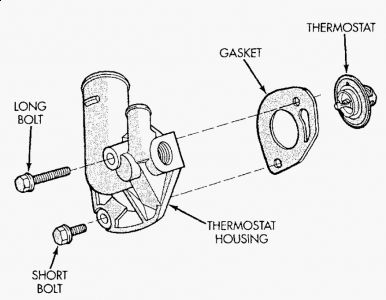
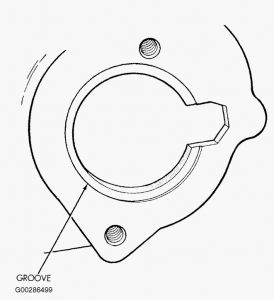
I just changed the thermostat on a 1997 Jeep Wrangler and I think I put the gasket on the engine block first then the thermostat and last the housing, the engine overheated two times out of the 3 or four times I ran it to clean/rinse the system I am now looking on line for anything I can find to help and I think I saw somewhere that the thermostat goes first then the gasket but I believe that was for an engine different that what I am working with let’s say I installed the gasket first and that was not the way it should have been done could that be enough reason for the engine to over heat.
Also now I am have read something about an air vent on the thermostat that might be a little whole or mark on the thermostat that might have to be up ,what if I installed the thermostat with that little thing pointing down or not up would that cause the thermostat to malfunction.
1997 Jeep Wrangler 6 cyl Four Wheel Drive Automatic
I just changed the thermostat on a 1997 Jeep Wrangler and I think I put the gasket on the engine block first then the thermostat and last the housing, the engine overheated two times out of the 3 or four times I ran it to clean/rinse the system I am now looking on line for anything I can find to help and I think I saw somewhere that the thermostat goes first then the gasket but I believe that was for an engine different that what I am working with let’s say I installed the gasket first and that was not the way it should have been done could that be enough reason for the engine to over heat.
Also now I am have read something about an air vent on the thermostat that might be a little whole or mark on the thermostat that might have to be up ,what if I installed the thermostat with that little thing pointing down or not up would that cause the thermostat to malfunction.
Nov 21, 2009 at 10:27 PM