Ignition module replacement?

Tiny
MARIOC68
  • MEMBER
  • 1995 TOYOTA COROLLA
  • 250,000 MILES
Hello. My car does not want to start, the starter motor does not turn, the battery charge indicator on the dashboard does not turn on when putting contact, everything else works (lights, horn, radio, rocker). Checking the fuse box of AM2 (15A) is burned. An amateur electricity friend suggested removing the condenser from the distributor (his insulator was blown), after removing it, the car started without problems. Should I check a short-circuited cable in the distributor?
Sunday, January 13th, 2019 AT 11:07 AM

7 Replies

Tiny
JACOBANDNICKOLAS
  • MECHANIC
  • 108,336 POSTS
Hi and thanks for using 2CarPros.

The condenser in the distributor is a sponge for electricity. You need to have that in the distributor. Have you replaced it?

Here are directions for taking the distributor apart. What I suggest is to replace the condenser if you haven't, and make sure none of the wires are shorted in it. Often times, a wire will break internally from constant movement. Take a look through these directions and confirm everything looks good.

____________________________________

DISASSEMBLY AND ASSEMBLY
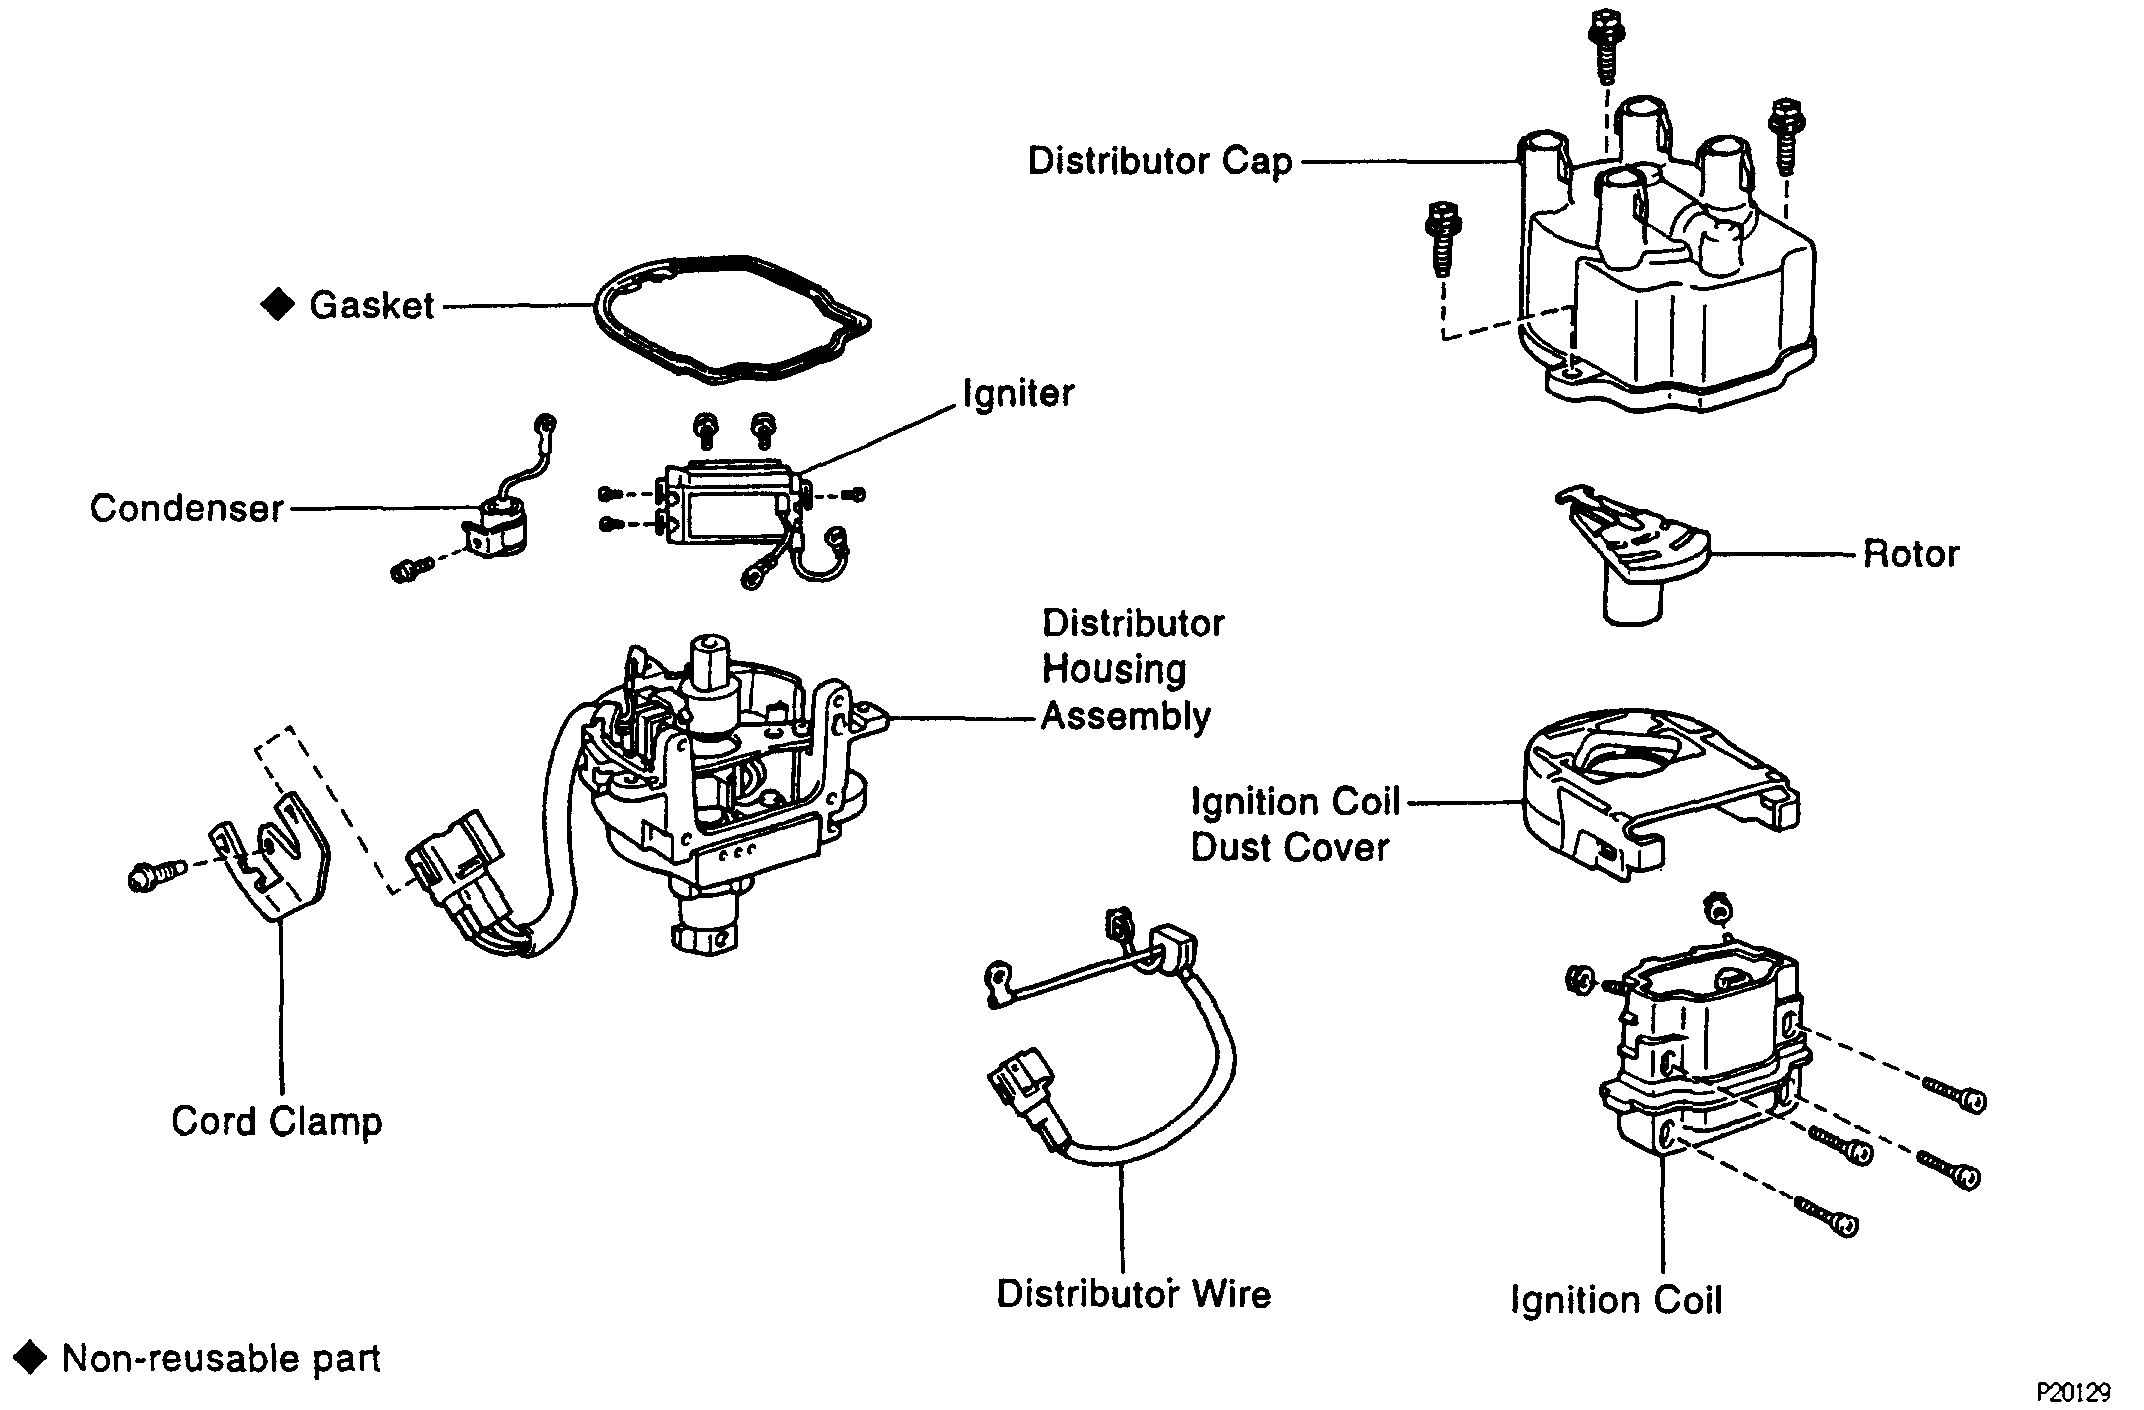
see pic 1

DISTRIBUTOR DISASSEMBLY

1. REMOVE DISTRIBUTOR CAP.
- Remove the 3 bolts and distributor cap.
2. REMOVE ROTOR.
3. REMOVE IGNITION COIL DUST COVER.
- Remove the dust cover.
- Remove the gasket.
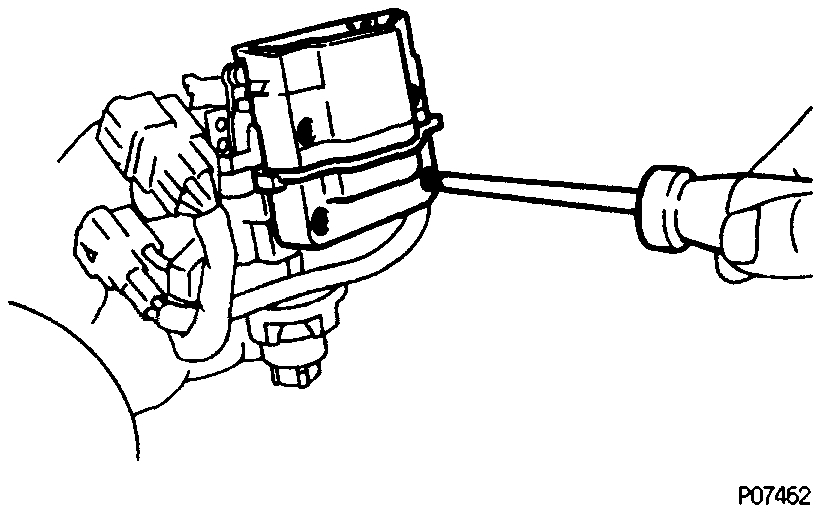
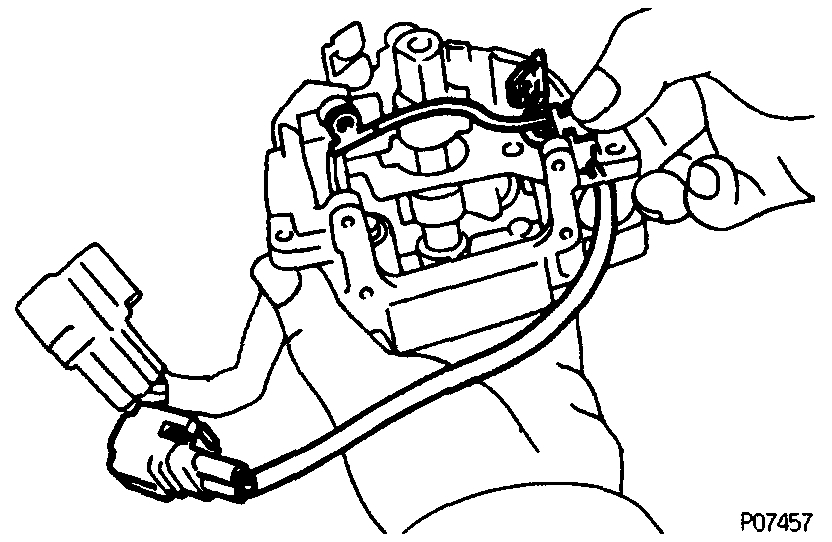
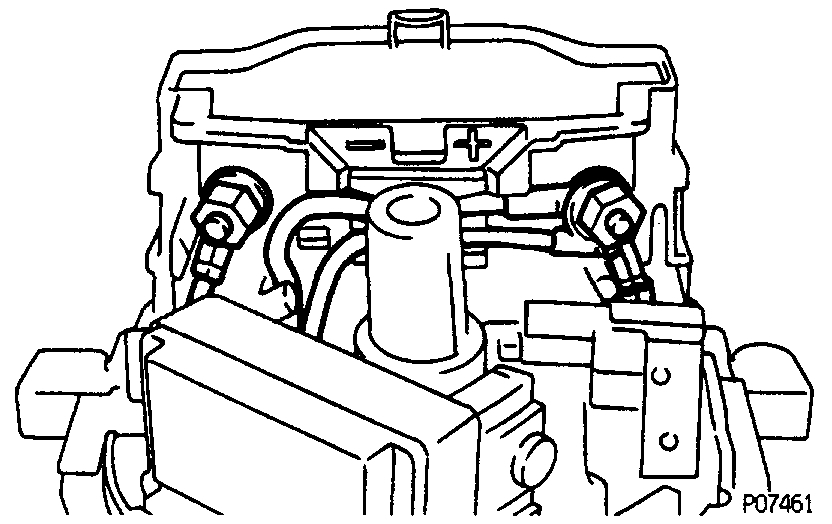
4. REMOVE IGNITION COIL.

See picture 2

- Remove the 2 nuts, and disconnect the 4 wires from the ignition coil terminals.

See picture 3

- Remove the 4 screws and ignition coil.
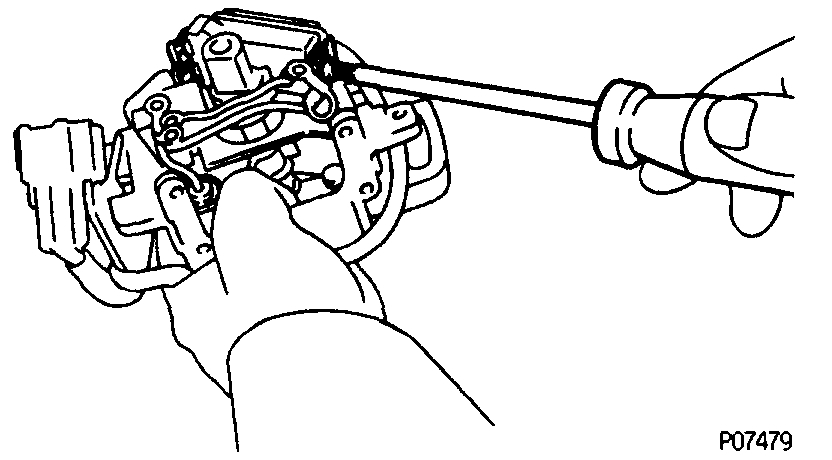
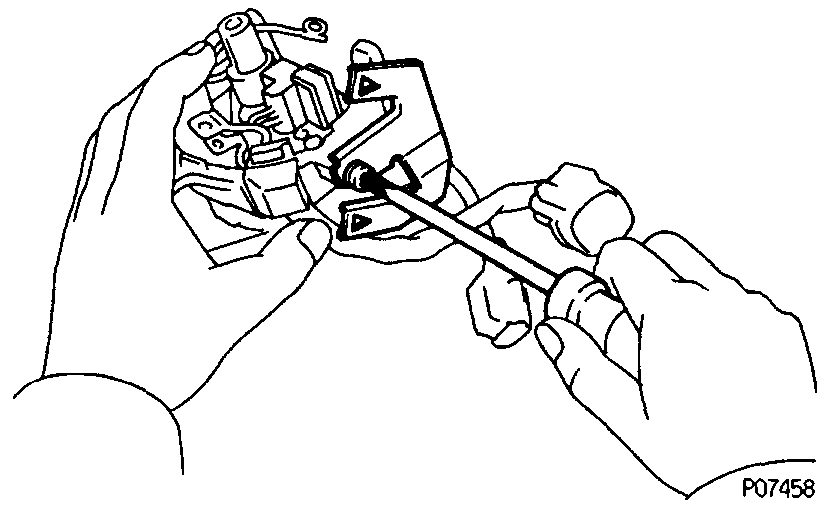
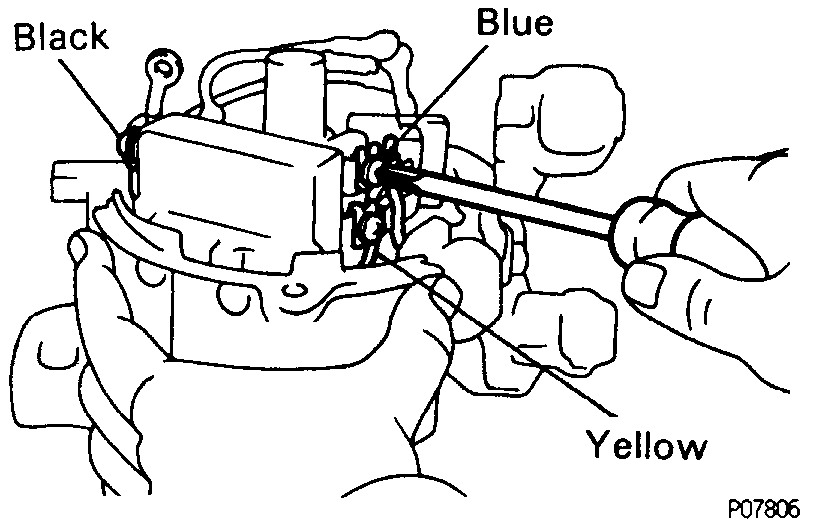
5. REMOVE IGNITER.

See pic 4

- Remove the 3 screws, and disconnect the 3 wires from the igniter terminals.

See picture 5

- Remove the 2 screws and igniter.
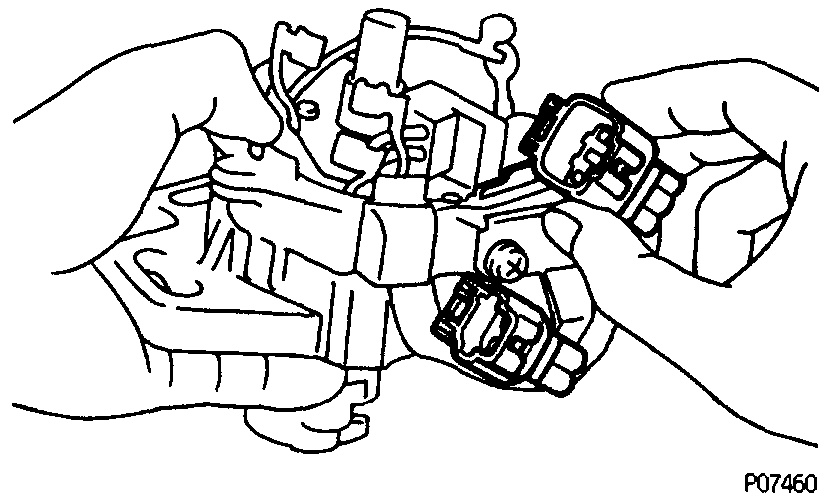
6. REMOVE CORD CLAMP AND DISTRIBUTOR WIRE.

See picture 6

- Disconnect the 2 connectors from the cord clamp.

See picture 7

- Remove the screw and cord clamp.

See picture 8

- Remove the distributor wire from the distributor housing.
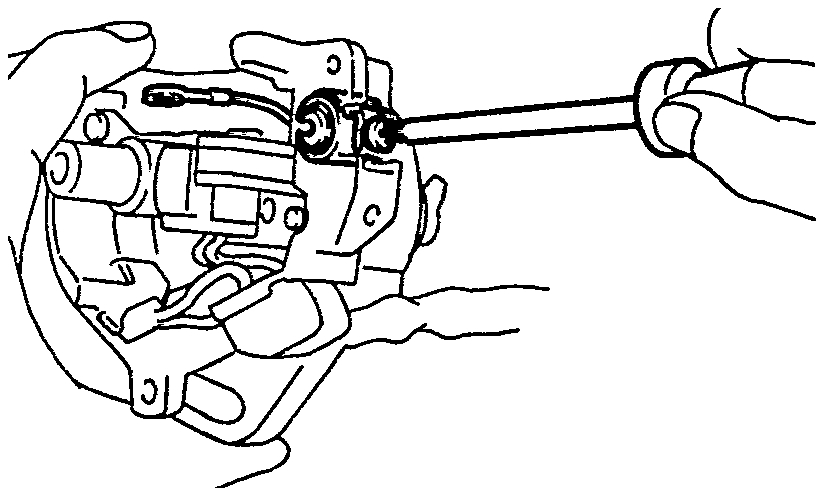
7. REMOVE CONDENSER.

See picture 9

- Remove the screw and condenser.

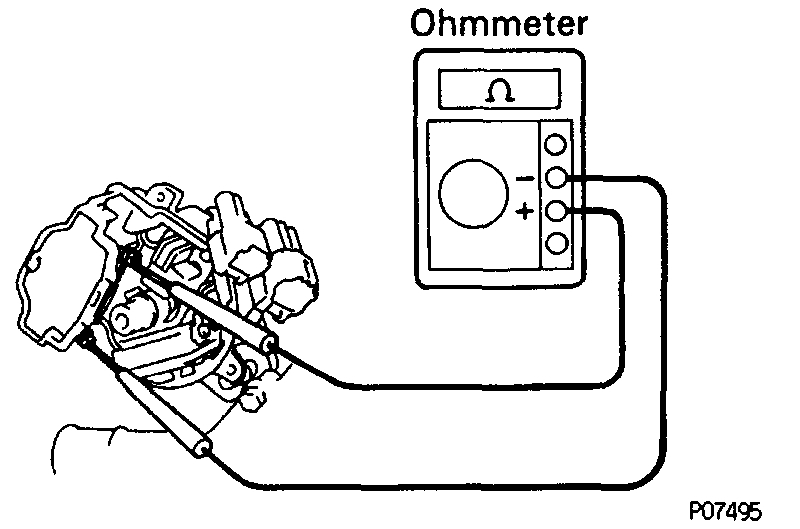
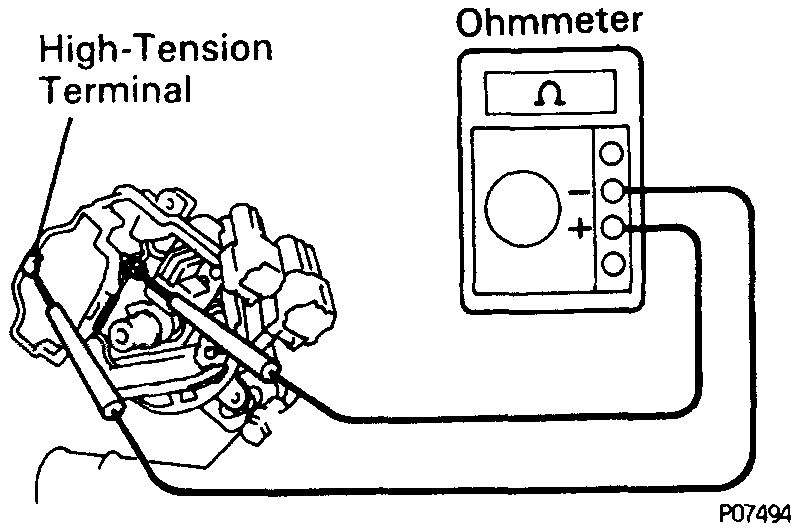
DISTRIBUTOR INSPECTION
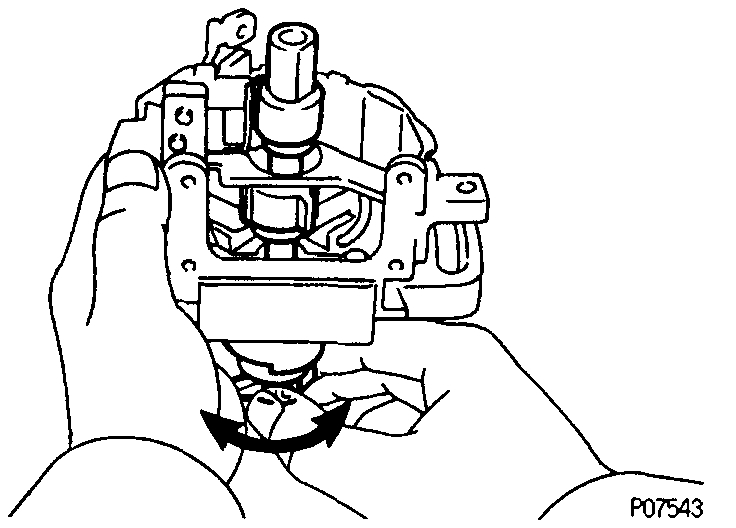
1. INSPECT SHAFT.

See picture 10

- Turn the shaft and check that it is not rough or worn.
- If it feels rough or worn, replace the distributor during assembly.

DISTRIBUTOR REASSEMBLY

1. INSTALL CONDENSER.
- Install the condenser with the screw.
2. INSTALL DISTRIBUTOR WIRE AND CORD CLAMP
- Install the grommet of the wire to the distributor housing.
- Install the cord clamp with the screw.
- Install the 2 connectors to the cord clamp.
3. INSTALL IGNITER.
- Install the igniter with the 2 screws.

See picture 11

- Connect the 3 wires to the igniter terminals with the 3 screws.

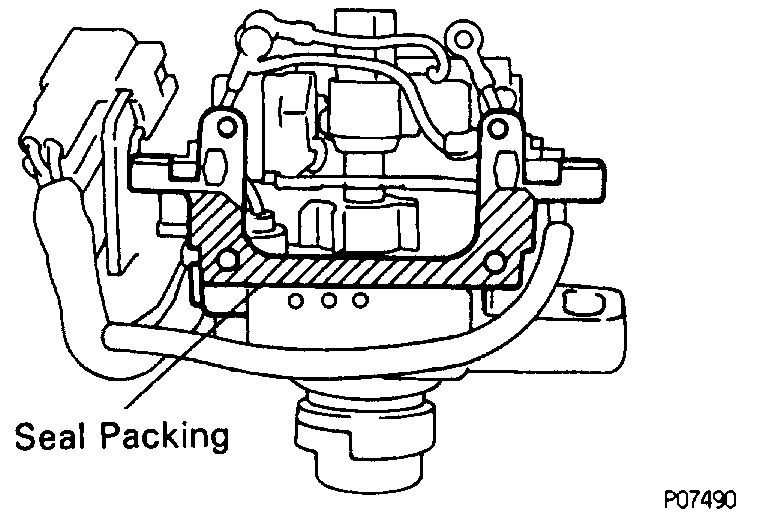
4. INSTALL IGNITION COIL.
- Remove any old packing (FIPG) material.

See picture 12

- Apply seal packing to the ignition coil installing surface of the housing as shown in the illustration.
- Seal packing: Part No. 08826-00080 or equivalent
- Install the ignition coil with the 4 screws.
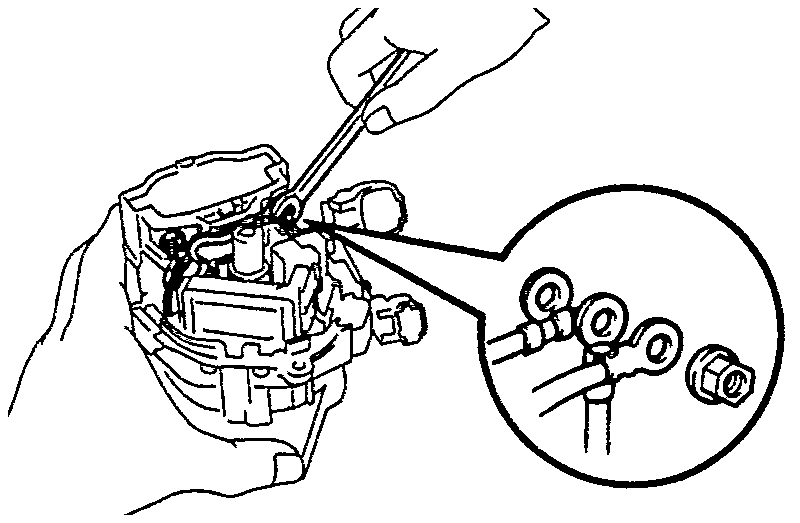
See picture 13

- Connect the 4 wires to the ignition coil terminals with the 2 nuts as shown in the illustration.

See picture 14

NOTICE:
- When connecting the wires to the ignition coil, insert both properly into their grooves found on the side of the ignition coil.
- Be sure the wires do not contact with signal rotor or distributor housing.

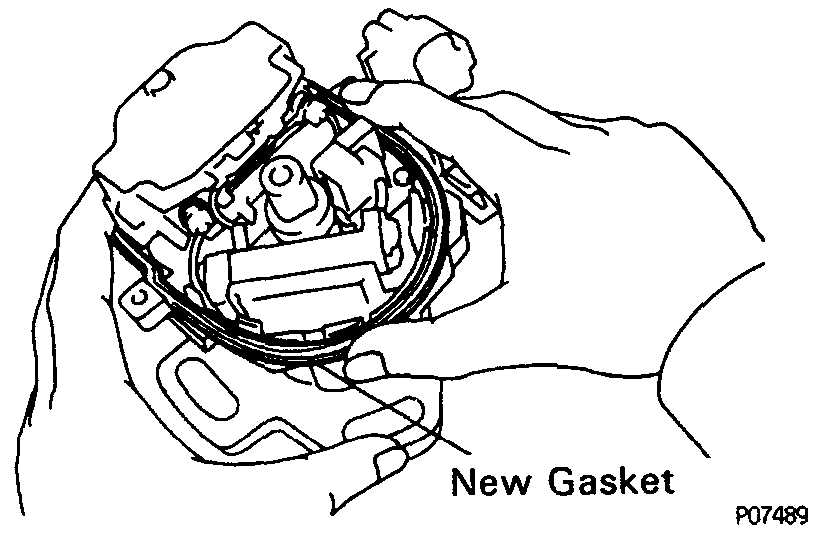
5. INSTALL IGNITION COIL DUST COVER.

See picture 15
- Install a new gasket to the distributor housing.
- Install the dust cover.

6. INSTALL ROTOR.
7. INSTALL DISTRIBUTOR CAP.
- Install the distributor cap with the 3 bolts.

____________________________________________________

Let me know if this helps. Again, without the condenser, you will end up causing other components to fail.

Take care,
Joe
Was this
answer
helpful?
Yes
No
Sunday, January 13th, 2019 AT 3:13 PM
Tiny
MARIOC68
  • MEMBER
  • 120 POSTS
I placed another condenser, lasted approximately three days driving well, until again the same failure occurred. Apparently there is a cable shorted. How to test the conditions of a capacitor? I tried it in the following way: a good capacitor has no conductivity between the central cable and the frame of the latter; but the damaged one if there was conductivity.
Was this
answer
helpful?
Yes
No
Sunday, January 13th, 2019 AT 3:27 PM
Tiny
JACOBANDNICKOLAS
  • MECHANIC
  • 108,336 POSTS
Welcome back.

What you described is a good way to determine if the condenser is bad. However, it doesn't tell us why. I have a feeling the igniter / coil is causing the problem. Take a look through this test and let me know the results.

IGNITION COIL INSPECTION

NOTICE: Cold and Hot in the following sentences express the temperature of the coils themselves.
"Cold" is from - 10°C (14°F) to 50°C (122°F).
"Hot" is from 50°C (122°F) to 100°C (212°F).

1. DISCONNECT DISTRIBUTOR CONNECTORS.
2. REMOVE DISTRIBUTOR CAP.
3. REMOVE ROTOR.
4. REMOVE IGNITION COIL DUST COVER.
5. INSPECT PRIMARY COIL RESISTANCE.

Picture 1

- Using an ohmmeter, measure the resistance between the positive (+) and negative (-) terminals.

Primary coil resistance (Cold): 1.11 - 1.75 Ohms
Primary coil resistance (Hot): 1.41 - 2.05 Ohms

- If the resistance is not as specified, replace the ignition coil.
6. INSPECT SECONDARY COIL RESISTANCE.

Picture 2

- Using an ohmmeter, measure the resistance between the positive (+) and high-tension terminals.

Secondary coil resistance (Cold): 9.0 - 16.7 k Ohms
Secondary coil resistance (Hot): 11.4 - 18.4 kOhms

- If the resistance is not as specified, replace the ignition coil.

7. REINSTALL IGNITION COIL DUST COVER.
8. REINSTALL ROTOR.
9. REINSTALL DISTRIBUTOR CAP.
10. RECONNECT DISTRIBUTOR CONNECTORS.

_______________________

Let me know the results.

Take care,
Joe
Was this
answer
helpful?
Yes
No
Sunday, January 13th, 2019 AT 9:07 PM
Tiny
MARIOC68
  • MEMBER
  • 120 POSTS
This are my results:
Primary coil resistance (Cold): 1.7 Ohm
Primary coil resistance (Hot): 2.05 Ohm
Secondary coil resistance (Cold): 13.33 kOhm
Secondary coil resistance (Hot):14.71 kOhm
Was this
answer
helpful?
Yes
No
Tuesday, January 15th, 2019 AT 5:35 AM
Tiny
JACOBANDNICKOLAS
  • MECHANIC
  • 108,336 POSTS
That's right where it should be. The only think I can think of is a short in one of the wires. Or you got a bad condenser. Have you replaced it again?
Was this
answer
helpful?
Yes
No
Tuesday, January 15th, 2019 AT 5:39 PM
Tiny
MARIOC68
  • MEMBER
  • 120 POSTS
I installed another used condenser, I will try with it until I get a new one. I'll see if the fault occurs with this capacitor.
Was this
answer
helpful?
Yes
No
Tuesday, January 15th, 2019 AT 6:14 PM
Tiny
JACOBANDNICKOLAS
  • MECHANIC
  • 108,336 POSTS
There is a chance you got a bad one. Let me know what happens. I would like to know. Also, get a different brand when you get the new one. Stay away from the brand you first had.
Was this
answer
helpful?
Yes
No
Tuesday, January 15th, 2019 AT 8:06 PM

Please login or register to post a reply.

Sponsored links