Hi,
The filter isn't serviceable. It is part of the pressure regulator and needs to be replaced. Here are the directions for doing it:
1996 Dodge or Ram Truck 1500 4x2 Pickup V6-239 3.9L Magnum
Fuel Filter Replacement
Vehicle Powertrain Management Fuel Delivery and Air Induction Fuel Filter Service and Repair Procedures Fuel Filter Replacement
FUEL FILTER REPLACEMENT
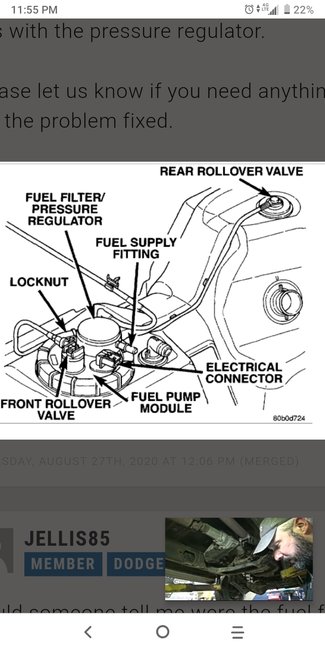
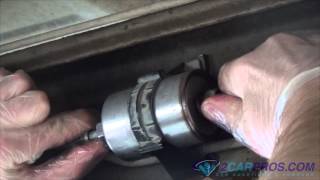
Fig. 50 Fuel Filter & Pressure Regulator Assembly
Pic 1
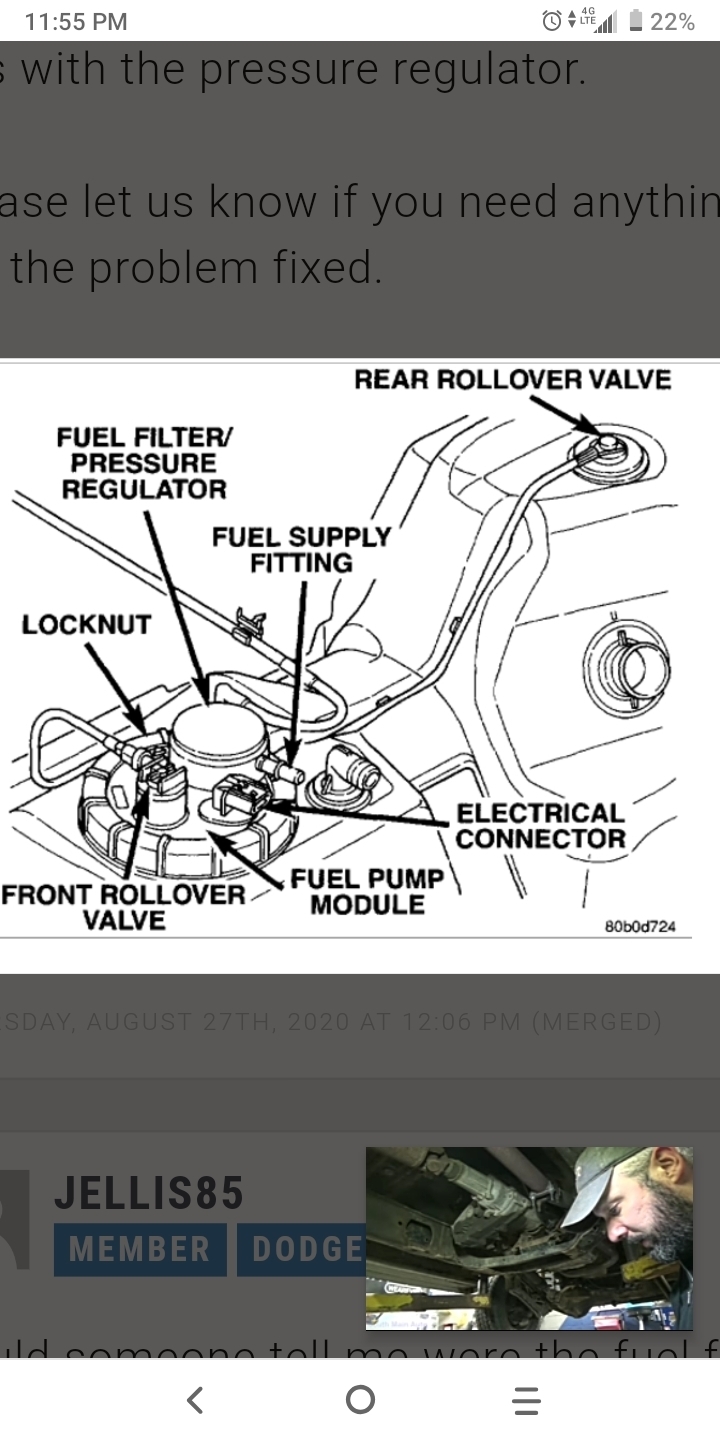
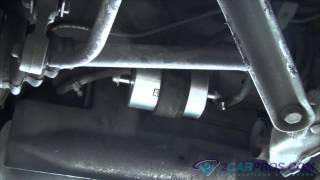
Fig. 51 Fuel Filter & Pressure Regulator Assembly Replacement
Pic 2
1. Relieve fuel system pressure as outlined in "Fuel System Pressure Relief" under "Precautions."
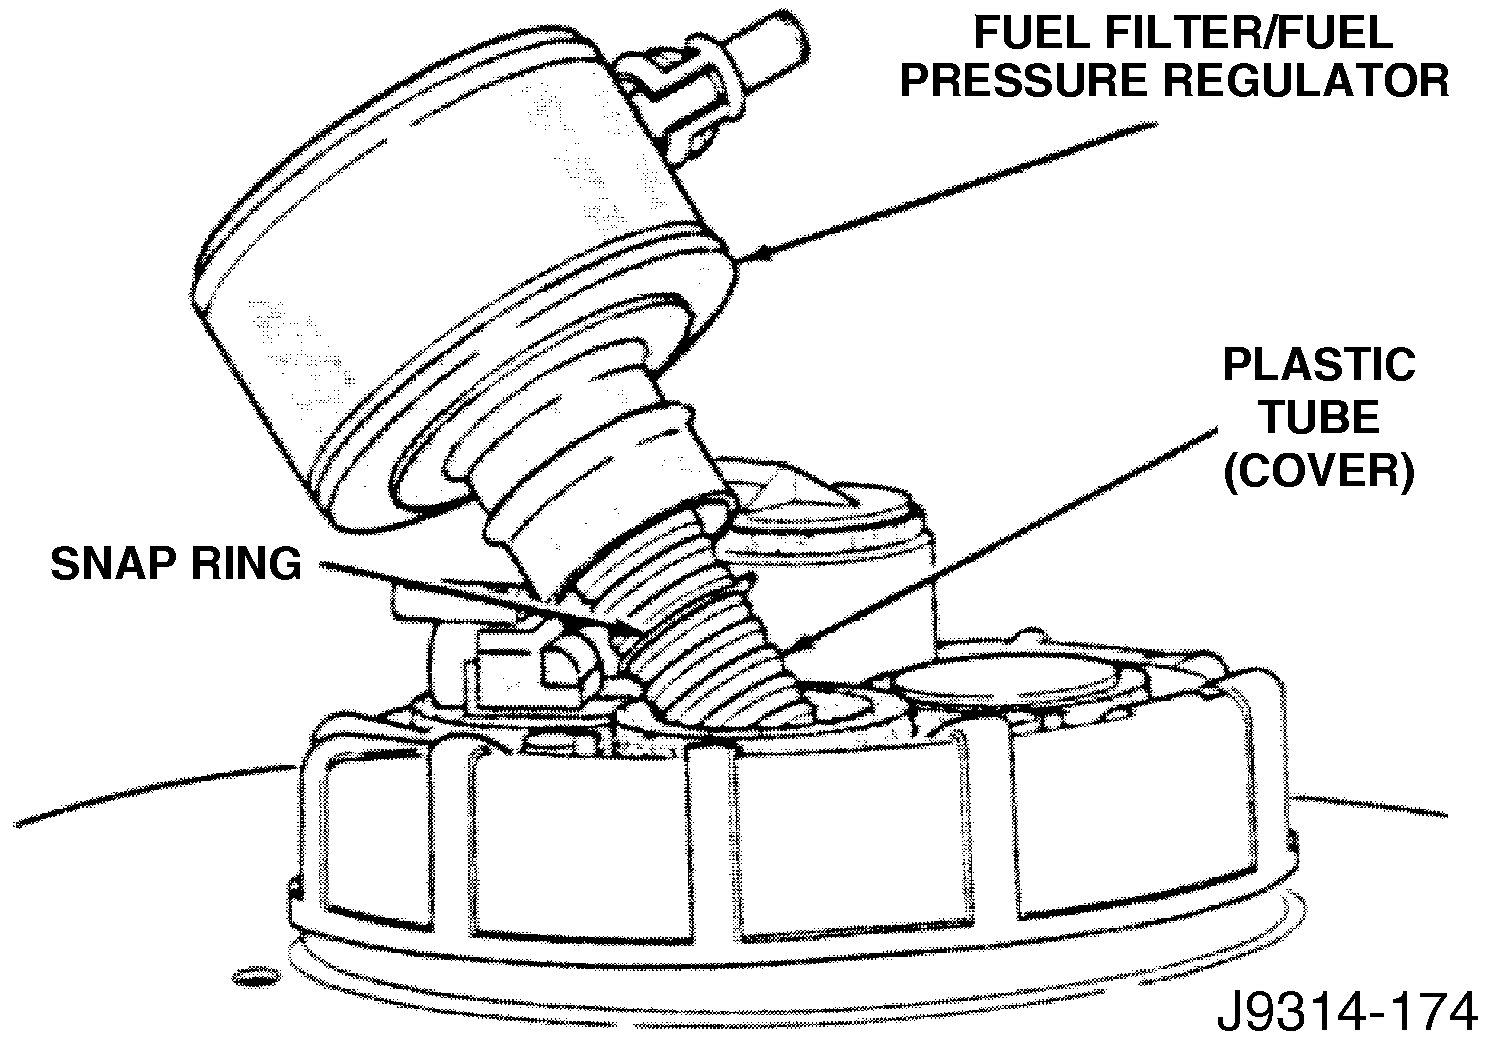
2. Drain and remove fuel tank, then remove fuel filter/regulator assembly by twisting and pulling straight up. Do not pull filter/regulator more than three inches from fuel pump module.
3. Remove snap ring securing tube to filter/regulator then slide plastic tube down fuel tube to clear fuel tube clamp.
4. Cut off old fuel tube clamp and discard, then slip fuel tube from filter/regulator and remove filter/regulator from fuel pump module.
5. Reverse procedure to install. Use a new plastic fuel tube clamp.
______________________
Here are the directions for removing the fuel tank:
1996 Dodge or Ram Truck 1500 4x2 Pickup V6-239 3.9L Magnum
Fuel Tank Draining and Removal/Installation
Vehicle Powertrain Management Fuel Delivery and Air Induction Fuel Tank Service and Repair Procedures Fuel Tank Draining and Removal/Installation
Fuel tank draining and removal/installation
Fuel tank draining and removal/installation procedure
DRAINING FUEL TANK
1. Remove fuel tank filler tube cap to release fuel tank pressure.
2. Perform Fuel System Pressure Release procedure.
3. Raise vehicle on hoist.
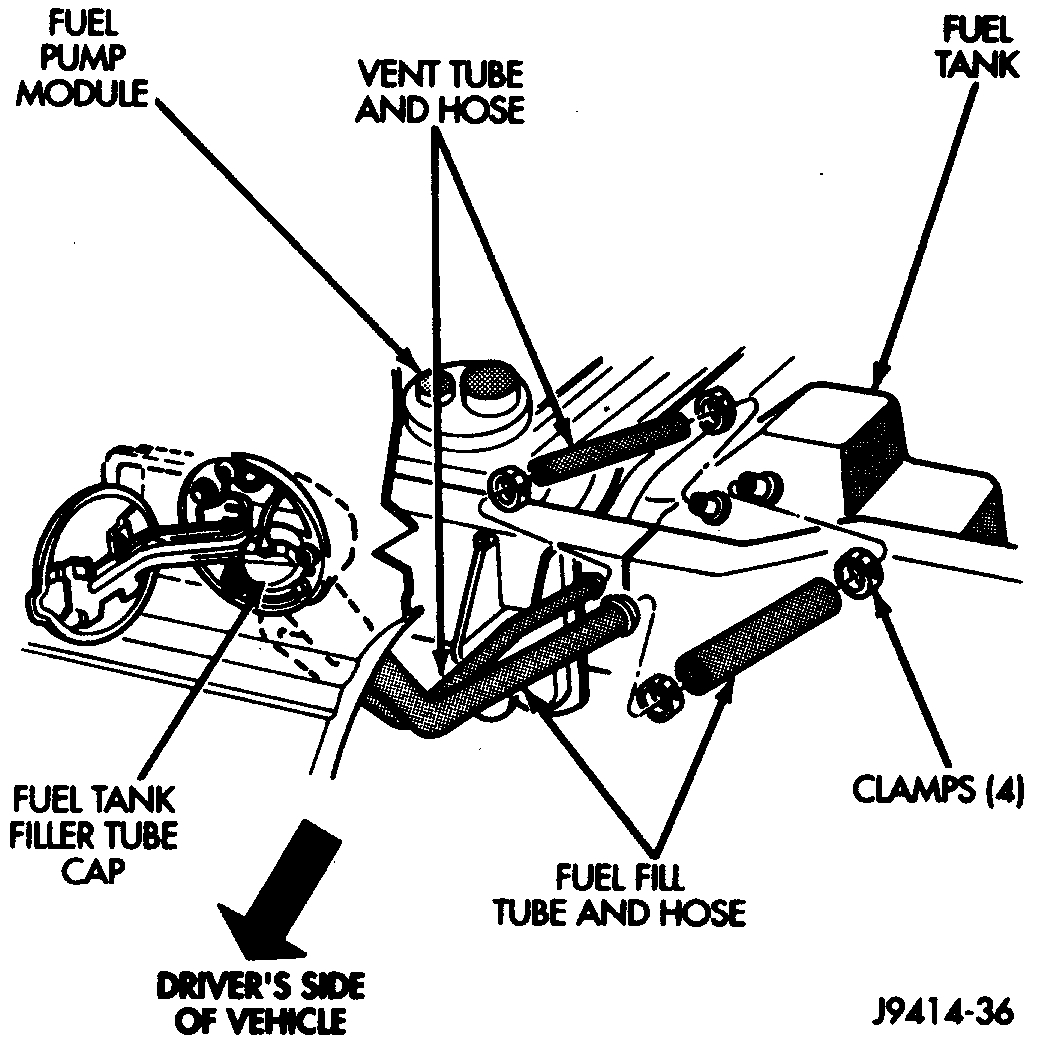
Fuel Tank Fill And Vent Hoses
pic 3
4. When working over the left rear tire/wheel, disconnect the rubber fuel filler hose and clamp at fuel tank. Position fuel siphoning/drain hose into this opening at tank.
5. Drain fuel into an approved portable holding tank or a properly labeled gasoline safety container.
TANK REMOVAL
1. Disconnect negative battery cable at battery.
2. Remove fuel tank filler tube cap.
Warning: the fuel system is under a constant pressure even with the engine off before servicing the fuel tank, fuel system pressure must be released. Refer to the fuel system pressure release procedure before servicing the fuel tank.
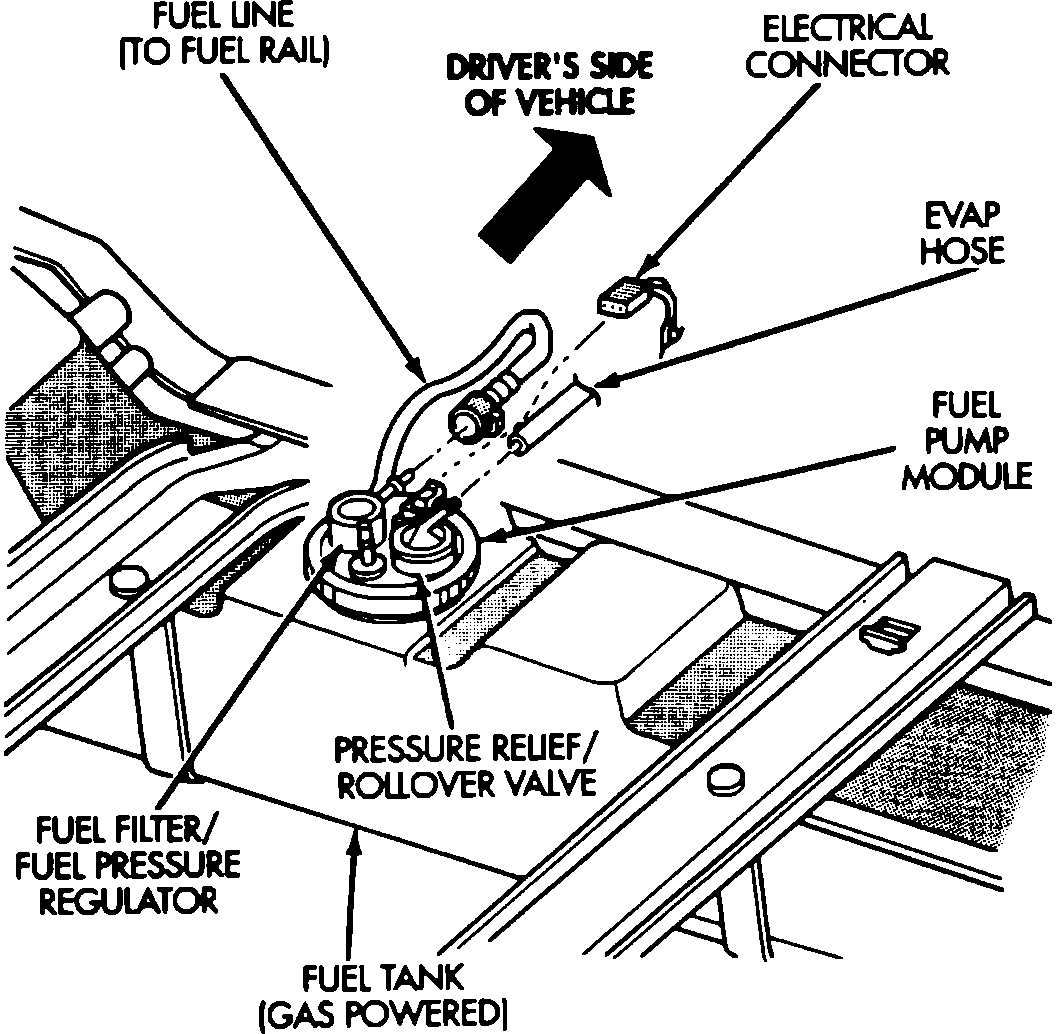
Fuel Tank Location (Gas)
pic 4
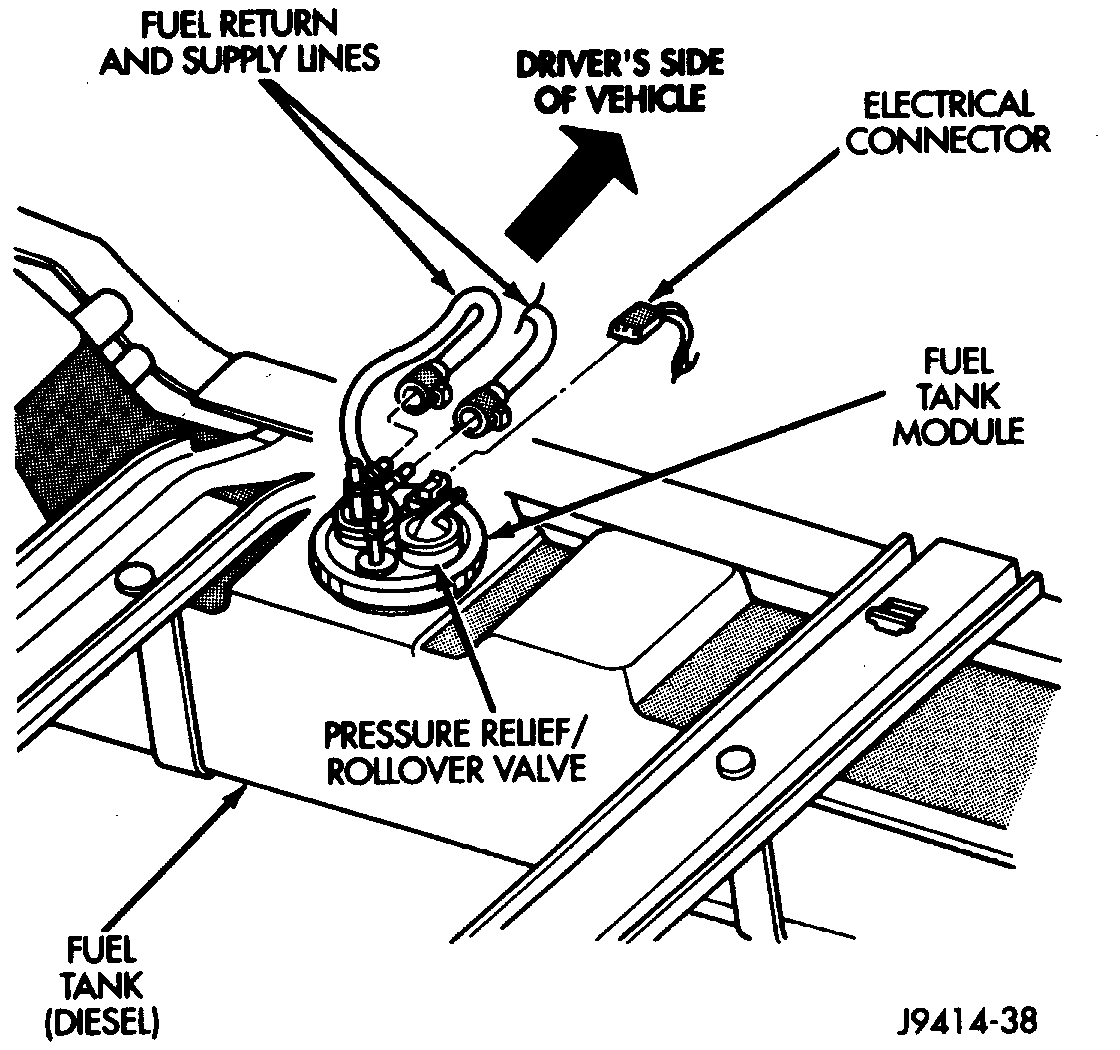
Fuel Tank Connections (Diesel)
pic 5
3. Drain fuel tank. Refer to Draining Fuel Tank.
4. Disconnect both the fuel fill and fuel vent rubber hoses at the fuel tank.
5. Gas Powered Engines:
a. While working over the left rear tire/wheel, disconnect the electrical connector from the fuel pump module.
B. Disconnect the EVAP hose at the pressure relief/rollover valve.
C. Disconnect the fuel supply line at the fuel filter/fuel pressure regulator.
6. Diesel Powered Engines:
a. While working over the left rear tire/wheel, disconnect the electrical connector from the fuel tank module.
B. Disconnect the fuel supply and fuel return lines at the fuel tank module.
7. Place a transmission jack under the center of the fuel tank. Apply a slight amount of pressure to fuel tank with transmission jack.
Warning: wrap shop towels around hoses to catch any gasoline spillage.
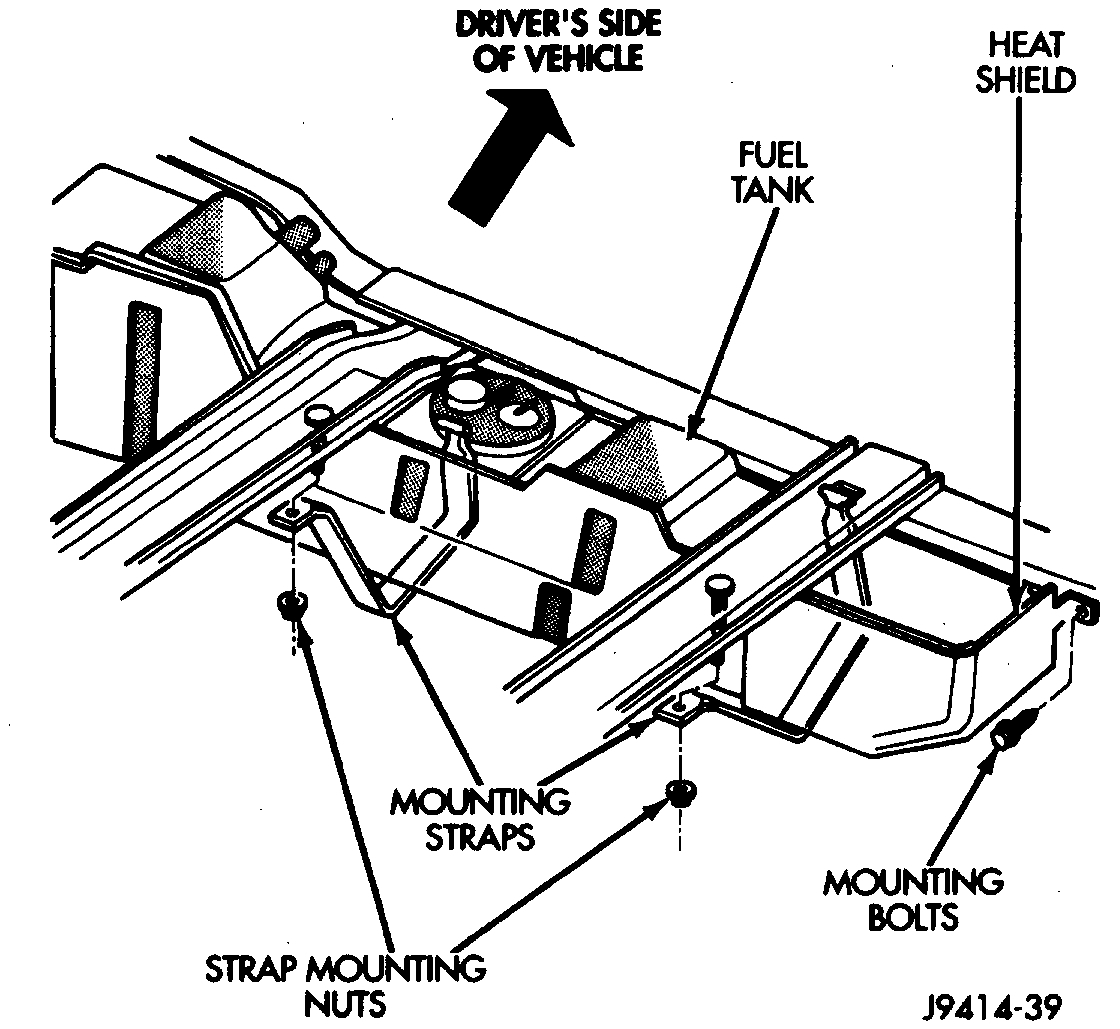
8. Remove the fuel tank mounting strap nuts at the mounting straps. If equipped, remove the fuel tank heat shield bolts.
Fuel Tank Mounting (Typical)
pic 6
9. Lower fuel tank for removal.
TANK INSTALLATION
1. Place fuel tank on top of transmission jack.
2. Raise tank into position in the frame crossmembers.
3. Connect the two mounting straps and mounting strap nuts.
4. Remove transmission jack. Tighten strap nuts 41 Nm 30 ft. Lbs. Torque. Do not over tighten retaining strap nuts.
5. Gas Powered Engines:
a. Connect the electrical connector to the fuel pump module.
B. Connect the EVAP hose at the pressure relief/rollover v76
alve.
C. Connect the fuel supply line at the fuel filter fuel pressure regulator.
6. Diesel Powered Engines:
d. Connect the electrical connector to the fuel tank module.
E. Connect the fuel supply and fuel return lines at the fuel tank module.
6. Install the rubber fill and vent lines to tank. Tighten hose clamps to 2.3 Nm 20 in. Lbs. Torque.
7. Refill fuel tank and inspect all hoses and lines for leaks.
8. Connect negative battery cable to battery.
____________________
I hope this helps. Let me know if you have other questions.
Take care,
Joe
Images (Click to make bigger)
SPONSORED LINKS
Tuesday, December 29th, 2020 AT 12:18 AM