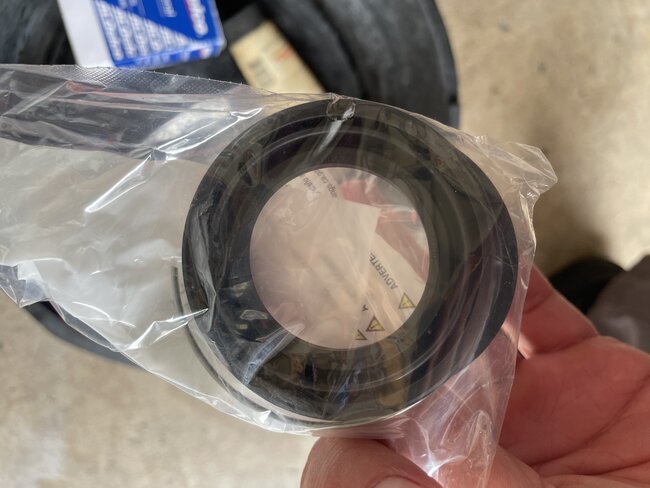
First feel on the new dust boot if there's a hard metal ring embedded on the outer edge. If there is, you don't have to remove the piston. For a competent do-it-yourselfer, a nifty trick is to drill a small hole through the rubber and that metal ring, then thread in a wood screw. As it is tightened, that screw will pull the boot out. Then it's just a matter of pulling it off the piston and popping the new boot on.
That groove on the caliper housing must be nice and clean. Back in the '70s and '80s when we rebuilt calipers with every brake job, we used special hones with a drill to clean those sealing surfaces. When the piston is out, you can do the same thing with sandpaper. Run a strip through a cotter pin, then put that in the drill to spin it. The goal is to have no dirt or rust in there preventing a good seal.
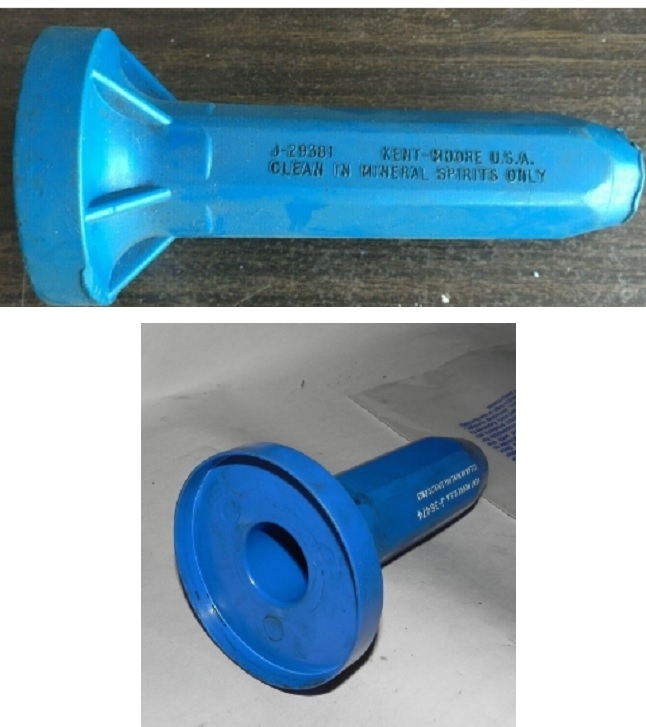
Pull the boot over the piston and engage it in the piston's groove. To seat the metal ring, there is a special tool that makes the job rather easy. The photo below shows GM's version. They love special tools, and with this design, you have to find the right diameter for your application. Mine is metal and has a half dozen cones in different sizes. You pick the right one, then screw the handle onto it. These tools ensure the metal ring doesn't become deformed and that is fully seated all the way around. The only problem is they might not work with the piston still in the housing.
The next alternative is to tap the boot in with a small hammer and a really wide flat-blade screwdriver. Tap the ring in a little at a time as you work your way around.
Older Fords and Chryslers used a different boot design where there was a lip molded as part of the boot, that went into a groove in the caliper housing. That groove had to be cleaned out really well for the lip to seat, otherwise it could prevent the piston from releasing freely. As soon as the piston was inserted a little way, it trapped that lip in the groove so it couldn't pull out. Chrysler boots went together very easily. For some reason, I always had a lot of frustration with Ford boots. If your new boot does not have a hard ring on the outer edge, it will have that rubber lip too. Then the piston will have to be removed.
With that design with the outer lip, there's three ways to get the boot over the piston. The easiest is to pull the boot over the piston first and all the way to the back of it so it's hanging down. Use the piston as a handle to set the boot into position, then nudge the lip until it seats all the way around. Now as the piston is lowered into the housing, it will trap the lip, then you can just push the piston in all the way.
The second way, and the way that worked best for me with Fords, is to put the boot into the housing first, then go around with your finger to ensure it's seated all the way around. Now, for what I call the "cheaters" way, there is a special pliers with curved jaws that fit just inside the boot. As you squeeze the pliers, it expands the boot and you just drop the piston in. I've seen at least two different sizes of that pliers.
The last way is the one I used most often because it's fast, but this is not for novices. You install the boot into the housing like in the last method, but then you hold the piston over the boot, and blow in compressed air through the hose connection. Pressure will blow the boot up on one side of the piston, then, since it's leaking out, nothing good happens. You have to be forceful and determined. The next thing that happens is the pressure leaks out, the piston drops down. That makes it seal, the pressure builds again, then it leaks. The piston bounces up and down like an old-time door bell. If you keep at it, you'll come out with bloody stumps for fingers. Once you get the hang of it, when the leaking starts in one area, just wobble the piston around until the rest of the boot blows up around it. At that point you have to collect your wits and hold pressure on the piston as you stop the air flow. The boot will collapse, but if you don't allow the piston to tip, you'll be able to push it in all the way. After you do a few hundred caliper rebuilds, this becomes second nature.
Here's some additional tidbits to be aware of. First, petroleum products are the deadly enemy of rubber brake parts. One drop of engine oil, power steering fluid, transmission fluid, or penetrating oil will contaminate the entire hydraulic system. The only proper repair for that is to remove every part that contains a rubber part that contacts the brake fluid. Flush and dry the steel lies, then install all new rubber parts. If any part is not replaced, the contamination will leach out of it and recontaminate the new brake fluid. This includes calipers, wheel cylinders, rubber flex hoses, master cylinder, combination valve, and the ABS hydraulic controller if your car has anti-lock brakes. Most minivans and pickup trucks also have a rear height-sensing proportioning valve to maintain brake balance front to rear, under a wide variety of loading conditions. The cost of that repair can easily exceed the value of the car
Another source of contamination years ago was when we had to repack the wheel bearings with axle grease. We did that by hand. Later, when it was time to refill the reservoir with brake fluid, it was common to find the rubber bladder seal in the cap had gotten pulled out. We'd pop it back into the cap with a finger with grease residue on it. Just contaminated the system. Today, brake system professionals even wash their hands with soap and water before touching those rubber parts, to avoid getting fingerprint grease on them.
The second concern was when you were told to press the brake pedal repeatedly to push the piston out. While that will work, it's the worst way to do it. The first problem is your helper is going to push the brake pedal all the way to the floor. Given the age of the car, (more than a year old), that has about a 95 percent chance of destroying the master cylinder. Crud and corrosion build up in the lower halves of the bores where the pistons don't normally travel. Pushing the brake pedal to the floor runs those pistons and the rubber lip seals over that crud and can rip them. That results in a slowly-sinking brake pedal, and that often takes two or three days to show up. At that point the master cylinder must be replaced. Proper procedure is to never push the brake pedal over half way to the floor. That includes for those people who insist on using a helper to pedal-bleed the system.
If you are going to do it this way, you're going to run the master cylinder out of brake fluid. Now you've added bleeding at the wheels to the job. Worse, if you have anti-lock brakes, if air gets into the hydraulic controller, for most models you need a scanner to command the computer to open two valves so those chambers can expel the air that pooled in them. You'll have a low pedal until that is done. If you're going to go this route, a better trick is to use a stick between the front seat and the brake pedal to hold the pedal down about an inch. That moves the rubber lip seals past the fluid return ports in the master cylinder. Gravity won't be strong enough to pull brake fluid past those seals, so the reservoir won't run empty.
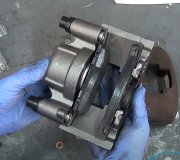
Now, unbolt the rubber flex hose from the caliper and you can continue on a workbench. Put a block of wood where the rotor runs through the caliper. That will prevent shooting the piston over to your neighbor's yard. Flip the caliper over so you can hold onto it while keeping your fingers away from the piston. Hold on tight, then use a rubber-tipped air nozzle to blow air in where the hose bolts on. The piston will pop out part way and may be surprisingly loud. At this point we pull that block of wood out and hit it with air again to finish the job. You may want to use a thinner piece of wood first. Don't let your fingers get between the wood and the piston. Swear words will ensue.
Once the service is completed to the caliper, bolt the hose back on, install the caliper to its mount, remove the stick from the front seat, and loosen the cap on the reservoir. Gravity will pull brake fluid down and fill the caliper. Once only fluid is coming out of the bleeder screw, close it, then work the brake pedal by hand a few times. Instead, you can start to pump the pedal to run the piston back out to adjust it, but again, do not push the pedal over half way to the floor. Open the bleeder screw once more to let the last few tiny bubbles pop out, and bleeding is done.
Please be sure to use a torque wrench on the lug nuts when you put the wheel back on. 100 foot / pounds is listed for your model. That's typical for steel wheels. There's no mention of a slightly lower setting for aluminum or cast wheels.
Let me know how this turns out or if I missed something.
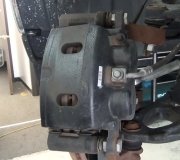
Image (Click to make bigger)
SPONSORED LINKS
Saturday, August 19th, 2023 AT 9:53 PM