Hi and thanks for using 2CarPros. Com.
I have attached the directions from alldata for band adjustment. Take a look through these directions. They include both front and rear adjustment procedures and special tooling required. All attached pictures correlate with these directions.
____________________________________________
42/44RE (A500) 4-SPEED
FRONT BAND ADJUSTMENT
The front (kickdown) band adjusting screw is located on the left side of the transmission case above the manual valve and throttle valve levers.
1. Raise vehicle.
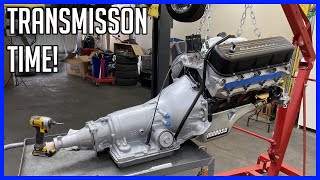
Front Band Adjustemnt Screw Location
2. Loosen band adjusting screw locknut. Then back locknut off 3-5 turns. Be sure adjusting screw turns freely in case. Apply lubricant to screw threads if necessary.
3. Tighten band adjusting screw to 8 Nm (72 inch lbs.) Torque with Inch Pound Torque Wrench C-3380-A, a 3-in. Extension and 5/16 socket.
Band Adjustment Adapter Tool
CAUTION: If Adapter C-3705 is needed to reach the adjusting screw, tighten the screw to only 5 Nm (47 - 50 inch lbs.) Torque.
42RE TRANSMISSION
- Back off front band adjusting screw 3-5/8 turns.
- Hold adjuster screw in position and tighten locknut to 41 Nm (30 ft. Lbs.) Torque.
44RE TRANSMISSION
- Back off front band adjusting screw 2-1/4 turns.
- Hold adjuster screw in position and tighten locknut to 41 Nm (30 ft. Lbs.) Torque.
4. Lower vehicle.
REAR BAND ADJUSTMENT
The transmission oil pan must be removed for access to the rear band adjusting screw.
1. Raise vehicle.
2. Remove transmission oil pan and drain fluid.
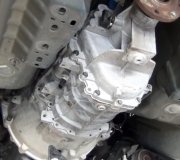
Rear Band Adjustment Screw Location
3. Loosen band adjusting screw locknut 5-6 turns. Be sure adjusting screw turns freely in lever.
4. Tighten adjusting screw to 8 Nm (72 inch lbs.) Torque.
42/44RE TRANSMISSION
- Back off adjusting screw 4 turns.
- Hold adjusting screw in place and tighten locknut to 34 Nm (25 ft. Lbs.) Torque.
5. Position new gasket on oil pan and install pan on transmission. Tighten pan bolts to 17 Nm (13 ft. Lbs.) Torque.
6. Lower vehicle and refill transmission with Mopar(R) ATF Plus 4, Type 7176 fluid.
_______________________________
I hope this is what you needed. Let me know if you have other questions.
Take care,
Joe
Images (Click to make bigger)
SPONSORED LINKS
Friday, August 31st, 2018 AT 6:26 PM