Removal & Installation (3.0L)
Drain the coolant from the cooling system.
Loosen the clamps and remove the heater water hose from the vehicle.
Route the heater water hose following route of original or removed hose exactly.
Connect the heater water hose to the fittings, and tighten the clamps to 1.81-2.49 N-M (17-22 lb-in). DO NOT overtighten the hose clamps.
Fill and bleed the cooling system. See appropriate COOLING SYSTEM SPECIFICATIONS & DRIVE BELT ROUTING article.
Check for coolant leaks and for proper operation of the system.
Removal (1998 3.8L)
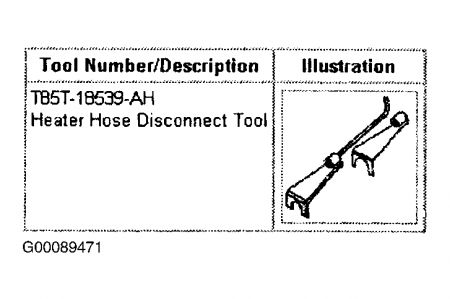
SPECIAL SERVICE TOOL(S) REQUIRED
DescriptionTool Number
Heater Hose Disconnect ToolT85T-18539-AH
Drain the coolant from the cooling system.
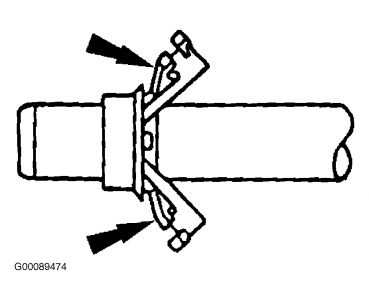
Push the heater water hose toward the engine to fully expose the locking tabs.
When compressing the White coupling retainer, the Heater Hose Disconnect Tool (T85T-18539-AH) must be perpendicular to and on the highest point of the coupling. See SPECIAL TOOLS .
NOTE:A slight twisting motion while pulling on the heater water hose may be necessary to assist in the removal.
Pull the heater water hose away from the engine.
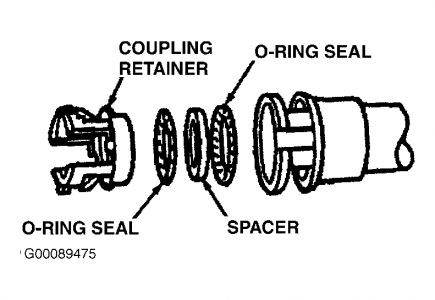
Spread the retainer tabs apart and slide the retainer off the tube. Discard the retainer. See Fig. 44 .
Loosen the clamps at the remaining connections and remove the heater water hoses from the vehicle. Note routing for installation procedure.
Installation
Clean the tubes and lubricate with Ford Rubber Suspension Insulator Lube (E25Y-19553-A) or equivalent meeting Ford specification.
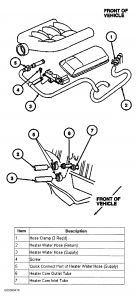
Route the heater water hoses following route of original or removed hose exactly. See Fig. 46 .
Connect the heater water hose to the fittings and install clamps.
Push the heater water hose with a quick disconnect coupling onto the tube. See Fig. 45 . Make sure the coupling is fully engaged by lightly pulling on the heater water hose.
Fill and bleed the cooling system. See appropriate COOLING SYSTEM SPECIFICATIONS & DRIVE BELT ROUTING article.
Check for coolant leaks and for proper operation of the system.
Jan 13, 2009 at 7:38 PM
