Timing chain replacement?

Tiny
0THREE
  • MEMBER
  • 2003 FORD RANGER
  • 3.0L
  • V6
  • 2WD
  • AUTOMATIC
  • 150 MILES
Timing was previously set wrong or the chain jumped. Always ran with a miss. I had to do a water pump anyways, and I want to change out the sprockets and chain to new units. Before I remove the chain do I need to rotate the crank until the timing marks line up on the sprockets first, then remove the chain? Or can I simply swap out the old units with new in the current position? Also upon reassembly of the balancer onto the crankshaft does TDC have to be established first? A removal and replacement procedure for both the chain and balancer would be optimal. Thank you in advance.
Do you
have the same problem?
Yes
No
Tuesday, October 16th, 2018 AT 6:50 AM

21 Replies

Tiny
JACOBANDNICKOLAS
  • MECHANIC
  • 108,014 POSTS
Hi and thanks for using 2CarPros. Com.

Before removing the chain, you should align the timing marks. Here are the directions specific to your vehicle for replacing the timing chain. It is a straight forward job. All attached pictures correlate with these directions.

__________________________

Timing Chain

Removal
1. Disconnect the battery ground cable.
2. Remove the engine front cover.

3. Rotate the crankshaft and align the timing marks.
4. Remove the bolt.
5. Remove the timing chain, the camshaft sprocket and the crankshaft sprocket as an assembly.

Installation

1. Align the timing marks.

2. Install the timing chain, the camshaft sprocket and the crankshaft sprocket as an assembly.

3. Install the bolt.
4. Install the engine front cover.
5. Connect the battery ground cable.

_______________________________________

I hope this is helpful. Let me know if you have other questions.

Take care,
Joe
Was this
answer
helpful?
Yes
No
+1
Tuesday, October 16th, 2018 AT 7:10 PM
Tiny
RLMUNGER
  • MEMBER
  • 1 POST
  • 2002 FORD RANGER
  • 4 CYL
  • 4WD
  • MANUAL
  • 67,000 MILES
My ranger is making a rattling noise, especially at low speeds. After taking it to dealer, their diagnosis is the timing chain gear needs to be replaced. Is this normal at this mileage? What should the average cost for the repair be?
Was this
answer
helpful?
Yes
No
Thursday, November 12th, 2020 AT 10:44 AM (Merged)
Tiny
RASMATAZ
  • MECHANIC
  • 75,992 POSTS
Labor rate per hr could range from $70.00-$130.00 and varies with location see below quotes


https://www.2carpros.com/forum/automotive_pictures/12900_timing_chain_5.jpg

Was this
answer
helpful?
Yes
No
+1
Thursday, November 12th, 2020 AT 10:44 AM (Merged)
Tiny
RDANNENFELSER
  • MEMBER
  • 43 POSTS
  • 2001 FORD RANGER
  • 3.0L
  • V6
  • 2WD
  • AUTOMATIC
  • 201,000 MILES
What would be the recommended product to use to coat the threads of water pump and timing cover bolts when installing pre-cut gaskets such as Fel-Pro? Would it be Blue/Red threadlocker, PTFE thread sealant, anti-sieze compound, or something else?
Was this
answer
helpful?
Yes
No
Thursday, November 12th, 2020 AT 10:44 AM (Merged)
Tiny
SCGRANTURISMO
  • MECHANIC
  • 4,897 POSTS
Hello,

You really shouldn't have to put anything on these bolts, but if you are going to put something on them, I would recommend anti seize compound. I hope this helps.

Thanks,
Alex
2CarPros
Was this
answer
helpful?
Yes
No
Thursday, November 12th, 2020 AT 10:44 AM (Merged)
Tiny
DANNY L
  • MECHANIC
  • 5,648 POSTS
Hello, I'm Danny.

I would suggest none! There is no reason to use anything on the bolt threads. You can use a small amount of silicone RTV on the gaskets/mating surfaces but no reason to use anything on the bolt threads. Hope this helps and thanks for using 2CarPros.
Was this
answer
helpful?
Yes
No
Thursday, November 12th, 2020 AT 10:45 AM (Merged)
Tiny
RDANNENFELSER
  • MEMBER
  • 43 POSTS
A counterman at a local NAPA store actually told me the same thing. He advised using nothing on the bolt threads as well. I totally understand the reasoning behind this in that with the bolts passing through the gasket bolt holes they are sealed against contact with fluids.

Why then though does the Haynes repair manual direct people to use PTFE and why are some water pump bolt/stud kits such as those made by Dorman pre-coated with what appears to be blue thread-locker? Also, some of the timing cover bolts I pulled from my 2001 Ford Ranger actually appear to even have red thread-locker on them. I've attached a photo of those bolts.

Is the directed use of the PTFE by the Haynes repair manual just overkill and unnecessary? Is the thread-locker applied solely to prevent the bolts from backing out over time with no relation to sealant against fluids?
Was this
answer
helpful?
Yes
No
Thursday, November 12th, 2020 AT 10:45 AM (Merged)
Tiny
SCGRANTURISMO
  • MECHANIC
  • 4,897 POSTS
Hello again,

Yes, thread locker is to keep the bolts from backing out. If I was going to use anything on water pump bolts I would teflon tape, but even that is over kill. Were did the bolts in the picture come from. Are you sure that the red is not rust? If you torque the bolts down to their specified torque rating then you should have nothing to worry about. In the diagrams down below I have included the torque values for both the water pump/pulley and the timing cover, with an interesting instruction straight from the vehicle manufacturer, so this should be the last word. Please get back to us with what you decide to do and how it turns out.

Thanks,
Alex
2CarPros
Was this
answer
helpful?
Yes
No
Thursday, November 12th, 2020 AT 10:45 AM (Merged)
Tiny
RDANNENFELSER
  • MEMBER
  • 43 POSTS
The three bolts in the photo with the red substance on the threads are the three lowest bolts that pass only through the timing cover and bolt to the block. They do not pass through the water pump housing.

While I couldn't say with certainty that the red substance on those threads is a threadlocker, it definitely isn't just rust.
Was this
answer
helpful?
Yes
No
Thursday, November 12th, 2020 AT 10:45 AM (Merged)
Tiny
SCGRANTURISMO
  • MECHANIC
  • 4,897 POSTS
Hello again,

Did you have a chance to read my last diagrams that I sent. The third one states that you should use pipe sealant with teflon on the bolts in diagram 4. This is straight from the vehicle manufacturer.

Thanks,
Alex
2CarPros
Was this
answer
helpful?
Yes
No
Thursday, November 12th, 2020 AT 10:45 AM (Merged)
Tiny
DANNY L
  • MECHANIC
  • 5,648 POSTS
Hello again.

That reddish/orange coating is actually a type of sealer/thread-lock that was applied to the bolts when new. If you don't plan on using new bolts to reinstall I would say those are still good to be used. Hope this helps and thanks again for using 2CarPros.
Danny-
Was this
answer
helpful?
Yes
No
Thursday, November 12th, 2020 AT 10:45 AM (Merged)
Tiny
RDANNENFELSER
  • MEMBER
  • 43 POSTS
Yes, I did see the diagrams you included. Thank you both for the help. I do have one other question though. When I removed the timing cover from the block, I was gentle and took care to separate and not rip the oil pan gasket in order to reuse it. Whether it happened during the removal or not, the gasket does have a rip on the inside edge just below the timing chain. Based on what can be seen in the attached photos, with proper cleaning and black RTV, does the oil pan gasket still look reusable or likely to leak? The oil pan for this 3.0 Ford Ranger is not an easy removal and pulling the motor is typically recommended for doing it.
Was this
answer
helpful?
Yes
No
Thursday, November 12th, 2020 AT 10:45 AM (Merged)
Tiny
RDANNENFELSER
  • MEMBER
  • 43 POSTS
  • 2001 FORD RANGER
  • 3.0L
  • V6
  • 2WD
  • AUTOMATIC
  • 201,000 MILES
When installing new timing cover and water pump gaskets? Any general advice, directions, or recommendations as to a particular product or instructions on the application?

Working on the truck listed above and do not want to have to do this repair again due to the gaskets failing to seal.
Was this
answer
helpful?
Yes
No
Thursday, November 12th, 2020 AT 10:45 AM (Merged)
Tiny
CARADIODOC
  • MECHANIC
  • 33,699 POSTS
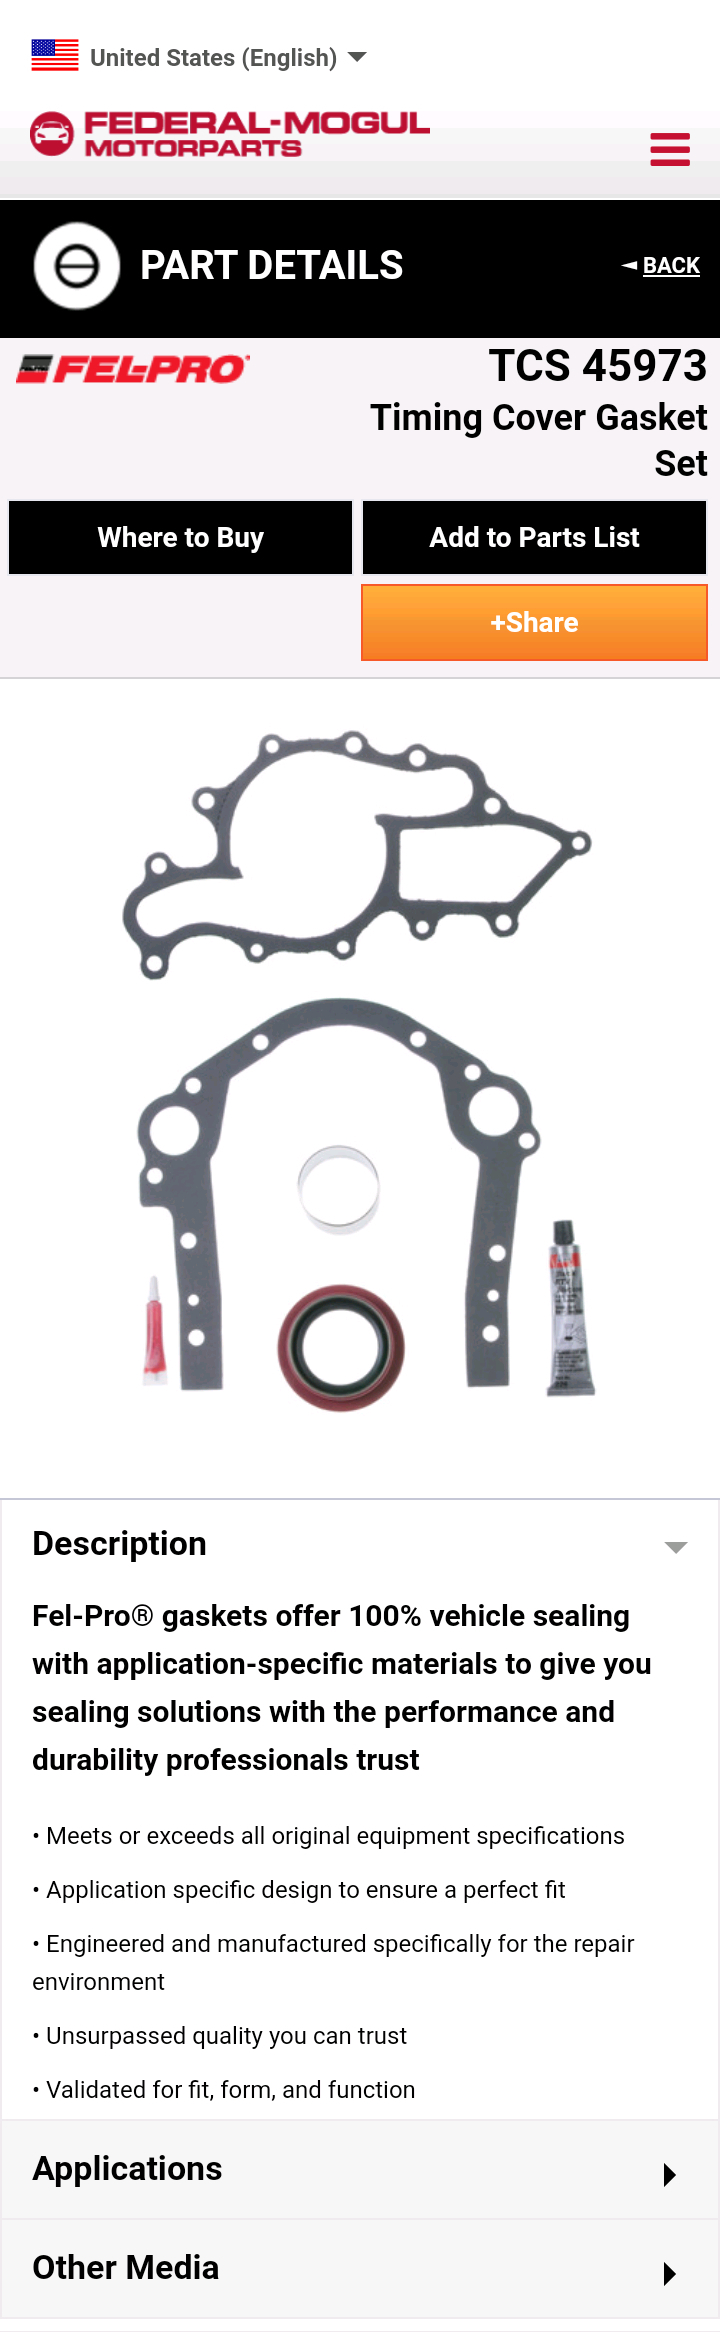
For most of these applications, the manufacturers are using only sealants out of a tube now, with no cardboard or cork gaskets. Some of us still like the old cardboard gaskets, but when I use them, I still put a light coating of sealant on both sides. That insures a good seal if there are scratches in the sealing surfaces that got overlooked, and it makes removing them a lot easier next time.

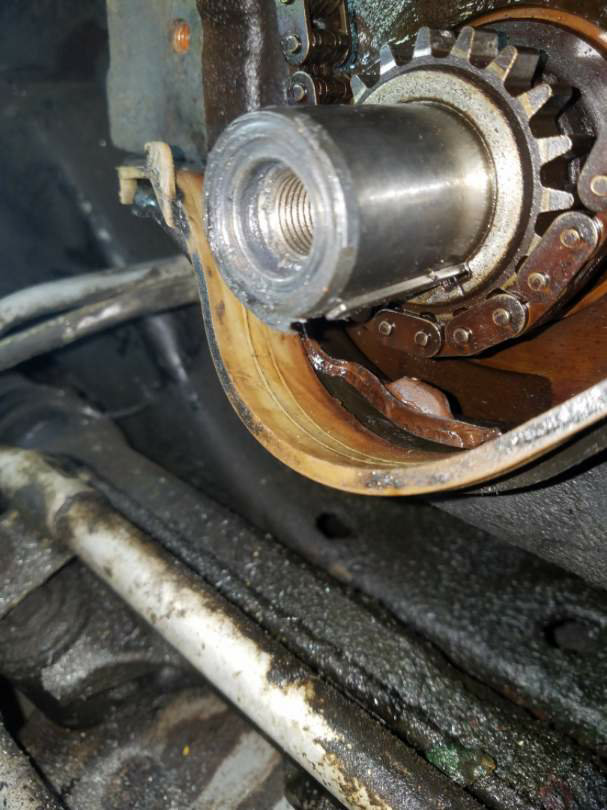
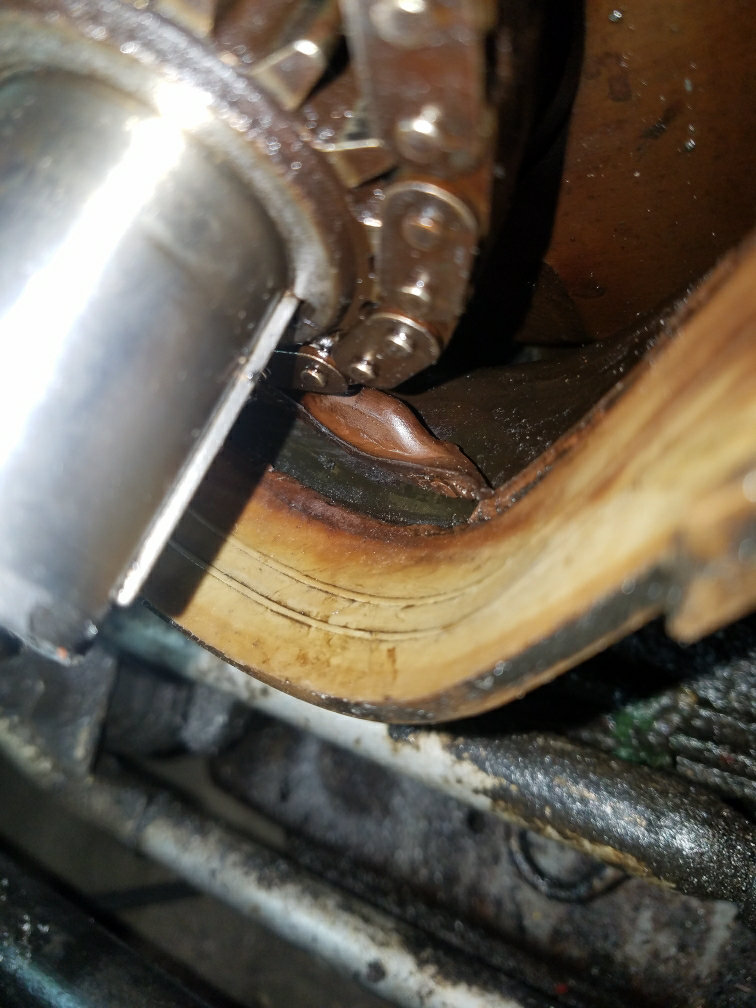
Regardless of what you use, the first thing to watch out for is a little old gasket material left that doesn't get cleaned off. That can prevent the parts from sitting squarely against each other. This is where the sealants do a good job where the paper gaskets won't seal well.

The biggest problem has to do with adhesion to the surfaces. I'm familiar with the two products in a tube available from the Chrysler dealer's parts department, but I'm pretty sure you can get the same stuff from other dealers and auto parts stores, under different trade names. Chrysler has a black sealant and a gray one. The black remains a little more flexible and is easier to remove next time, but it absolutely will not bond and seal through any light film of oil. This was a problem on their four-speed automatic transmissions. Transmission fluid would run out slowly and drip for hours after the pan was removed. There are multiple simple tricks to work around that, but if you weren't aware of the need to have perfectly dry surfaces, you would have a slow leak.

The gray sealant will bond and seal through a light film of oil, although it is still the goal with all brands of sealant to not have the film in the first place. This stuff is stiffer when it cures and can take a little more work to clean it off next time. Once the tube is opened, the gray sealant lasts longer in the tube. The black is more likely to cure in the tube within a few months. With both of these products, you can fill the fluids and / or put the parts in service right away. You don't have to wait for them to cure. They do use humidity for the curing process, but that occurs even when there's engine oil or transmission fluid on the other side.

When working on engines, also be aware of the need to use "oxygen sensor-safe" sealants. They "off-gas" during the curing process, and in the past, those gases could affect oxygen sensors. These products used to be advertised as "oxygen sensor-safe" when they were, but since today that applies to almost all cars on the road, I suspect all of these sealants are safe.
Was this
answer
helpful?
Yes
No
+1
Thursday, November 12th, 2020 AT 10:45 AM (Merged)
Tiny
DANNY L
  • MECHANIC
  • 5,648 POSTS
Hello again,

To be honest just put a small amount in the 2 corners where the oil pan, engine block, and timing chain cover join. You don't want to double gasket to prevent leaking. Be sure to clean well and torque to proper specifications. Hope this helps and let me know if you have any further questions on this issue. Thanks again for using 2CarPros.

Danny-
Was this
answer
helpful?
Yes
No
Thursday, November 12th, 2020 AT 10:45 AM (Merged)
Tiny
RDANNENFELSER
  • MEMBER
  • 43 POSTS
Thank you for all the information. Making a selection gets confusing with the wide variety of sealant/maker products available out there.

I totally understand the importance of a clean surface for gasket application and definitely will not half-ass the surface prep during this repair.

I'm planning to use pre-cut Fel-Pro timing cover/water pump gaskets from a set I purchased from O'Reilly Auto Parts. The Fel-Pro item number for that set is TCS 45973 and attached is an image.

I actually called the Fel-Pro technical support phone number and spoke with someone regarding the instructions for application of the gaskets and use of the included black RTV silicone. The person I spoke with told me that both the timing cover and water pump gaskets should be applied dry with the black RTV silicone ONLY being used at the lower section where the timing cover gasket meets the oil pan gasket.

While I'm not disregarding the manufacturer instructions, I wanted to ask if you'd recommend following them exactly or if you'd do anything different?

Also, if I do install the gaskets dry as instructed, what are your thoughts on using a aerosol spray gasket tack adhesive just to mist the gasket surfaces to help them stay in place during installation?
Was this
answer
helpful?
Yes
No
Thursday, November 12th, 2020 AT 10:45 AM (Merged)
Tiny
RDANNENFELSER
  • MEMBER
  • 43 POSTS
So then I take it you think the oil pan gasket is still re-usable and should seal despite that torn section?

Aside from applying RTV in the two bottom corners, should any be used at the upper corners around or near the coolant ports or should the gasket alone seal it enough?
Was this
answer
helpful?
Yes
No
Thursday, November 12th, 2020 AT 10:45 AM (Merged)
Tiny
CARADIODOC
  • MECHANIC
  • 33,699 POSTS
I never used the mist-type of products but I don't see a problem with that idea. If the gasket feels like felt, I wouldn't worry about it squirting out. That material does a better job of sealing into scratches and conforming to them, so it's true, additional sealants aren't necessary. If I was watching a coworker do this repair, I wouldn't argue for or against them using additional sealant with the gasket. We tend to stick with what we've had good luck with in the past.

Their comment about using a small dab of sealant at corners is a common and accepted practice because it is unlikely a fiber gasket is going to stretch to fill the voids when it is compressed. This is common with two-piece valve cover gaskets too.

When you stick the gasket in place, stick it to the engine, then put the cover on. That way you can insure the gasket stays in place. If you stick it to the cover first, there could be things on the engine that bump the gasket out of place as you put the cover on. You likely won't see that happen.

A related place where I've run into minor trouble is when a gasket is cut wider in one area compared to the original gasket. Look around the sealing surface on the engine, and often you'll see little bolted-on housings, covers, or brackets that interfere with the new, wider gasket. Sometimes you have to trim the gasket a little, and sometimes the edge of it will just be lifted, or held up a little, but it doesn't get hit by the cover. You'd see that when you stick the gasket to the engine first, then you can decide if it needs attention or if you can just slide the cover on and let the gasket bend up in that area. That obstruction would cause more of a problem if you stuck the gasket to the cover first. It could push the gasket off-center as you slide the cover in place.

Sometimes a new gasket will have some of the bolt holes smaller in diameter than the rest. You'll usually find this with transmission pan gaskets. There's too many areas to keep an eye on when you slap the pan in place, so those smaller holes will hold the pan bolts in place to hold the gasket from sliding out of place. If your timing cover gasket is set rather deep in the engine where it's hard to poke your fingers, you may have to put the gasket on the cover first. When that is expected, the gasket manufacturer may also use those smaller holes for you to use some of the bolts to hold the gasket. I'd trust the bolts a lot more than sealants from a tube or spray-on gasket glues.
Was this
answer
helpful?
Yes
No
Thursday, November 12th, 2020 AT 10:45 AM (Merged)
Tiny
DANNY L
  • MECHANIC
  • 5,648 POSTS
Hello again.

If you want to apply a small film to the paper gasket for the cover that is okay. Just don't use any on that rubber oil pan gasket. That will usually cause a leak from using rubber/RTV together. As I stated earlier put a small dab in the corners were it all meets. Hope this helps and thanks again for using 2CarPros.

Danny-
Was this
answer
helpful?
Yes
No
+1
Thursday, November 12th, 2020 AT 10:45 AM (Merged)
Tiny
1NISAM1
  • MEMBER
  • 1 POST
  • 1991 FORD RANGER
Is there a way to see if the timing chain on my 1991 Ford Ranger 4.0 OHV has jumped time? The truck died coming off the interstate, no codes, I've replaced the Ign Module, crank sensor, coil pack, and MAF sensor, and I'm tired of throwing parts at it. It has the classic "jumped time symptoms" you can hear it fire in the exhaust, and every now and then a backfire through the throttle body. With no distributor to index the timing, I'm lost and really don't want to pull down the front of the motor to find nothing wrong! Any help would be greatly appreciated!.
Was this
answer
helpful?
Yes
No
Thursday, November 12th, 2020 AT 10:45 AM (Merged)

Please login or register to post a reply.

Sponsored links