Was the fluid that used to
refill transmission ATF Plus 4, Type 9602, fluid
very important to use the ATF plus 4
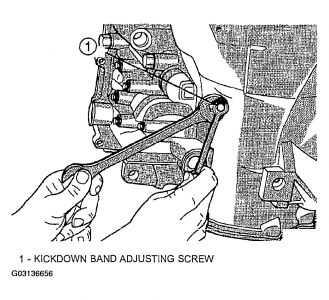
ADJUSTMENT - FRONT BAND
The front (kickdown) band adjusting screw is located on the left side of the transmission case above the manual valve and throttle valve levers.
1.Disconnect battery negative cable.
2.Remove air cleaner assembly.
3.Loosen band adjusting screw lock nut Then back lock nut off 3-5 turns. Be sure adjusting screw turns freely in case. Apply lubricant to screw threads if necessary.
4.Tighten band adjusting screw to 8 N.m (72 INCH lbs.).
5.Back off front band adjusting screw 2 1/4 turns.
6.Hold adjuster screw in position and tighten lock nut to 47 N.m (35 ft. lbs.) torque.
7.Install air cleaner assembly. 8.Connect battery negative cable.
ADJUSTMENTS - REAR BAND
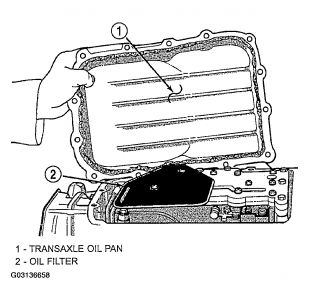
The transmission oil pan must be removed for access to the rear (low/reverse) band adjusting screw.
1.Raise vehicle.
2.Remove transaxle oil pan and drain fluid
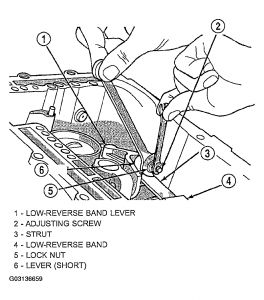
3.Loosen band adjusting screw lock nut 5-6 turns. Be sure adjusting screw turns freely in lever.
4.Tighten adjusting screw to 5 N.m (41 INCH lbs.) (See Fig. 160 ).
5.Back off adjusting screw 3 turns.
6.Hold adjusting screw in place and tighten lock nut to 14 N.m (125 ft. lbs.) torque.
7.Install a bead of Mopar(R) Silicone Rubber Adhesive Sealant to the oil pan and install to case immediately.
8.Install oil pan-to-case bolts and torque to 19 N.m (165 INCH lbs.).
9.Lower vehicle and refill transmission with Mopar(R); ATF Plus 4, Type 9602, fluid.
Feb 9, 2009 at 9:24 PM
