Disconnect the negative battery cable.
Place a drain pan under the radiator. Open the radiator drain located at the lower right side of the radiator. Do NOT use pliers to open the plastic drain.
Remove the coolant reservoir cap and open the thermostat bleed valve.
Remove the cylinder block drain plugs located behind each exhaust manifold.
Remove the radiator closure panel sight shield.
Remove the mounting screws that secure the headlamp module to the mounting adapter.
Remove the headlamp module from the mounting adapter.
Unplug the wiring connectors from the headlamp and fog lamp assemblies.
Remove the headlamp module from the vehicle.
**Have the air conditioning system discharged by a certified technician. **
Remove the upper radiator crossmember. Remove the hose clamps and the hoses from the radiator.
Disconnect and plug the automatic transaxle cooler hoses.
Unplug the fan electrical harness connector from the EFI module.
Remove the upper radiator mounting screws and disconnect the engine block heater wire, if equipped.
Disconnect and plug the air conditioning system hoses from the condenser unit.
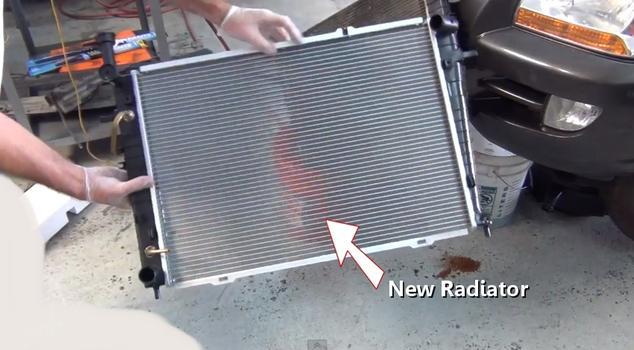
Remove the radiator/condenser/cooling fan assembly out of the vehicle. Be careful not to damage the radiator or condenser cooling fins or water tubes.
Separate the cooling fan assembly from the radiator. Separate the radiator from the air conditioning condenser.
To install:
Install the condenser unit to the radiator. Install the cooling fan assembly to the radiator and condenser.
Install the radiator/condenser/cooling fan assembly into position in the vehicle seating the lower rubber isolators in the mounting holes provided.
Reconnect the air conditioning system hoses to the condenser unit.
Install and tighten the radiator mounting bolts to 123 inch lbs. (14 Nm).
Reconnect the engine block heater wire, if equipped.
Install the lower radiator hose and clamp, then reconnect the automatic transaxle cooler hoses. Tighten the lower hose clamp.
Install the upper radiator hose and align so it will not interfere with the hood, accessory drive belt or engine.
Install the upper radiator crossmember and tighten the bolts to 21 ft. Lbs. (28 Nm).
Install the cylinder block drain plugs on both sides of the engine block.
Attach the fan motor electrical connector and reconnect the negative battery cable.
Be sure that the radiator drain cock is closed. Open the thermostat bleed valve. Install a 1 / 4 -inch diameter clear hose that is approximately 48 inch in length, to the end of the bleed valve and the other end into a clean container. The intent is to keep coolant off the drive belt. Be careful not to allow coolant to get on the drive belt.
Slowly refill the coolant reservoir until a steady stream of coolant flows out of the thermostat bleed valve. Gently squeeze the upper radiator hose until all of the air is removed from the system.
Close the bleed valve and continue to fill up the coolant reservoir to the proper level. Install the cap back on the bottle and remove the hose from the bleed valve.
Start the engine and allow it to run until normal operating temperature is reached.
Check the cooling system and automatic transaxle for leaks and correct fluid level. Be sure that the thermostat bleed valve is closed once you have bled the cooling system of all trapped air.
Attach the wiring connector to the headlamp and fog lamp assemblies.
Place the headlamp module into proper position on the mounting adapter. Tighten the retaining screws securing the headlamp module to the mounting adapter.
Install the radiator closure panel sight shield. Recharge the air conditioning system.
SPONSORED LINKS
Tuesday, February 23rd, 2010 AT 12:23 PM


