A leaking valve would cause poor running as there would be vacuum leakage causing one of the cylinders to run lean.
REPAIR PROCEDURE
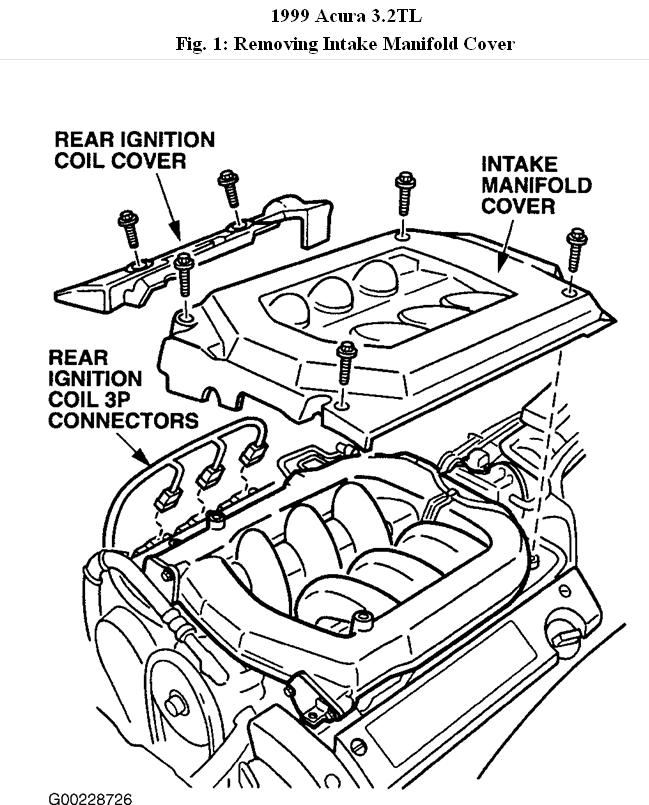
1. Remove the intake manifold cover. Unplug the ignition coil 3P connectors on the rear bank, then remove the rear ignition coil cover. See Fig. 1 .
2. Disconnect the brake booster vacuum hose and the vacuum hose from the intake manifold.
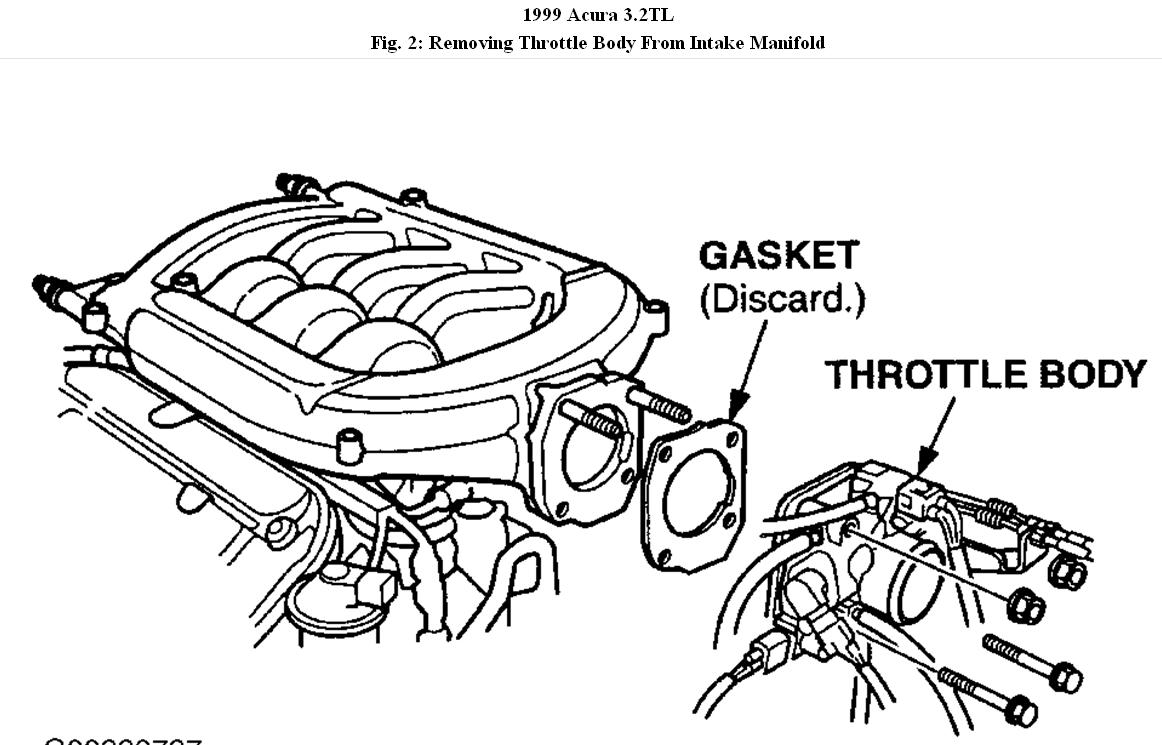
3. Remove the throttle body from the intake manifold (two nuts and two bolts). Leave all hoses, cables, and electrical connectors connected to the throttle body. Discard the throttle body gasket. See Fig. 2 .
4. Remove the PCV valve from the cylinder head cover. Remove the intake manifold (three nuts and six bolts).
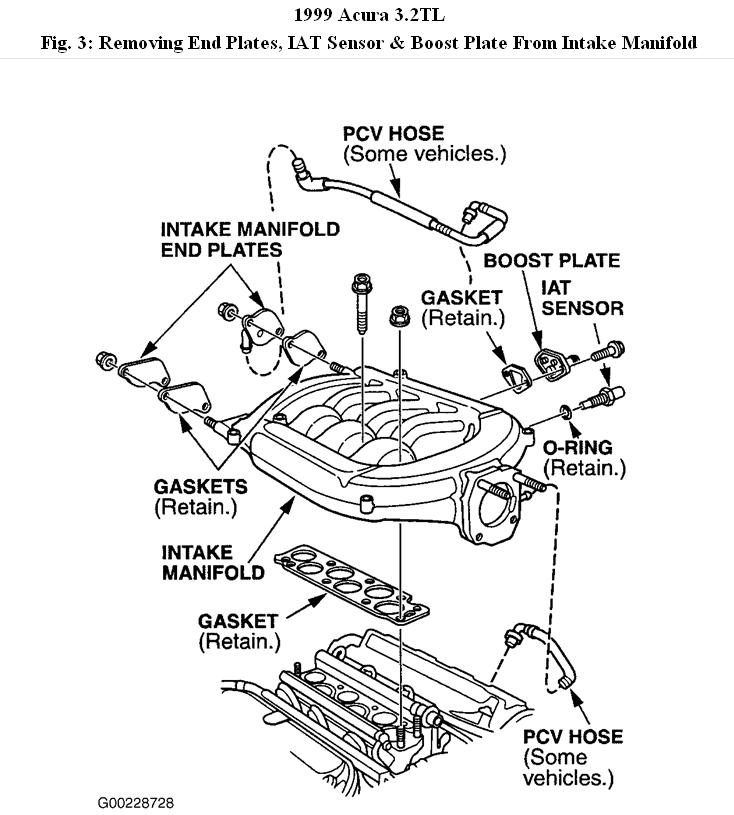
5. Remove the end plates, IAT sensor, and boost plate from the intake manifold. If the PCV hose connects to the intake manifold instead of the end plate, remove the hose. See Fig. 3 .
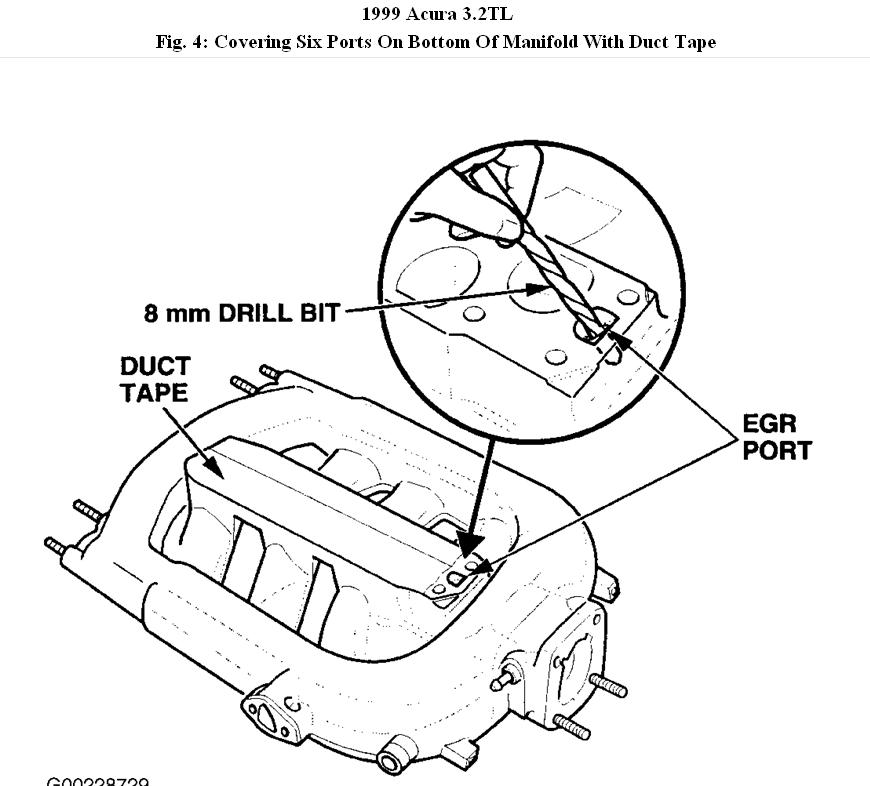
6. Cover the six ports on the bottom of the manifold with duct tape. See Fig. 4 .
7. Use an 8-mm drill bit and carburetor cleaner to clean the EGR port in the intake manifold. Turn the drill bit only by hand. Do not use a power drill.
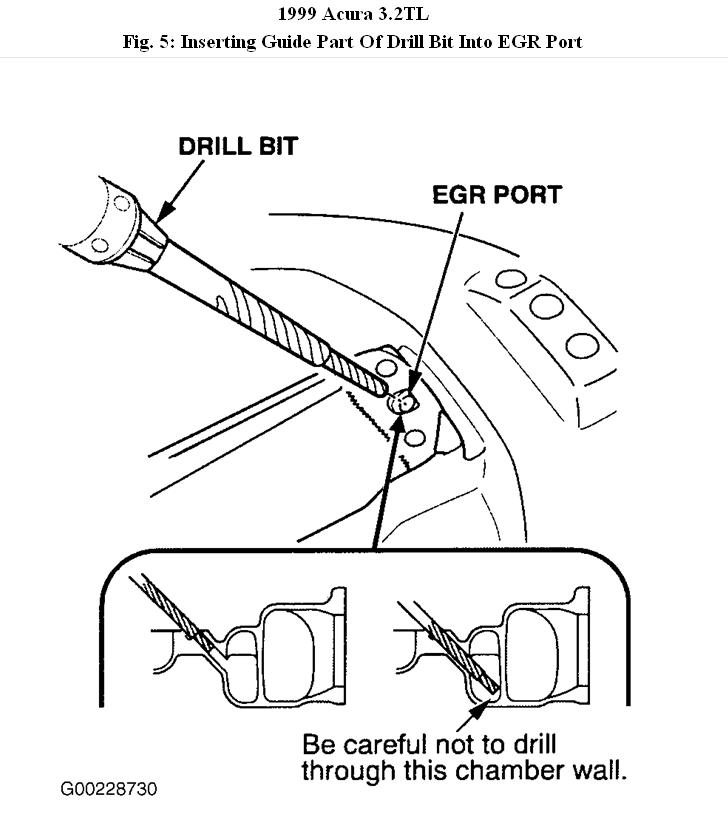
8. Put the special drill bit from the EGR pipe installation kit in your power drill. Coat the drill bit completely with clean engine oil.
NOTE:
The oil coating is critical to drilling the hole accurately, and
it contributes to drill bit life.
9. Insert the guide part of the drill bit into the EGR port. Make sure it is inserted fully. Then drill out the EGR port using steady pressure on the drill. Make , the port is drilled through completely. See Fig. 5 .
10. Clean up the aluminum chips from drilling, then remove the duct tape.
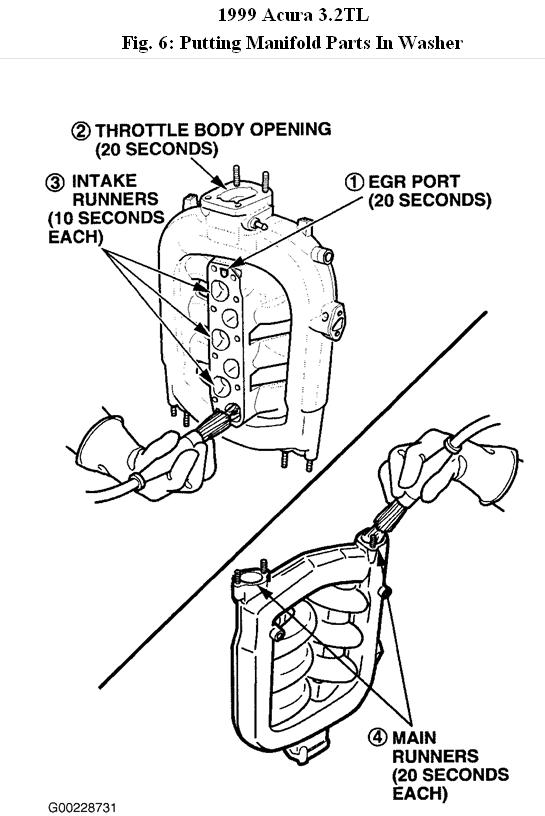
11. Put the manifold in a parts washer (solvent or soap and water) and clean it thoroughly. See Fig. 6 .
• Flush out the EGR port for 20 seconds.
• Flush out the manifold from the throttle body opening. Run cleaner down each side for 20 seconds.
• Flush each intake runner for 10 seconds. Start at the throttle body end and work toward the back.
• Turn the manifold so the throttle body opening is facing down. Flush each main runner for 20 seconds.
• Dry the manifold with compressed air and clean shop towels.
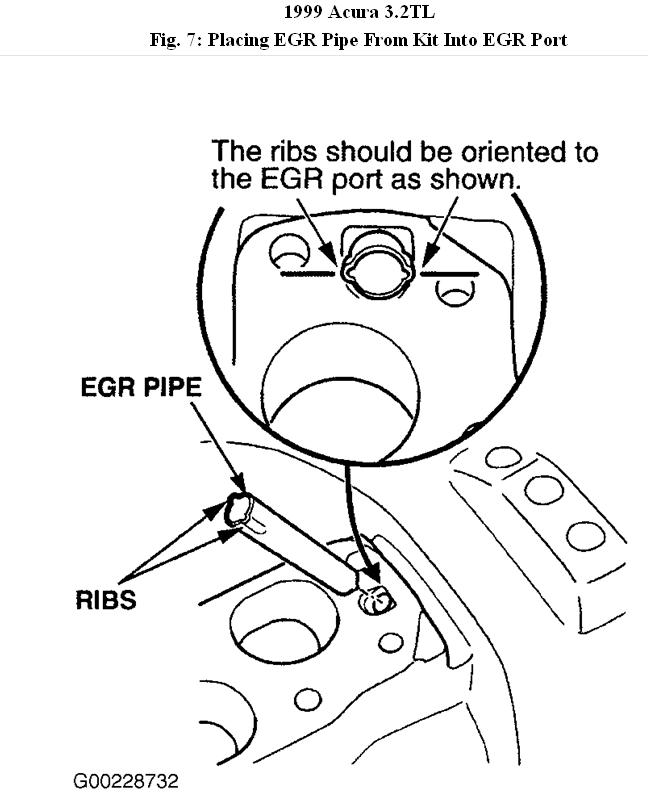
12. Place the EGR pipe from the kit into the EGR port. See Fig. 7 .
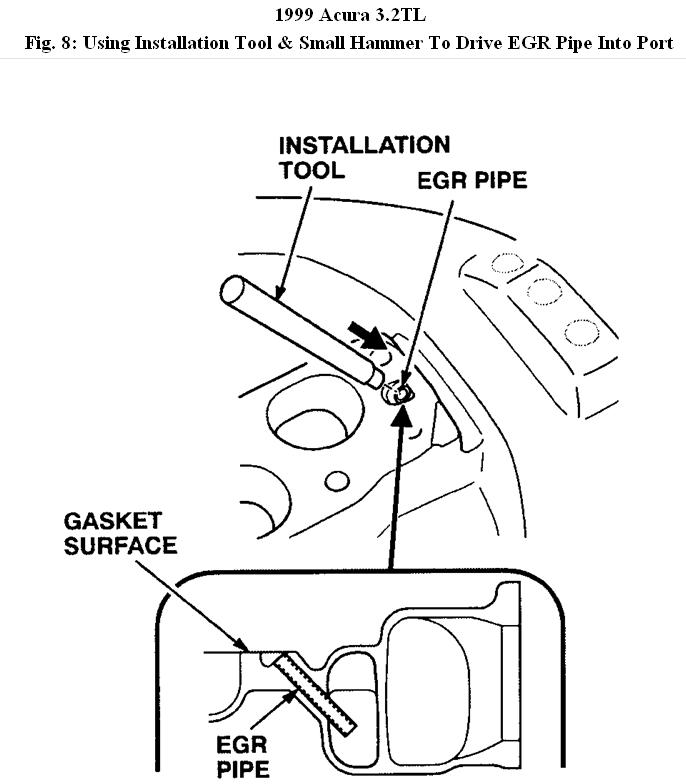
13. Use the installation tool and a small hammer to drive the EGR pipe into the port until it is flush with the port. Make sure the pipe will not contact the gasket after installation. See Fig. 8 .
14. Install the end plates torque the nuts to 12 N.m (8.7 lb-ft). Install the IAT sensor with the original O-ring; torque it to 18 N.m (13 lb-ft). Install the boost plate with the original gasket; torque the bolts to 12 N.m (8.7 lb-ft). If necessary, install the PCV hose.
15. Inspect the EGR port in the front of the injector base on the engine. If it is partially or fully clogged, clean the port.
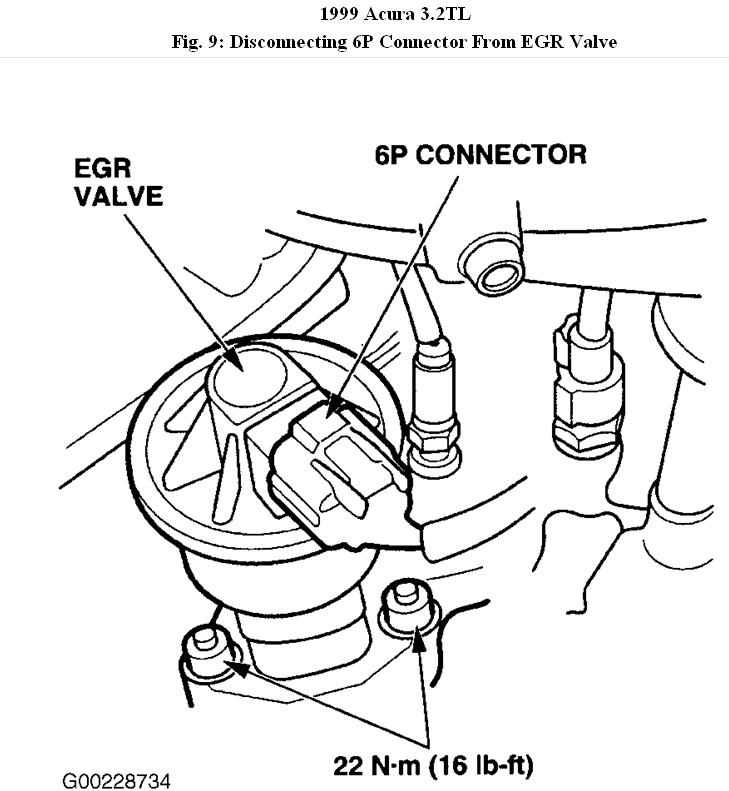
16. Disconnect the 6P connector from the EGR valve. Remove the EGR valve. See Fig. 9 .
17. Install the new EGR valve with a new gasket. Torque the mounting nuts to 22 N.m (16 lb-ft). Reconnect the 6P connector.
18. Install the intake manifold with the original gasket. Torque the mounting nuts and bolts to 22 N.m (16 lb-ft) sequentially in two or three steps. Route the PCV hose so it is not pinched under the intake manifold. See Fig. 10 .
19. Install the PCV valve in the cylinder head cover.
20. Install the throttle body with a new gasket. Torque the mounting nuts and bolts to 22 N.m (16 lb-ft).
21. Reinstall the brake booster vacuum hose and the vacuum hose. Connect the 3P ignition coil connectors, and install the covers.
22. Connect the PGM Tester (loaded with SN200 or later software). Clear any DTCs.
23. Use the PGM Tester to override two-trip error detection:
• From the PGM Tester menu, select 1. Honda Systems .
• Then select 2. SCS.
24. Test-drive the vehicle to make sure no new DTCs are set.
Images (Click to enlarge)
Mar 17, 2011 at 8:46 PM