Good afternoon,
I attached the procedure for you to follow.
The housing has to come out and then disassemble the housing to get the evaporator out.
Roy
1. Recover the refrigerant from the air conditioning (A/C) system. Refer to Refrigerant Recovery and Recharging.
2. Drain the cooling system. Refer to Draining and Filling Cooling System (Static Fill) Draining and Filling Cooling System (Vac-N-Fill) in Cooling System.
3. Set the heating, ventilation and air conditioning (HVAC) controls in the vent setting to close the defroster door.
IMPORTANT: The defroster door must be closed to allow clearance during defroster duct removal.
4. Remove the blower motor.
5. Disconnect the electrical connector from the blower motor resistor.
6. Disconnect the electrical connector from the evaporator temperature sensor.
7. Disconnect all of the HVAC actuator electrical connectors.
8. Remove the instrument panel (I/P) carrier.
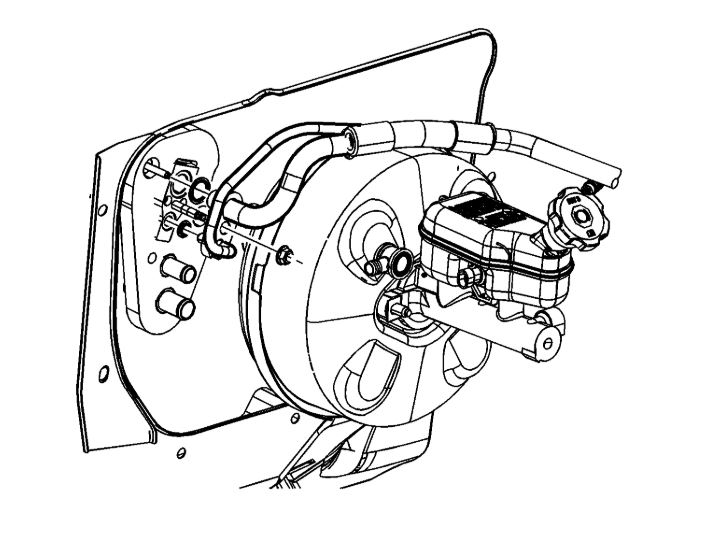
9. Remove the evaporator outlet tube nut.
10. Disconnect the evaporator outlet tube and evaporator inlet tube from the thermal expansion valve (TXV).
11. Remove and discard the sealing washers.
ImageOpen In New TabZoom/Print
12. Remove the heater inlet and outlet hoses.
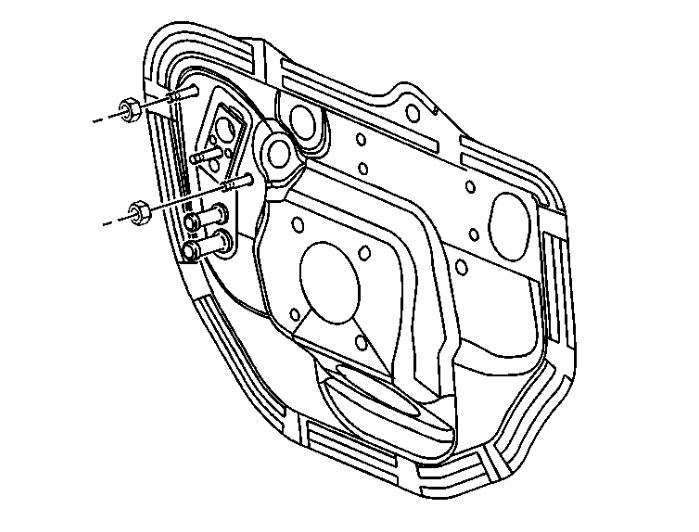
13. Remove the HVAC module nuts.
EVAPORATOR CORE REPLACEMENT
REMOVAL PROCEDURE
imageOpen In New TabZoom/Print
1. Remove the heating, ventilation and air conditioning (HVAC) module assembly.
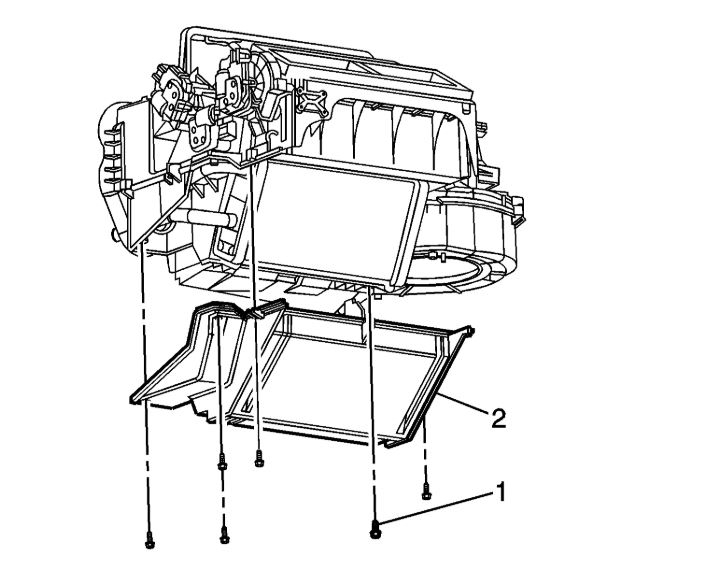
2. Remove the heater outlet duct screws.
3. Remove the heater outlet duct.
ImageOpen In New TabZoom/Print
4. Remove the heater core cover screws (1).
5. Remove heater core cover (2).
ImageOpen In New TabZoom/Print
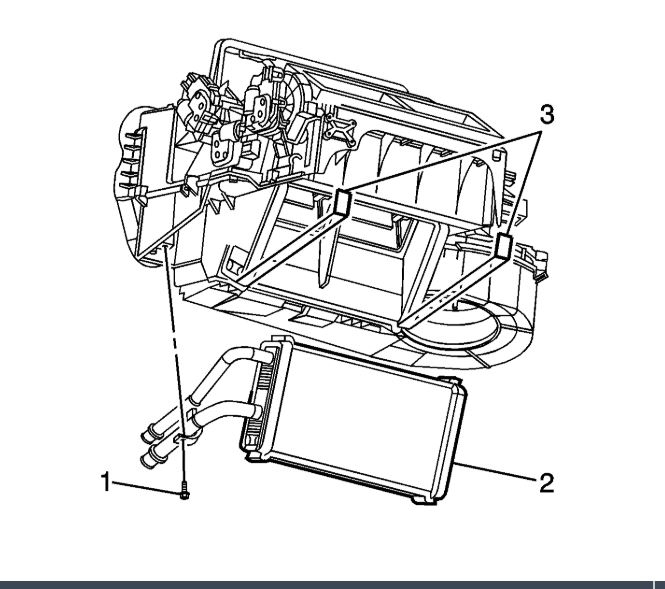
6. Remove the heater core pipe screw.
7. Remove the heater core.
ImageOpen In New TabZoom/Print
8. Remove the HVAC module to dash panel sound barrier seal.
ImageOpen In New TabZoom/Print
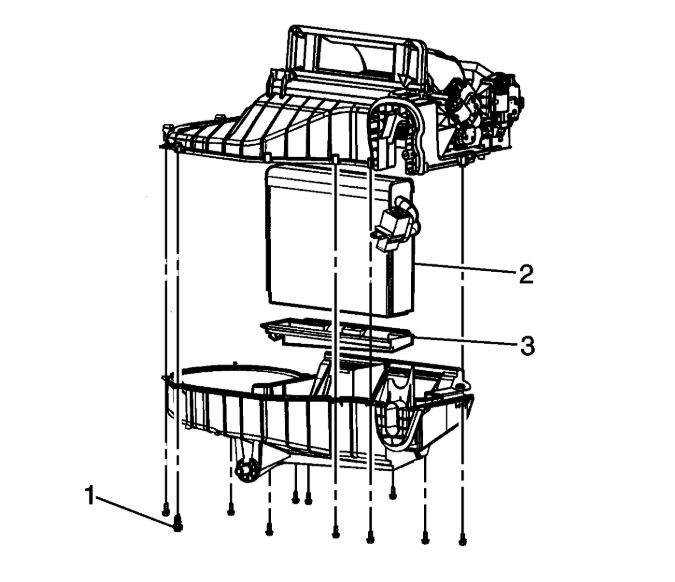
9. Remove the lower HVAC module screws (1).
10. Separate the upper and lower HVAC module halves.
11. Remove the evaporator core.
ImageOpen In New TabZoom/Print
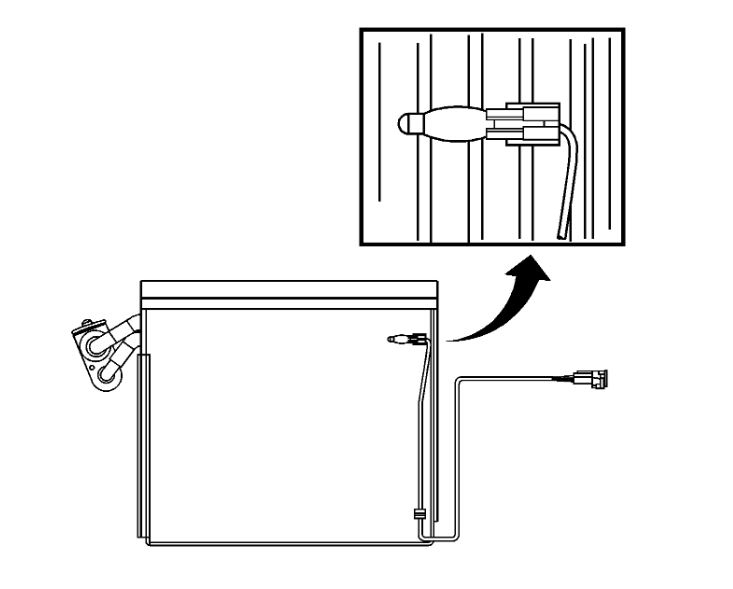
12. Remove the evaporator temperature sensor.
ImageOpen In New TabZoom/Print
13. Remove the thermal expansion valve (TXV) screws.
14. Remove the TXV from the evaporator core.
15. Remove and discard the sealing washers.
Images (Click to make bigger)
Wednesday, June 3rd, 2020 AT 2:09 PM