Welcome to 2CarPros.
The manual indicates to remove the engine and transmission together. However, here are the directions for transmission removal and replacement.
___________________________________
1996 Toyota Truck Tacoma 2WD L4-2.4L (2RZ-FE)
Removal and Installation
Vehicle Transmission and Drivetrain Automatic Transmission/Transaxle Service and Repair Procedures Removal and Installation
REMOVAL AND INSTALLATION
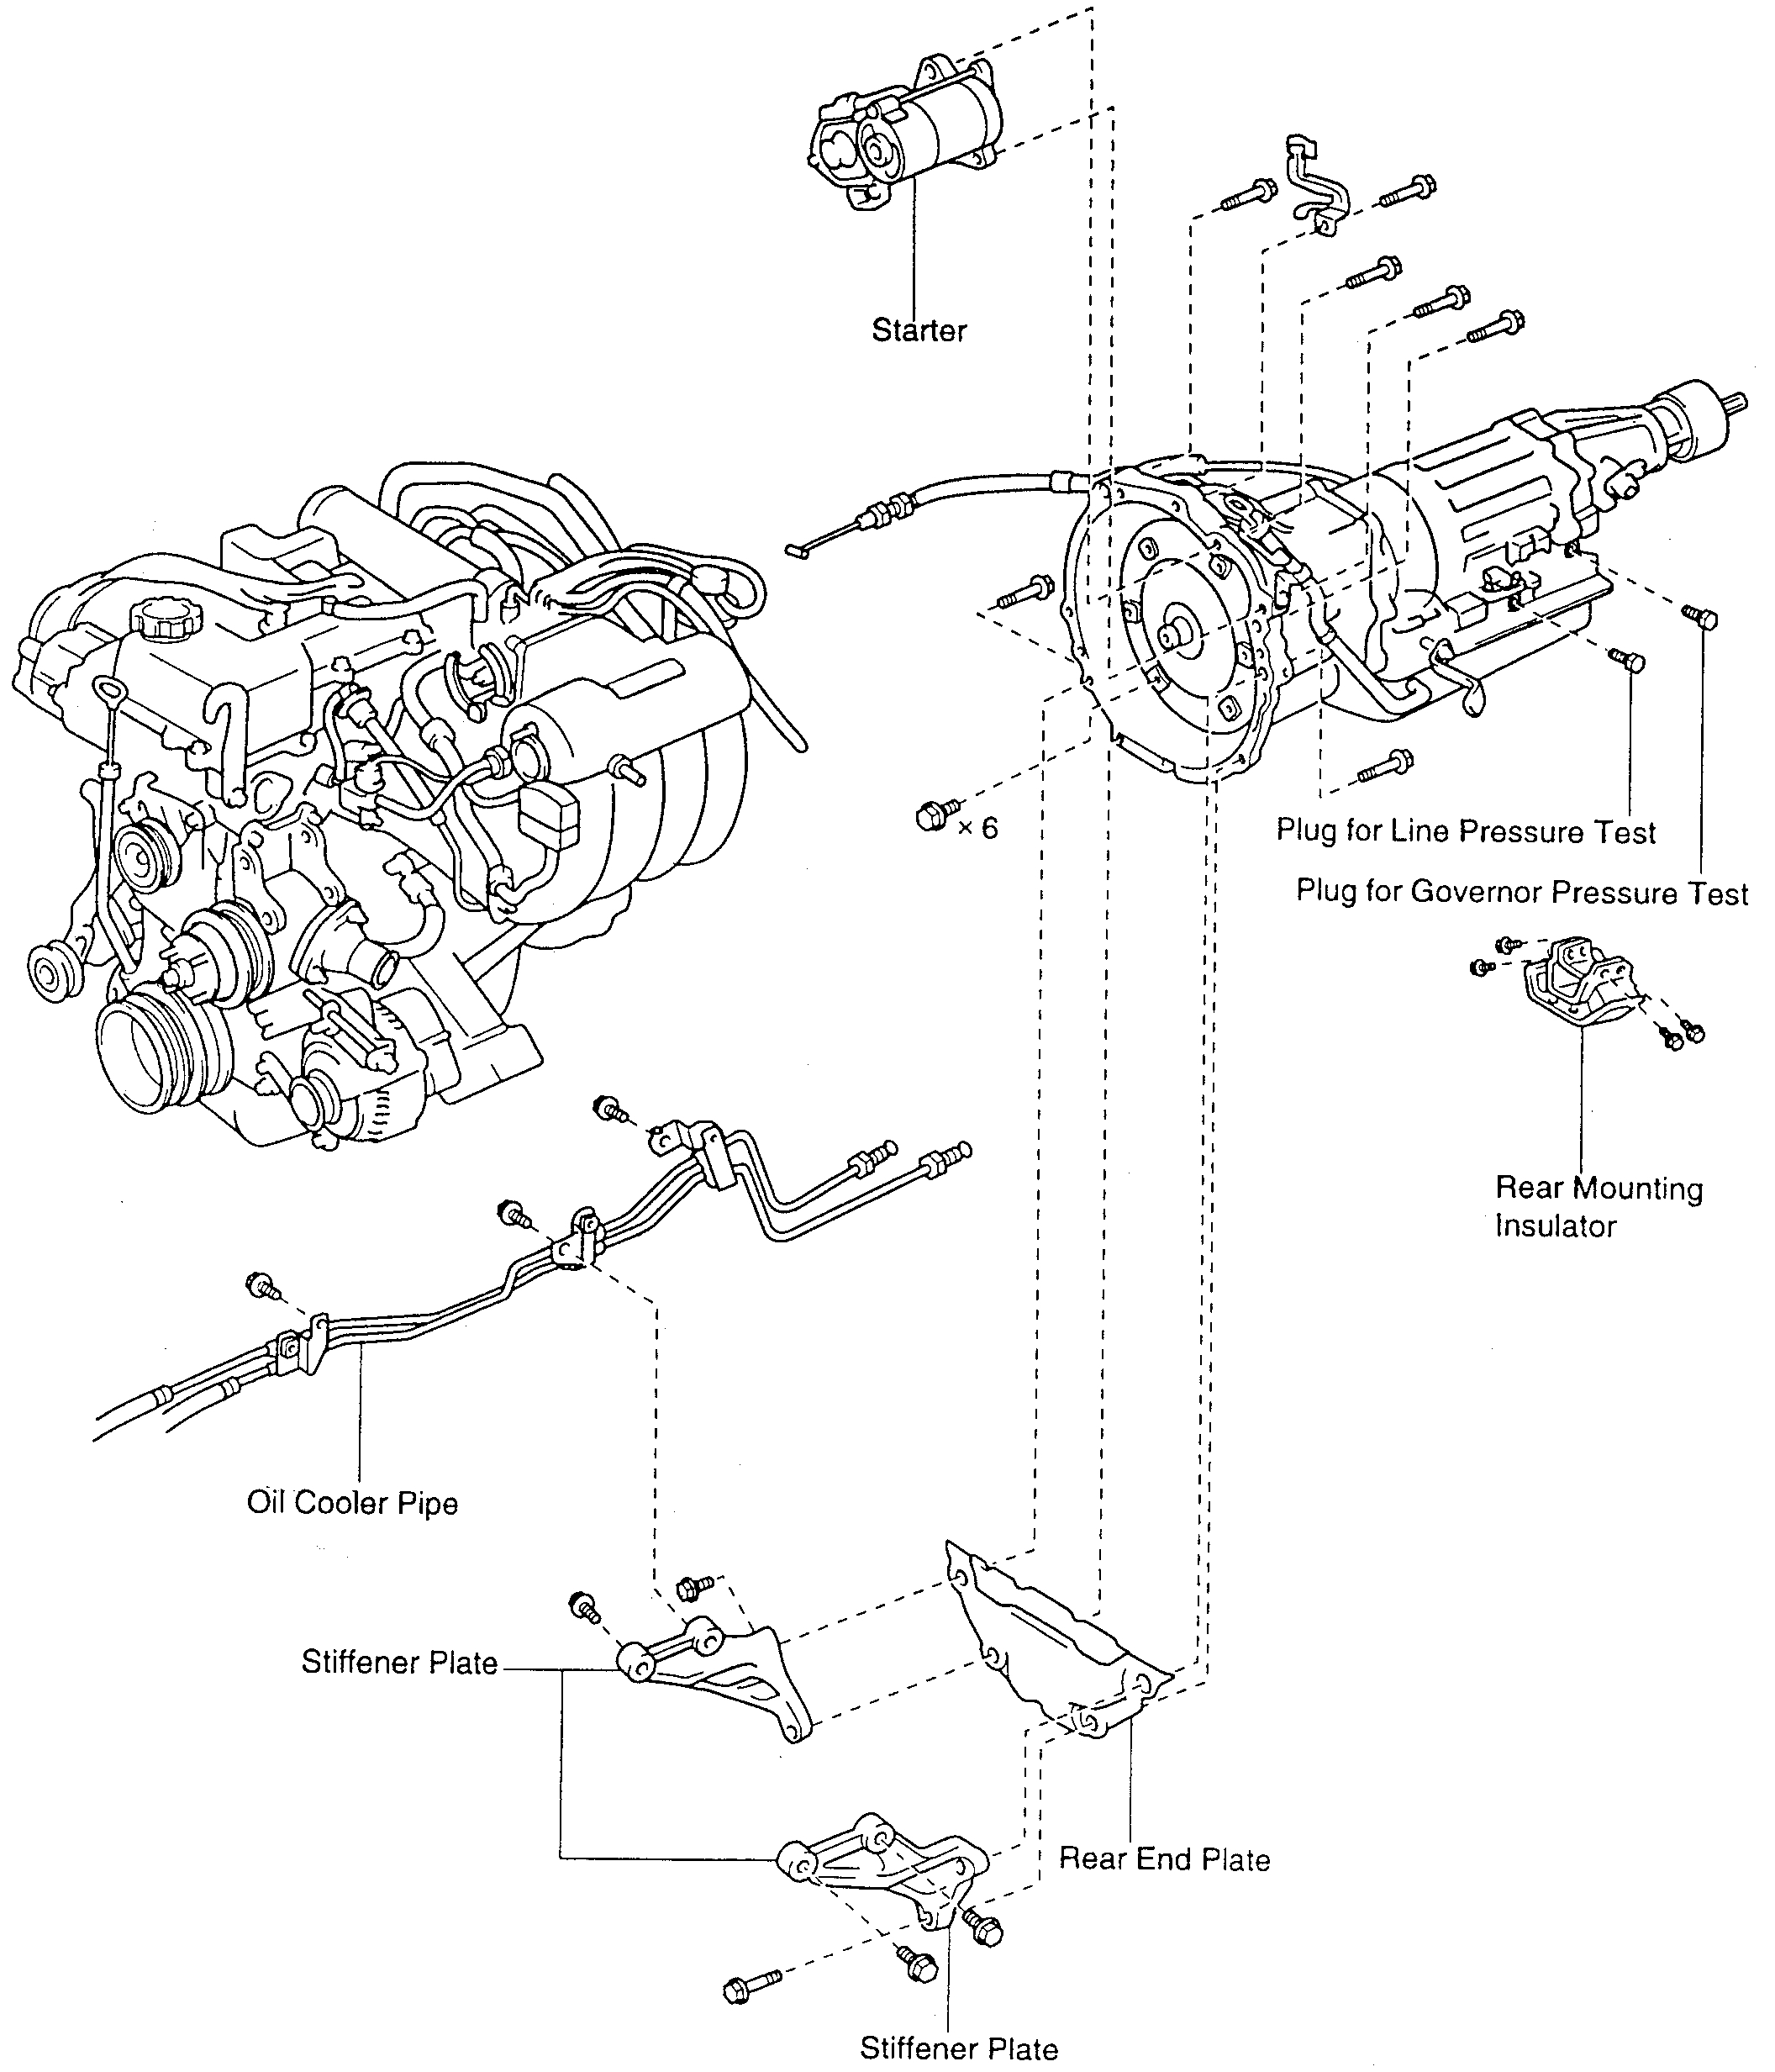
pic 1
REMOVAL
1. Remove transmission with engine.
Pic 2
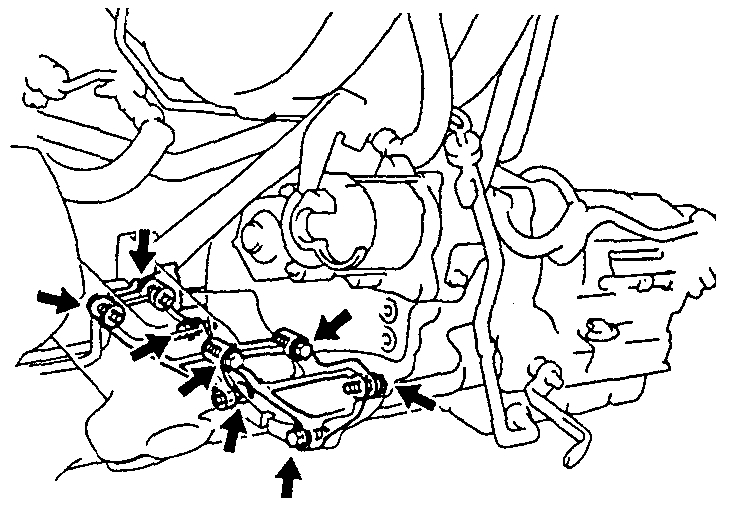
2. Remove left and right side stiffener plates.
A. Remove the 8 bolts, 2 stiffener plates and rear end plate.
Torque: 37 N.M (28 ft. Lbs.)
pic 3
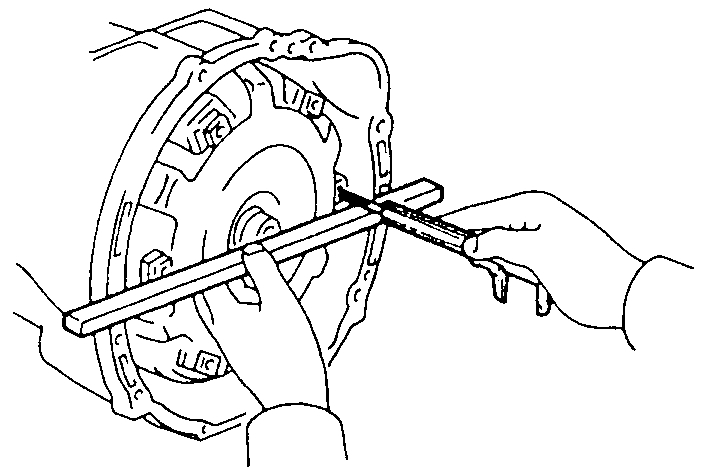
b. Turn the crankshaft to gain access and remove the 6 bolts with holding the crankshaft pulley set bolt a wrench.
Torque: 41 N.M (30 ft. Lbs.)
pic 4
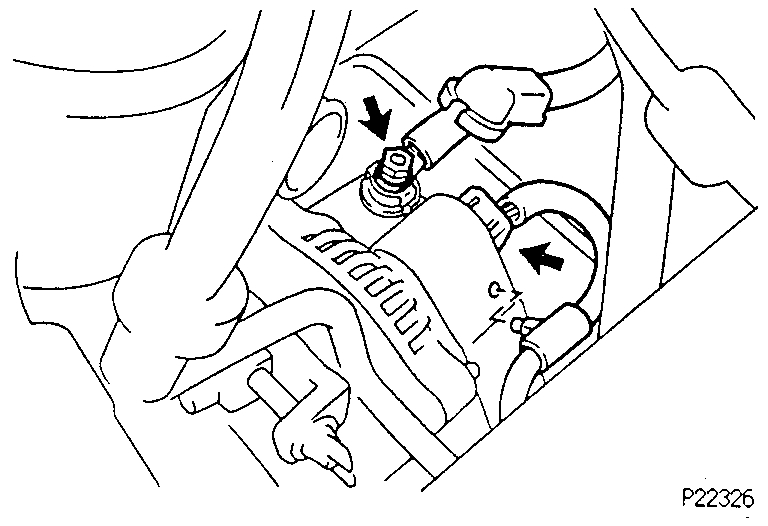
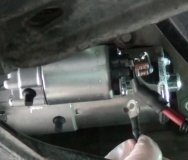
3. Remove starter.
Remove the 2 bolts and starter.
Torque 39 N.M (29 ft. Lbs.)
4. Remove transmission from engine.
A. Remove the 3 transmission mounting bolts from the engine.
Torque: 71 N.M (53 ft. Lbs.)
b. Pull out the transmission toward the rear.
INSTALLATION
Installation is in the reverse order of removal.
Pic 5
Using calipers and a straight edge, measure from the installed surface of the transmission housing. Correct distance:
More Than 31.75 mm (1.2500 inch)
If the distance is less than the standard, check for an improper installation.
HINT:
After installation, adjust the shift lever position and throttle cable.
Fill and check fluid level.
______________________________________
Here are directions for engine removal. It includes information for both automatic and manual transmission. The attached pictures correlate with the directions.
_____________________________________
Removal
Vehicle Engine, Cooling and Exhaust Engine Service and Repair Procedures Removal and Installation Removal
REMOVAL
pic 6
pic 7
pic 8
1. Remove engine under cover.
2. Drain engine coolant.
3. Drain engine oil.
4. Drain transmission oil.
5. Remove hood.
6. Remove radiator. Refer to Cooling System.
7. Remove drive belt for generator, fan with fluid coupling and water pump pulley. Refer to Cooling System.
8. Disconnect these cables:
(a) Disconnect the accelerator cable from the throttle body.
(b) w/ Cruise Control System: Remove the actuator cover, and disconnect the cruise control cable from the actuator.
9. Remove air cleaner assembly.
(a) Disconnect the Intake Air Temperature (IAT) sensor and Mass Air Flow (MAF) meter connectors.
(b) Disconnect the 3 wire clamps and engine wire.
(c) Loosen the air cleaner hose clamp.
Pic 9
(d) Remove the 3 bolts and the Mass Air Flow (MAF) meter, resonator and air cleaner assembly.
10. Remove intake air connector.
11. W/ A/C: Disconnect A/C compressor.
(a) Loosen the idler pulley nut and adjusting bolt, and remove the drive belt.
(b) Disconnect the A/C compressor connector.
Pic 10
(c) Remove the 4 bolts, and disconnect the compressor from the bracket.
NOTE: Put aside the compressor, and suspend it.
12. Remove generator wire.
(a) Disconnect the generator connector.
Pic 11
(b) Remove the nut, and disconnect the generator wire and wire clip.
13. Disconnect heater hoses.
Pic 12
(a) Remove the bolt and hose clamp.
(b) Disconnect the heater hoses.
Pic 13
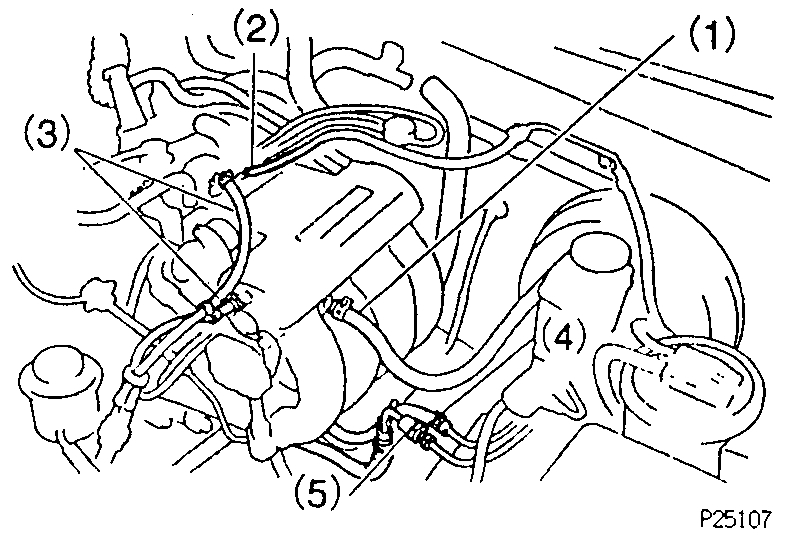
14. Disconnect hoses.
Disconnect these hoses:
(a) Brake booster vacuum hose (1).
(b) Evaporative Emission (EVAP) hose (2).
(c) w/Power Steering (PS): 2 air hoses for PS idle-up (3).
(d) Fuel return hose (4).
(e) Fuel inlet hose (5).
15. W/PS:Disconnect PS pump from engine.
16. Disconnect engine wire from cabin.
Pic 14
(a) Remove these parts:
1. Glove compartment door (1).
2. Lower finish No. 2 panel (2).
(b) Disconnect the 4 Engine Control Module (ECM) connectors.
(c) Disconnect the 2 cassette connectors (cowl wire & engine wire) and 2 wire clamps from the lower finish panel.
Pic 15
(d) Disconnect these connector, ground strap and clamps:
1. Igniter connector (1).
2. Ground strap from cowl top panel (2).
3. 2 engine wire clamps (3).
Pic 16
(e) Remove 2 nuts holding the engine wire retainer to the cowl panel and pull out the engine wire from the cabin.
Pic 17
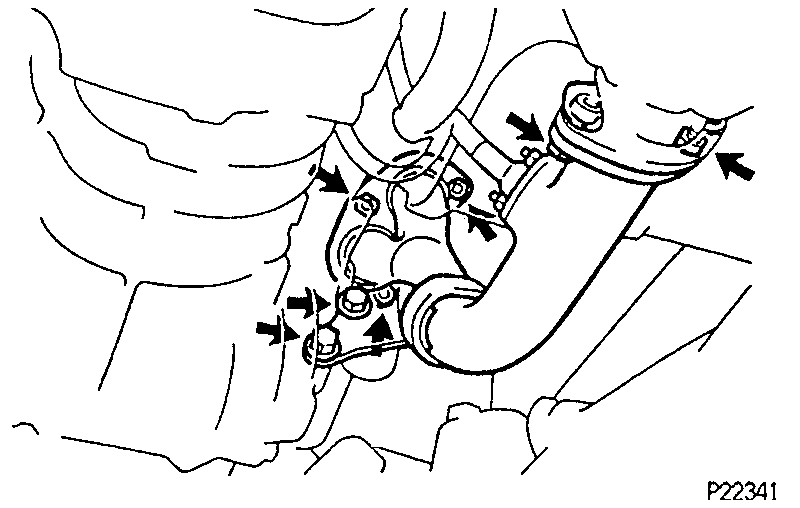
17. Remove front exhaust pipe.
(a) Disconnect the heated oxygen sensor connector.
(b) Remove the 2 bolts holding the front exhaust pipe to the Three-Way Catalytic Converter (TWC).
(c) Remove the 2 bolts holding the support bracket to the transmission.
(d) Remove the 3 nuts, front exhaust pipe and 3 gaskets.
18. M/T: Remove shift lever assembly.
(a) Remove the shift lever knob.
(b) Remove the 4 screws and shift lever boot.
Pic 18
(c) Remove the 6 bolts, shift lever assembly and baffle.
CAUTION: Do not lose the washers.
19. Remove propeller shaft. Refer to Transmission and Drivetrain.
20. Disconnect speedometer cable.
CAUTION: Do not lose the felt protector and washers.
Pic 19
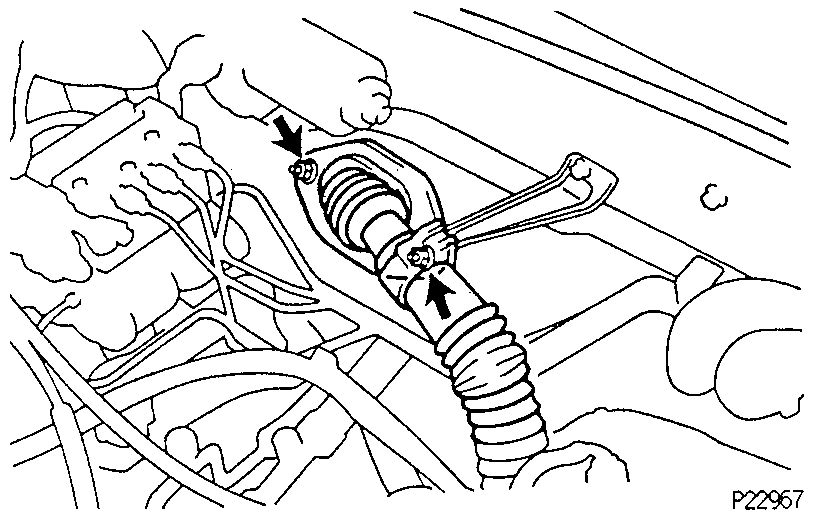
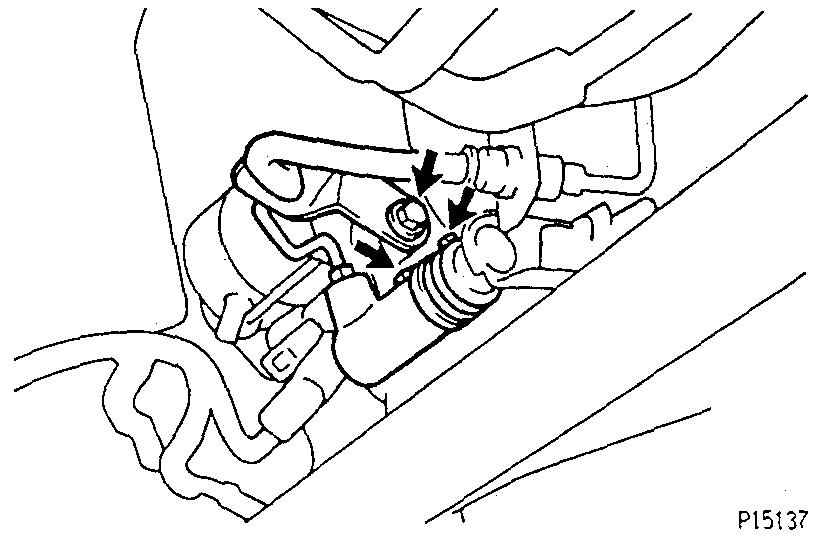
21. M/T: Remove clutch release cylinder.
(a) Remove the 2 bolts, and disconnect the clutch release cylinder from the clutch housing.
(b) Remove the bolt and disconnect the clutch line.
Pic 20
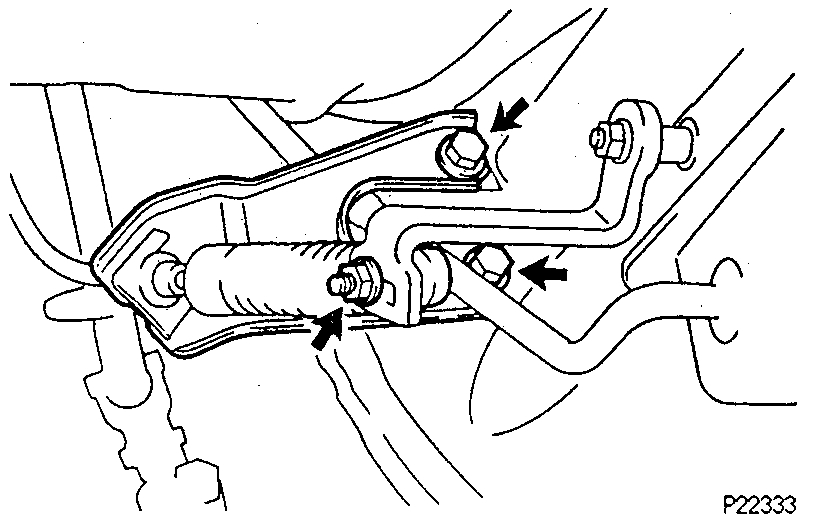
22. A/T: Remove cross shaft.
Remove the 2 bolts and nut, and disconnect bracket from the transmission.
Pic 21
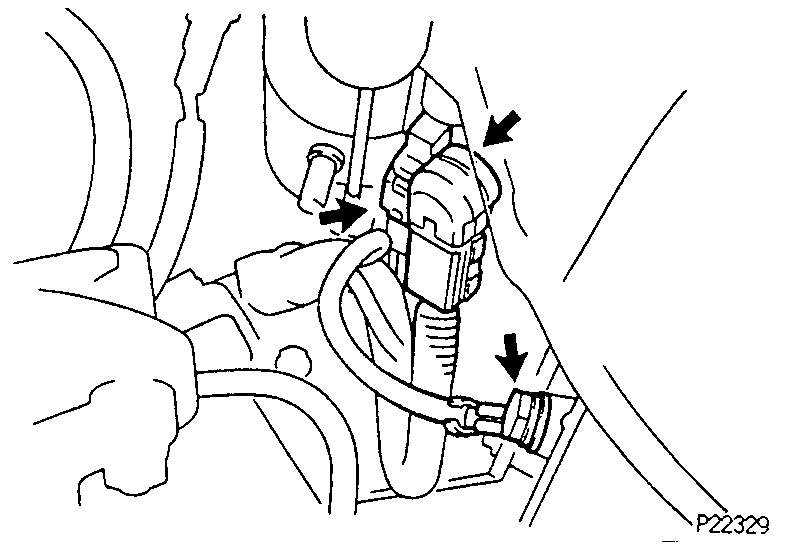
23. Disconnect starter wire.
(a) Remove the nut and disconnect the starter wire.
(b) Disconnect the starter connector.
(c) Remove the bolt and disconnect ground strap.
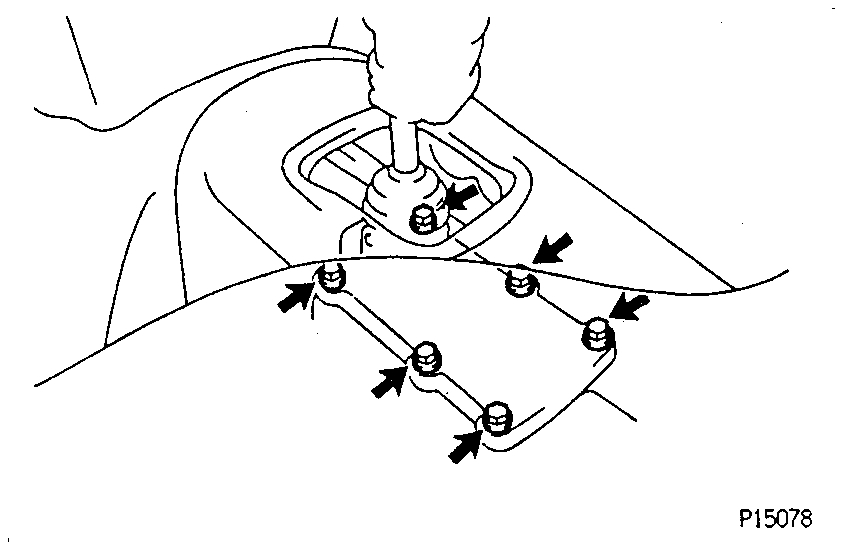
24. Place jack under transmission.
Pic 22
25. Remove engine rear mounting bracket.
Remove the 8 bolts holding the mounting bracket to the mounting insulator and cross member.
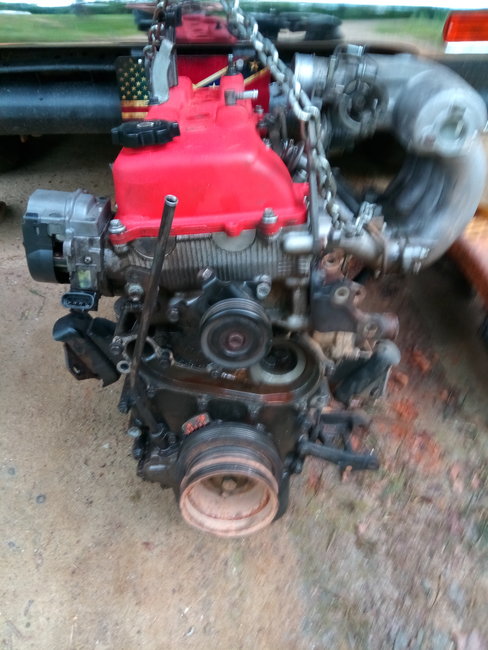
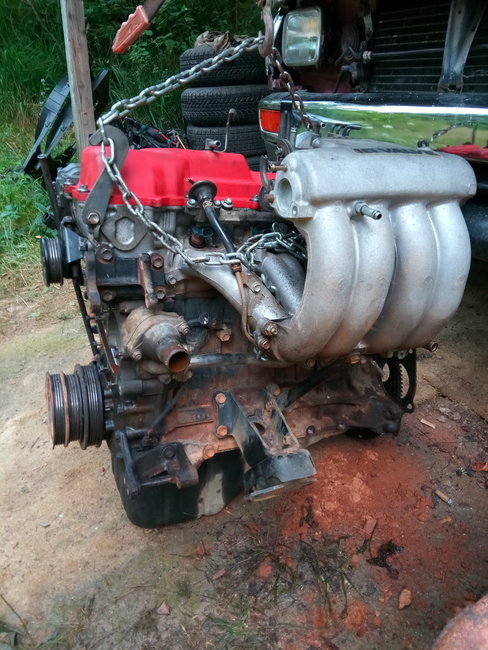
26. Remove engine with transmission.
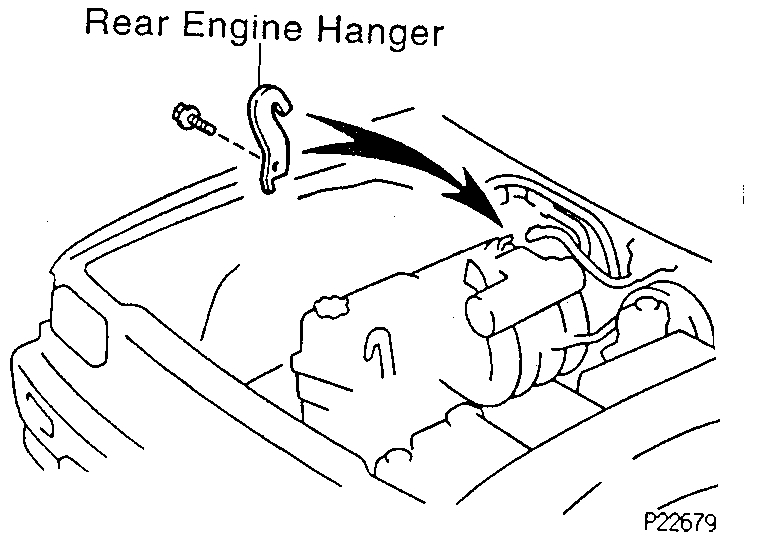
Pic 23
(a) Install a rear engine hanger in the correct direction.
Part No:
Engine hanger No. 2: 12282 - 75020
Bolt: 91512 - 61020 or equivalents.
Torque: 42 Nm (30 ft. Lbs.)
pic 24
(b) Attach the engine hoist chain to the 2 engine hangers.
Pic 25
(c) Remove the 4 bolts and nuts holding the engine front mounting insulators to the frame.
(d) Lift the engine with transmission out of the vehicle slowly and carefully.
CAUTION: Make sure the engine is clear of all wiring and hoses.
(e) Place the engine and transmission assembly onto the stand.
Pic 26
27. Separate engine and transmission.
_________________________________
Install
INSTALLATION
1. Install transmission to engine.
2. Install engine and transmission assembly in vehicle.
Pic 27
(a) Attach the engine hoist chain to the engine hangers.
(b) Lower the engine and transmission assembly into the engine compartment.
(c) Keep the engine level, and align the RH and LH mountings and body mountings.
Pic 28
(d) Attach the RH and LH mounting insulators to the body mountings, and temporarily install the 4 bolts and 4 nuts.
(e) Jack up and put the transmission onto the frame.
(f) Remove the hoist chain.
(g) Remove the bolt and rear engine hanger.
Pic 29
3. Install engine rear mounting bracket.
Torque:
Bolt A: 18 Nm (13 ft. Lbs.)
Bolt B: 25 Nm (19 ft. Lbs.)
4. Tighten RH and LH engine mounting insulator bolts and nuts.
Tighten the 4 bolts and nuts holding the mounting insulators to the body mountings.
Torque: 38 Nm (28 ft. Lbs.)
5. Connect starter wire.
Pic 30
6. M/T: Install clutch release cylinder.
(a) Connect the clutch line with the bolt.
Torque: 39 Nm (29 ft. Lbs.)
(b) Install the clutch release cylinder with the 2 bolts.
Torque: 13 Nm (9 ft. Lbs.)
pic 31
7. A/T: Install cross shaft.
Torque:
Bolt: 39 Nm (29 ft. Lbs.)
Nut: 18 Nm (13 ft. Lbs.)
8. Connect speedometer cable.
9. Install propeller shaft. Refer to Transmission and Drivetrain.
Pic 32
10. M/T: Install shift lever assembly.
Pic 33
11. Install front exhaust pipe.
(a) Install 2 new gaskets and the front exhaust pipe assembly with new 3 nuts.
Torque: 62 Nm (46 ft. Lbs.)
(b) Install the support bracket with the 2 bolts.
Torque: 39 Nm (29 ft. Lbs.)
(c) Connect a new gasket and the Three-Way Catalytic Converter (TWC) to the tailpipe with the 2 bolts and nuts.
Torque: 39 Nm (29 ft. Lbs.)
(d) Connect the heated oxygen sensor connector.
12. Connect engine wire to cabin.
13. Connect generator wire.
14. W/ Power Steering (PS): Connect PS pump.
15. Connect hoses.
Connect these hoses:
- Fuel return hose.
- Fuel inlet hose.
- Brake booster vacuum hose.
- Evaporative Emission (EVAP) hose.
- w/ PS: 2 air hoses for PS idle-up.
16. Connect heater hoses.
17. W/ A/C: Install A/C compressor.
Torque: 25 Nm (18 ft. Lbs.)
18. Install intake air connector.
Torque: 18 Nm (13 ft. Lbs.)
19. Install air cleaner assembly.
20. Connect these cables:
(a) Connect the throttle cable to the throttle body.
(b) w/ Cruise Control System: Connect the cruise control cable to the actuator, and install the actuator cover.
21. Install radiator. Refer to Cooling System.
22. Fill with engine oil.
23. Fill with engine coolant.
24. Fill transmission oil.
25. Start engine and check for leaks.
26. Install engine under cover.
27. Install hood.
28. Perform road test.
Check for abnormal noise, shock, slippage, and smooth operation.
29. Recheck engine coolant and engine oil levels.
__________________
Let me know if this helps.
Take care,
Joe
Images (Click to make bigger)
SPONSORED LINKS
Wednesday, July 31st, 2019 AT 8:37 PM