REMOVAL
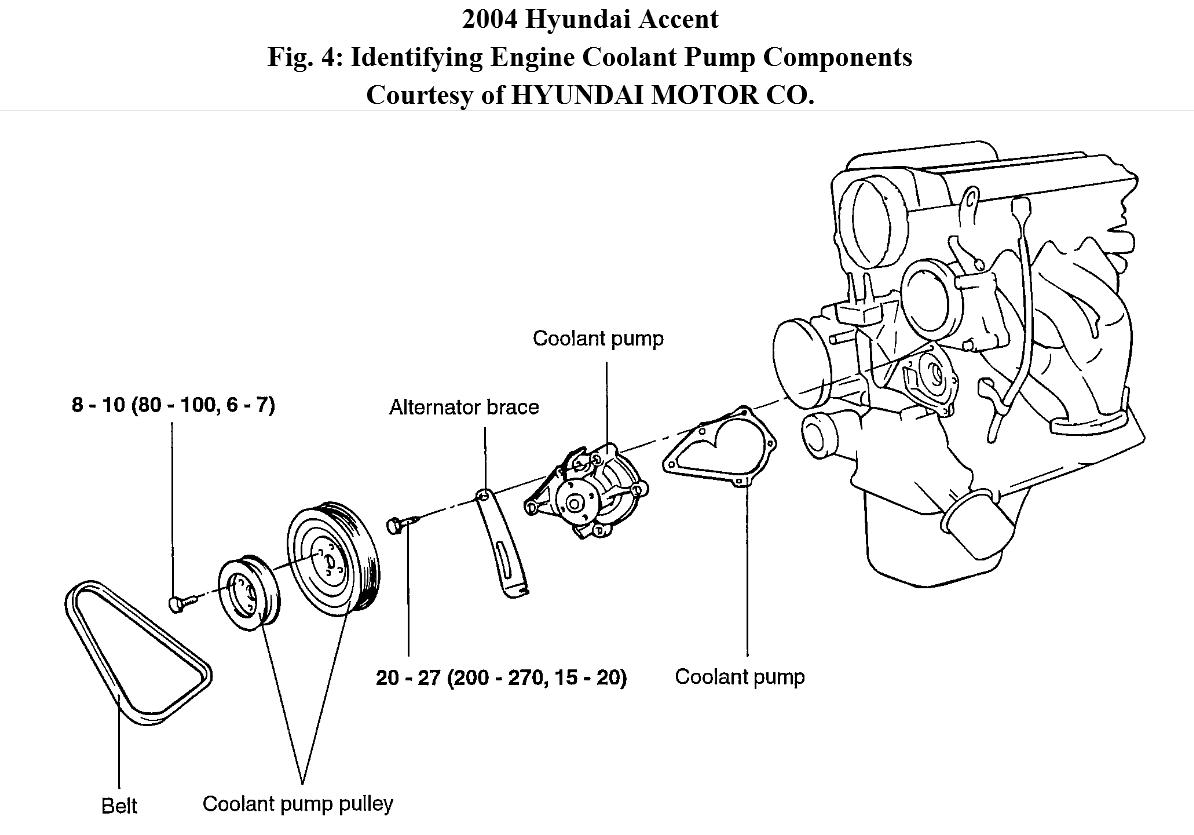
1. Drain the coolant and disconnect the coolant inlet pipe connection hose from the coolant pump.
2. Remove the drive belt and engine coolant pump pulley (loosen pulley bolts before removing drive belt).
3. Remove the timing belt covers and the timing belt idler (refer to timing belt).
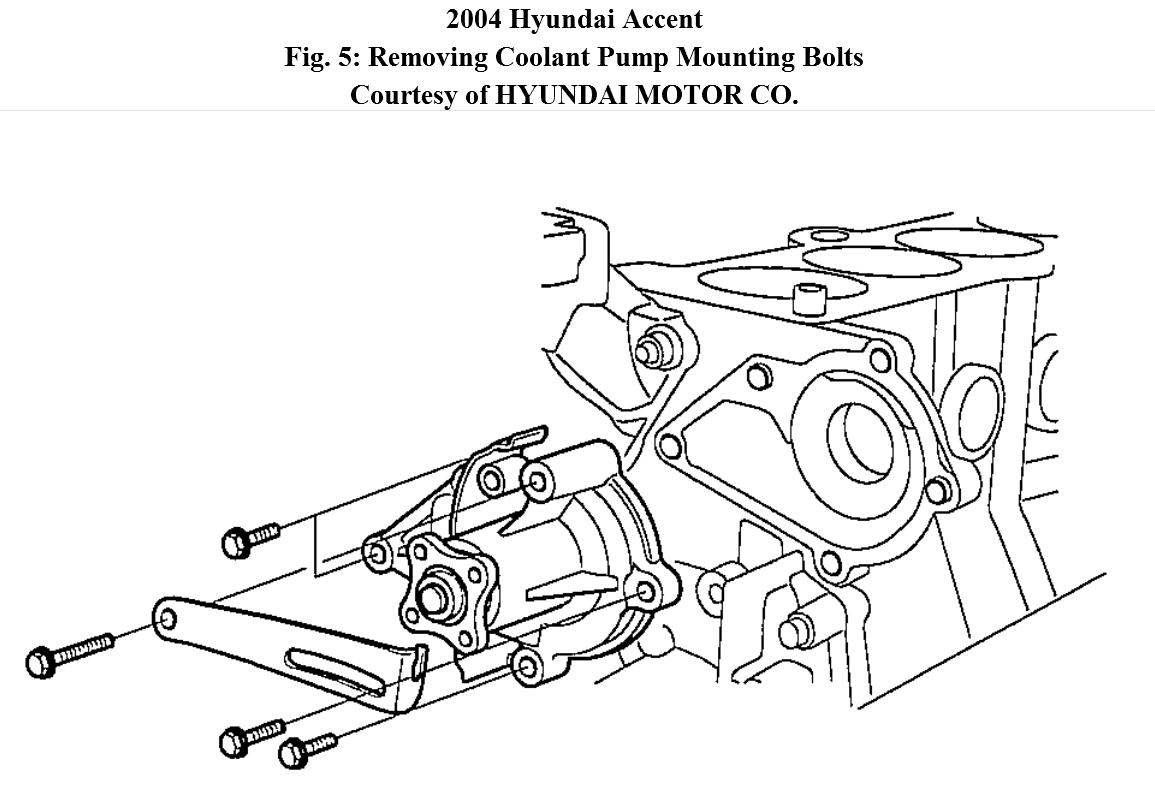
4. Remove the coolant pump mounting bolts, then remove the alternator brace.
5. Remove the coolant pump assembly from the cylinder block.
REMOVAL & INSTALLATION
TIMING BELT
CAUTION:
This application is an interference engine. Do not rotate camshaft or crankshaft when timing belt is removed, or engine damage may occur.
Removal
1. Lift vehicle using a jack. Remove engine support bracket, if necessary. Loosen, but do not remove water pump pulley bolts. Remove all accessory drive belts. Remove pulleys from crankshaft and water pump.
CAUTION:
DO NOT rotate engine counterclockwise. If reusing timing belt, place reference mark on timing belt to indicate direction of rotation before removal.
2. Remove timing belt covers and gaskets, noting bolt length and location. Rotate crankshaft clockwise to align timing marks on crankshaft and camshaft sprockets.
3. If reusing old belt, place mark on belt to indicate direction of belt rotation. Loosen timing belt tensioner bolts, and move tensioner inward
toward water pump. Temporarily tighten bolt in slotted side of tensioner. Remove timing belt.
Installation
1. Ensure camshaft and crankshaft timing marks are still aligned. Move timing belt tensioner toward water pump and tighten bolt. Install crankshaft sprocket (if removed) with chamfer (flange) toward engine.
2. Install timing belt on crankshaft sprocket, timing belt idler, camshaft sprocket and timing belt tensioner. Make sure there is no slack in belt. If reusing old belt, ensure belt is installed in original direction of rotation.
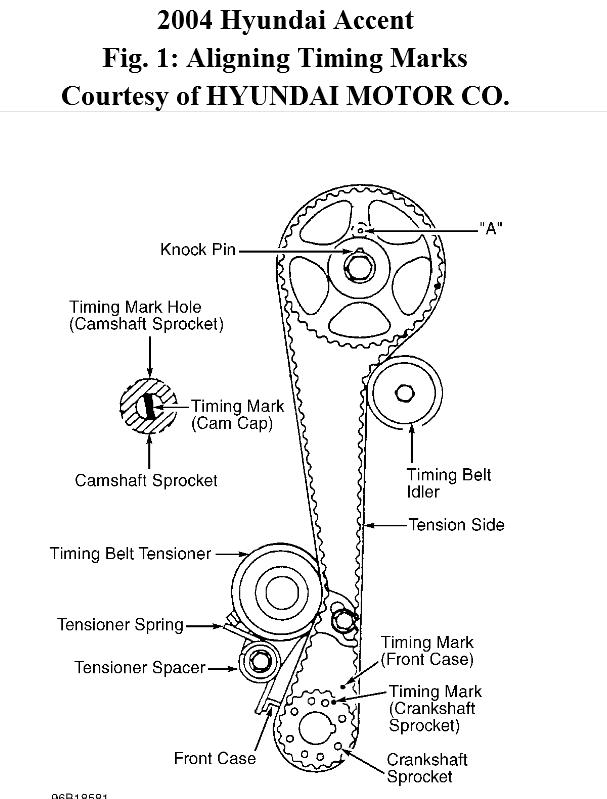
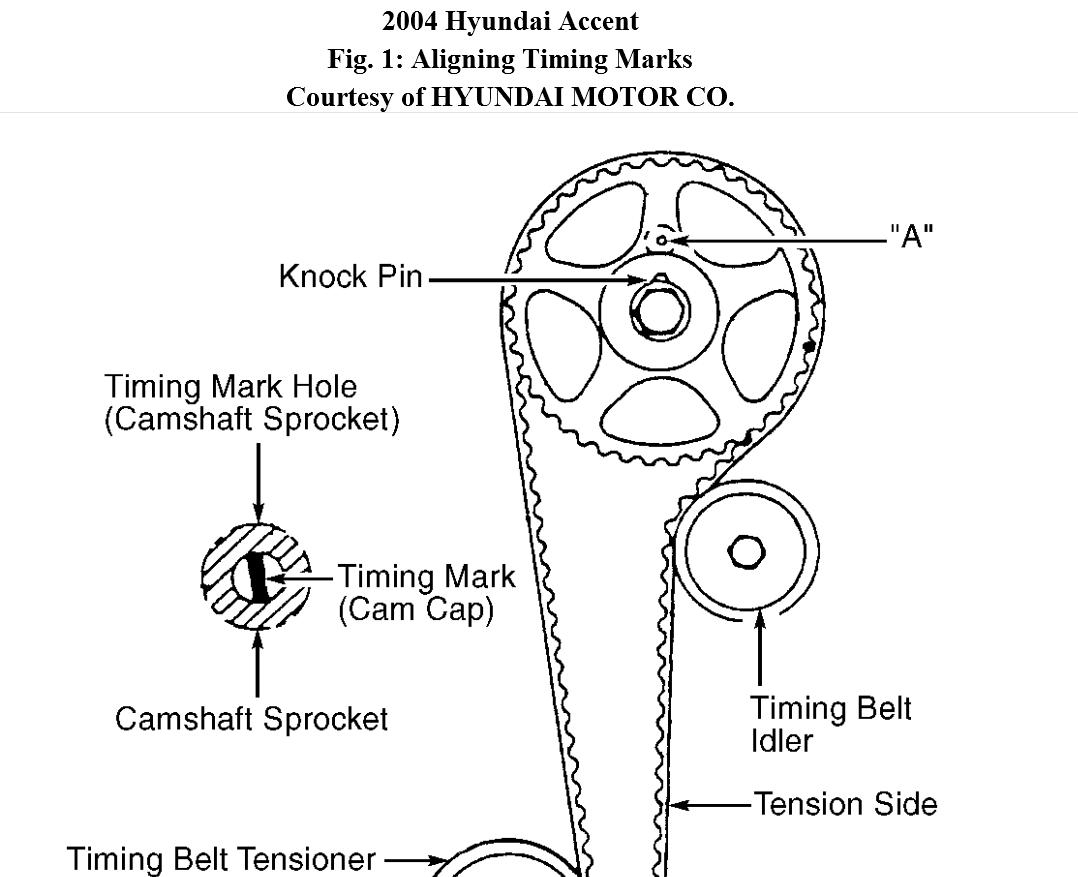
3. Apply counterclockwise force on camshaft sprocket to apply tension on tension side of belt. Ensure all timing marks are aligned. See Fig. 1 .
CAUTION:
Slot-side timing belt tensioner bolt must be tightened before pivot-side to prevent belt tensioner from rotating, causing belt to be overtightened
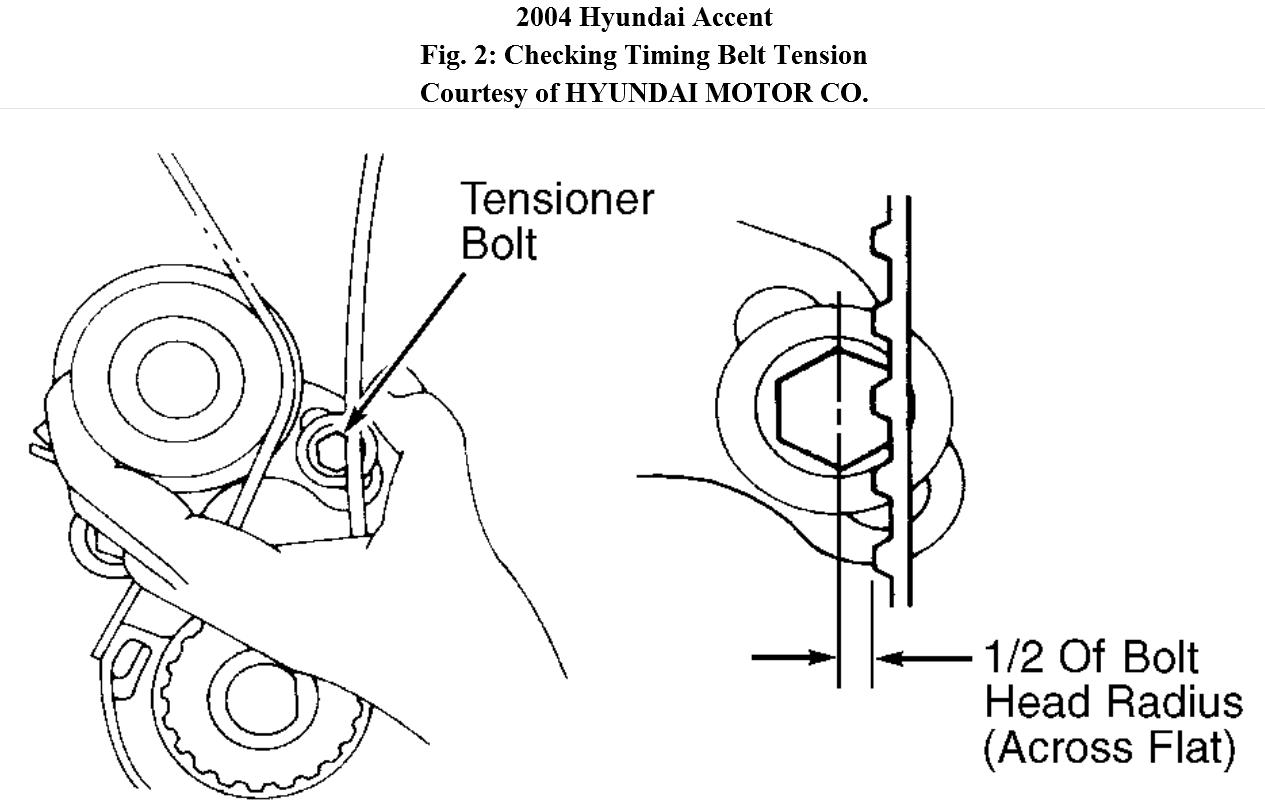
4. Loosen timing belt tensioner bolts to place tension on timing belt. See Fig. 2 . Tighten timing belt tensioner bolts to specification.
5. Smoothly rotate crankshaft clockwise for 2 full revolutions. Realign crankshaft and camshaft timing marks. To check belt tension, hold belt tensioner and timing belt together and apply slight thumb pressure (about 11 lbs.) at center point of belt tensioner. See Fig. 2 .
6. Ensure belt cog will reach half the width of timing belt tensioner bolt on slot-side of belt tensioner. Install crankshaft flange. Install timing belt cover. To install remaining components, reverse removal procedure. Adjust drive belts to proper tension.
Images (Click to enlarge)
Oct 24, 2012 at 3:07 PM