Job is not too difficult but requires the door trims to be removed to replace the door outer handle.
FRONT DOOR OUTER HANDLE REPLACEMENT
NOTE:
Put on gloves to protect your hands.
1. Remove these items:
• Door panel
• Plastic cover, as necessary
2. Raise the glass fully.
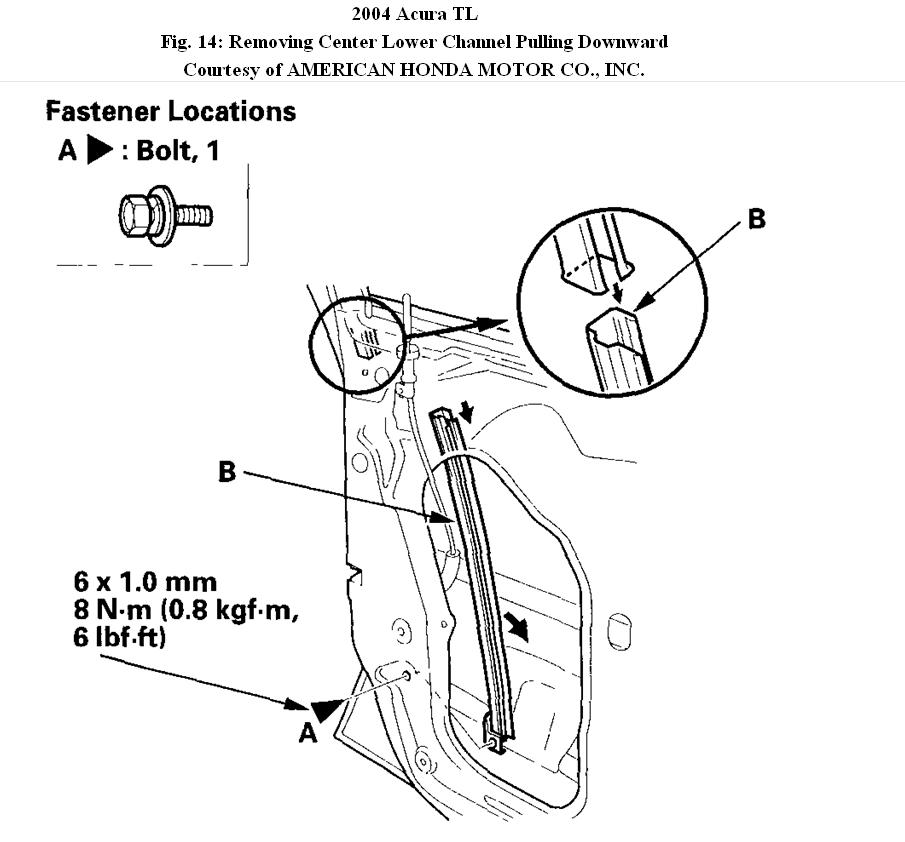
3. Remove the bolt (A), then remove the center lower channel (B) by pulling it downward.
NOTE:
Be careful of sharp edges.
Fig. 14: Removing Center Lower Channel Pulling Downward
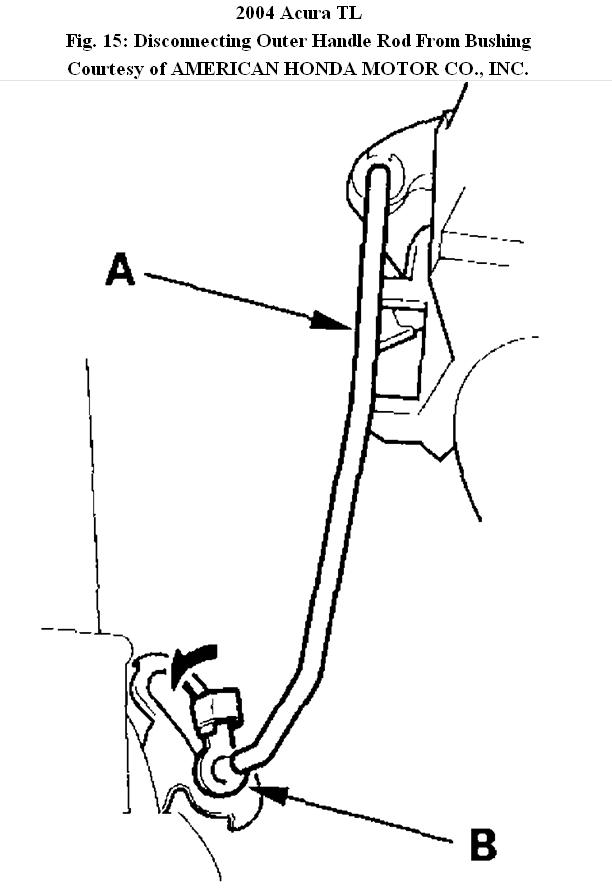
4. Disconnect the outer handle rod (A) from the bushing (B).
NOTE:
Check the bushing for damage and replace if necessary.
Fig. 15: Disconnecting Outer Handle Rod From Bushing
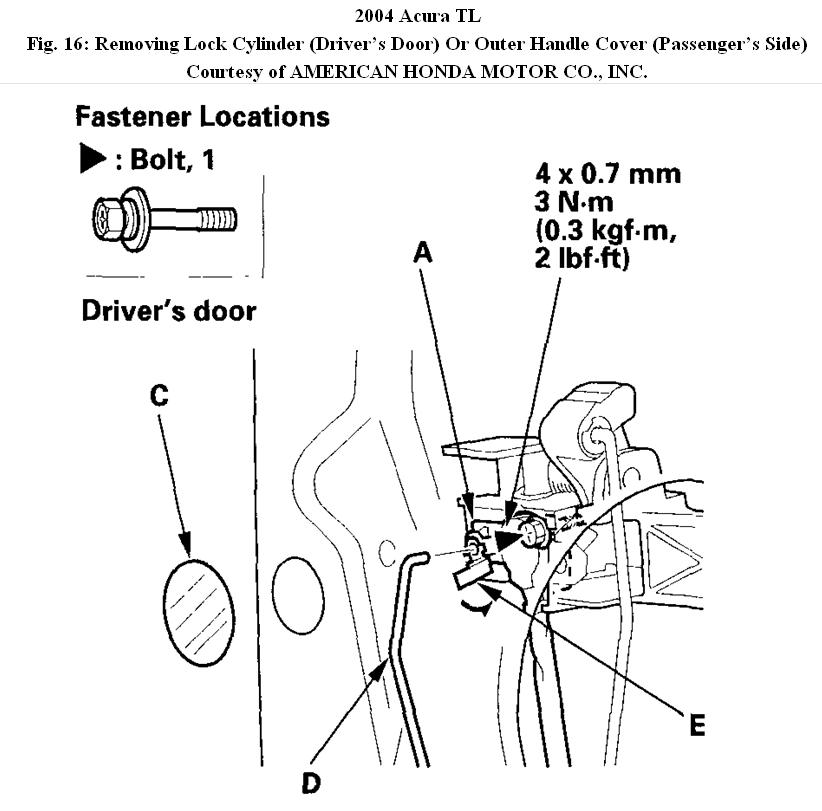
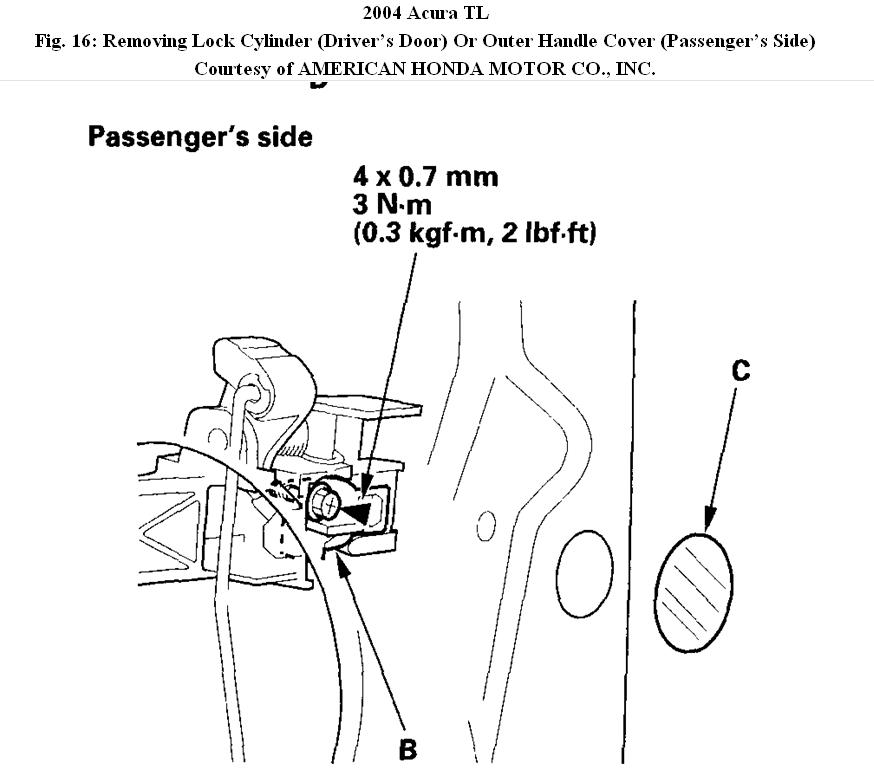
5. Remove the lock cylinder (A) (driver's door) or outer handle cover (B) (passenger's side).
? - Remove the maintenance hole seal (C).
? - Loosen the bolt securing the lock cylinder (driver's door), or outer handle cover (passenger's side).
? - Disconnect the cylinder rod (D) (driver's door) from the bushing (E).
NOTE:
• Hold the lock cylinder (driver's door) or outer handle cover (passenger's side) with your hand to prevent it from falling when removing the bolt.
• Check the bushing for damage and replace if necessary.
Fig. 16: Removing Lock Cylinder (Driver's Door) Or Outer Handle Cover
(Passenger's Side)
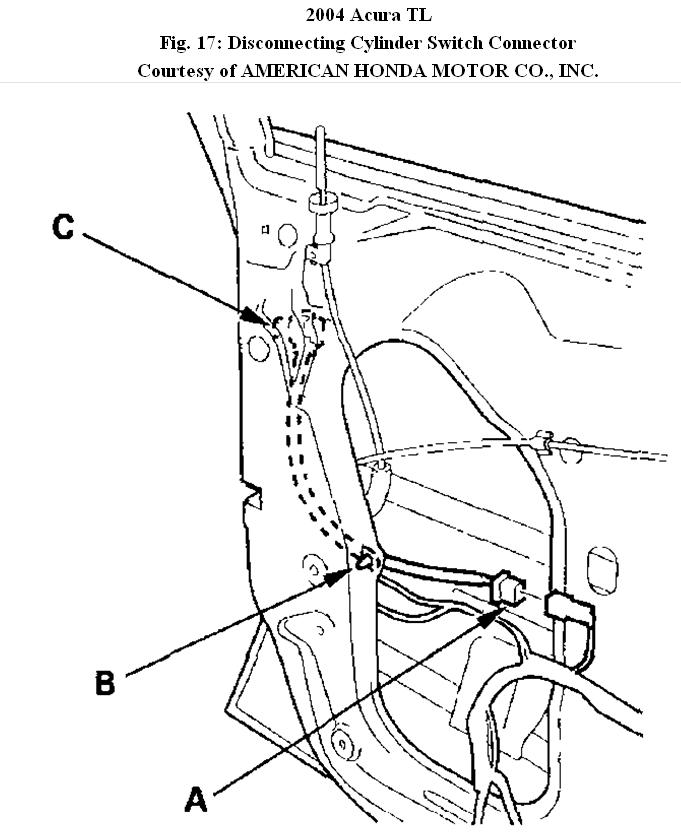
6. Disconnect the cylinder switch connector (A), and detach the harness clip (B), then remove the cylinder switch (C) (driver's door).
Fig. 17: Disconnecting Cylinder Switch Connector
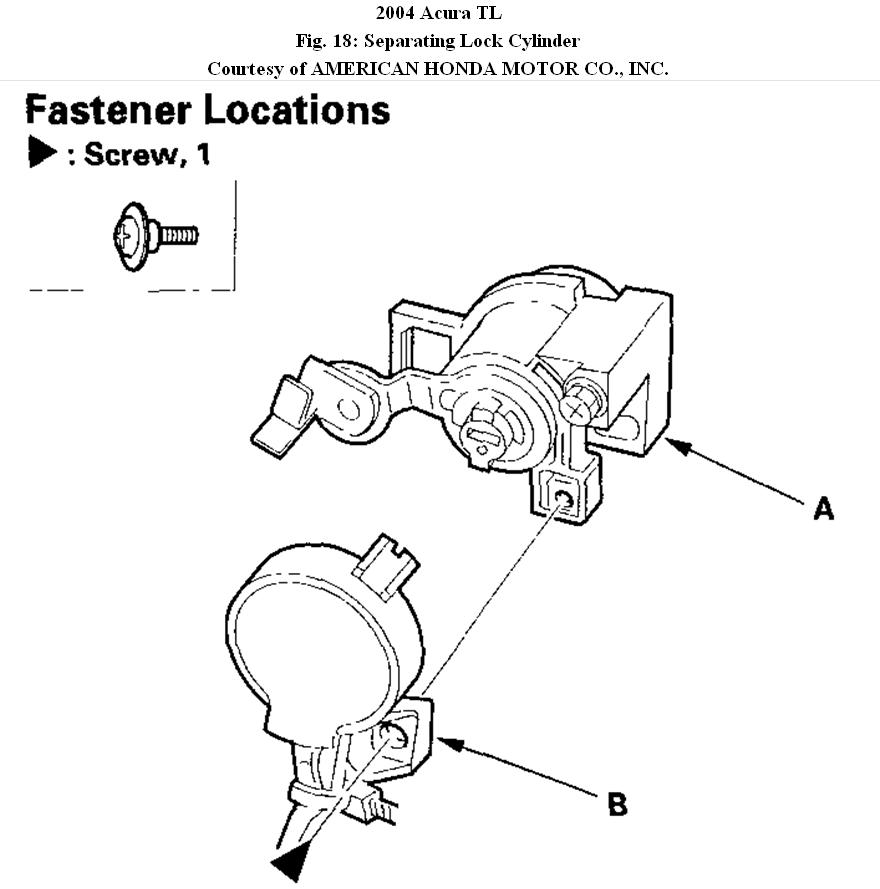
7. Remove the screw, then separate the lock cylinder (A), cylinder switch (B) (driver's door).
NOTE:
Keep your hand over the outer handle cover to prevent it from falling during removal.
Fig. 18: Separating Lock Cylinder
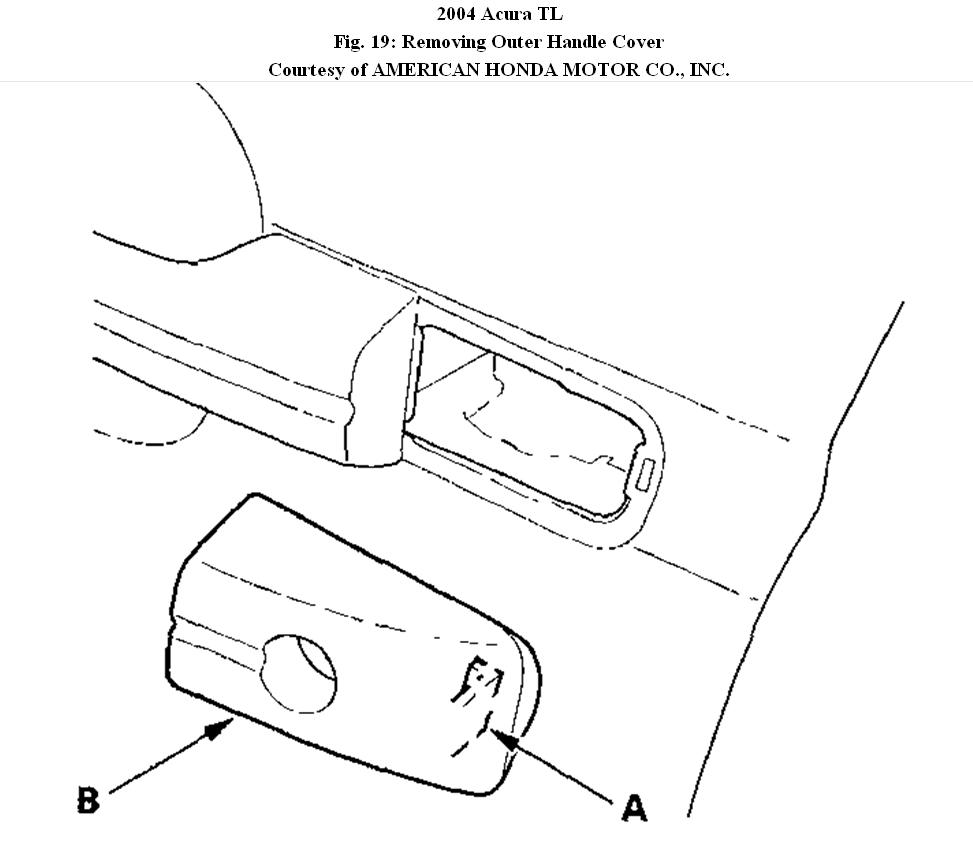
8. Release the hook (A), and then remove the outer handle cover (B).
Fig. 19: Removing Outer Handle Cover
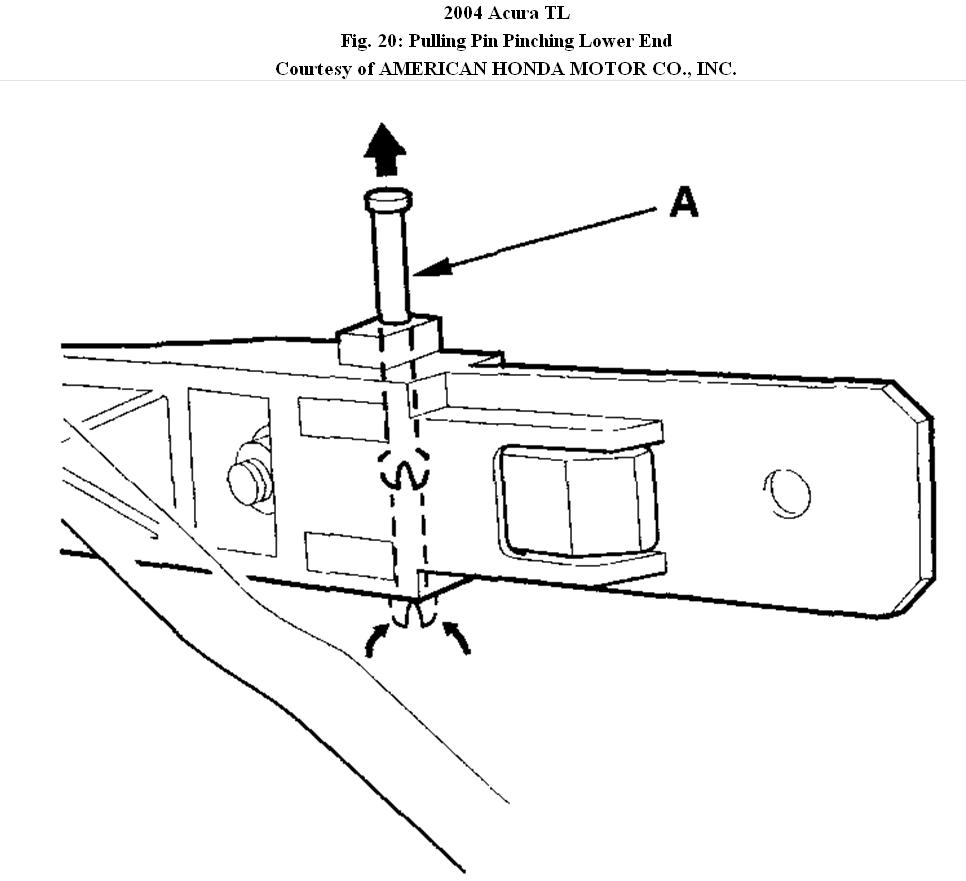
9. Pull the pin (A) up while pinching its lower end.
Fig. 20: Pulling Pin Pinching Lower End
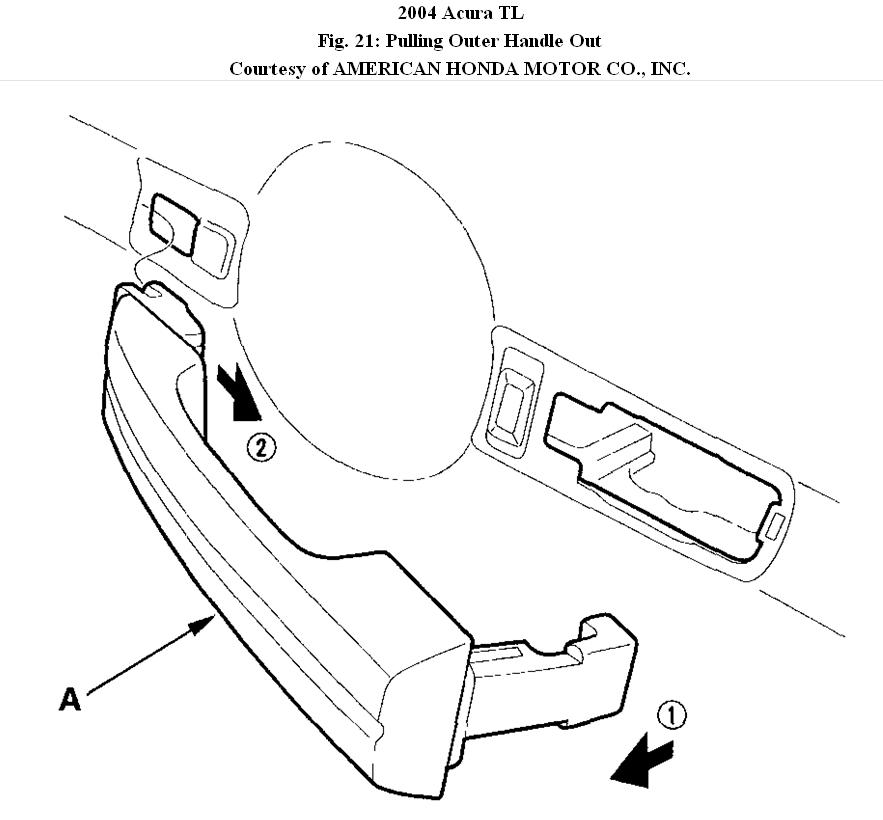
10. Pull the outer handle (A) out, and then back as shown to remove it from the door panel. Take care not to scratch the door.
Fig. 21: Pulling Outer Handle Out
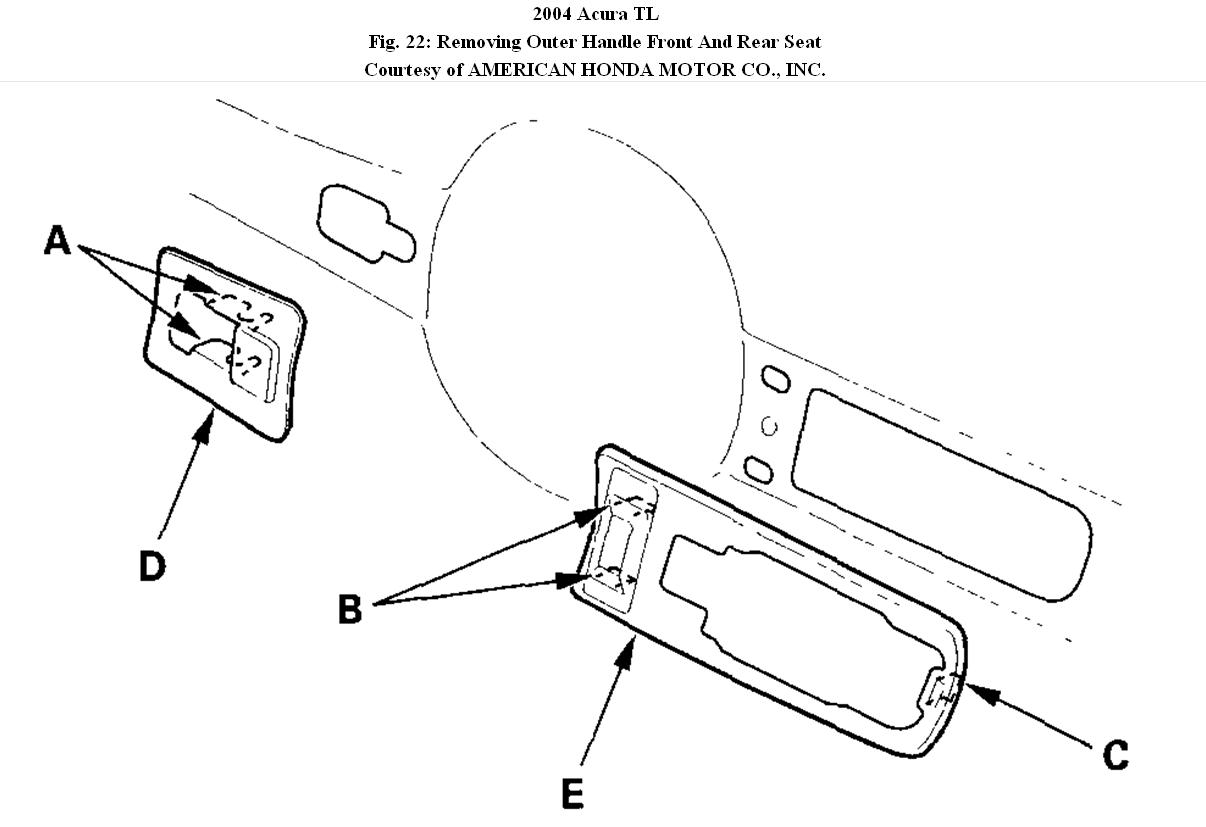
11. Release the hooks (A, B, C), then remove the outer handle front seat (D) and outer handle rear seat (E).
Fig. 22: Removing Outer Handle Front And Rear Seat
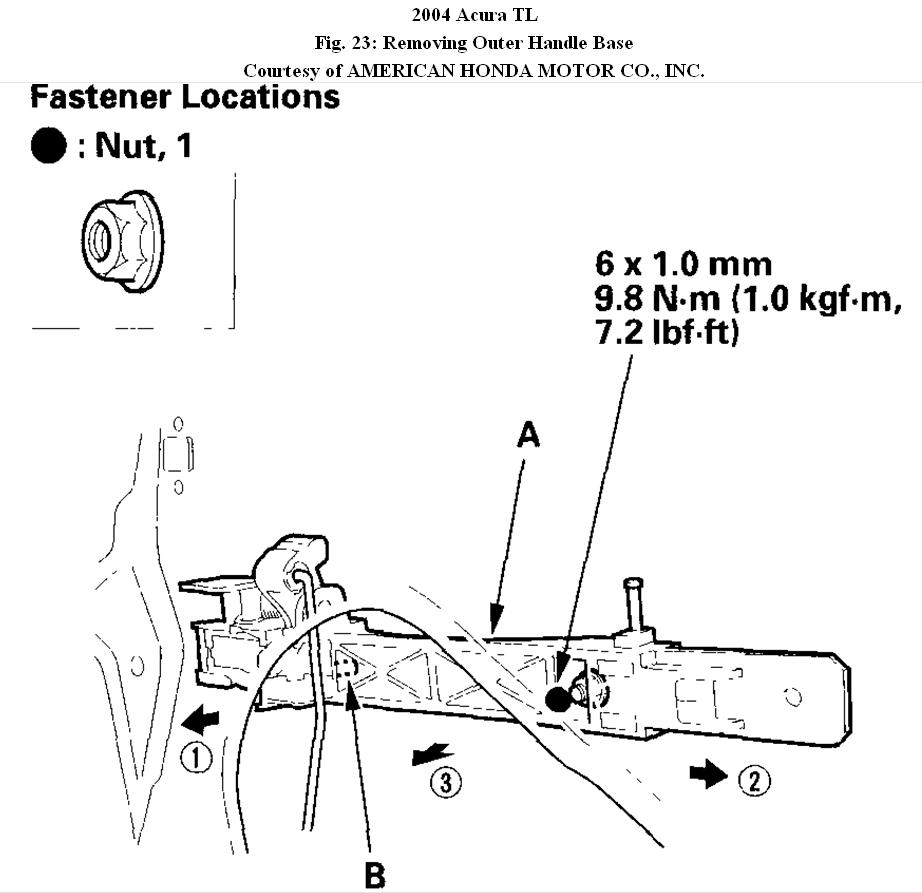
12. Remove the outer handle base (A).
? - Loosen the nut.
? - Release the tab (B) and slide the outer handle base forward.
Fig. 23: Removing Outer Handle Base
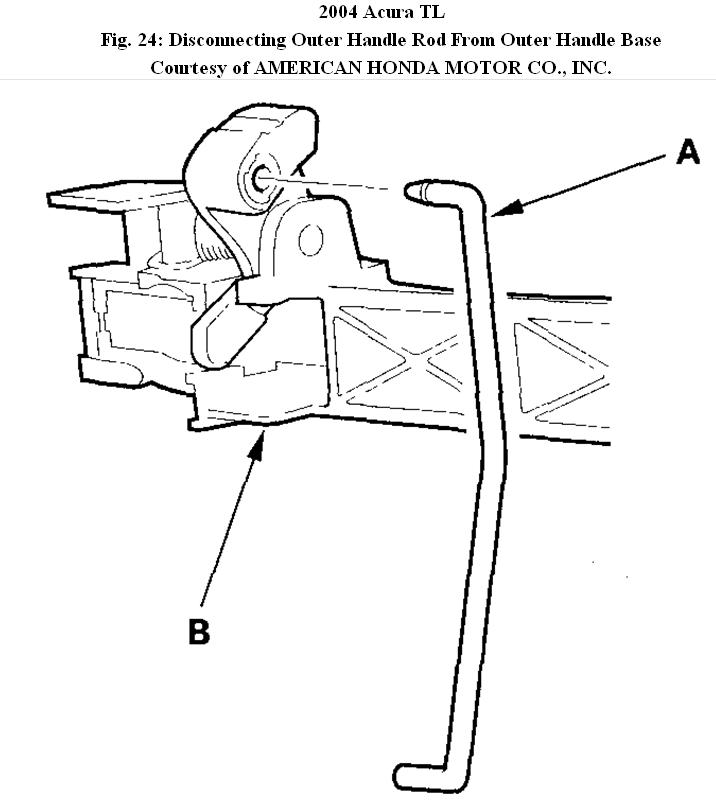
13. Disconnect the outer handle rod (A) from outer handle base (B).
Fig. 24: Disconnecting Outer Handle Rod From Outer Handle Base
14. Install the handle in the reverse order of removal, and note these items:
• Reinstall the lock cylinder (driver's door) or the outer handle holder (passenger's door) before installing the outer handle cover.
• Make sure the cylinder switch harness is routed properly (driver's door).
• Make sure the cylinder switch connector is plugged in properly, and each rod is connected securely (driver's door).
• Make sure the door key cylinder/door locks operate properly (driver's door).
• Make sure the door handle works properly.
• When reinstalling the door panel, make sure the plastic cover is installed properly and sealed around its outside perimeter to prevent water leaks.
© 2008 Mitchell Repair Information Co., LLC.
Images (Click to enlarge)
Feb 7, 2011 at 9:28 AM