Hi,
To replace the parking brake shoe on this vehicle, you will need to remove the brake pads, calipers, caliper mount, and then the rotor. It can take a little time. However, if you follow the directions, you should be fine.
Here are the directions specific to your vehicle. The pics below correlate with the directions.
_________________________________________
2003 Toyota Camry Sedan L4-2.4L (2AZ-FE)
Procedures
Vehicle Brakes and Traction Control Parking Brake System Parking Brake Shoe Service and Repair Procedures
PROCEDURES
pic 1
pic 2
pic 3
pic 4
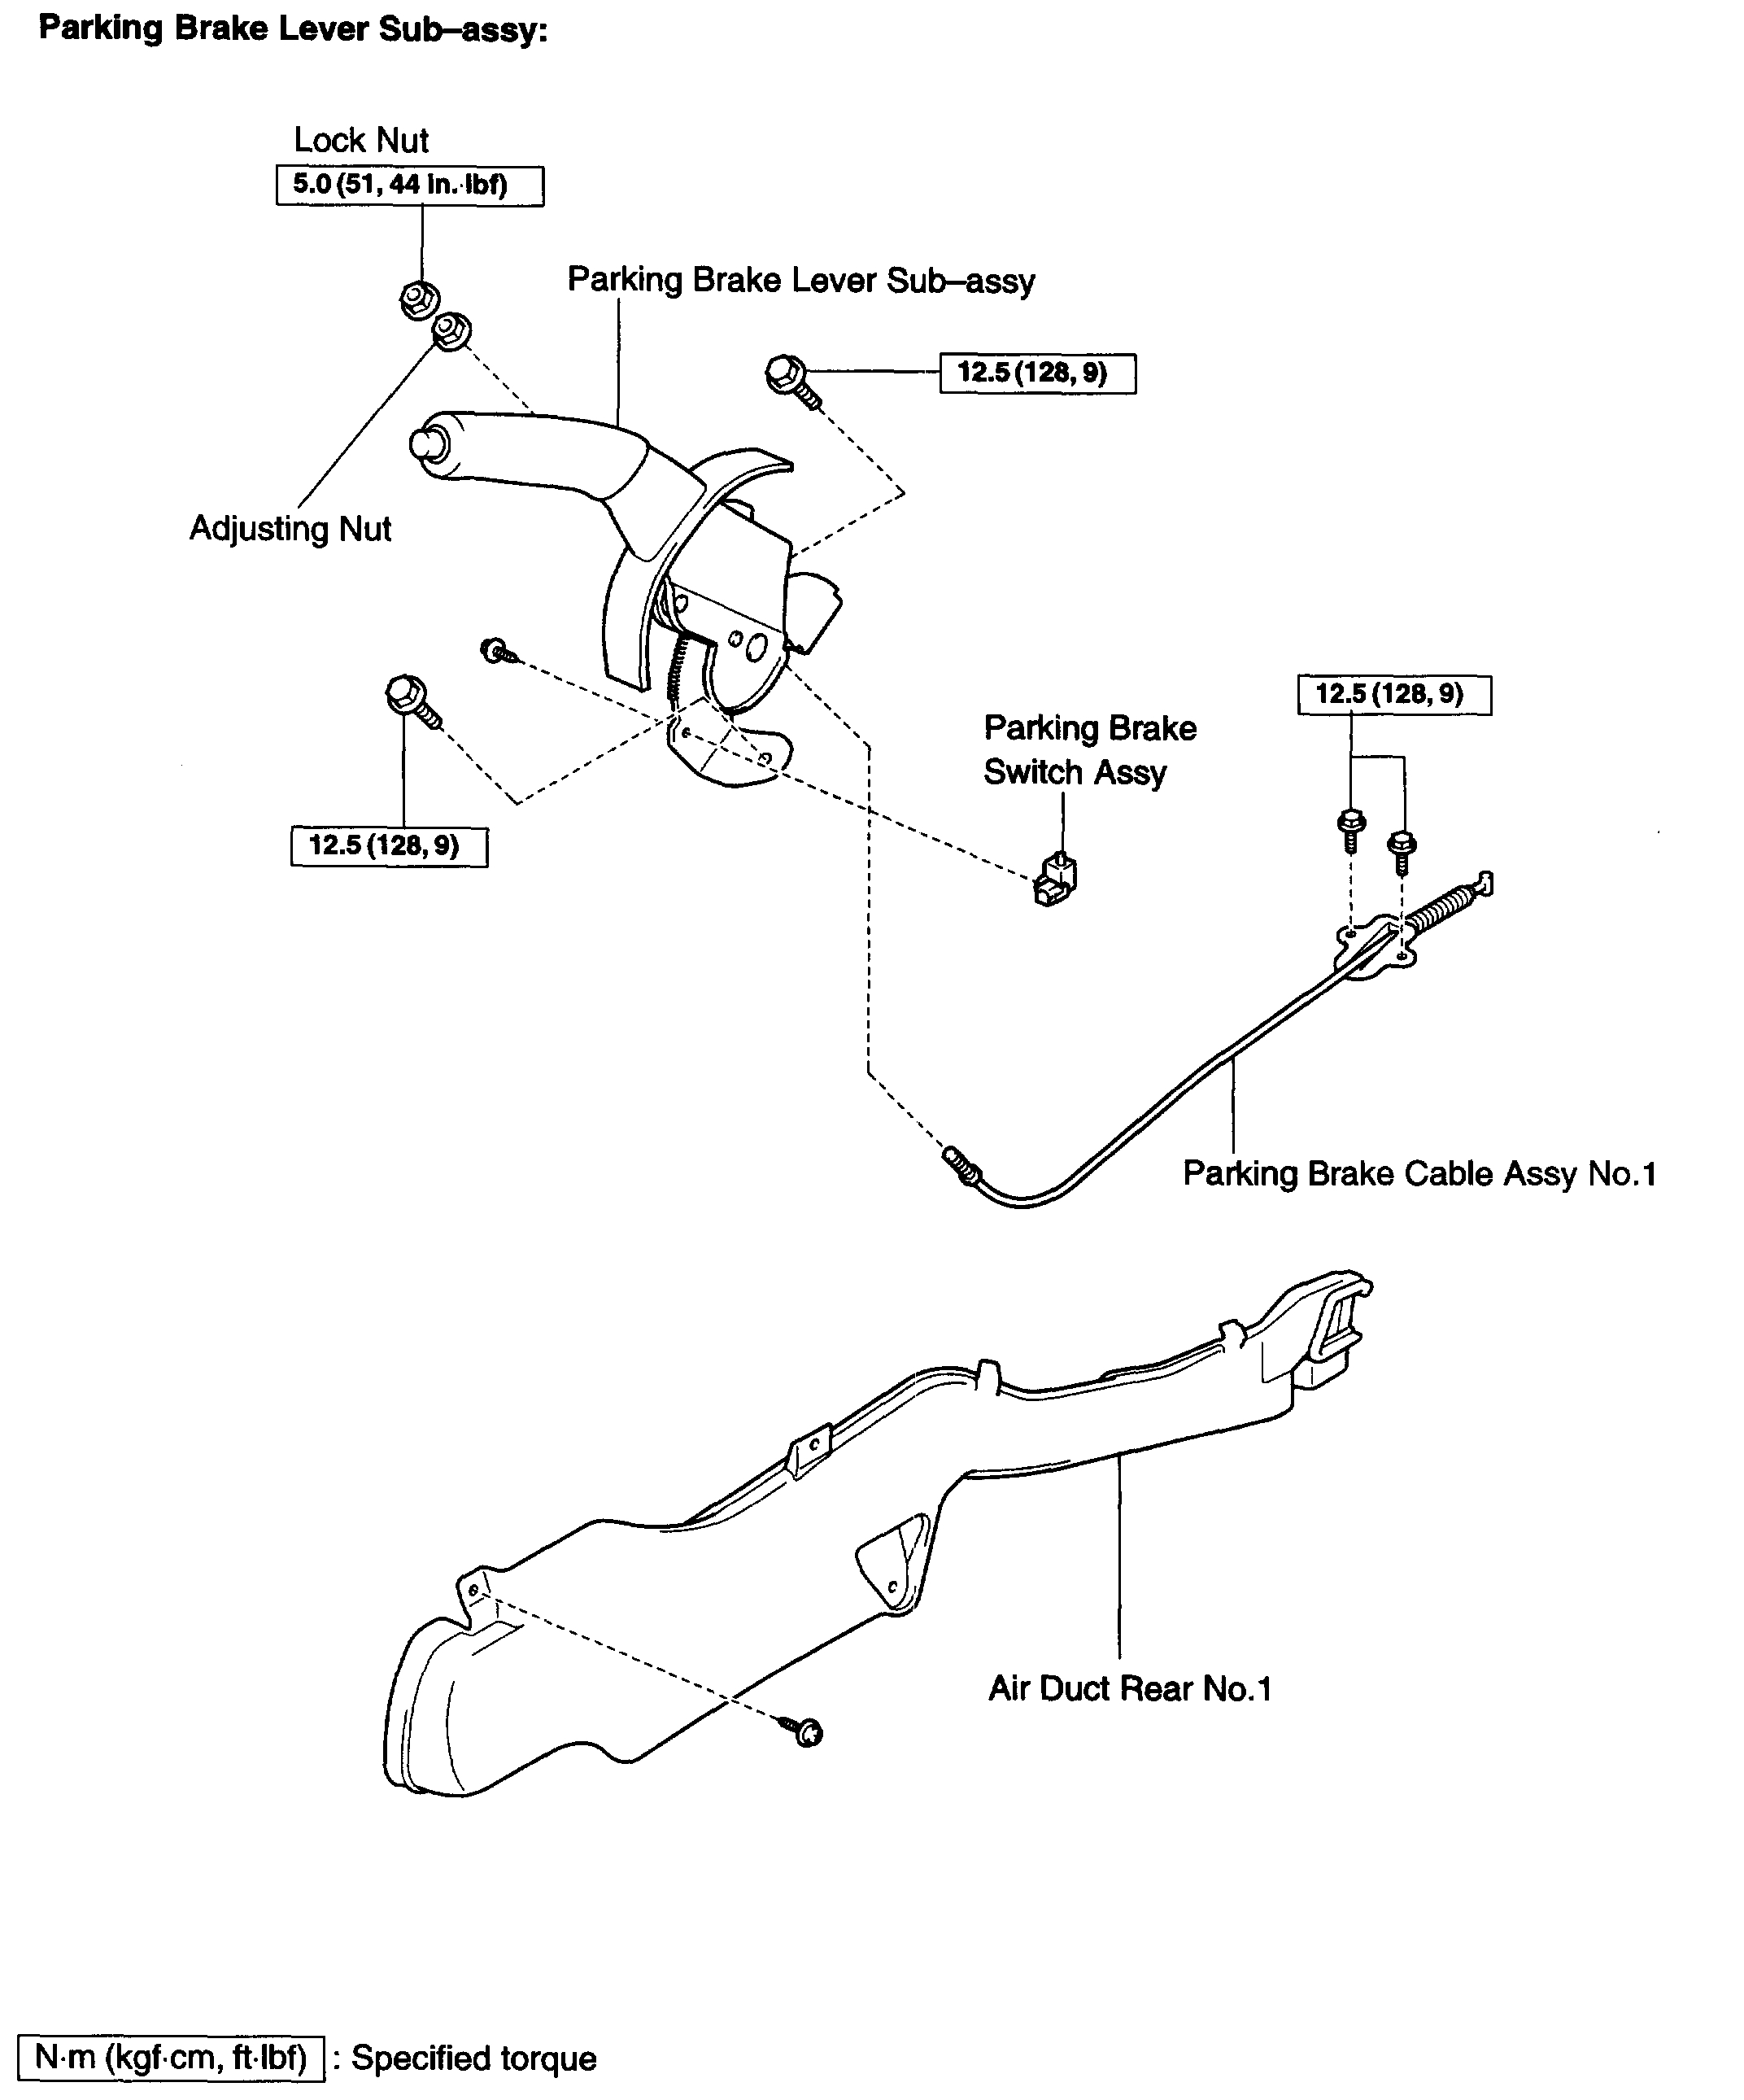
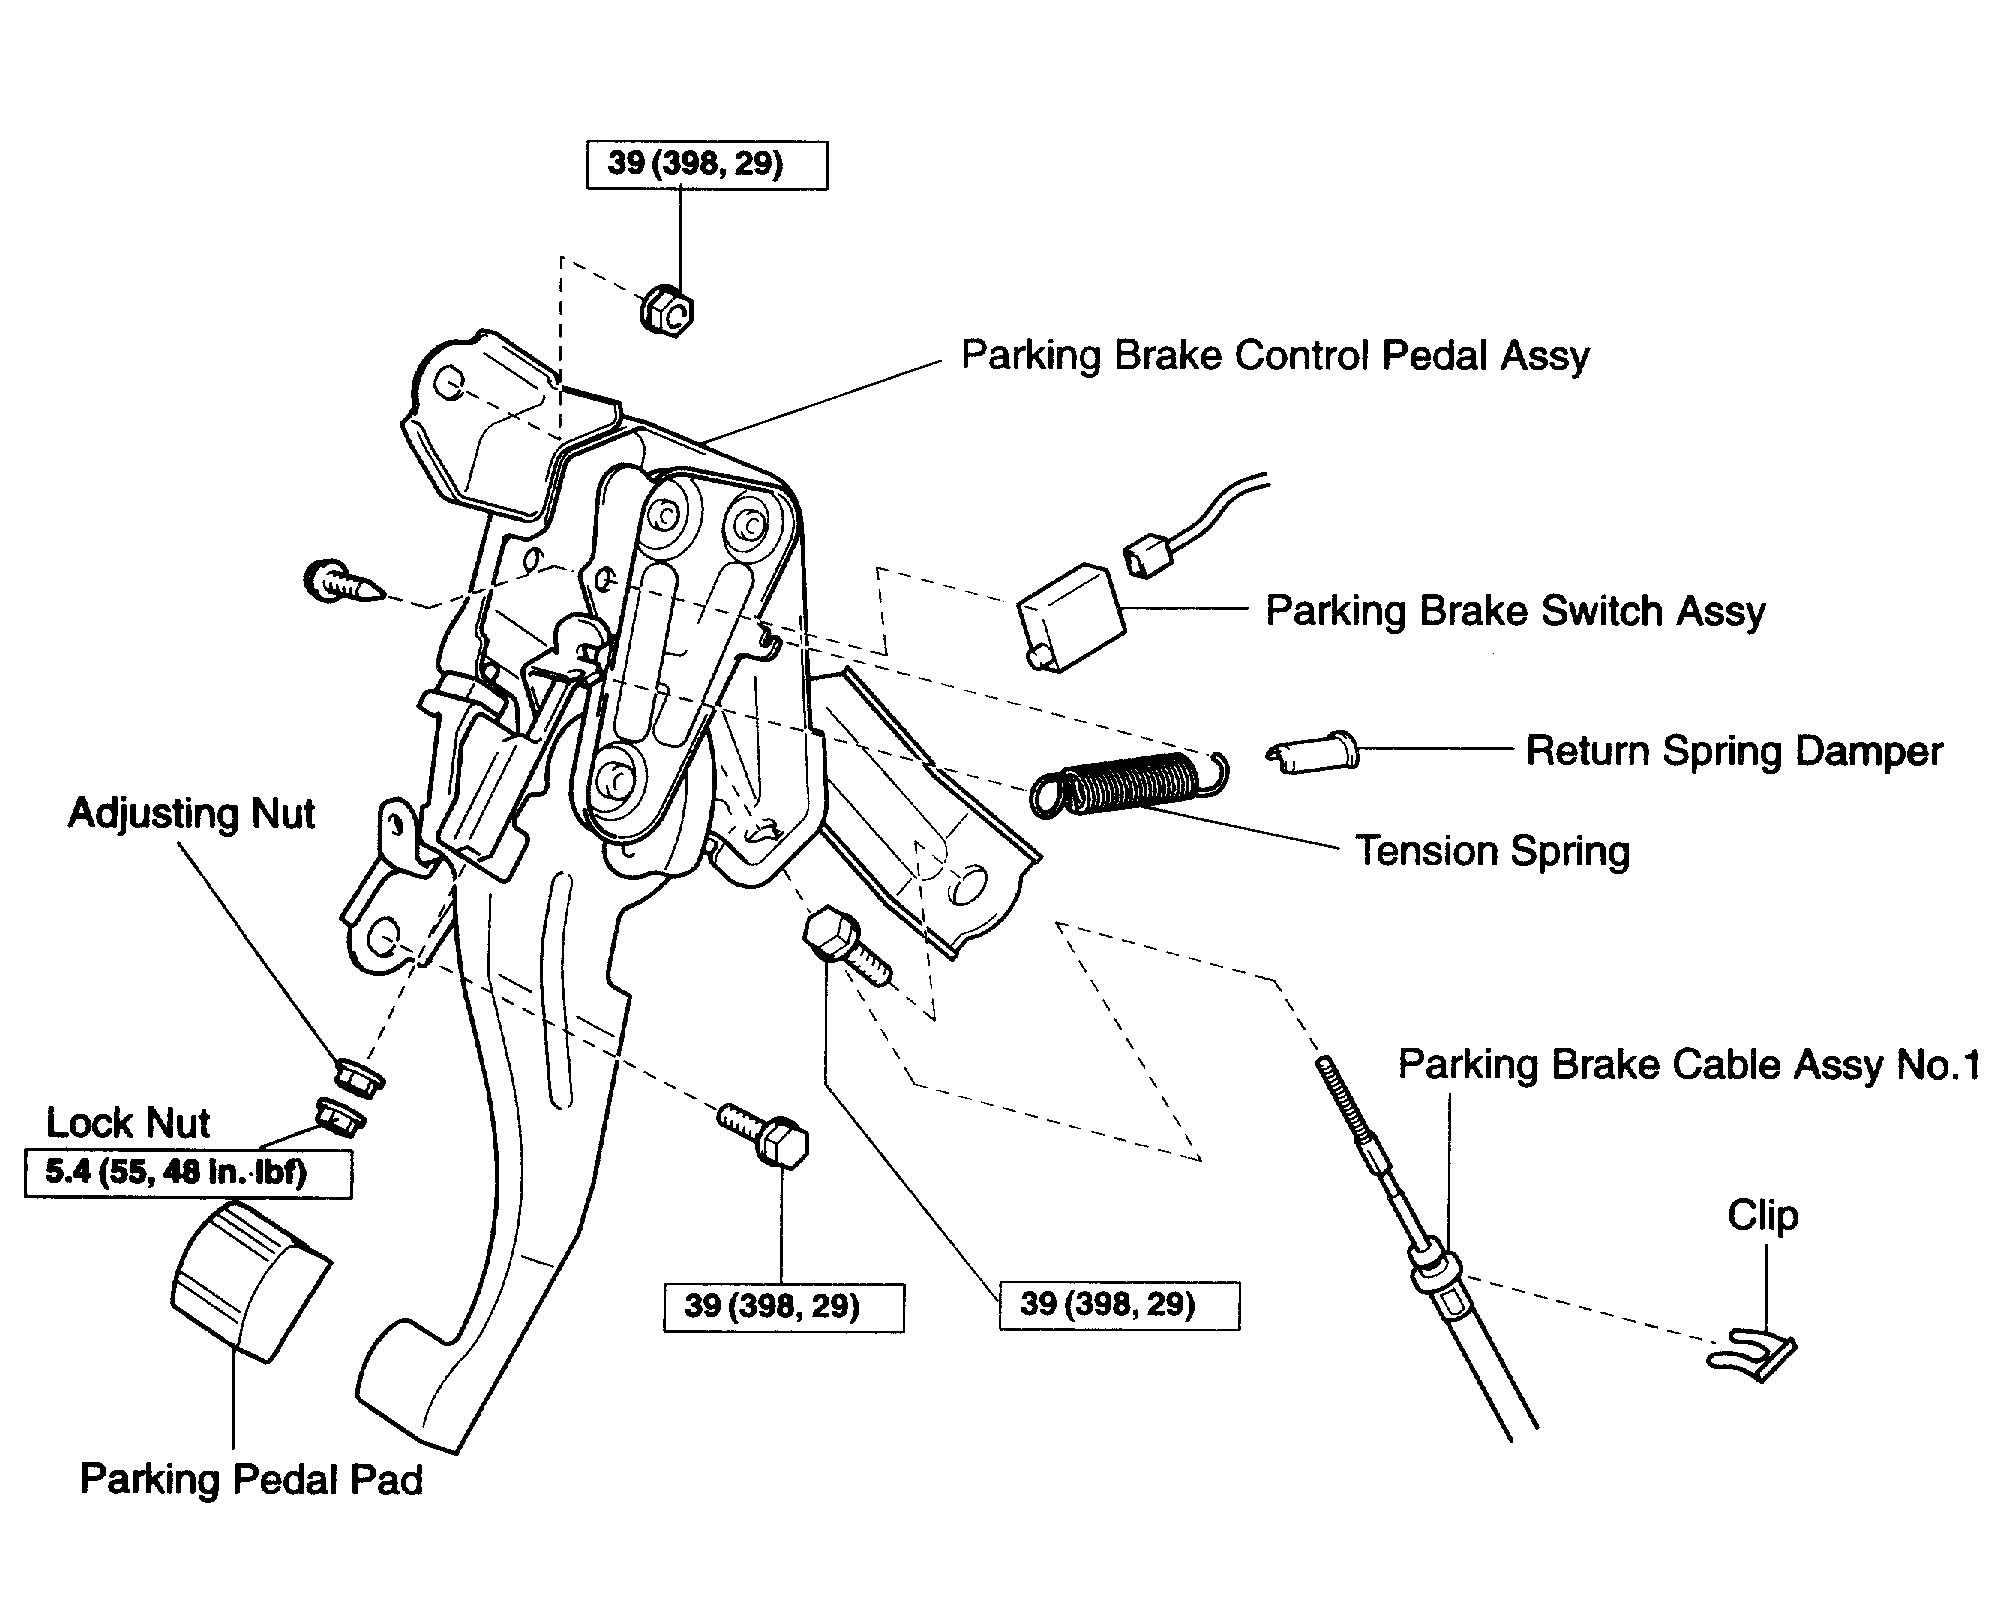
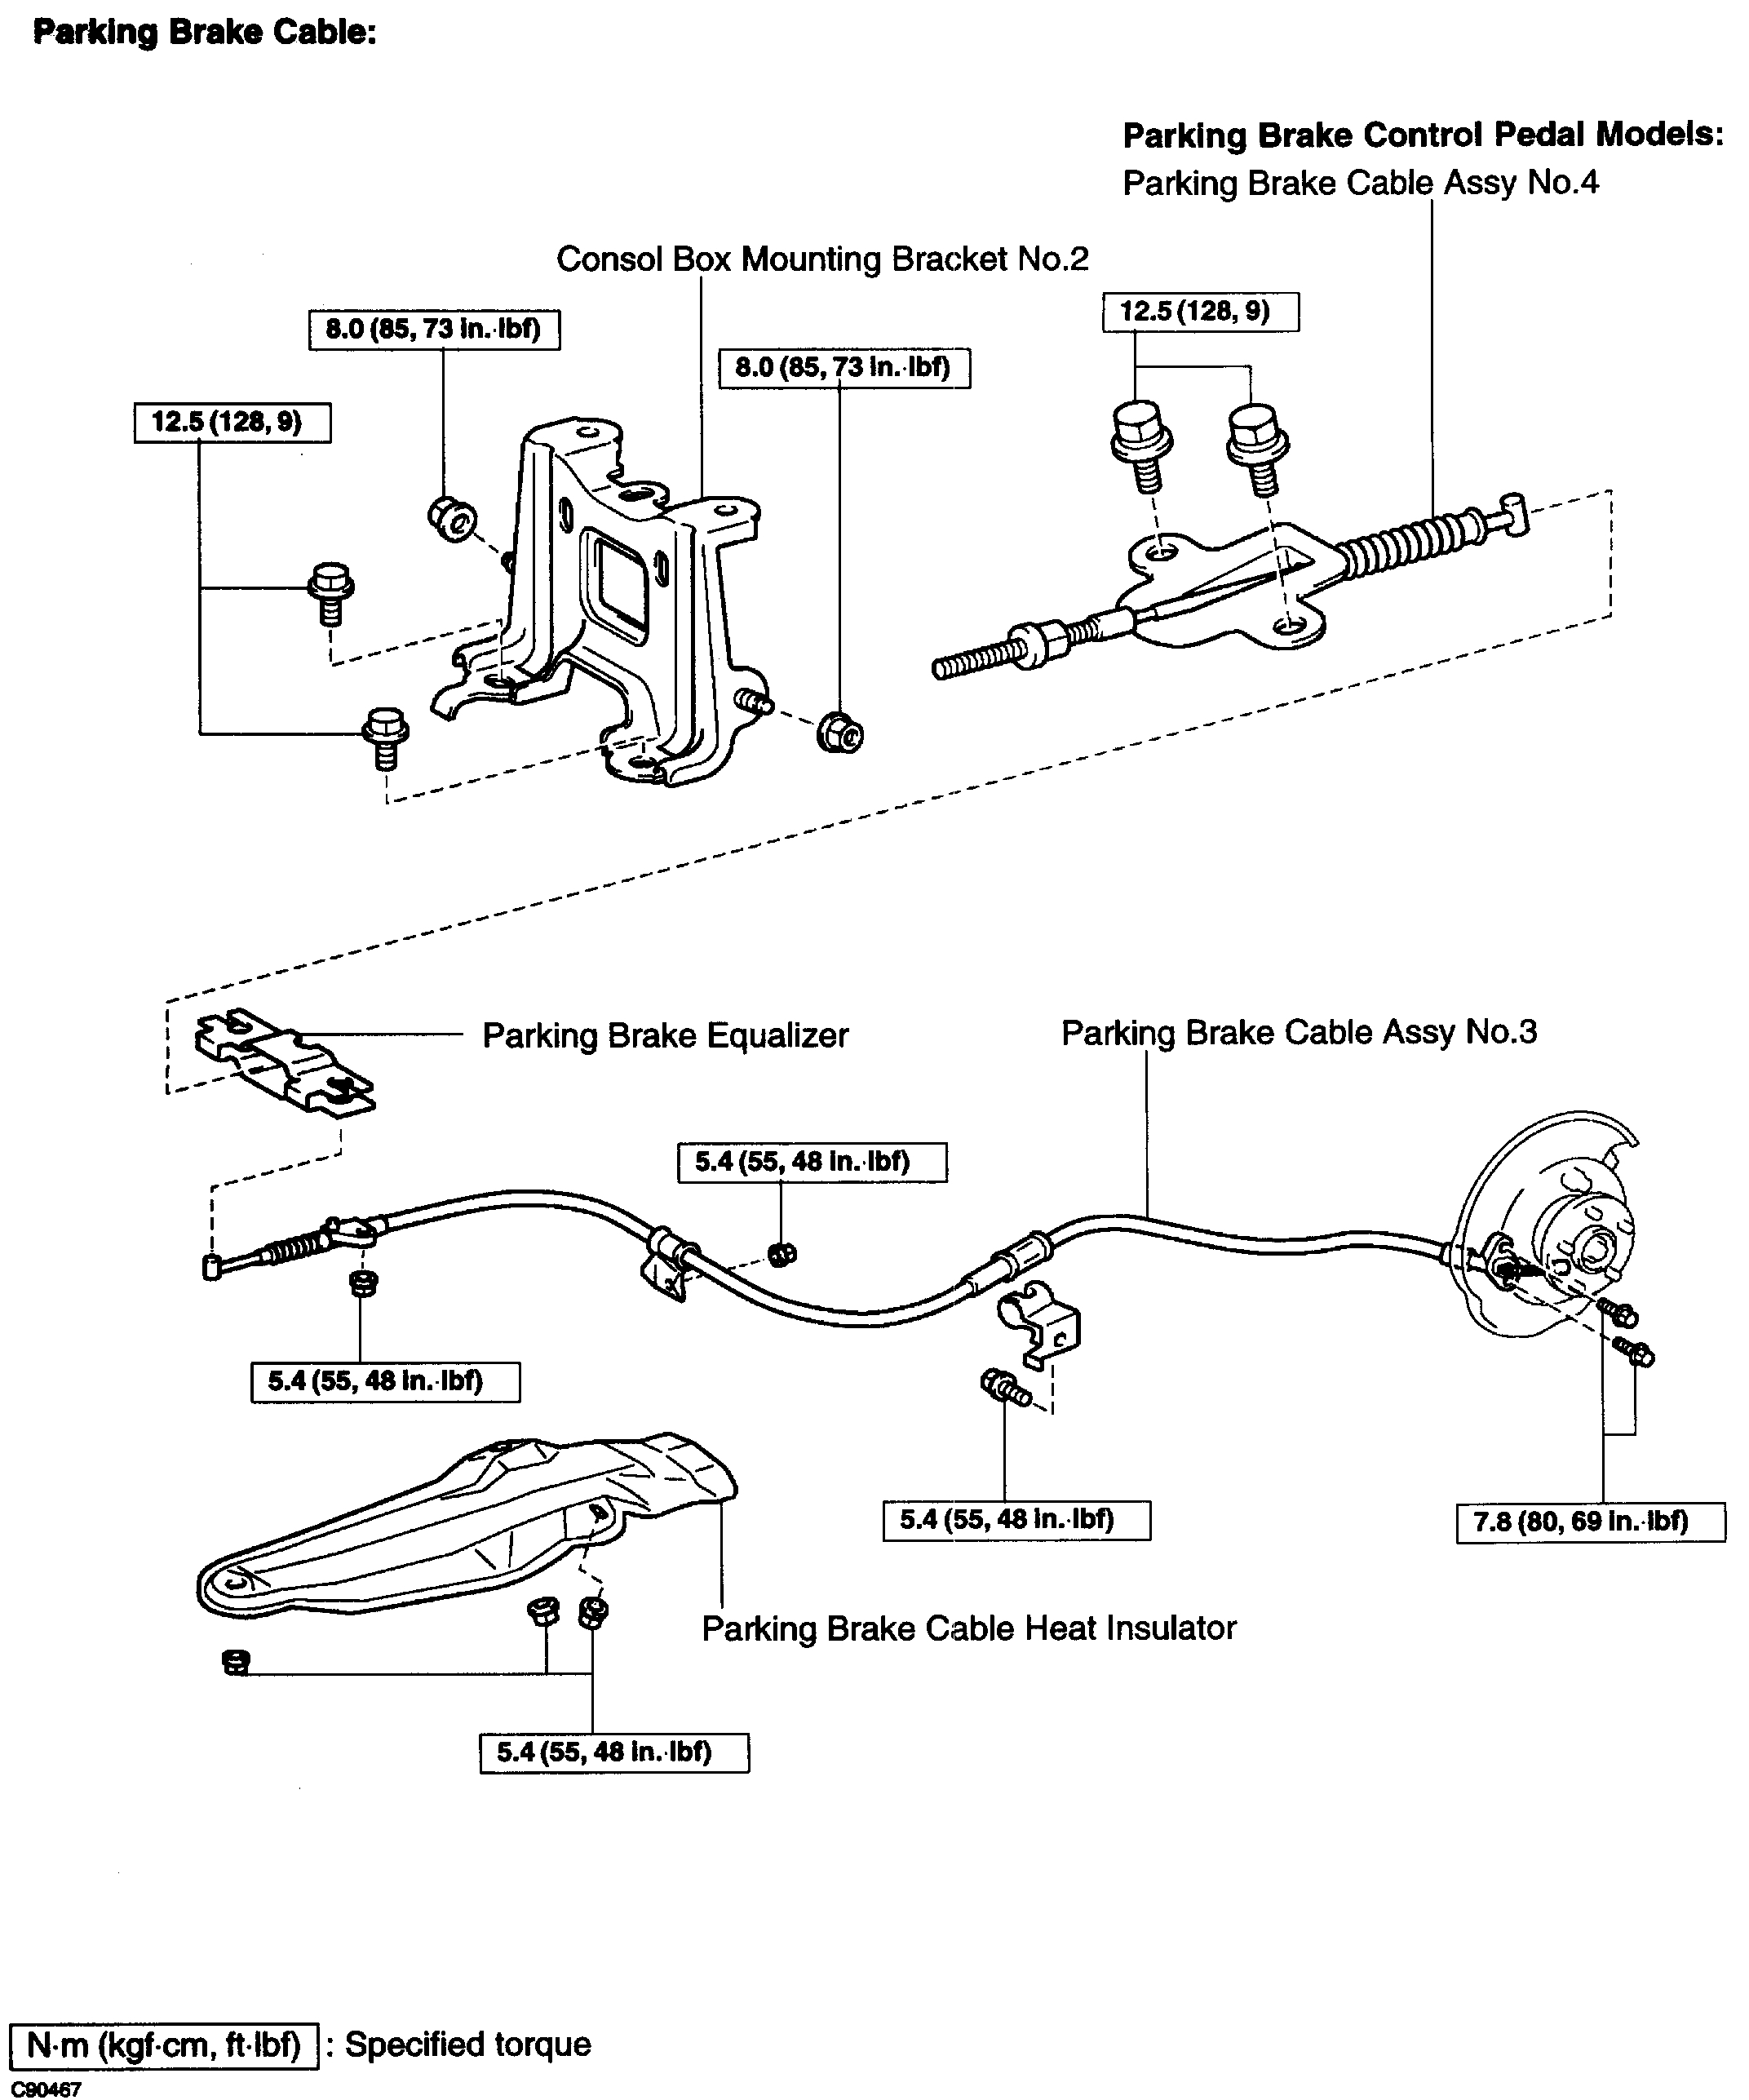
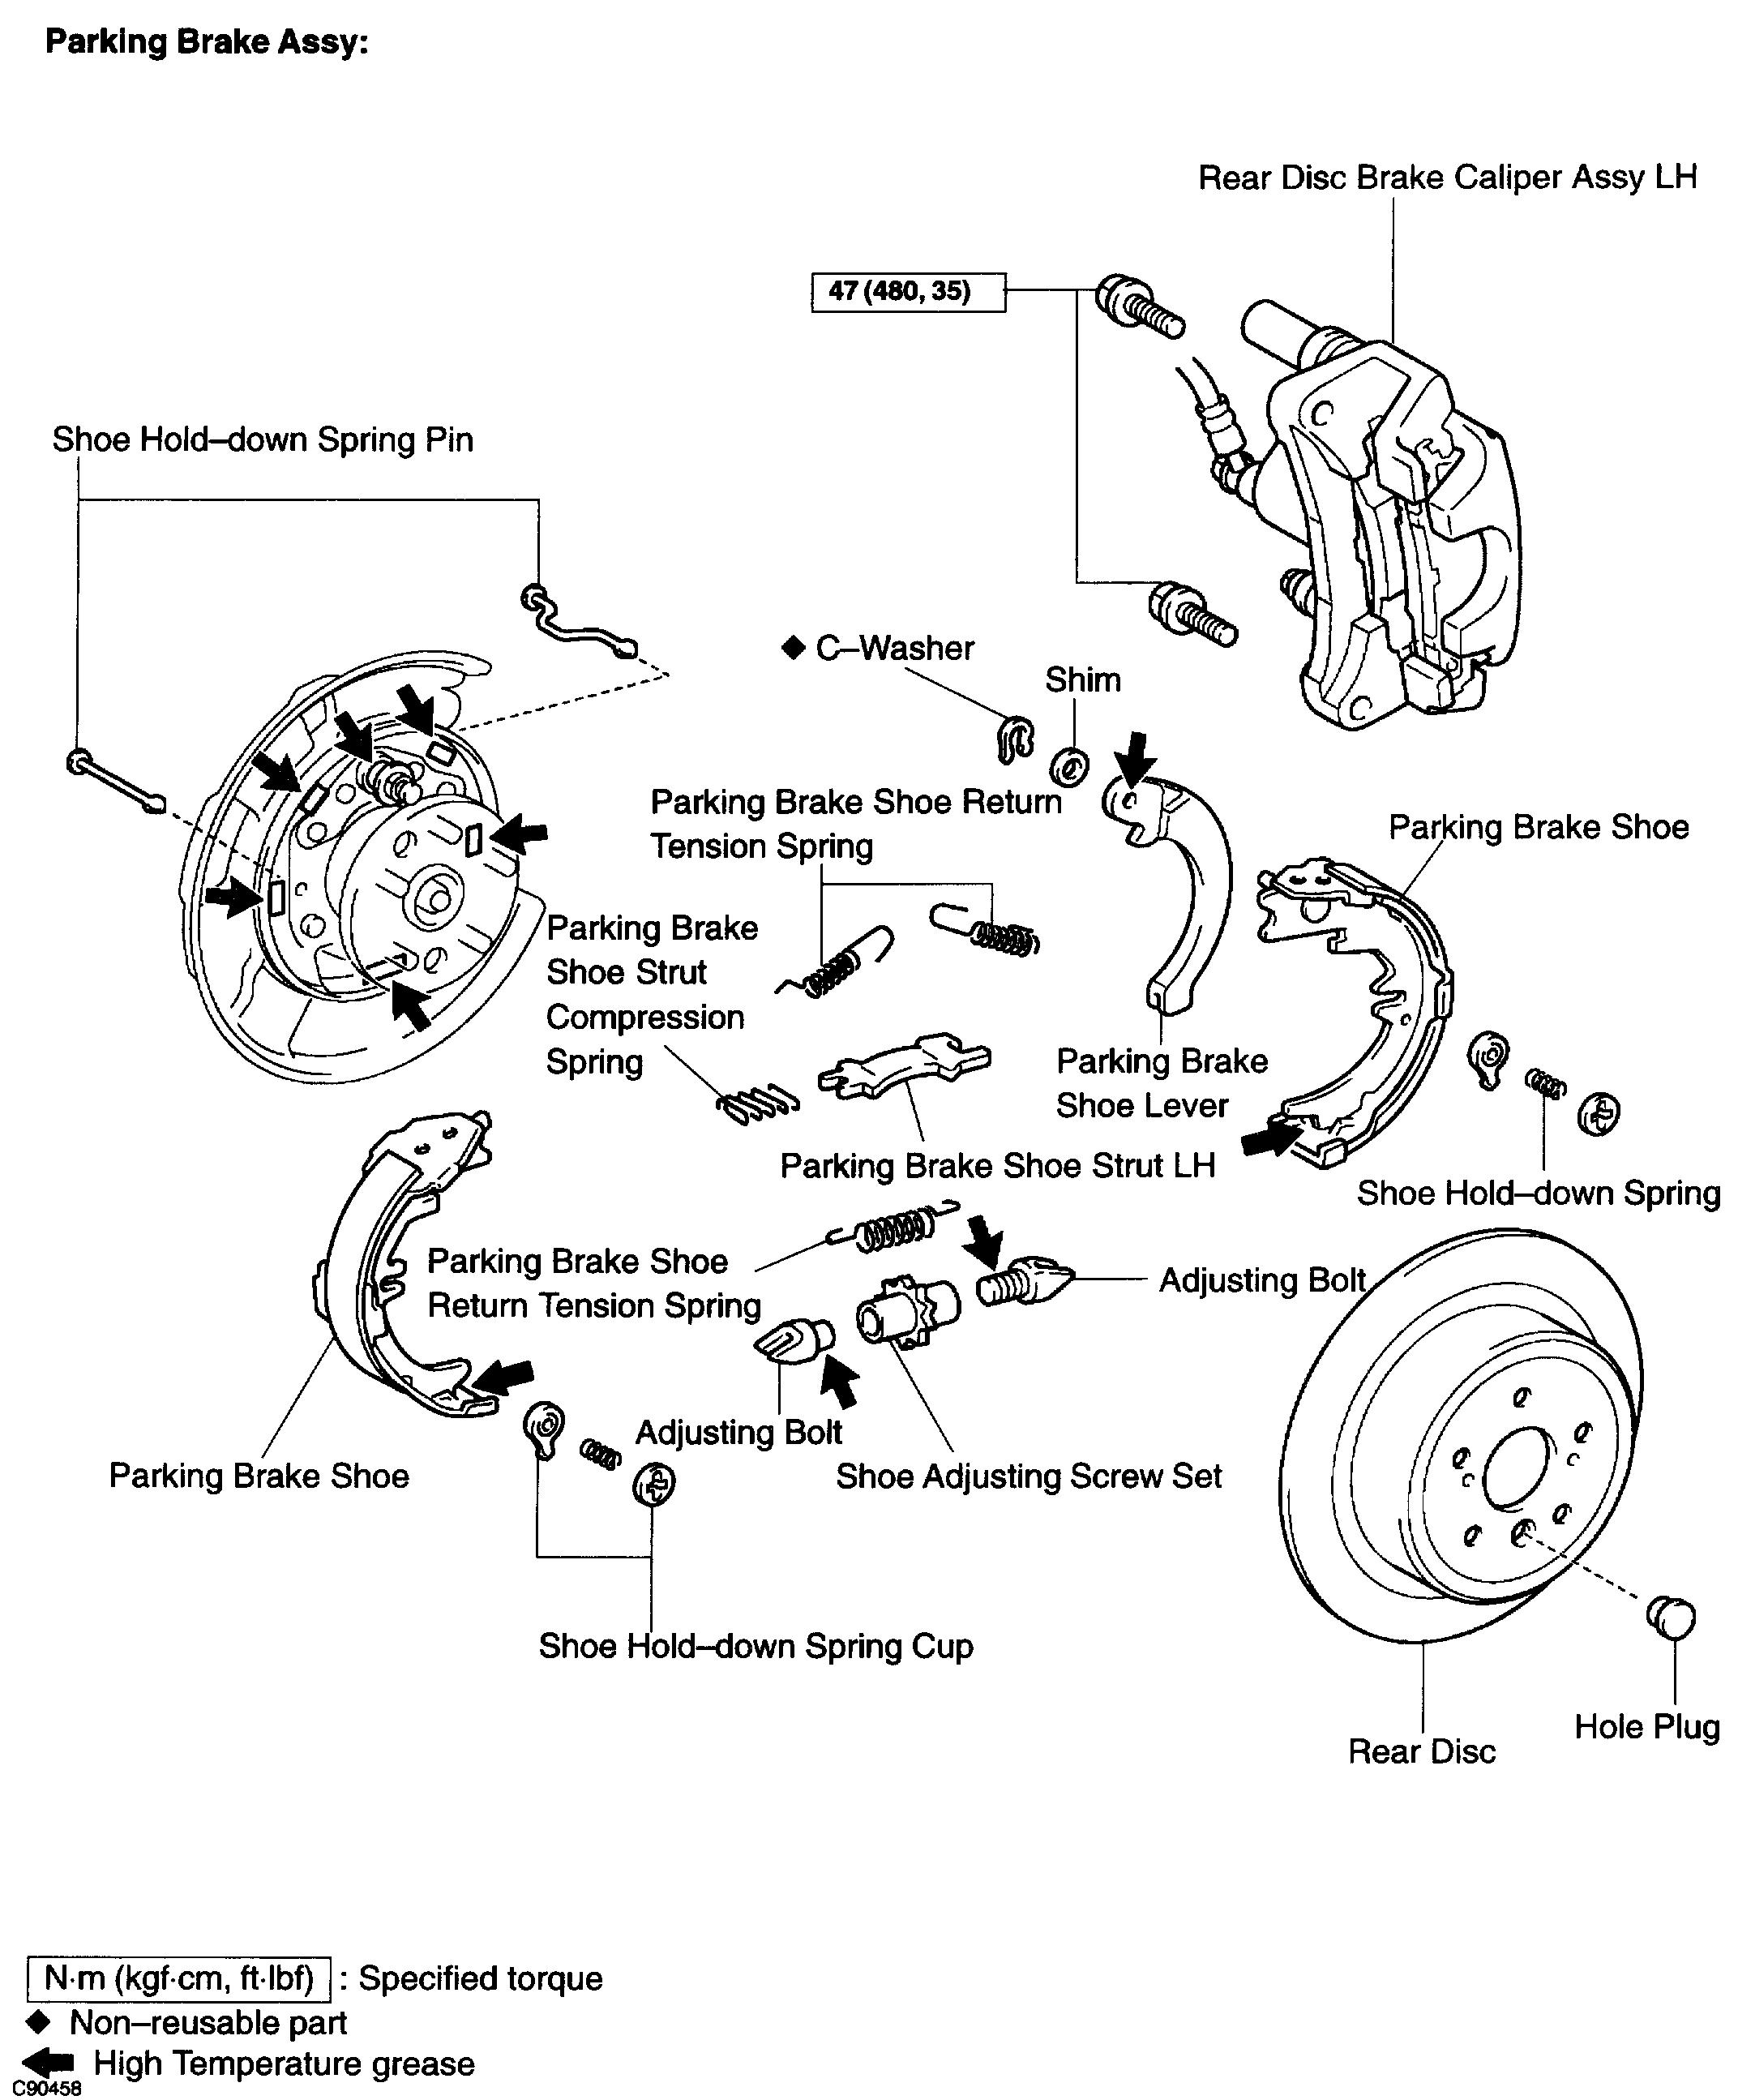
PARKING BRAKE ASSY OVERHAUL
HINT:
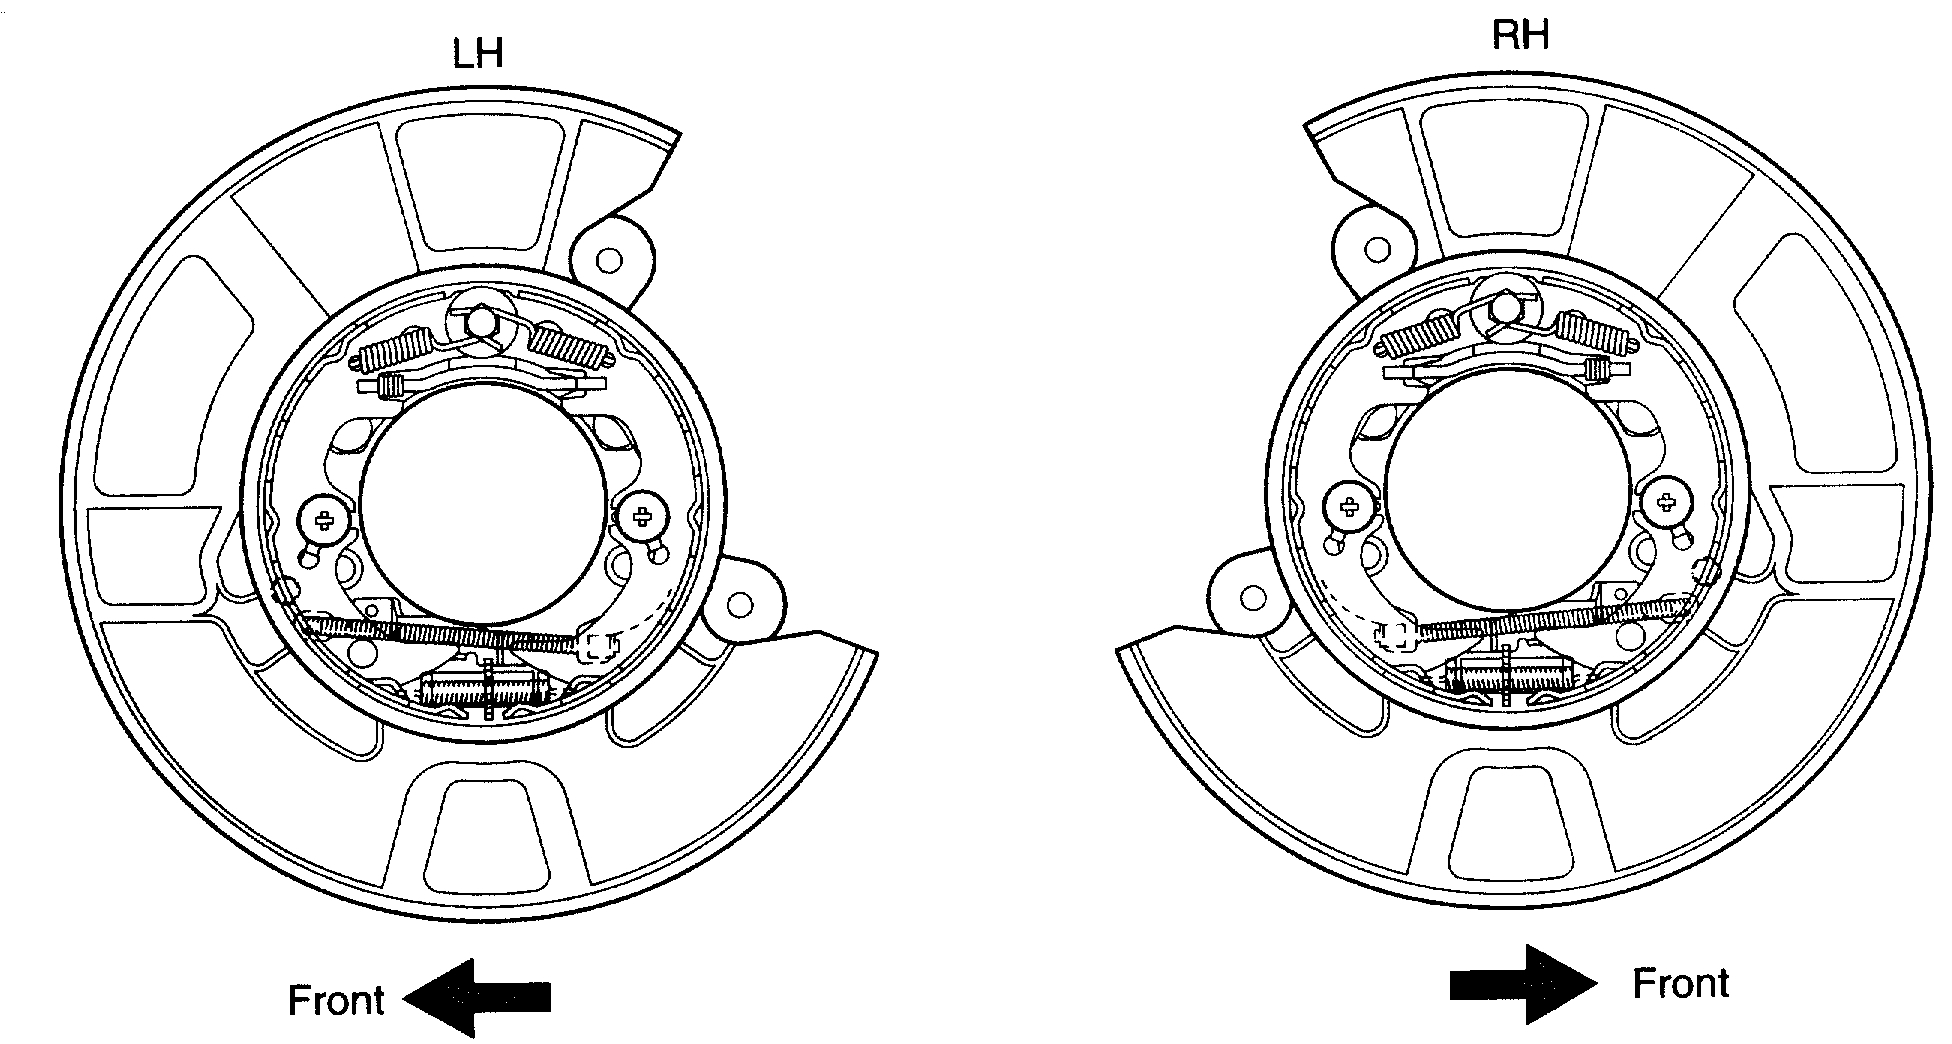
^ Overhaul the RH side by the same procedures with LH side.
1. REMOVE REAR WHEEL
2. SEPARATE REAR DISC BRAKE CALIPER ASSY, LH
a. Remove the 2 bolts and separate the rear disc brake caliper assy LH.
HINT: Do not disconnect the flexible hose from the brake caliper.
pic 5
3. REMOVE REAR DISC
a. Release the parking brake, and remove the rear disc.
HINT:
^ Put matchmarks on the disc and the axle hub.
^ If the disc cannot be removed easily, turn the shoe adjuster until the wheel turns freely.
pic 6
4. INSPECT BRAKE DISC INSIDE DIAMETER
a. Using a brake drum gauge or equivalent, measure the inside diameter of the disc.
Standard Inside diameter: 170 mm (6.69 inch)
Maximum Inside diameter: 171 mm (6.73 inch)
pic 7
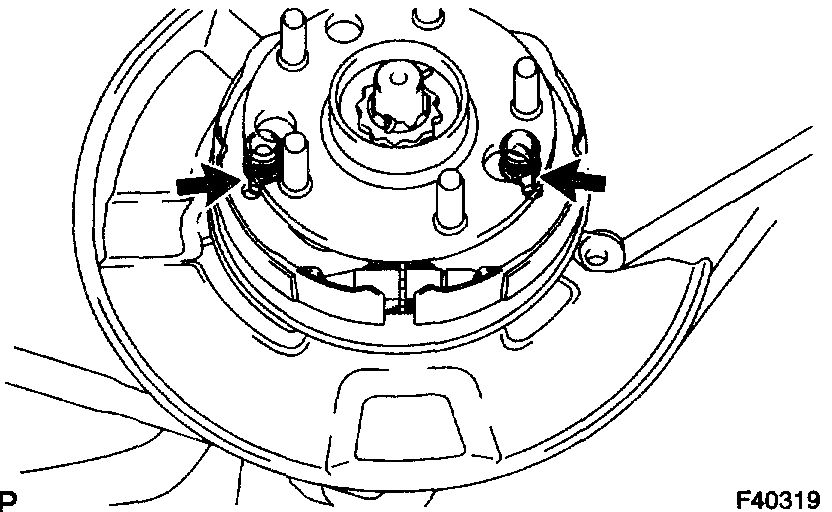
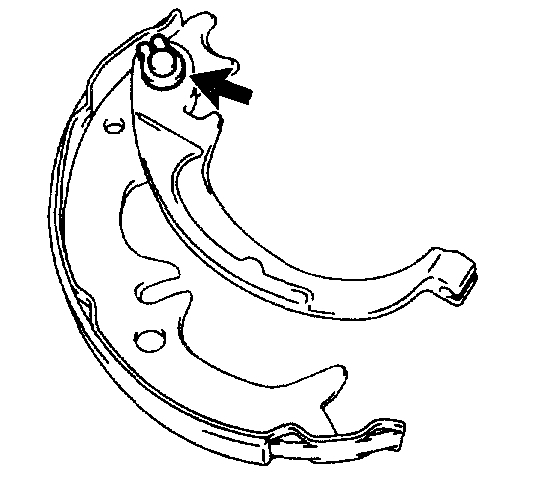
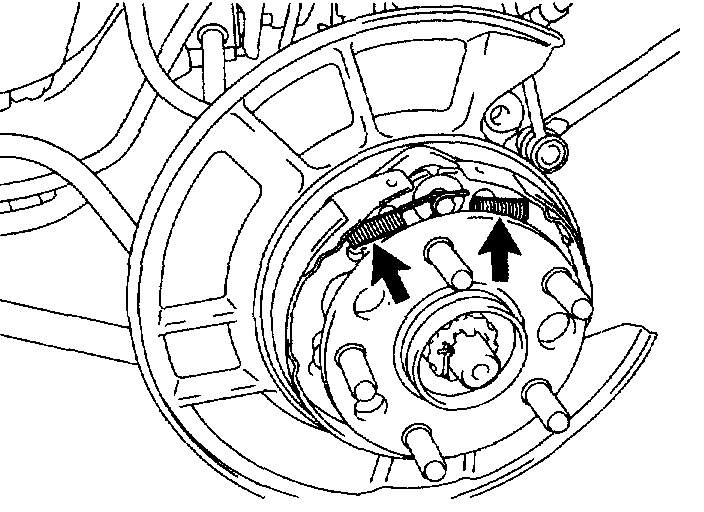
5. REMOVE PARKING BRAKE SHOE RETURN TENSION SPRING
a. Using a needle-nose pliers, remove the 2 return tension springs.
6. REMOVE PARKING BRAKE SHOE STRUT COMPRESSION SPRING
a. Slide out the front shoe and remove the compression spring.
7. REMOVE PARKING BRAKE SHOE STRUT LH
8. REMOVE PARKING BRAKE SHOE
pic 8
a. Release the cup claw and remove the front and rear parking brake shoe.
b. Disconnect the parking brake cable from the shoe lever.
c. Remove the tension spring and shoe adjuster screw set from the front and rear shoe.
d. Remove the 2 shoe hold-down springs, 4 cups and 2 pins.
pic 9
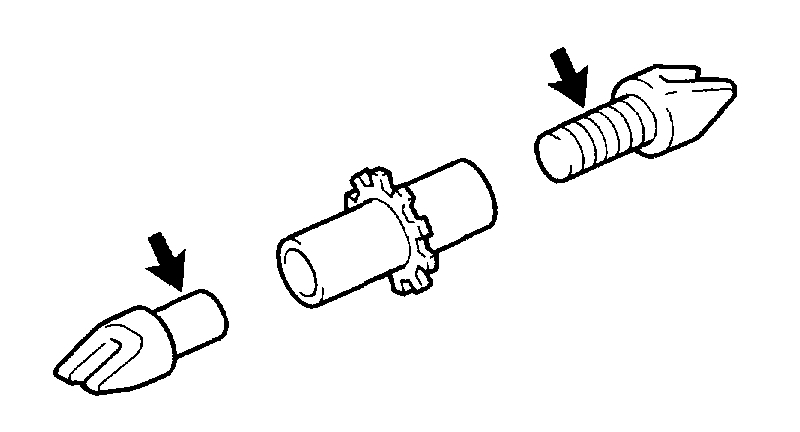
e. Using a screwdriver, remove the washer.
f. Remove the shim and shoe lever from the parking brake shoe.
pic 10
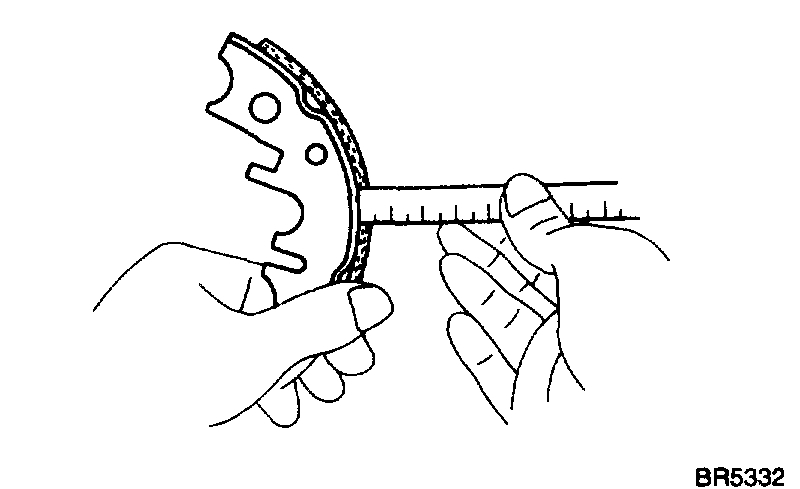
9. INSPECT PARKING BRAKE SHOE LINING THICKNESS
a. Using a ruler, measure the thickness of the shoe lining.
Standard thickness: 2.0 mm (0.079 inch)
Minimum thickness: 1.0 mm (0.039 inch)
If the lining thickness is at the minimum thickness or less, or if there is severe, uneven wear, replace the brake shoe.
pic 11
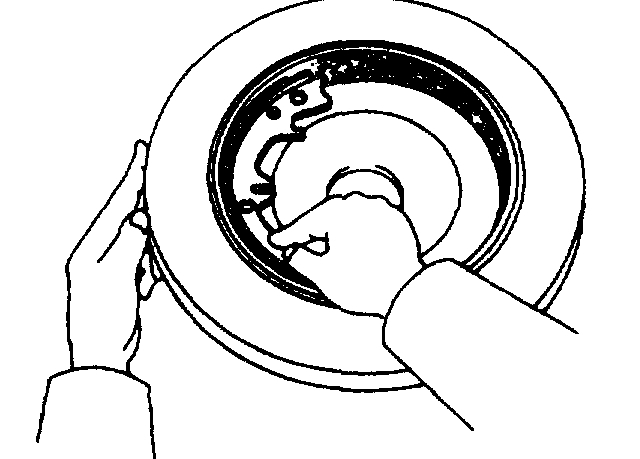
10. INSPECT BRAKE DISC AND PARKING BRAKE SHOE LINING FOR PROPER CONTACT
a. Apply chalk to the inside surface of the disc, then grind down the brake shoe lining to fit.
If the contact between the brake disc and the shoe lining is improper, repair it using a brake shoe grinder or replace the brake shoe assembly.
11. APPLICATION HIGH TEMPERATURE GREASE
a. Apply the high temperature grease to the shoe attached surface of backing plate.
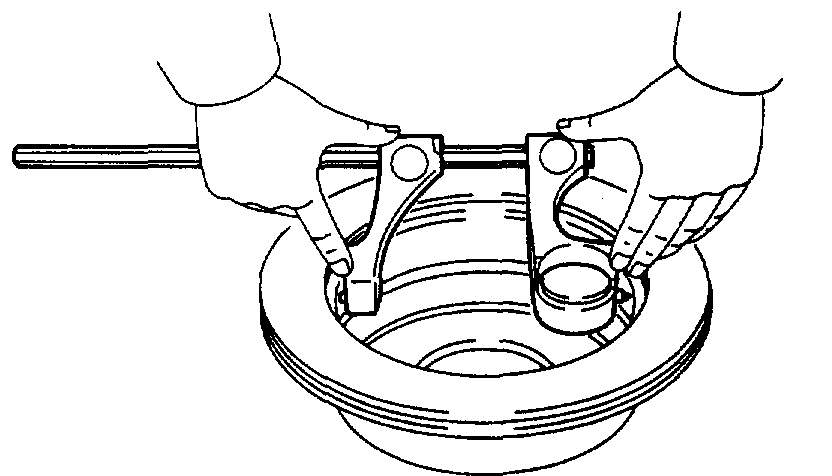
12. INSTALL PARKING BRAKE SHOE
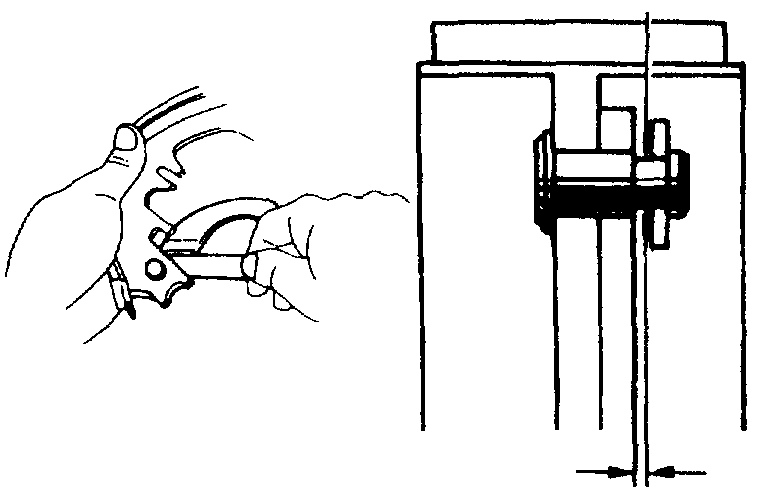
a. Install the shoe lever and shim to the rear shoe with a new C-washer.
pic 12
pic 13
b. Using a feeler gauge, measure the clearance.
Standard clearance: Less than 0.35 mm (0.0138 inch)
If the clearance is not within the specification, replace the shim with one of the correct size.
pic 14
c. Apply the high temperature grease to the adjusting bolt.
d. Install the shoe adjusting screw set and tension spring to the front and rear shoe.
e. Install the 2 pins, 4 cups and 2 shoe hold-down springs.
f. Connect the parking brake cable to the shoe lever.
g. Install the front and rear parking brake shoe.
13. INSTALL PARKING BRAKE SHOE STRUT LH
14. INSTALL PARKING BRAKE SHOE STRUT COMPRESSION SPRING
pic 15
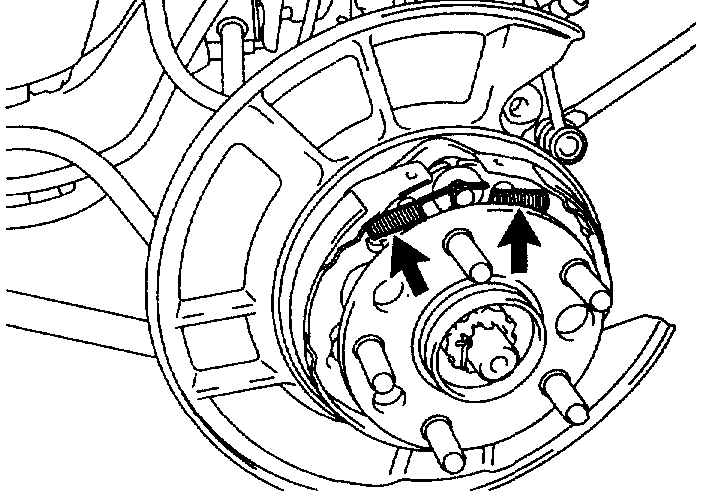
15. INSTALL PARKING BRAKE SHOE RETURN TENSION SPRING
a. Using a needle nose pliers, install the 2 return tension springs.
pic 16
16. CHECK PARKING BRAKE INSTALLATION
a. Check that each part is installed properly.
NOTICE: There should be no oil or grease adhering to the friction surface of the shoe lining and disc.
17. INSTALL REAR DISC
pic 17
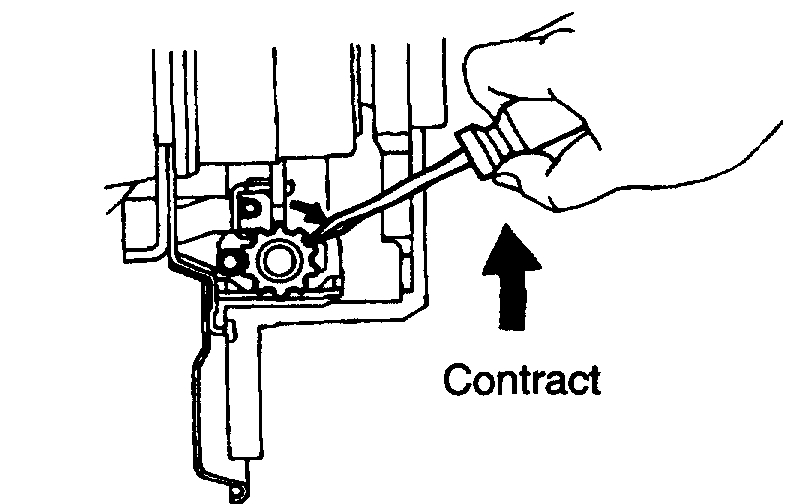
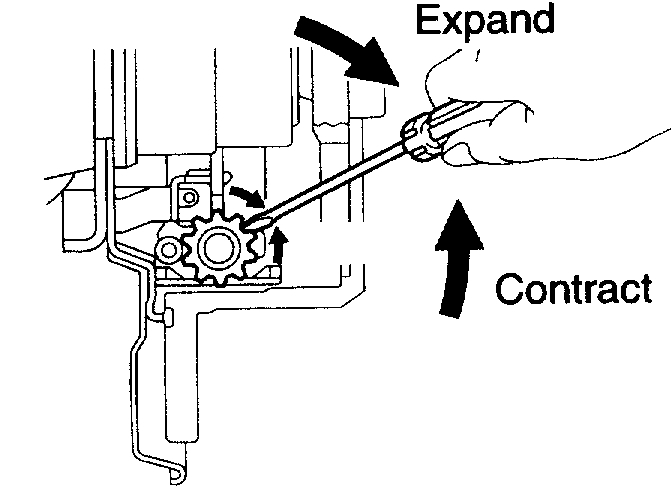
18. ADJUST PARKING BRAKE SHOE CLEARANCE
a. Temporarily install the hub nuts.
b. Remove the hole plug, and turn the adjuster and expand the shoes until the disc locks.
c. Contract the shoe adjuster until the disc can rotate smoothly.
Standard: Return 8 notches
d. Check shoe is no brake drag.
e. Install the hole plug.
19. CONNECT REAR DISC BRAKE CALIPER ASSY, LH
a. Install the rear disc brake caliper with the 2 bolts.
Torque: 47 Nm (480 kgf-cm, 35 ft. lbs.)
20. INSTALL REAR WHEEL
Torque: 103 Nm (1,050 kgf-cm, 76 ft. lbs.)
21. INSPECT AND ADJUST PARKING BRAKE PEDAL TRAVEL
______________________________
I hope this helps. Let me know if you have other questions.
Take care and God Bless,
Joe
Images (Click to enlarge)
Mar 5, 2021 at 11:35 PM