Oil pan gasket replacement

Tiny
CHRISTINA WOODS
  • MEMBER
  • 2008 CHEVROLET SILVERADO
  • 4.3L
  • V6
  • 2WD
  • AUTOMATIC
  • 190,000 MILES
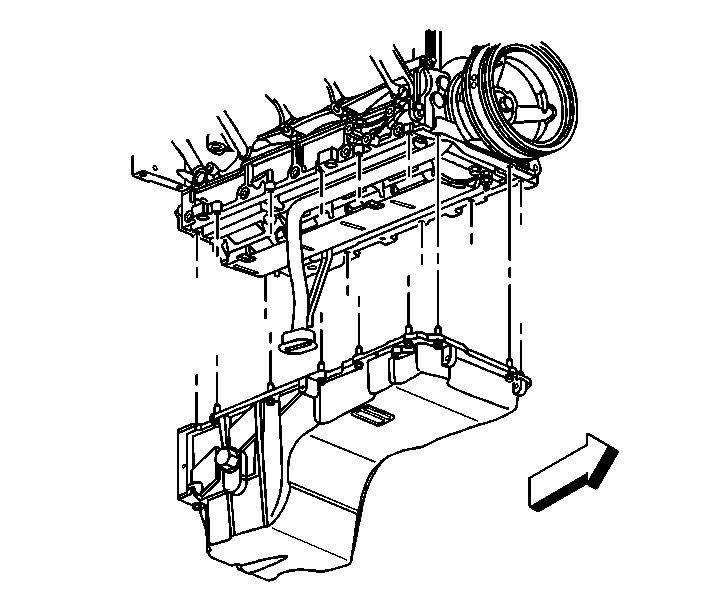
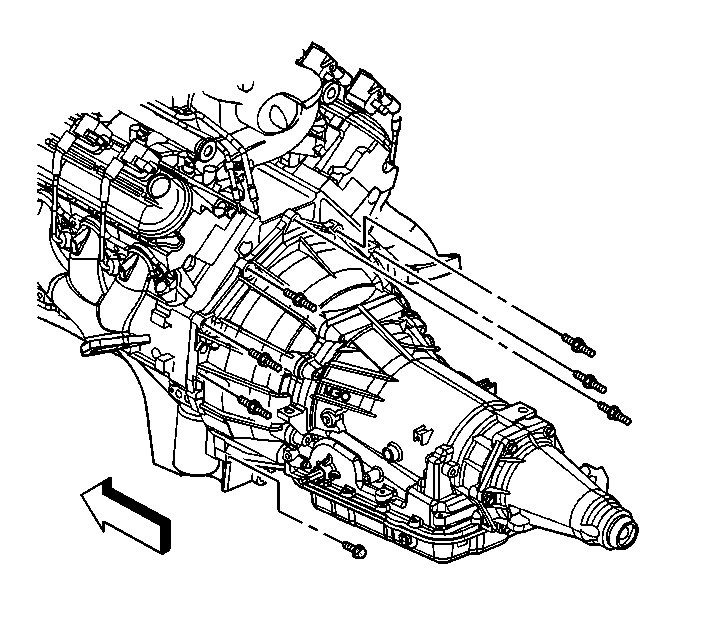
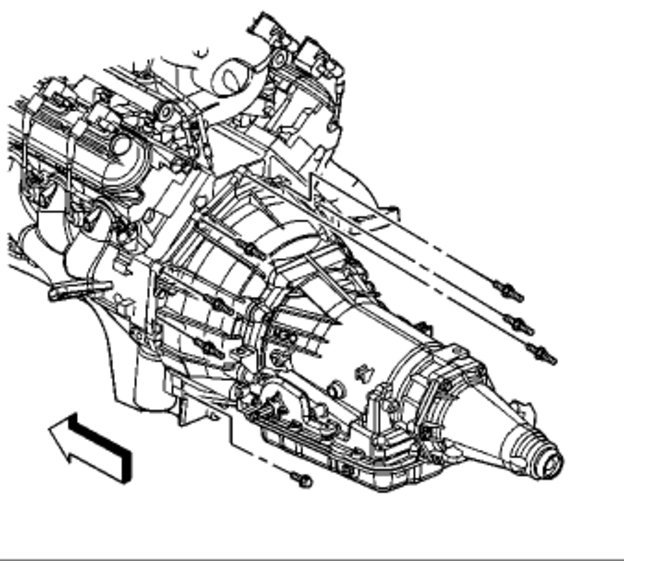
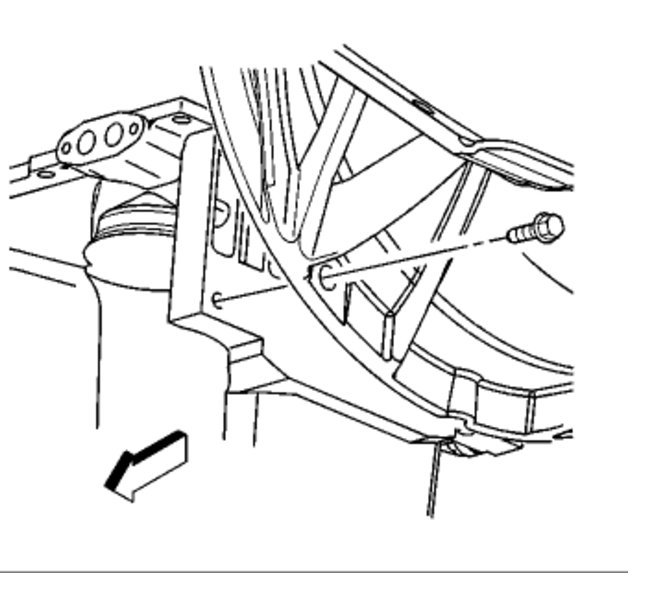
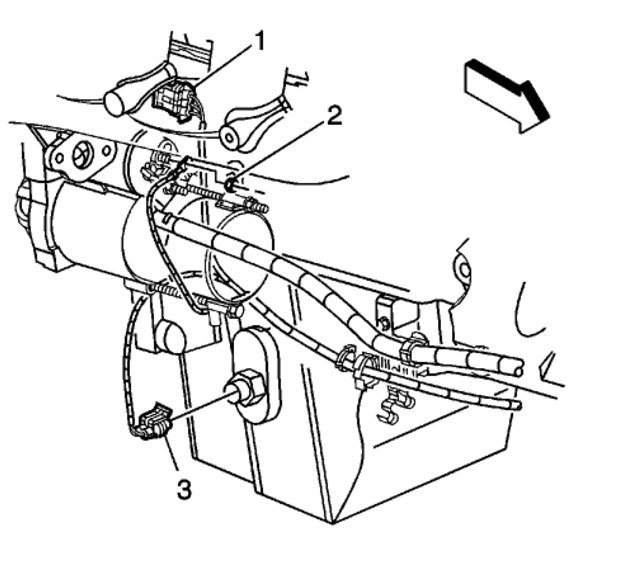
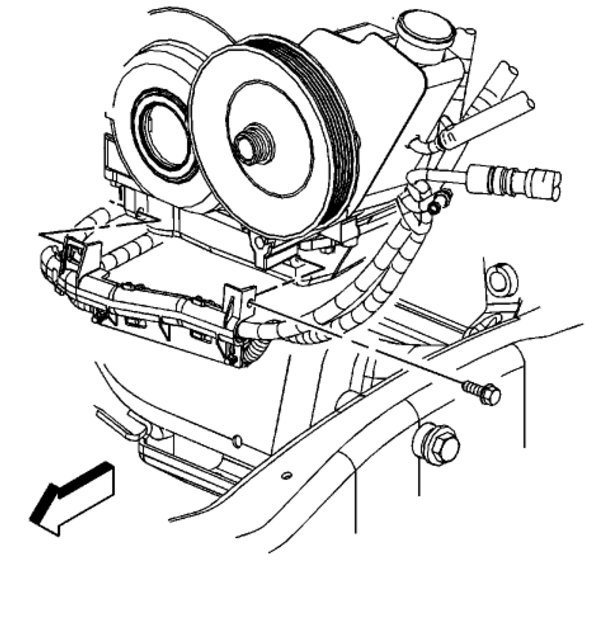
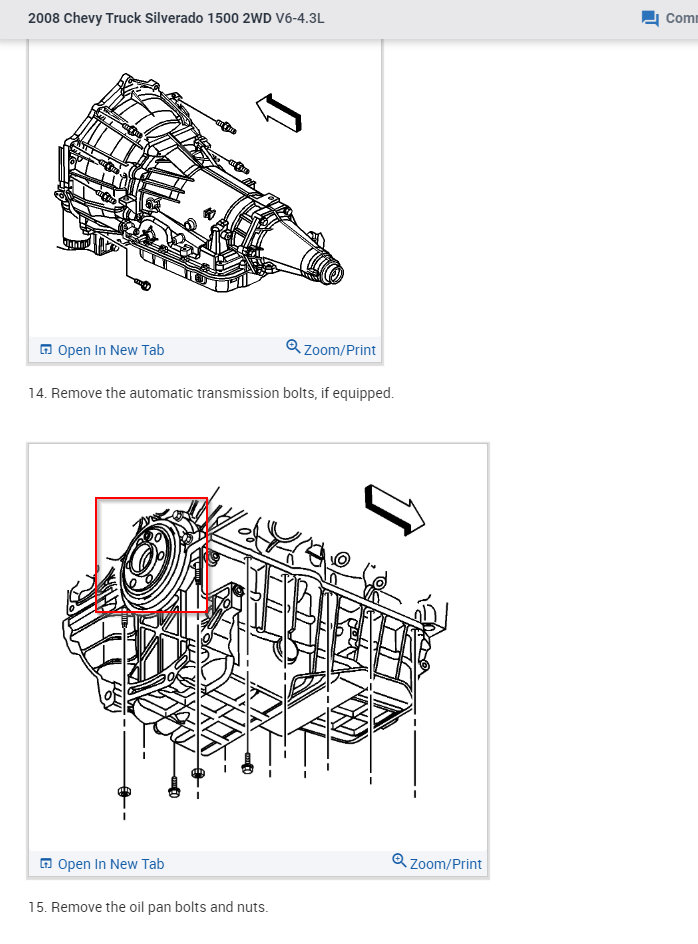
Replacing oil pan gasket, instruction say remove transmission bolts, all not just the ones going through the oil pan. Is it necessary to do this?
Monday, January 27th, 2020 AT 9:44 AM

34 Replies

Tiny
KASEKENNY
  • MECHANIC
  • 18,907 POSTS
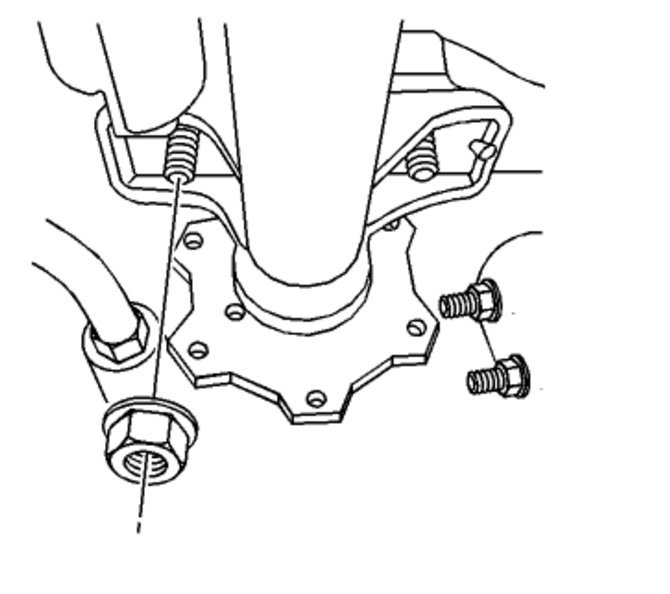
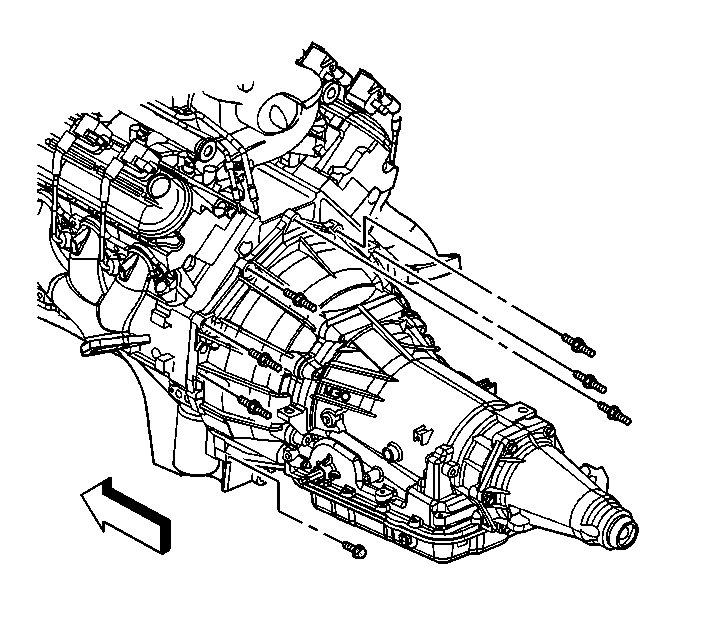
From what I remember you do not. There next picture shows the flex plate off so I imagine this was an added step that was not needed. Clearly it never had you take the drive shaft out so you can't move the transmission back. Nor does it tell you to unhook the torque converter so I suspect it is a oversight in the manual. Unfortunately this happened frequently in these types of manuals. They copy and paste from prior years and other services to cut down on editing and I think this one got past them.

I would just go through the process and if some reason you need to, you can always come back and do it.
Was this
answer
helpful?
Yes
No
Monday, January 27th, 2020 AT 5:23 PM
Tiny
DOWAT
  • MEMBER
  • 2 POSTS
  • 2008 CHEVROLET SILVERADO
  • 18,000 MILES
The dealer recently replaced the oil pan gasket on my 08 4.8 because of a leak. I just changed the oil and filter and it only took 5 1/2 qts. Instead of the normal 6. Do you have any idea why? Thankyou.
Was this
answer
helpful?
Yes
No
Saturday, December 12th, 2020 AT 9:15 AM (Merged)
Tiny
DOWAT
  • MEMBER
  • 2 POSTS
The dealer recently replaced the oil pan gasket on my 08 Silverado 4.8L because of a leak. I just changed the oil and filter and it only took 5 1/2 qts. Instead of the normal 6 to bring it to the full mark. Anyone know what could cause this? Thankyou.
Was this
answer
helpful?
Yes
No
Saturday, December 12th, 2020 AT 9:15 AM (Merged)
Tiny
ASEMASTER6371
  • MECHANIC
  • 52,797 POSTS
Residual oil in the pan. No worries, just make sure it is up to snuff on the dipstick.

Roy
Was this
answer
helpful?
Yes
No
Saturday, December 12th, 2020 AT 9:15 AM (Merged)
Tiny
DYLAN LINHOFF
  • MEMBER
  • 1 POST
  • 2005 CHEVROLET SILVERADO
  • 6.0L
  • V8
  • 2WD
  • AUTOMATIC
  • 195,000 MILES
I'm in search for some clarification in reference to the removal of the oil pan procedure. Preferably a dumbed down, step-by-step, directions. I've checked the pressure sensor, replaced with new one, not sure about there being a screen under the sensor, checked but wasn't able to remove if there even were one in place.

I wanted to replace the cluster to see what my dash would do with the apparent low oil warning that should be seen when looking at my oil pressure gauge.

I'm truly set on it being the pickup tube gasket, I really really hope it is.
Was this
answer
helpful?
Yes
No
-1
Saturday, December 12th, 2020 AT 9:15 AM (Merged)
Tiny
JACOBANDNICKOLAS
  • MECHANIC
  • 108,164 POSTS
Welcome to 2CarPros.

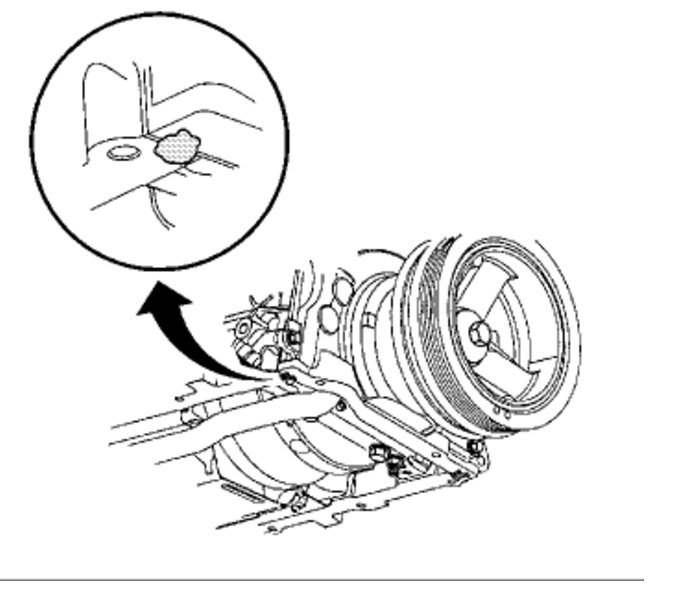
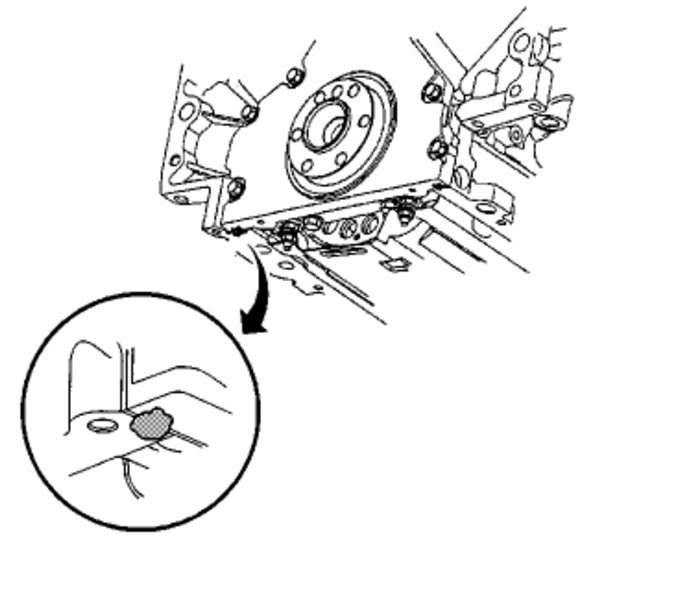
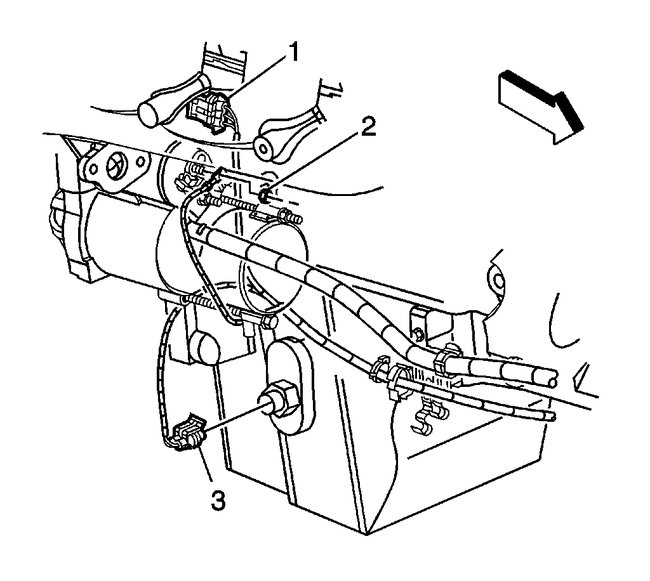
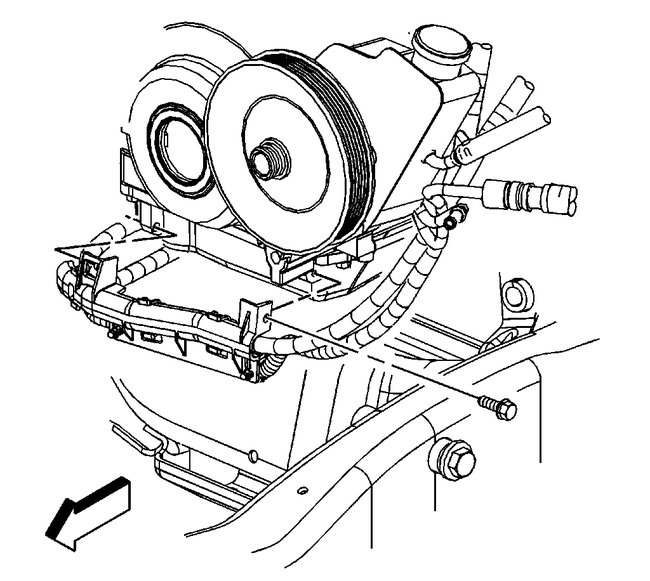
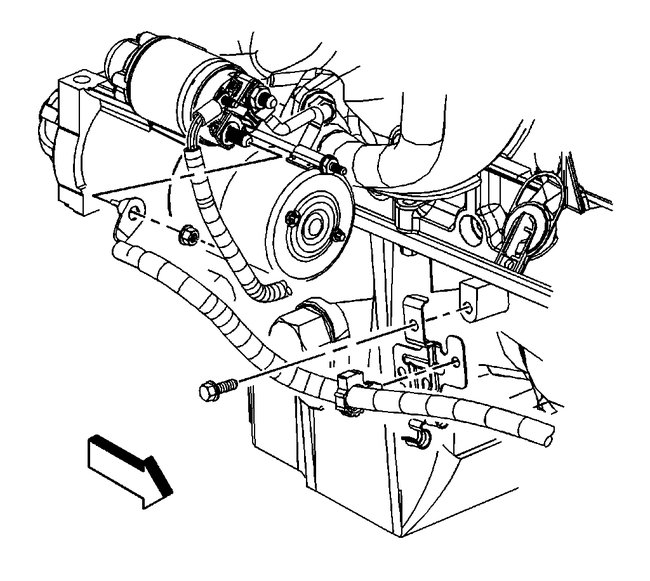
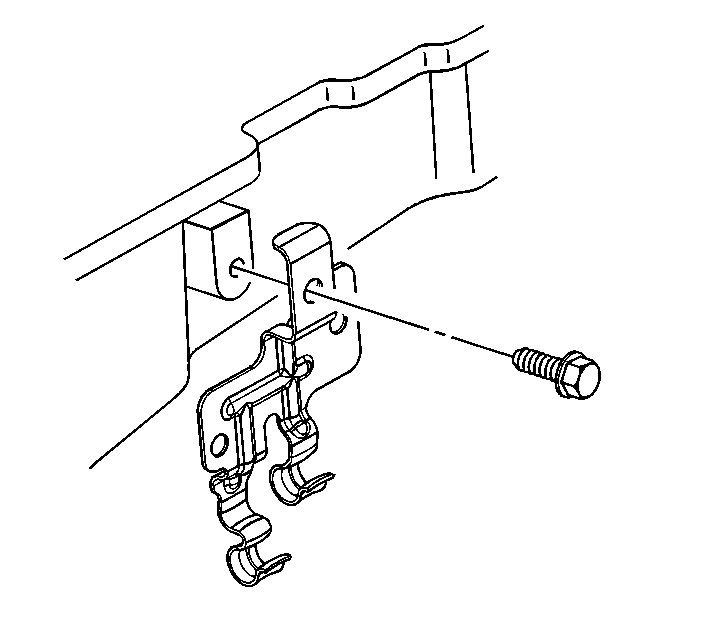
I'm not sure what the symptoms are to help guide you. However, here are the directions for removal and replacement of the pan. The attached pictures correlate with the directions. Also, the directions are for both 2wd and 4wd.

_________________________________________

2005 Chevy Truck Silverado 1500 2WD V8-6.0L VIN U
Oil Pan Replacement
Vehicle Engine, Cooling and Exhaust Engine Engine Lubrication Oil Pan Service and Repair Procedures Oil Pan Replacement
OIL PAN REPLACEMENT
Oil Pan Replacement

Removal Procedure

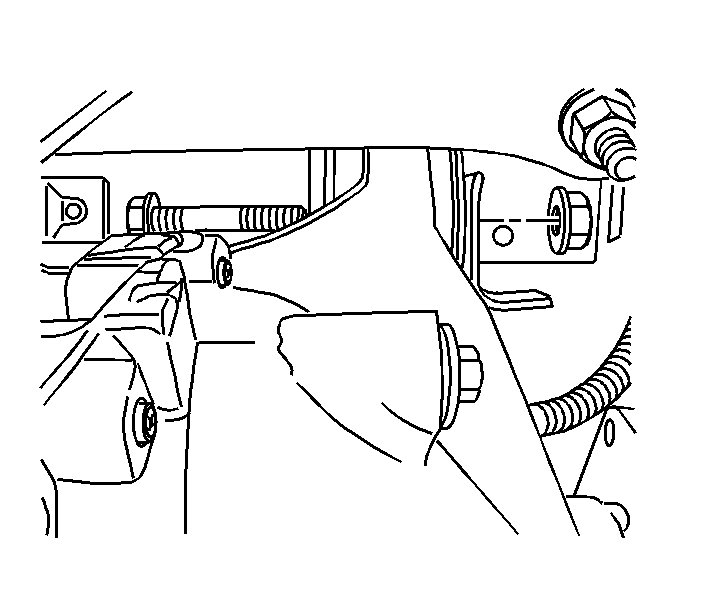
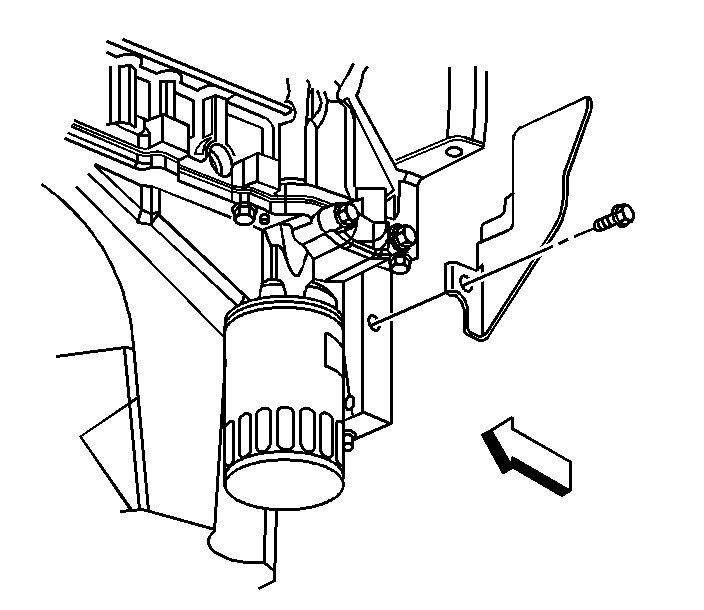
pic 1

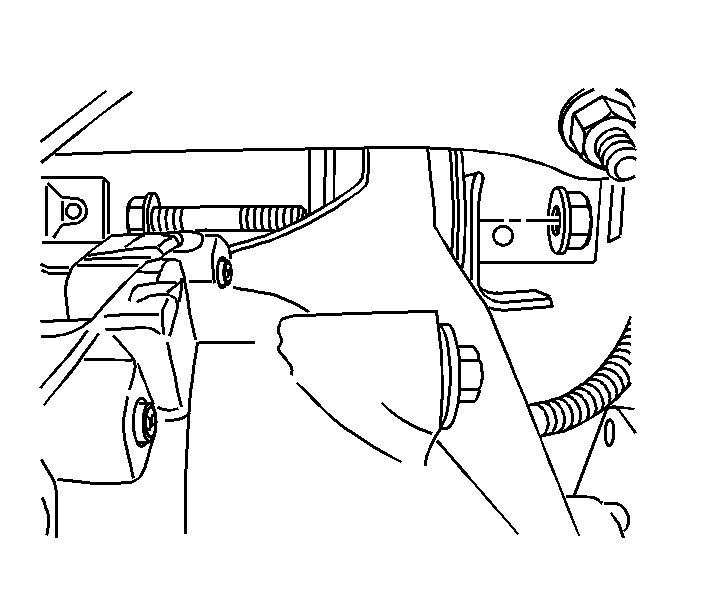
1. If equipped with Four Wheel Drive (4WD), remove the inner axle housing nuts and washers from the bracket.
2. Support the front drive axle with a suitable jack.

Pic 2

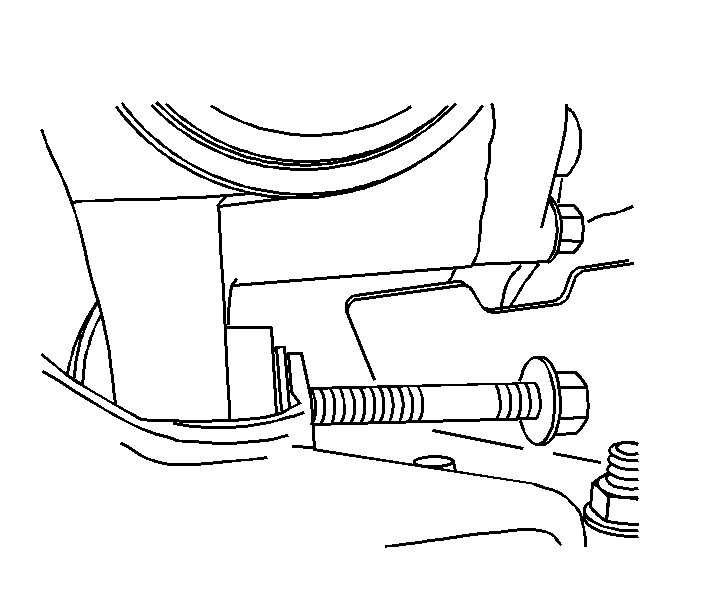
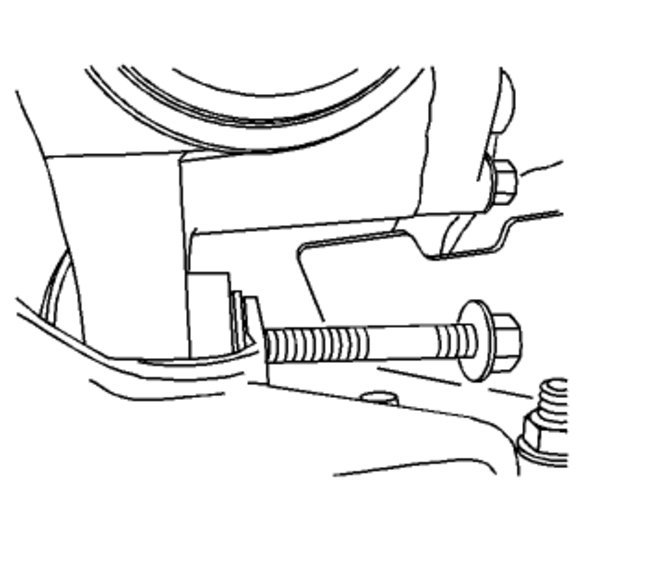
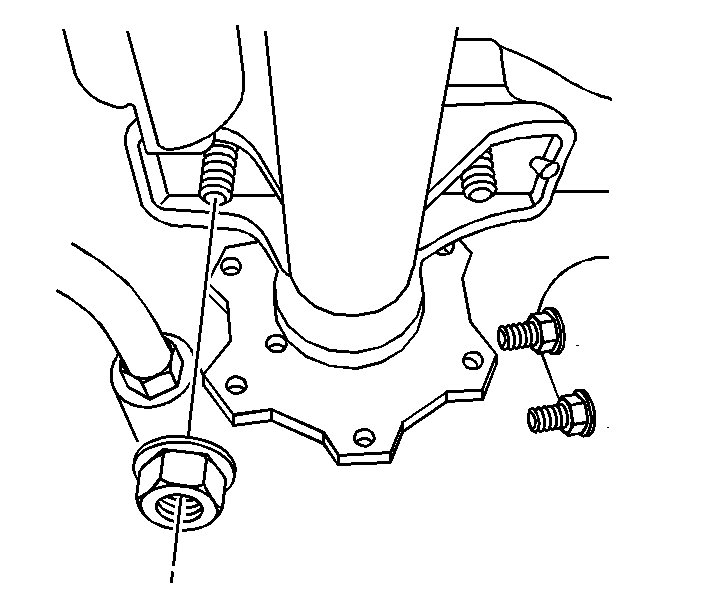
3. If equipped with 4WD, remove the differential carrier lower mounting bolt and nut.

Pic 3

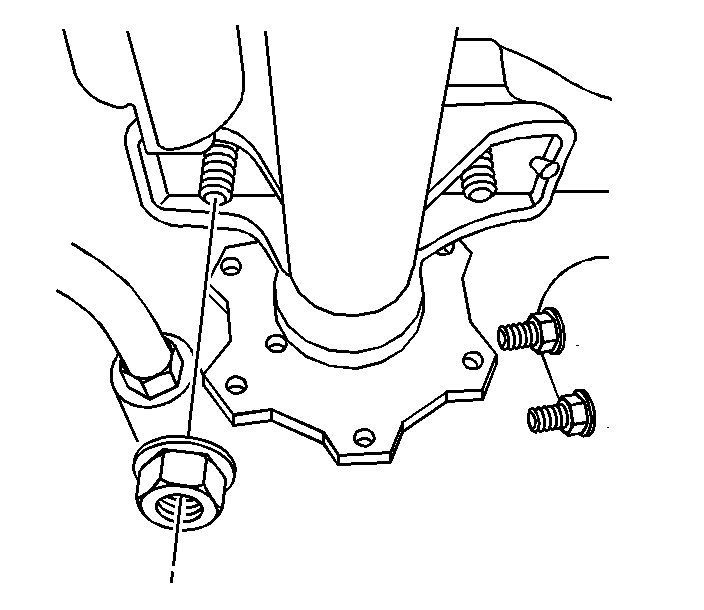
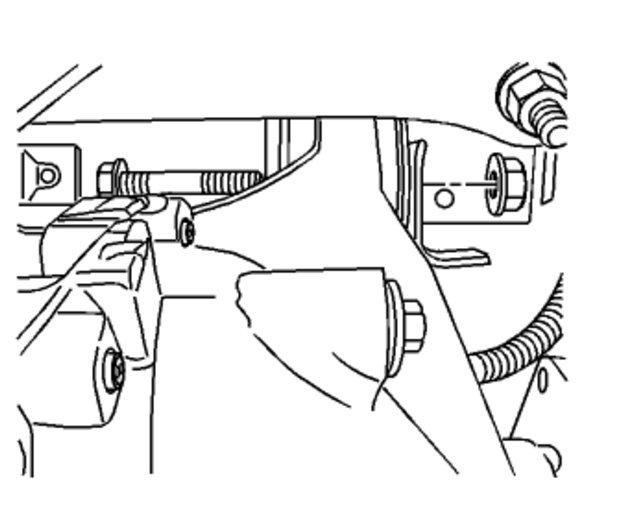
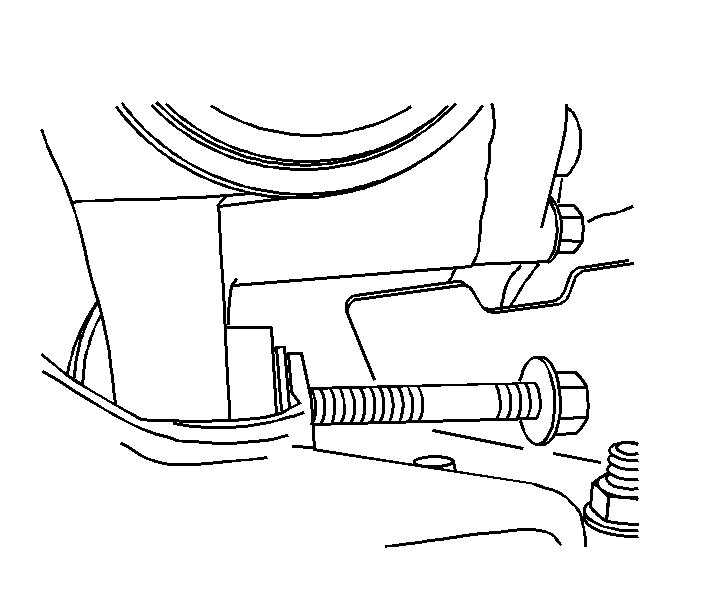
4. If equipped with 4WD, remove the differential carrier upper mounting bolt and nut.
5. Lower the front drive axle.

Pic 4

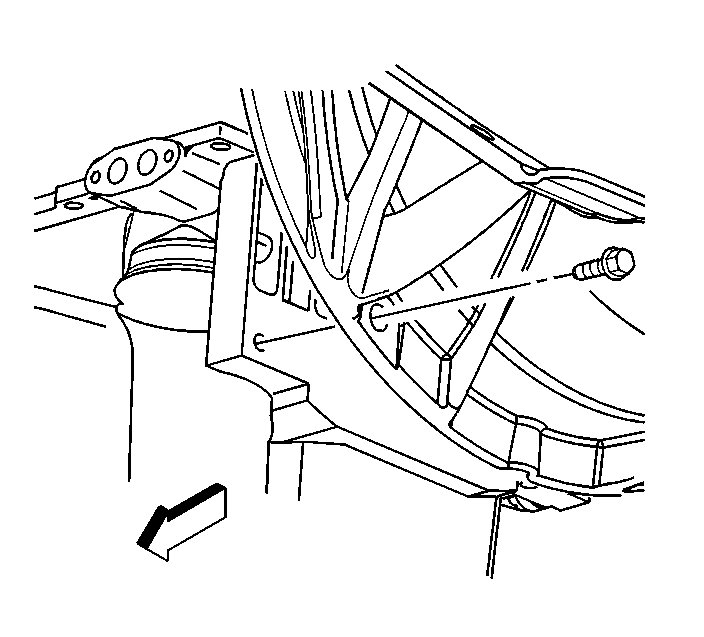
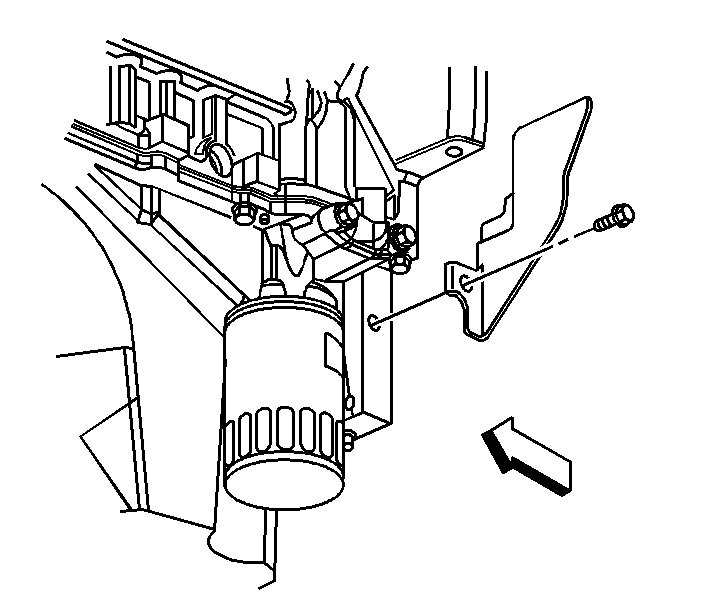
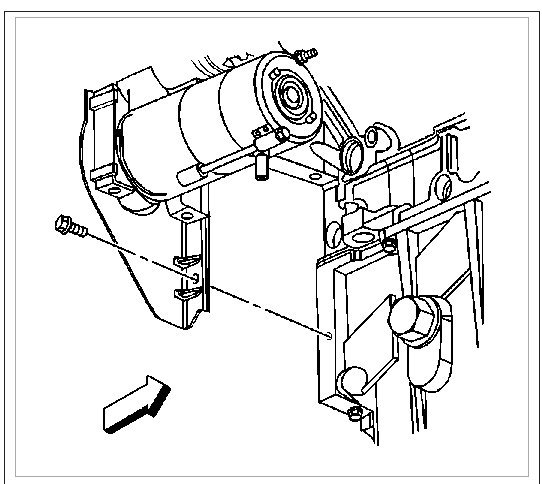
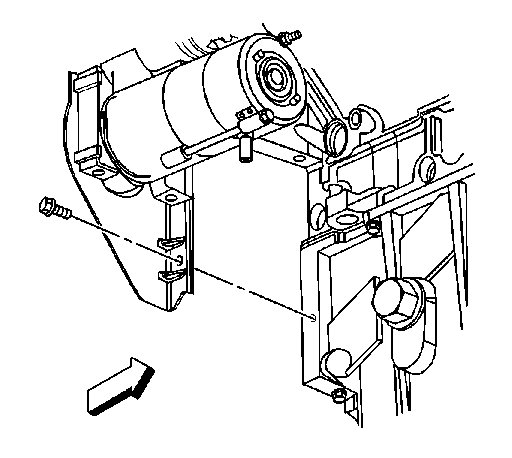
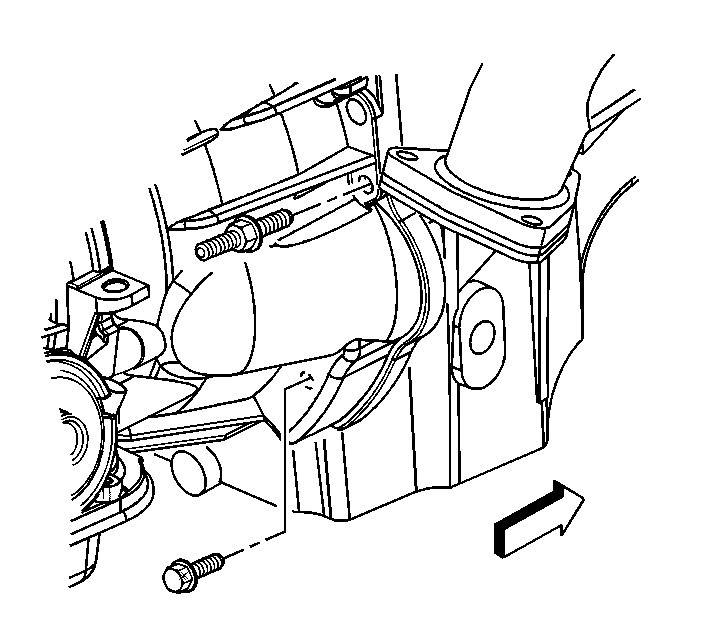
6. Remove the transmission cover bolt.

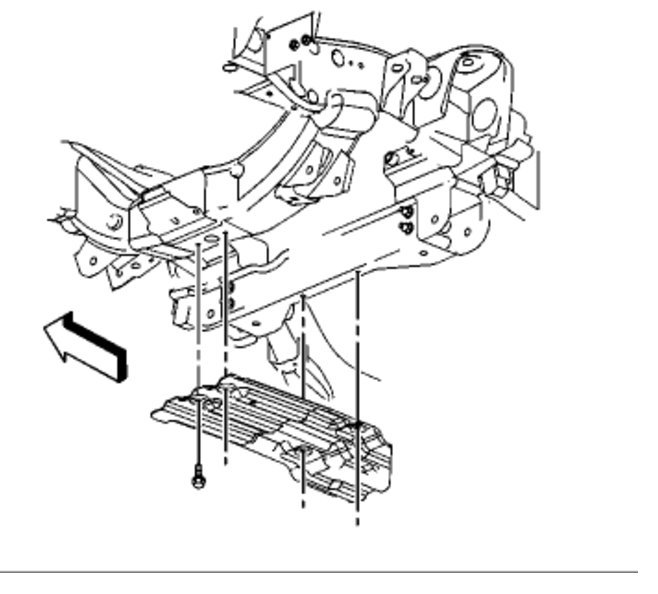
Pic 5

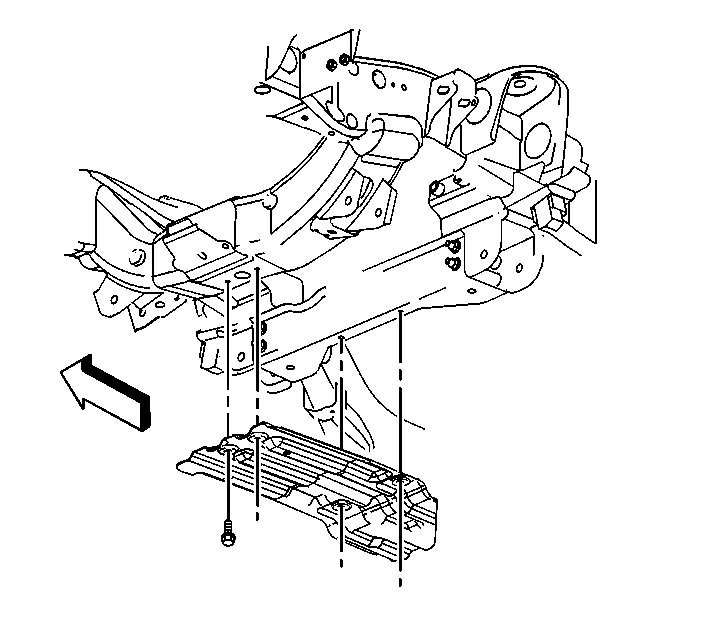
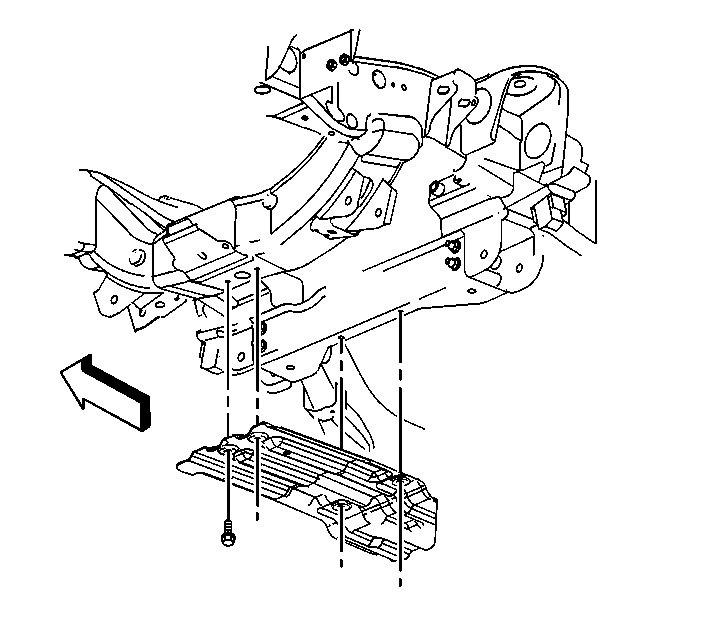
7. If equipped, remove the oil pan skid plate bolts.
8. Remove the oil pan skid plate.

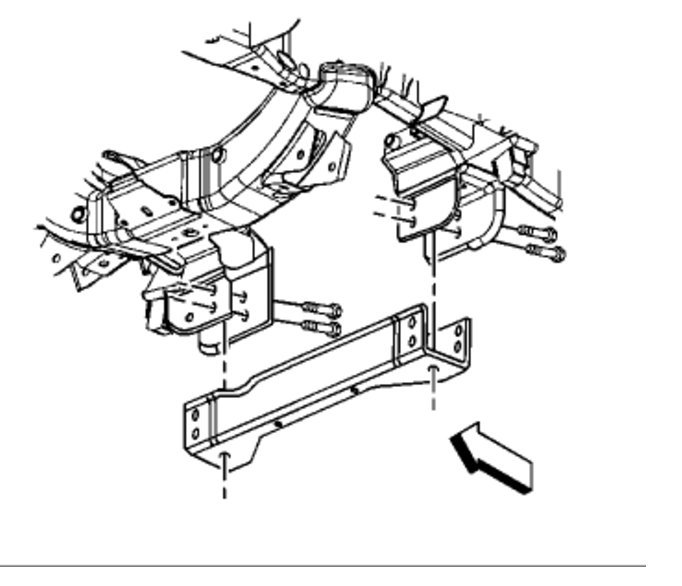
Pic 6

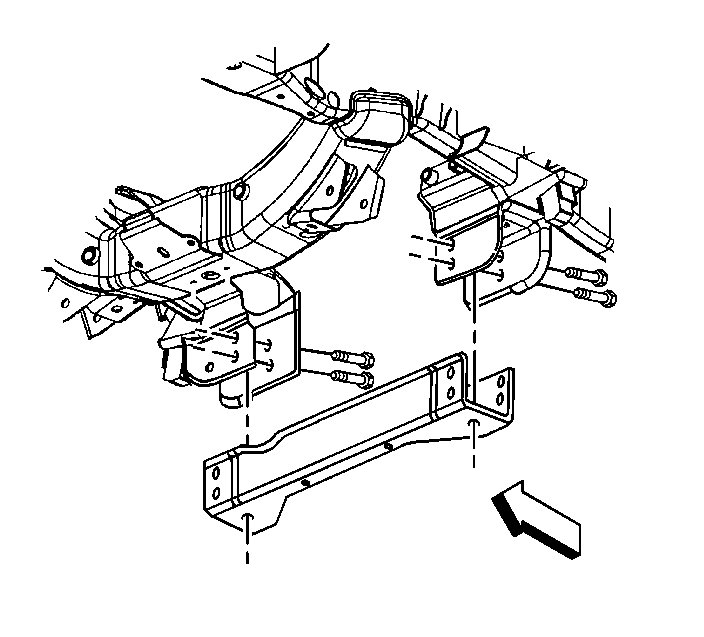
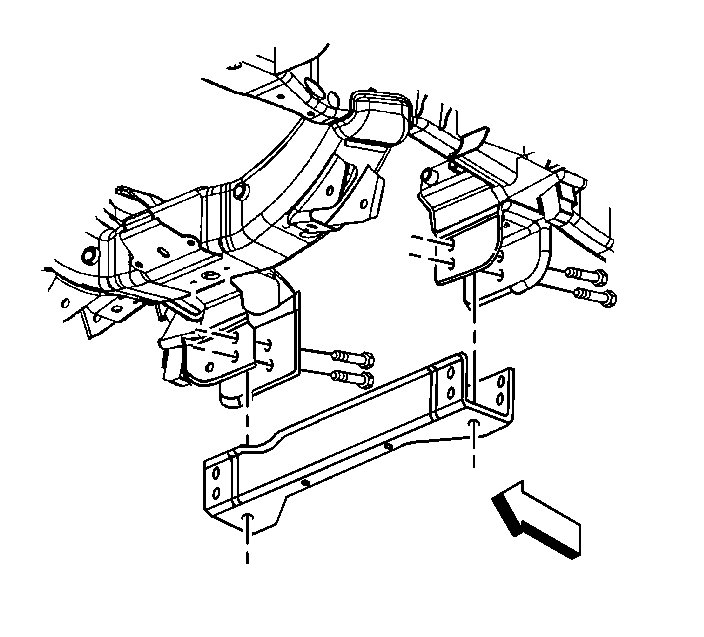
9. Remove the crossbar bolts.
10. Remove the crossbar.

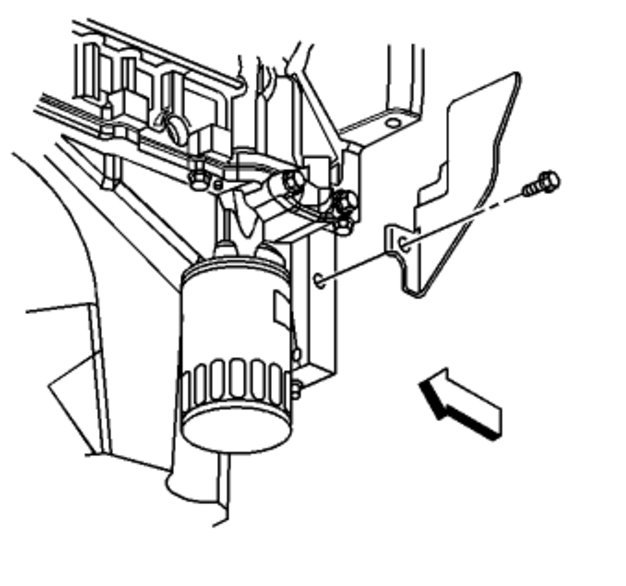
Pic 7

11. Remove the transmission cover bolt and cover.
12. Drain the engine oil and remove the engine oil filter.
13. Re-install the drain plug and oil filter until snug.

Pic 8

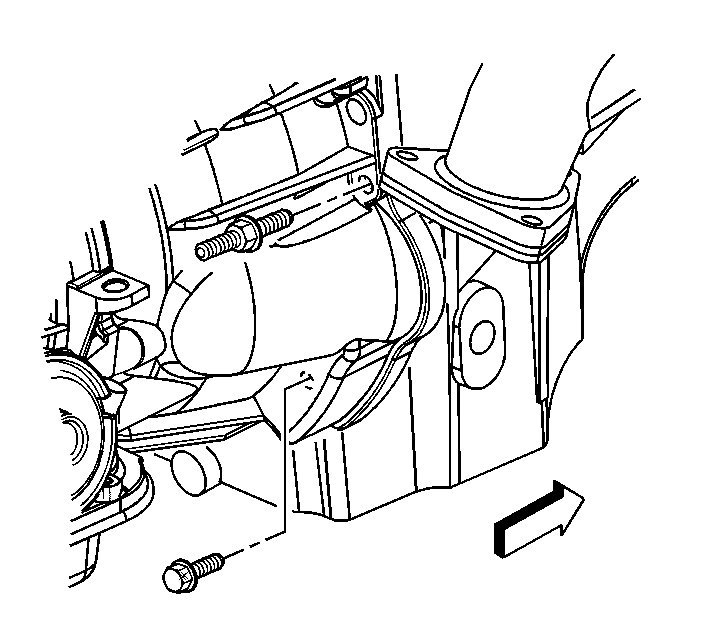
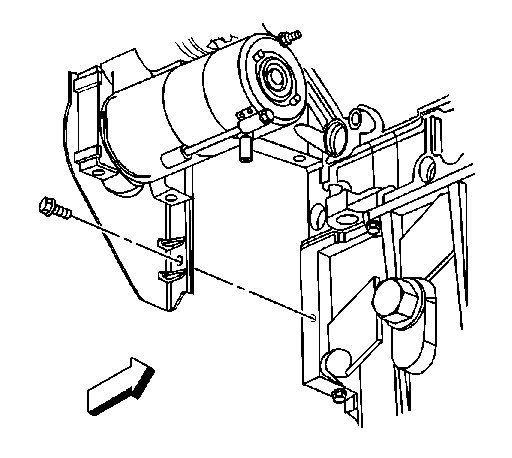
14. If equipped with the 4L60-E automatic transmission, remove the transmission bolt and stud on the right side.

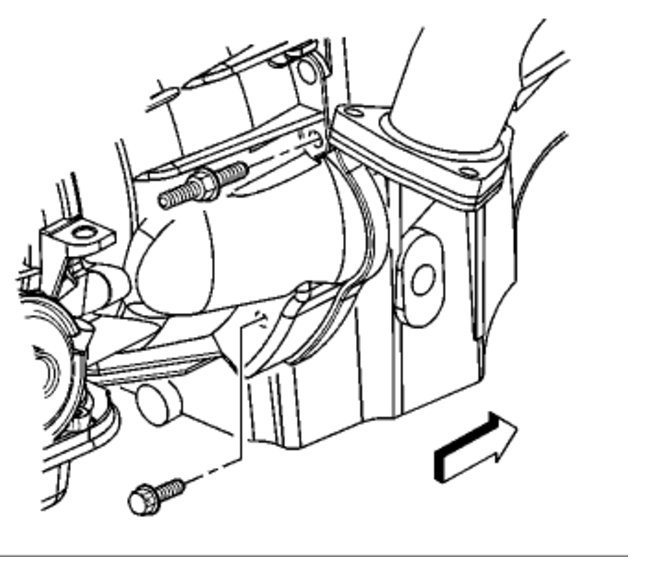
Pic 9

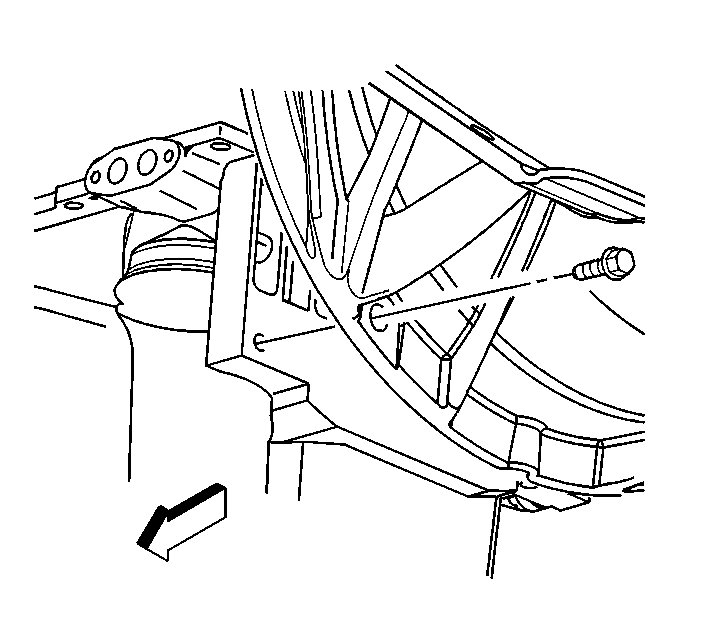
15. Remove the bottom bolt on the left side.

Pic 10

16. If equipped with the 4L80-E automatic transmission, remove the transmission converter cover bolts.

Pic 11

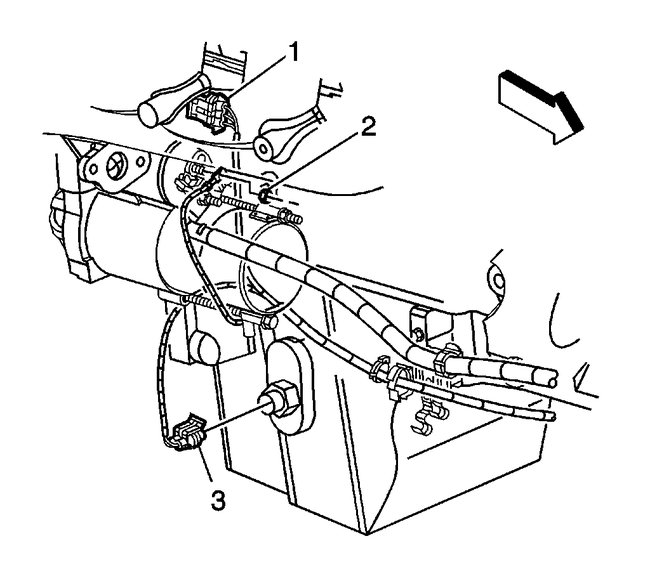
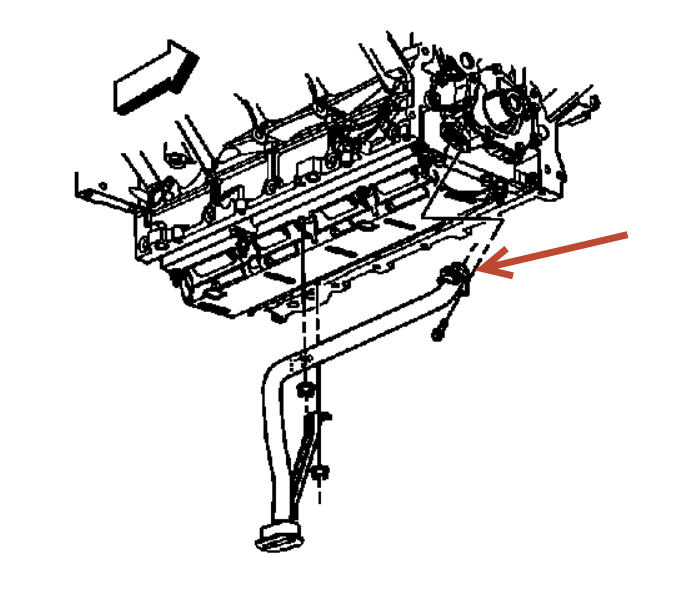
17. Disconnect the oil level sensor electrical connector (3).

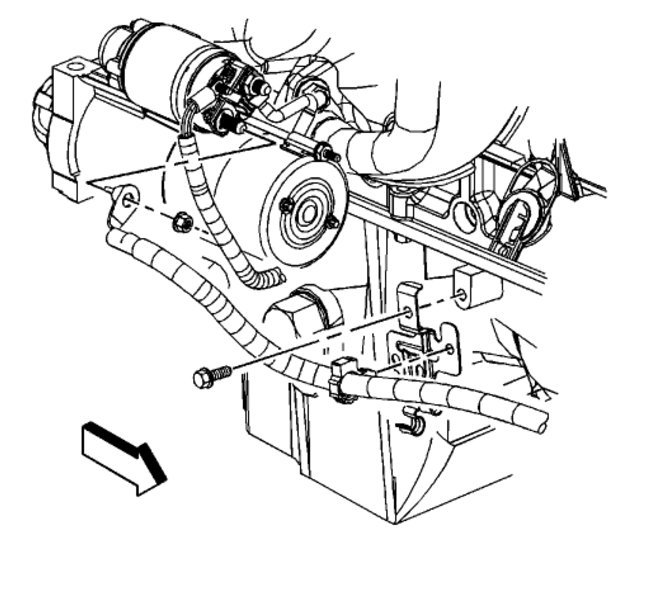
Pic 12

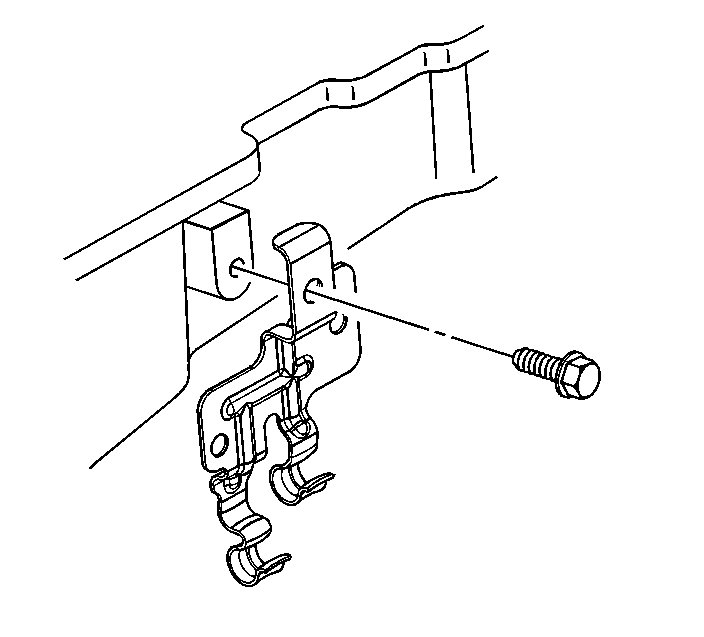
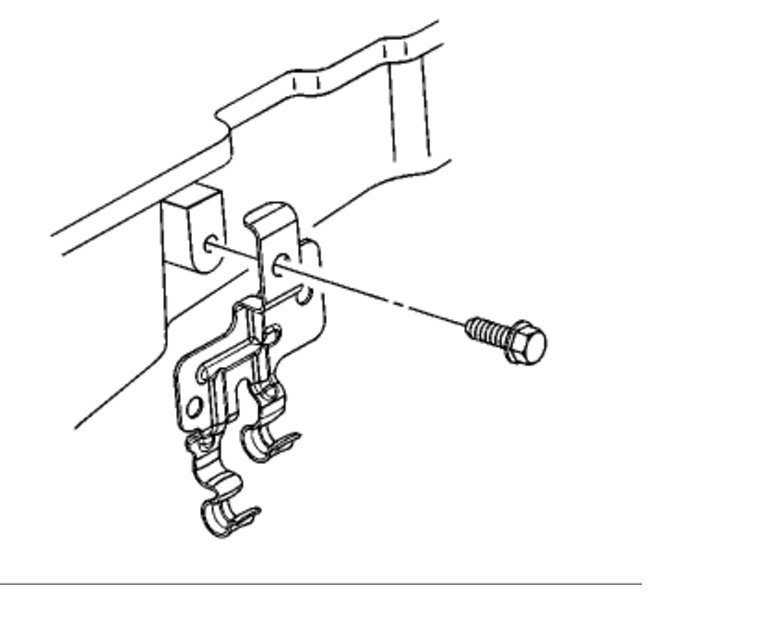
18. Remove the battery cable channel bolt.
19. Slide the channel pin out of the oil pan tab.

Pic 13

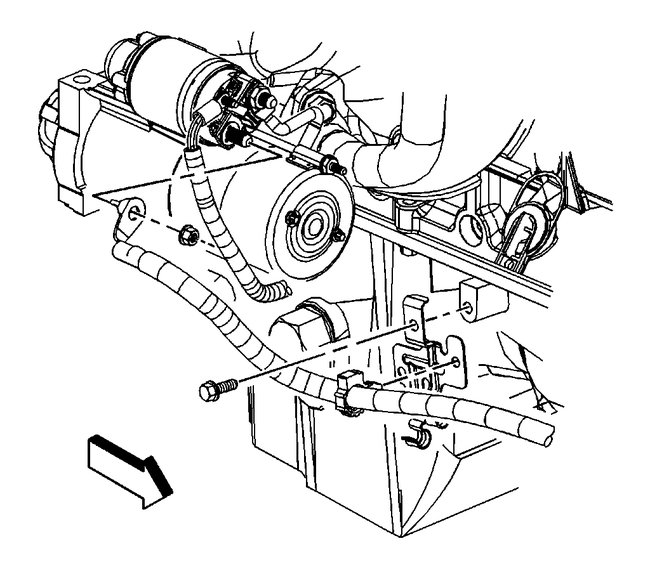
20. Remove the following from the positive battery cable clip:
Engine wiring harness clip
Positive battery cable clip

pic 14

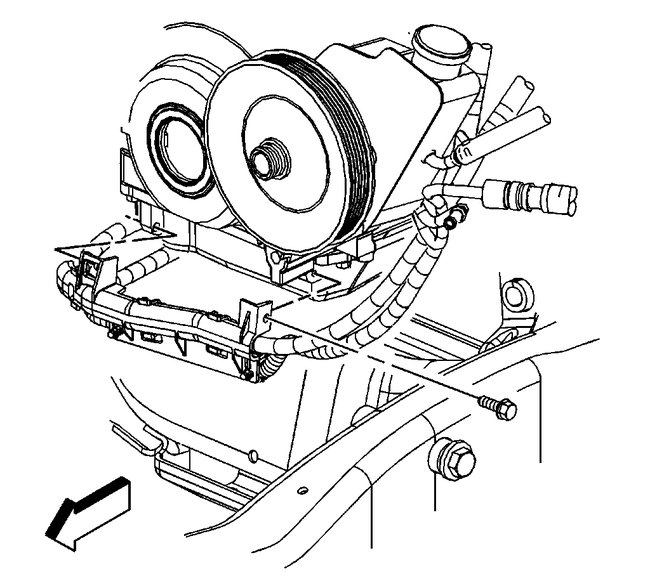
21. Remove the engine oil cooler lines from the positive battery cable clip.
22. Remove the positive battery cable clip bolt and clip.

Pic 15

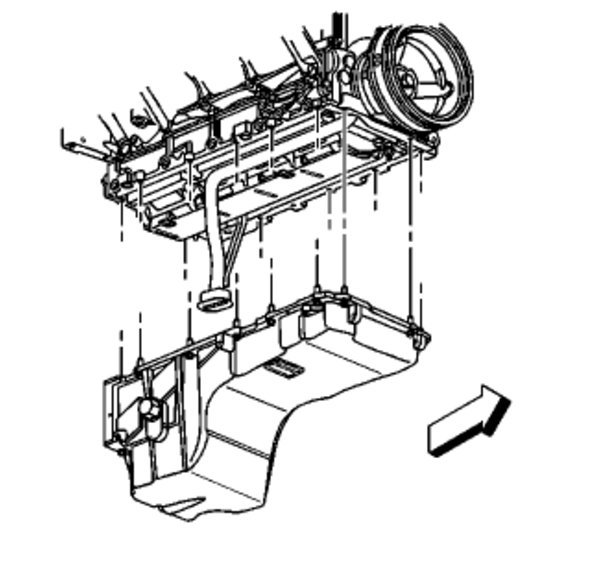
23. Remove the oil pan bolts.
24. Remove the oil pan.

Pic 16

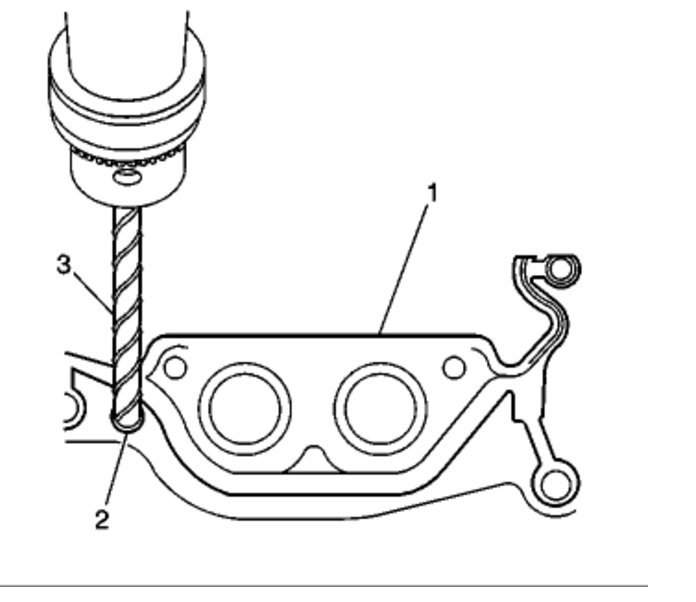
25. Important: DO NOT allow foreign material to enter the oil passages of the oil pan, cap or cover the openings as required.

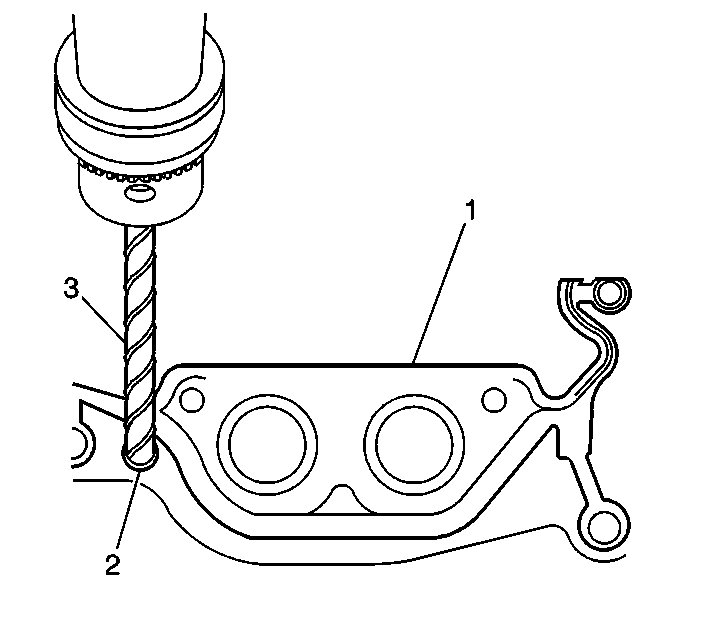
Drill (3) out the oil pan gasket retaining rivets (2), if required.
26. Remove the gasket (1) from the pan.
27. Discard the gasket and rivets.
28. If required, clean and inspect the engine oil pan.

Installation Procedure

Important:
The alignment of the structural oil pan is critical. The rear bolt hole locations of the oil pan provide mounting points for the transmission bellhousing. To ensure the rigidity of the powertrain and correct transmission alignment, it is important that the rear of the block and the rear of the oil pan must NEVER protrude beyond the engine block and transmission bellhousing plane.
Do not reuse the oil pan gasket.
It is not necessary to rivet the NEW gasket to the oil pan.

Pic 17

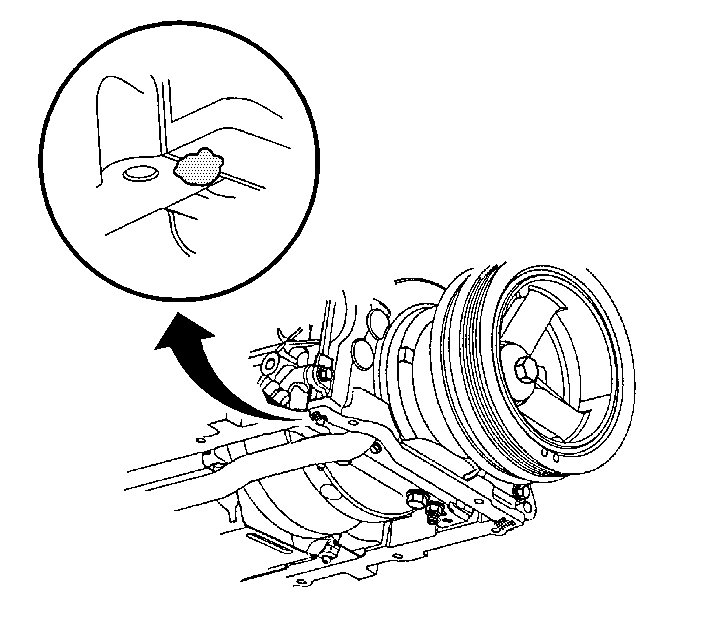
1. Apply a 5 mm (0.20 inch) bead of sealant GM P/N 12378190, or equivalent 20 mm (0.80 inch) long to the engine block. Apply the sealant directly onto the tabs of the front cover gasket that protrudes into the oil pan surface.

Pic 18

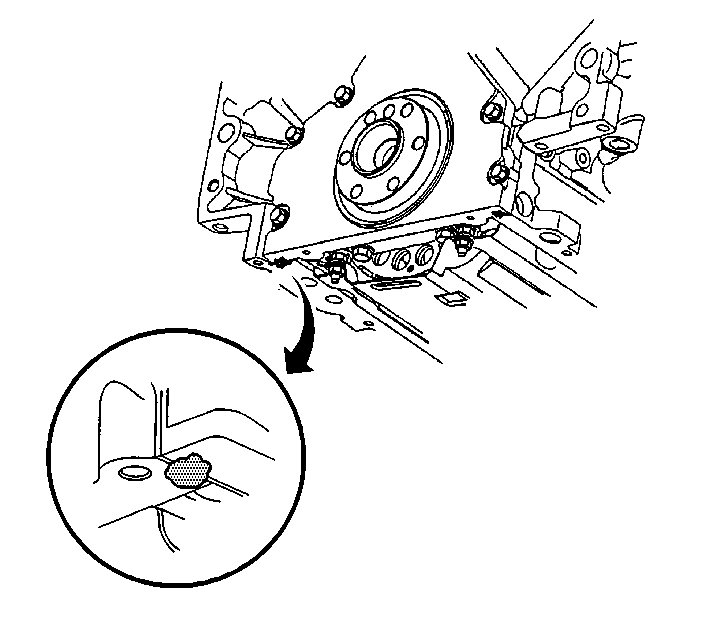
2. Apply a 5 mm (0.20 inch) bead of sealant GM P/N 12378190, or equivalent 20 mm (0.8 inch) long to the engine block. Apply the sealant directly onto the tabs of the rear cover gasket that protrudes into the oil pan surface.

Pic 19

3. Important: Be sure to align the oil gallery passages in the oil pan and engine block properly with the oil pan gasket.

Pre-assemble the oil pan gasket to the pan.
Install the gasket onto the pan.
Install the oil pan bolts to the pan and through the gasket.

4. Install the oil pan, gasket and bolts to the engine block.
5. Tighten the oil pan bolts until snug. Do not overtighten.

Pic 20

6. Install the transmission converter cover bolts until snug, if equipped with the 4L80-E automatic transmission.

Pic 21

7. Install the transmission bolt and stud on the right side until snug, If equipped with the 4L60-E automatic transmission.

Pic 22

8. Notice: Refer to Fastener Notice in Service Precautions.

Install the bottom bolt on the left side until snug.
1. Tighten the oil pan and oil pan-to-oil pan front cover bolts to 25 Nm (18 lb ft).
2. Tighten the oil pan-to-rear cover bolts to 12 Nm (106 lb in).
3. Tighten the bellhousing, converter cover, and transmission bolts/stud to 50 Nm (37 lb ft).

Pic 23

9. Install the positive battery cable clip and bolt to the oil pan.
Tighten the bolt to 9 Nm (80 lb in).
10. Install the engine oil cooler lines to the positive battery cable clip.

Pic 24

11. Install the following to the positive battery cable clip:
Engine wiring harness clip
Positive battery cable clip

pic 25

12. Slide the channel pin in to the oil pan tab.
13. Install the battery cable channel bolt.
Tighten the bolt to 12 Nm (106 lb in).

Pic 26

14. Connect the oil level sensor electrical connector (3).

Pic 27

15. Install the transmission cover and bolt.
Tighten the bolt to 12 Nm (106 lb in).

Pic 28

16. Install the crossbar.
17. Install the crossbar bolts.
Tighten the bolts to 100 Nm (74 lb ft).

Pic 29

18. If equipped, install the oil pan skid plate.
19. Install the oil pan skid plate bolts.
Tighten the bolts to 20 Nm (15 lb ft).

Pic 30

20. Install the transmission cover bolts
Tighten the bolt to 12 Nm (106 lb in).

Pic 31

21. Raise the front drive axle into position.
22. If equipped with 4WD, install the differential carrier upper mounting bolt and nut until snug. Do not tighten at this time.

Pic 32

23. If equipped with 4WD, instal the differential carrier lower mounting bolt and nut.
Tighten the bolts to 100 Nm (75 lb ft).

Pic 33

24. If equipped with 4WD, install the inner axle housing washers and nuts to the bracket.
Tighten the nuts to 100 Nm (75 lb ft).

25. Remove the jack from the front drive axle.
26. Install new engine oil and a new oil filter.

_______________________________

Let me know if this helps.

Take care,
Joe
Was this
answer
helpful?
Yes
No
Saturday, December 12th, 2020 AT 9:15 AM (Merged)
Tiny
LESTERANDSARAH
  • MEMBER
  • 5 POSTS
  • 2003 CHEVROLET SILVERADO
  • V8
  • 4WD
  • AUTOMATIC
  • 70,000 MILES
My oil pressure dropped to 0 instantaniously. I stopped and did an engine flush and oil change to no avail. I feel that the oil pump screen is blocked or the oil pump is defective.
I need to know the easiest way to remove the oil pan to get access to the pump and screen.

Thanks
Was this
answer
helpful?
Yes
No
Saturday, December 12th, 2020 AT 9:15 AM (Merged)
Tiny
JACOBANDNICKOLAS
  • MECHANIC
  • 108,164 POSTS
Did you hear any ticking or knocking from the engine? Before going to the extent of removing the oil pan, I would recommend getting a mechanical oil gauge (most parts stores will lend or rent them) and check to see if the engine is getting pressure. There is a good chance the sending unit went bad.

Let me know.

Joe
Was this
answer
helpful?
Yes
No
+2
Saturday, December 12th, 2020 AT 9:15 AM (Merged)
Tiny
LESTERANDSARAH
  • MEMBER
  • 5 POSTS
I do get clicking valve noise if I idle the motor now. I keep that to a bear minimum. I feel there is definately no oil pressure. I was considering removing the oil filter and then turning the engine over to see if there might clear out the oil pump screen (if that is the problem). What do you think? Removal of the oil pan seems like a big job. Any suggestions?
Was this
answer
helpful?
Yes
No
Saturday, December 12th, 2020 AT 9:15 AM (Merged)
Tiny
JACOBANDNICKOLAS
  • MECHANIC
  • 108,164 POSTS
Either you have a bad oil pump or the screen is plugged on the pick up. What I would like you to do is this. Go to a parts store and rent an oil pressure gauge. It screws into where the oil sending unit is located. Check the oil pressure using that and let me know what the pressure actually is. From that, I can help direct you. As far as removing the oil filter, it isn't recommended.

Let me know what you think. I really believe the oil pan will need to come off, but that is your call at this point.

Take care,
Joe
Was this
answer
helpful?
Yes
No
+1
Saturday, December 12th, 2020 AT 9:15 AM (Merged)
Tiny
LESTERANDSARAH
  • MEMBER
  • 5 POSTS
Thanks for the input. In retrospect, I agree that regardless, the oil pan will have to come off. There doesn't seem to be a lot of room to raise the motor approx. 10 inches, but, will try. I will remove the motor mounts and using a cherry picker (owned by a friend) to accomplish this. I agree also that the removal of the oil filter would be useless, as regardless what we find, the oil pan will still have to come off to correct the blockage or the broken oil pump drive shaft or the oil pump itself. It will have to wait until the Friday. We fully appreciate your input.
Was this
answer
helpful?
Yes
No
+2
Saturday, December 12th, 2020 AT 9:15 AM (Merged)
Tiny
JACOBANDNICKOLAS
  • MECHANIC
  • 108,164 POSTS
If you need help along the way, let me know. I check my email every day, so I'll get back to you ASAP. Be carefull not to damage any wiring, vacuum hoses, sensors. When lifting the engine. And you are correct, there isn't much room.

Let me know how it goes for you.

Joe
Was this
answer
helpful?
Yes
No
+1
Saturday, December 12th, 2020 AT 9:15 AM (Merged)
Tiny
BORN1972
  • MEMBER
  • 1 POST
  • 2003 CHEVROLET SILVERADO
  • 150,000 MILES
What would cause sludge to build up in oil pan, when oil changed every 3000 miles?
Was this
answer
helpful?
Yes
No
Saturday, December 12th, 2020 AT 9:15 AM (Merged)
Tiny
MHPAUTOS
  • MECHANIC
  • 31,938 POSTS
The type of oil used, excessive blow by, can cause sludge.
Was this
answer
helpful?
Yes
No
+1
Saturday, December 12th, 2020 AT 9:15 AM (Merged)
Tiny
CARADIODOC
  • MECHANIC
  • 33,737 POSTS
Most common cause is too much short-trip driving. All engines have some "blowby" past the piston rings. Those gases condense in the oil and form sludge. Once the oil becomes hot those hydrocarbons start to vaporize and they get drawn out through the PCV valve to be burned again in the cylinders. That just STARTS to occur when the engine gets hot. From there it takes time for it all to be drawn out.

Also, much of that sludge doesn't drain out with the oil when it's cold. That's why oil is normally changed when it's hot. Keep in mind too that when sludge collects in places like the oil pan it isn't harming anything What can cause problems is when there's so much sludge that it displaces the new oil. Professionals typically do not pour in measured amounts of new oil because, among other variables, it's impossible to memorize the needs of all the different engines. Instead, they will start with about four quarts, then add more as necessary. If there's a half quart of sludge stuck in there, you'll get a half quart less new oil. When those hydrocarbons finally do start to vaporize and circulate with the oil it impedes the oil's ability to isolate moving parts, (lubricate) and that can accelerate engine wear.
Was this
answer
helpful?
Yes
No
+2
Saturday, December 12th, 2020 AT 9:15 AM (Merged)
Tiny
2CP-ARCHIVES
  • MEMBER
  • 4,542 POSTS
  • 2002 CHEVROLET SILVERADO
  • 151,000 MILES
Loosing oil pressure, need to change the o ring on the in take tube, do I need to raise the motor to get my oil pan out? It's a half ton.
Was this
answer
helpful?
Yes
No
Saturday, December 12th, 2020 AT 9:15 AM (Merged)
Tiny
HMAC300
  • MECHANIC
  • 48,601 POSTS
Yes you probably will if it's a 4.3L there is no O-ring it is pump to block. You will also have to pull off front covr if anything other than a 4.3L and a lot of other stuff as well.
Was this
answer
helpful?
Yes
No
Saturday, December 12th, 2020 AT 9:15 AM (Merged)
Tiny
CARPROOO
  • MEMBER
  • 1 POST
  • 2002 CHEVROLET SILVERADO
  • 6.0L
  • V8
  • 4WD
  • AUTOMATIC
  • 160,000 MILES
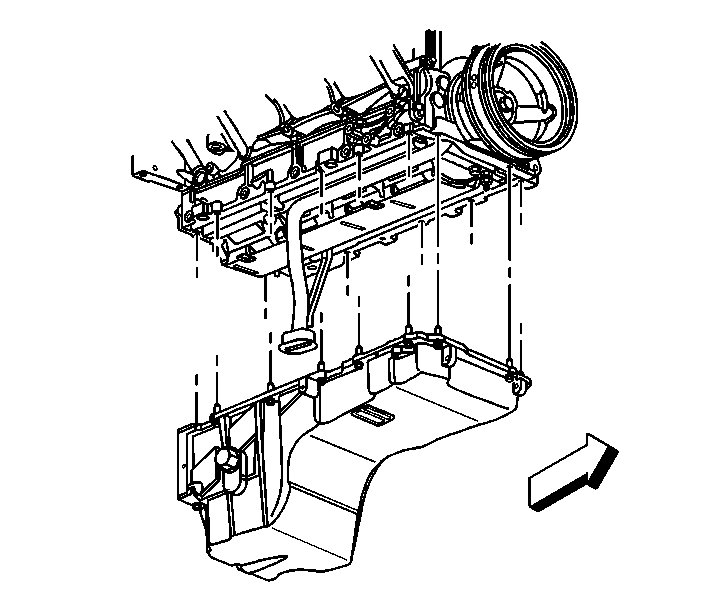
Do you have to take the transmission out when changing the oil pan/gasket? Can I get to the oil pump after I remove oil pan?
Was this
answer
helpful?
Yes
No
Saturday, December 12th, 2020 AT 9:15 AM (Merged)
Tiny
CARADIODOC
  • MECHANIC
  • 33,737 POSTS
The oil pump is driven by the snout of the crankshaft. You don't have to remove the oil pan to replace the pump assembly. It does look like the transmission may need to be separated check out the instructions in the diagrams below. Check out the diagrams (Below). Please let us know if you need anything else to get the problem fixed.
Was this
answer
helpful?
Yes
No
Saturday, December 12th, 2020 AT 9:15 AM (Merged)
Tiny
ERIC67
  • MEMBER
  • 2 POSTS
  • 2002 CHEVROLET SILVERADO
  • 4.3L
  • 6 CYL
  • 2WD
  • AUTOMATIC
  • 255,000 MILES
I have the same problem Jerry described in his question, I have removed all bolts, nuts, and any connectors and have the pan loose from any gasket material. I've jacked the motor and everything and I cannot get the pan out.
Was this
answer
helpful?
Yes
No
Saturday, December 12th, 2020 AT 9:15 AM (Merged)
Please login or register to post a reply.

Sponsored links