Yes, that uis a Code 13.
CODE 13
1. Disable air bag system. Connect negative battery cable. Turn ignition on. Observe AIR BAG warning light. If AIR BAG warning light displays Code 13, go to step 4). If AIR BAG warning light displays a code other than 13, go to next step.
2. Disconnect negative battery cable. Remove driver air bag module. Connect driver air bag module Orange and Blue clockspring connectors. Connect negative battery cable. Turn ignition on. Observe AIR BAG warning light. If AIR BAG warning light displays Code 13, replace clockspring assembly. If AIR BAG warning light displays a code other than 13, go to next step.
3. Turn ignition off. Disconnect negative battery cable. Connect passenger air bag module Orange and Blue clockspring connectors. Connect negative battery cable.Turn ignition on. Observe AIR BAG warning light. If AIR BAG warning light displays Code 13, replace passenger air bag module. If AIR BAG warning light displays a code other than 13, replace driver air bag module.
4. Turn ignition off. Disconnect diagnostic module connectors. Using a DVOM, check for continuity between diagnostic module connector terminal 2F and ground. If continuity is not present, got to next step. If continuity is present, replace wiring harness.
5. Using a DVOM, check for continuity between diagnostic module connector terminal 2G and ground. If continuity is not present, go step 7) . If continuity is present, go to next step.
6. Using a DVOM, check for continuity between diagnostic module connector terminal 2D and ground. If continuity is present, go to next step. If continuity is not present, go to step 8).
7. Disconnect S-sensor connector. Using a DVOM, check for continuity between S-sensor connector (sensor side) terminal "C" and ground. If continuity is present, replace S-sensor. If continuity is not present, replace wiring harness.
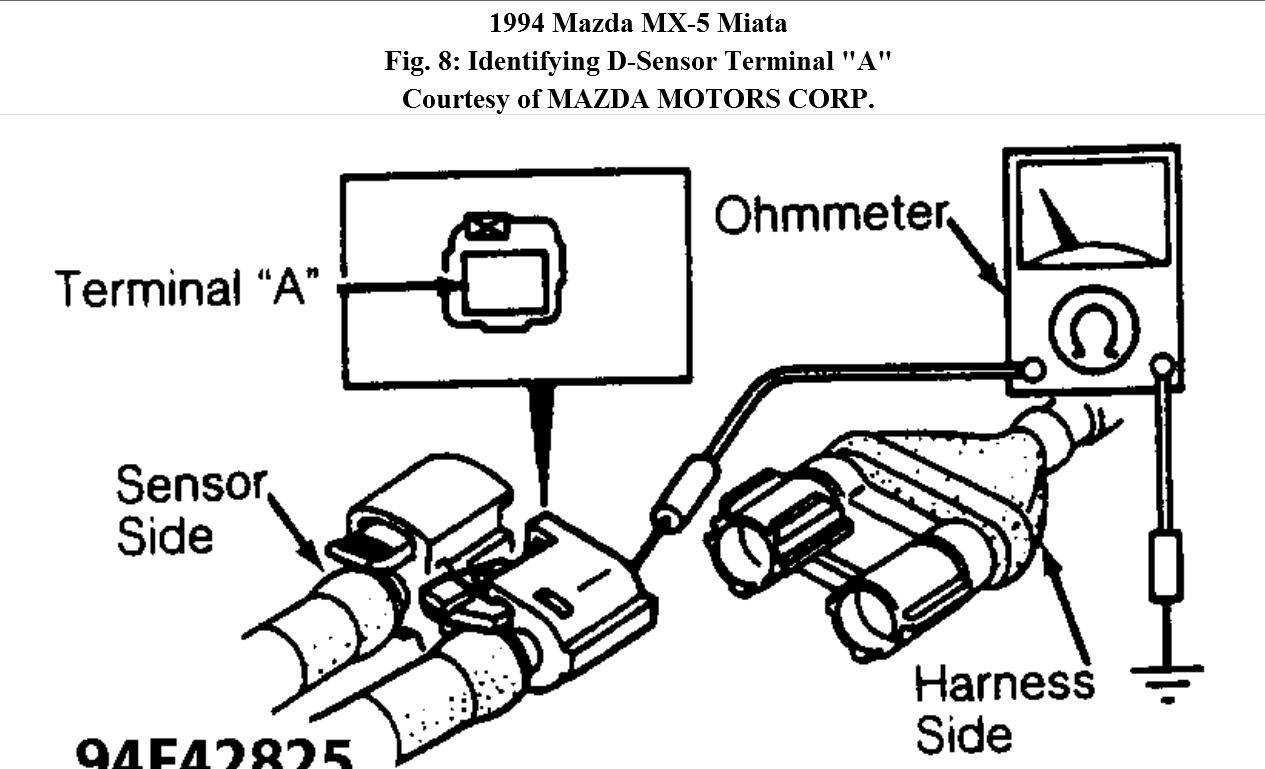
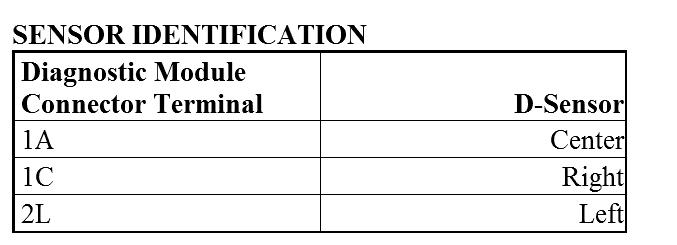
8. Using a DVOM, check resistance between diagnostic module connector terminals 1C, 1A, 2L and ground one at a time. If resistance on all terminals was 1.18 k-ohms, replace diagnostic module. If resistance was not 1.18 k-ohms, on one or more terminals, test suspect D-sensor. Go to next step.
9. Using a DVOM, check resistance between suspect D-sensor connector (sensor side) terminal "A" and ground. See Fig. 8. If resistance is 1.18 k-ohms, replace wiring harness. If resistance is not 1.18 k-ohms, replace suspect D-sensor.
Images (Click to enlarge)
Nov 30, 2012 at 1:52 PM