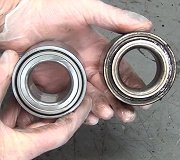
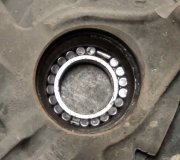
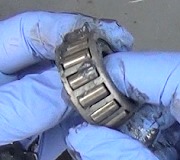
Looks like steps # 4 and # 11 are where you are getting the confusion. I use a press to push my breaings in (rotating the bearings periodically). If you have the special tool referred to in step 4, the torque is 144-188 ft lb, in order to "seat" the bearing. Once the assembly is together the axle nut torque is 52 ft lb (step #11). I hope this helps.
1. Fill the wheel bearing with multipurpose grease. Apply a thin coating of multipurpose grease to the knuckle and bearing contact surfaces.
2. Press the wheel bearing into the knuckle using an appropriate pressing tool. Once the bearing is installed, install the inner race using the proper driving tool.
3. Drive the oil seal into the knuckle using the proper size driver. Drive seal into knuckle until it is flush with the knuckle end surface.
4. Using pressing tool MB990998 or equivalent, mount the front hub assembly into the knuckle. Tighten the nut of the pressing tool to 144-188 ft. Lbs. (200-260 Nm). Rotate the hub to seat the bearing.
5. Mount the knuckle assembly in a vise. Check the hub assembly turning torque and end-play as follows:
6. Using a torque wrench and socket MB990998 or equivalent, turn the hub in the knuckle assembly. Note the reading on the torque wrench and compare to the desired reading of 16 inch lbs. (1.8 Nm) or less. This is known as the breakaway torque.
7. Check for roughness when turning the bearing.
8. Mount a dial indicator on the hub so the pointer contacts the machined surface on the hub.
9. Check the end-play.
10. Compare the reading to the limit of 0.002 in. (0.05mm).
11. If the starting torque or the hub end-play are not within specifications while the nut is tightened to 144-188 ft. Lbs. (200-260 Nm), the bearing, hub or knuckle have probably not been installed correctly. Repeat the disassembly and assembly procedure and recheck starting torque and end-play.
11. Install the hub and knuckle assembly onto the vehicle. Install the lower ball joint stud into the steering knuckle and install a new nut. Tighten to 52 ft. Lbs. (72 Nm).
12. Install the halfshaft into the hub/knuckle assembly.
13. Install the two front strut lower mounting bolts and tighten to 80-94 ft. Lbs. (110-130 Nm) on Mirage or 65-76 ft. Lbs. (90-105 Nm) on Diamante models.
14. Install the tie rod end and tighten the nut to 25 ft. Lbs. (34 Nm) for Mirage and 21 ft. Lbs. (29 Nm) on Diamante models
15. Install the brake disc and caliper assembly.
16. If equipped with Active-ECS, connect the height sensor and tighten the mounting bolt to 15 ft. Lbs. (20 Nm).
17. Install the front speed sensor, if removed.
18. Install the washer and new locknut to the end of the halfshaft. Tighten the locknut snugly to 144-188 ft. Lbs. (200-260 Nm).
19. Install the tire and wheel assembly onto the vehicle.
20. Lower the vehicle to the ground.
SPONSORED LINKS
Sunday, March 31st, 2013 AT 4:26 PM


