A battery jump start is easy to do but can be hazardous if not performed correctly. This guide will show you the do's and don'ts to keep you safe, and get you back on the road. A battery jumper cable is a pair of large gauge wires capable of carrying voltage from one battery to another. This is done by using two large spring loaded clamps on either side of the jumpers, two negative and two positive which connect two car batteries together.
Let's Get Started!
You will need to park a car with the good battery next to the car with the dead battery, this can be done nose to nose or side by side. You want the batteries to be close enough to one another so the jumper cables can reach. It's a good idea to wear gloves and protective eyewear before beginning.
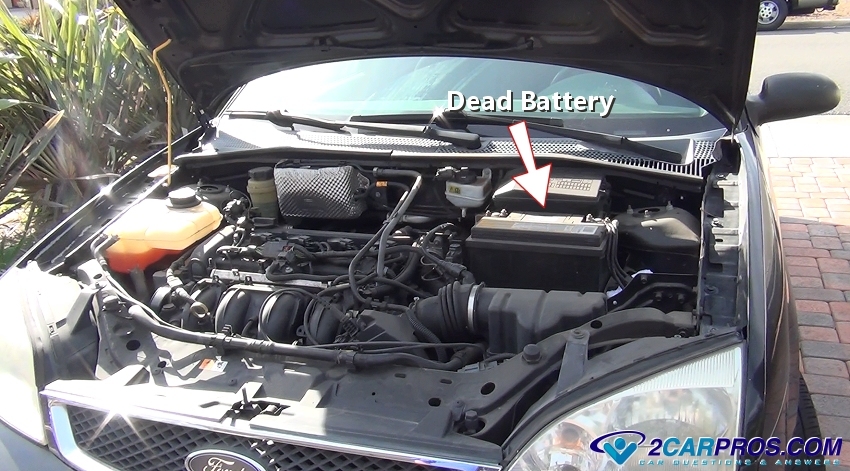
1. Lift Hood on Both Cars: Locate the battery in each car, nine time out of ten they are under the hood but sometimes they can be located in the trunk. Remove the battery terminal covers (if any) so the jumper cable clamps can get a good connection.
2. Inspect Jumper Cables: Gather your jumper cables and inspect them for any broken leads or open wires. Because these cables will carry high amperage they need to be of high quality and free from damage.

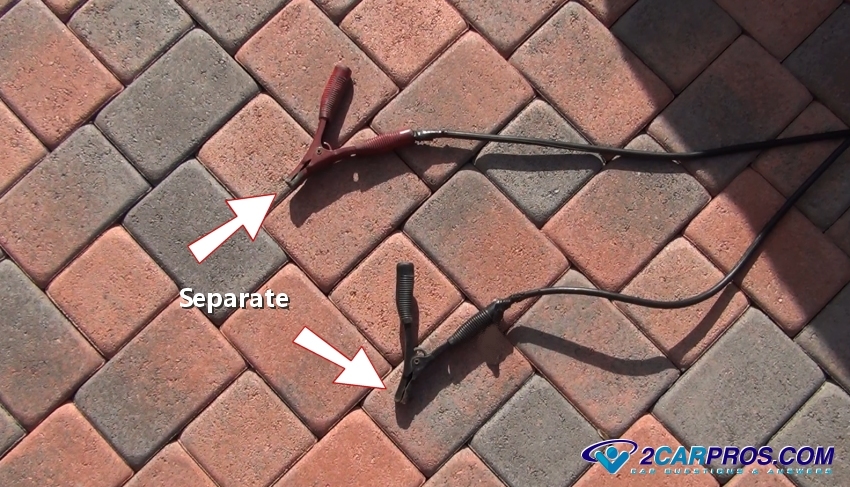
3. Separate Jumper Clamps: You will be connecting the jumpers to the car with the dead battery first, the opposite end of the cables must be separated. If these ends are touching when you connect the jumpers to the dead battery there will be a short circuit and sparks which can cause the battery to explode. We don't mean to scare you, but inside the battery there are hydrogen gasses which a spark can ignite. It doesn't happen very often but it does happen.
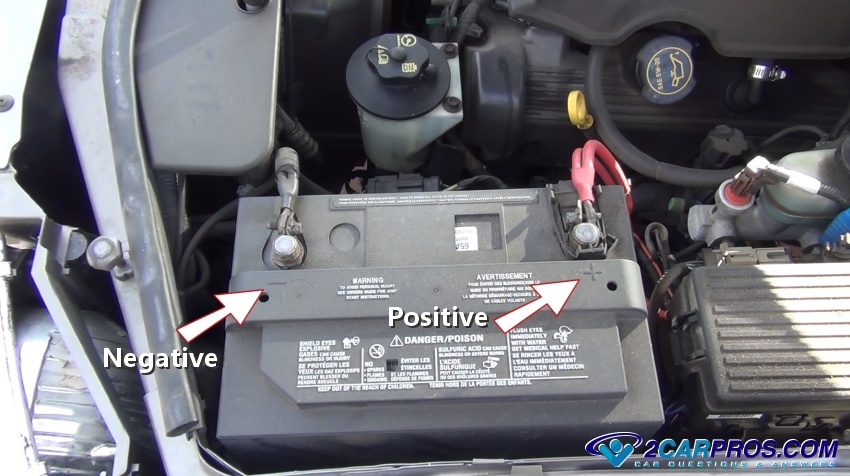
4. Identify Positive and Negative Battery Terminals: The most important rule when jumping a battery is identifying the positive (+) and negative (-) battery terminals on both the dead and charged battery. The jumpers must be connected in the same polarity, in other words positive to positive and negative to negative. The positive terminal will be slightly larger in size that the negative terminal.
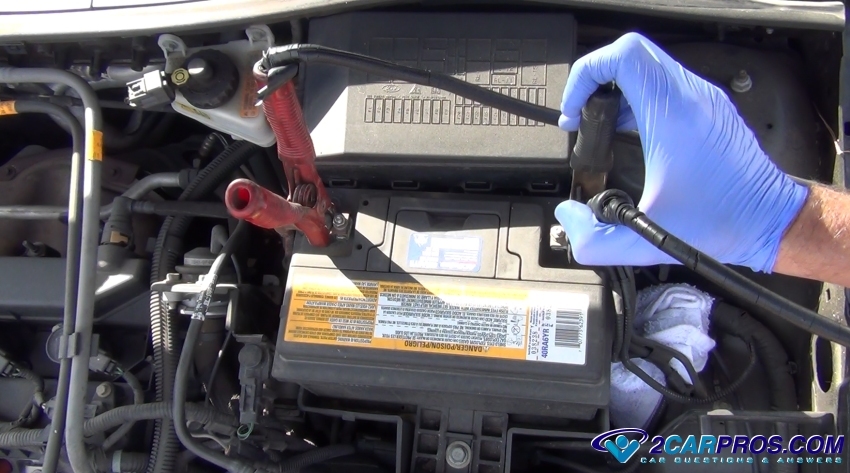
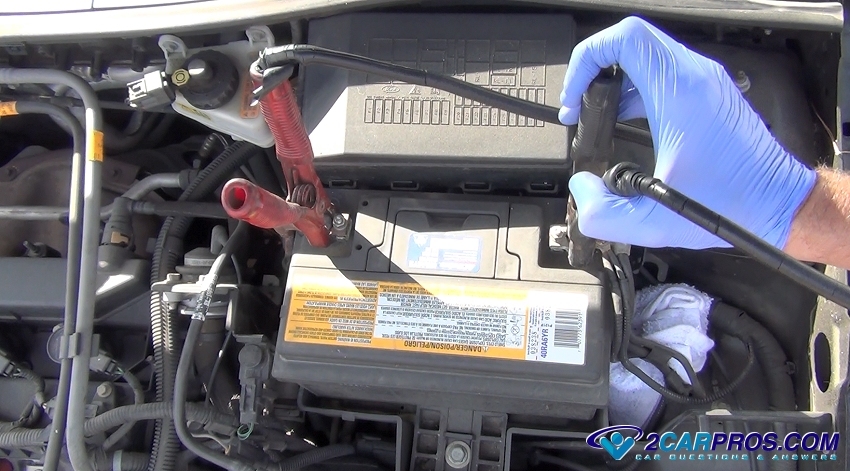
5. Connect Jumper Cables: Starting with the dead battery, connect the jumper cables by squeezing the clamps of both the positive and negative clamps and attaching them to their respective terminals. Black for negative (-) and red for positive (+) which should be indicated on the battery. Once connected, wiggle the clamps to get a good connection on both.
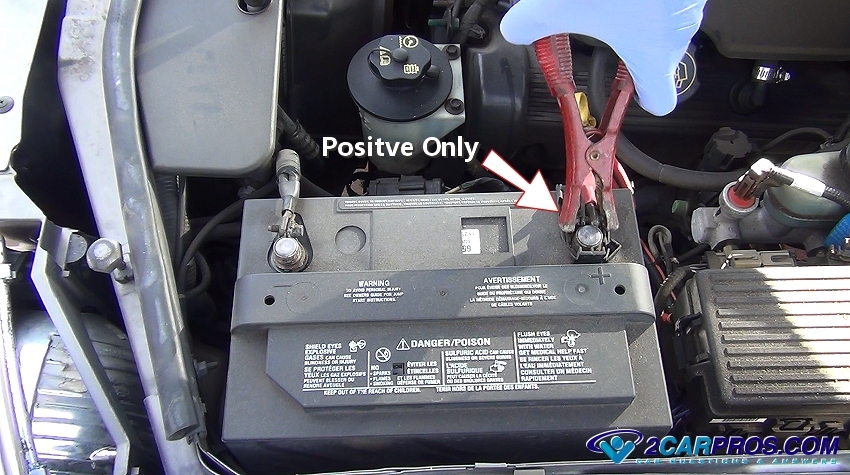
6. Connect Positive Jumper Only: Now you are ready to connect the charged battery to the dead battery, again making sure the positive and negative terminals are understood, connect the positive jumper clamp to the positive terminal which will be red or have a (+) sign near it. Take an extra second to make sure you are not hooking up the jumper cables backwards which can cause electrical system damage to both cars, wiggle the clamp to get a good connection.
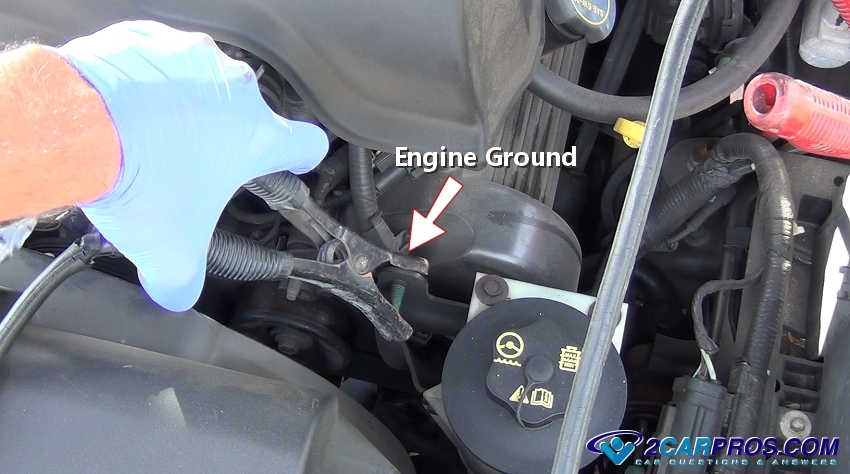
7. Connect Negative Jumper to Engine Ground Only: The final connection of the jumper cables will be to an engine ground only. The reason for this is because the final connection will make some minor sparks which can ignite hydrogen gasses inside the battery. For safety proposes find a metal bracket or bolt and make the final connection for the jumper cables. Wiggle the clamp to ensure a good connection, also you want to be sure the cables and clamps are clear from rotating engine parts such as the fan blade or serpentine belt.
8. Start Car with Good Battery: Start the car with the good battery, this will enable the alternator to boost the voltage of the dead battery. Allow the engine to run for about 5 minutes before trying to start the car with the dead battery. This is because the car that has the running engine is now charging the dead battery car. Once the engine is running rest your foot on the accelerator to raise the engine's idle, this will help the alternator output more amperage.
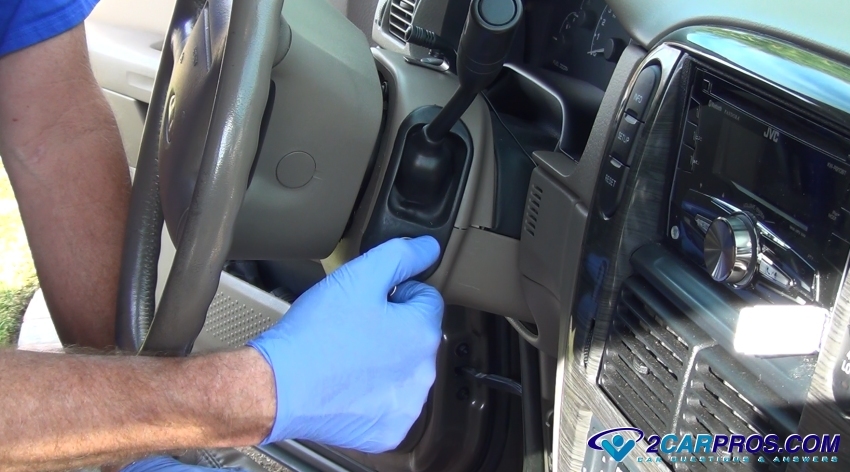
9. Jump Dead Battery: Turn the ignition system on of the car with the dead battery to start the engine. Have anyone in the area to step back when cranking over the car with the dead battery, once the car has started allow the car to run which will help charge the battery. Sometimes a jumpstart will not work because the dead battery has shorted inside and needs replacement.

10. Disconnect Jumper Cables: Once the dead battery car has started remove the jumper cables and shut the car with the good battery off. Then remove the clamp from the engine ground to avoid sparks from near the dead battery. Remove the remainder of the jumper cable's clamps and then store them away for next time.
Once the engine is running if the battery warning light is on it means the alternator could be bad and needs to be tested and then replaced if it is found to be bad. If the battery is new but is repeatedly drained your car could have a draw which needs to be fixed so the battery can operate normally.
Watch the Video!
Please watch this video of the job being done to glean additional helpful information.
Credits
This guide knowledge base was created by the 2CarPros Team, and by Ken Lavacot: Automobile repair shop owner and certified master automobile technician of over 30 years. If you have question or need help please ask one of our experts we are happy to help. Please visit our 2CarPros YouTube Channel.

Article published 2024-05-15

Battery Replacement

Battery Replacement Honda

Battery Replacement Saturn