Welcome to 2CarPros.
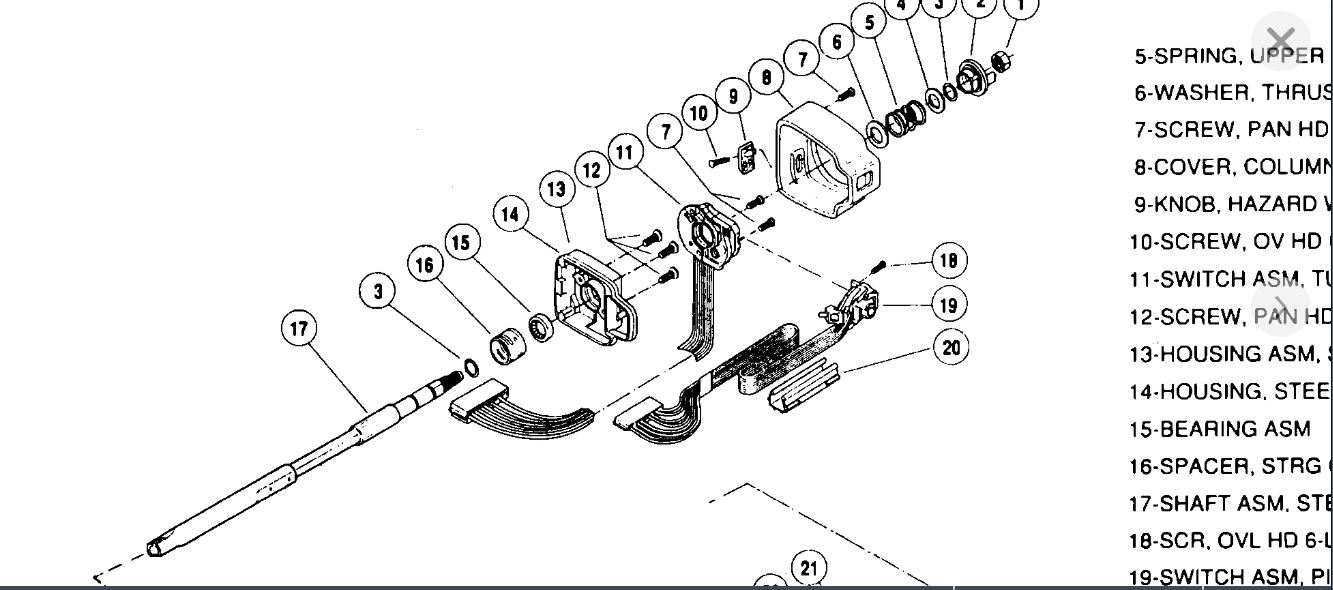
What I am going to provide are the directions specific to replacement with a tilt wheel. All attached pictures correlate with the directions. Also, pic 1 is an exploded view of the column. Read through the directions, compare the pics, and see if anything stands out as different to what you have done.
_____________________________
IGNITION LOCK CYLINDER
Tilt Wheel Steering Column
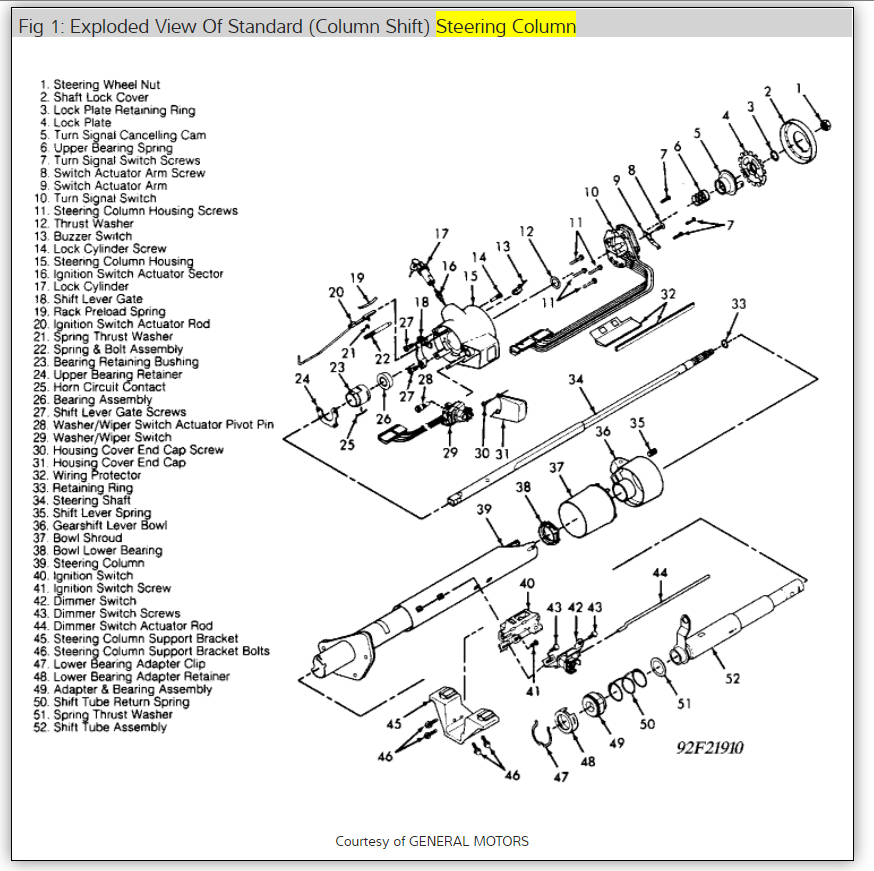
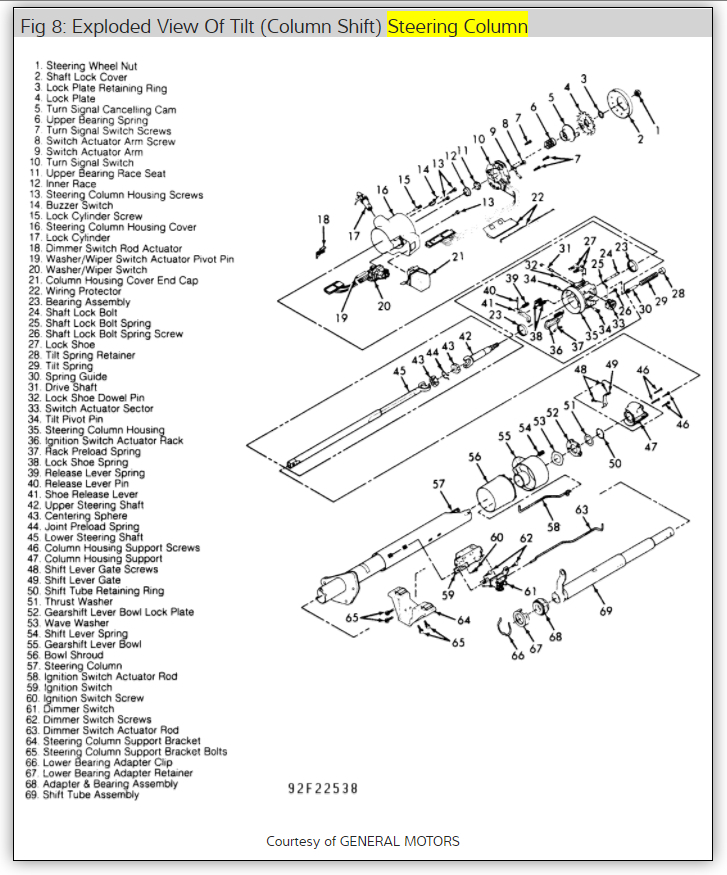
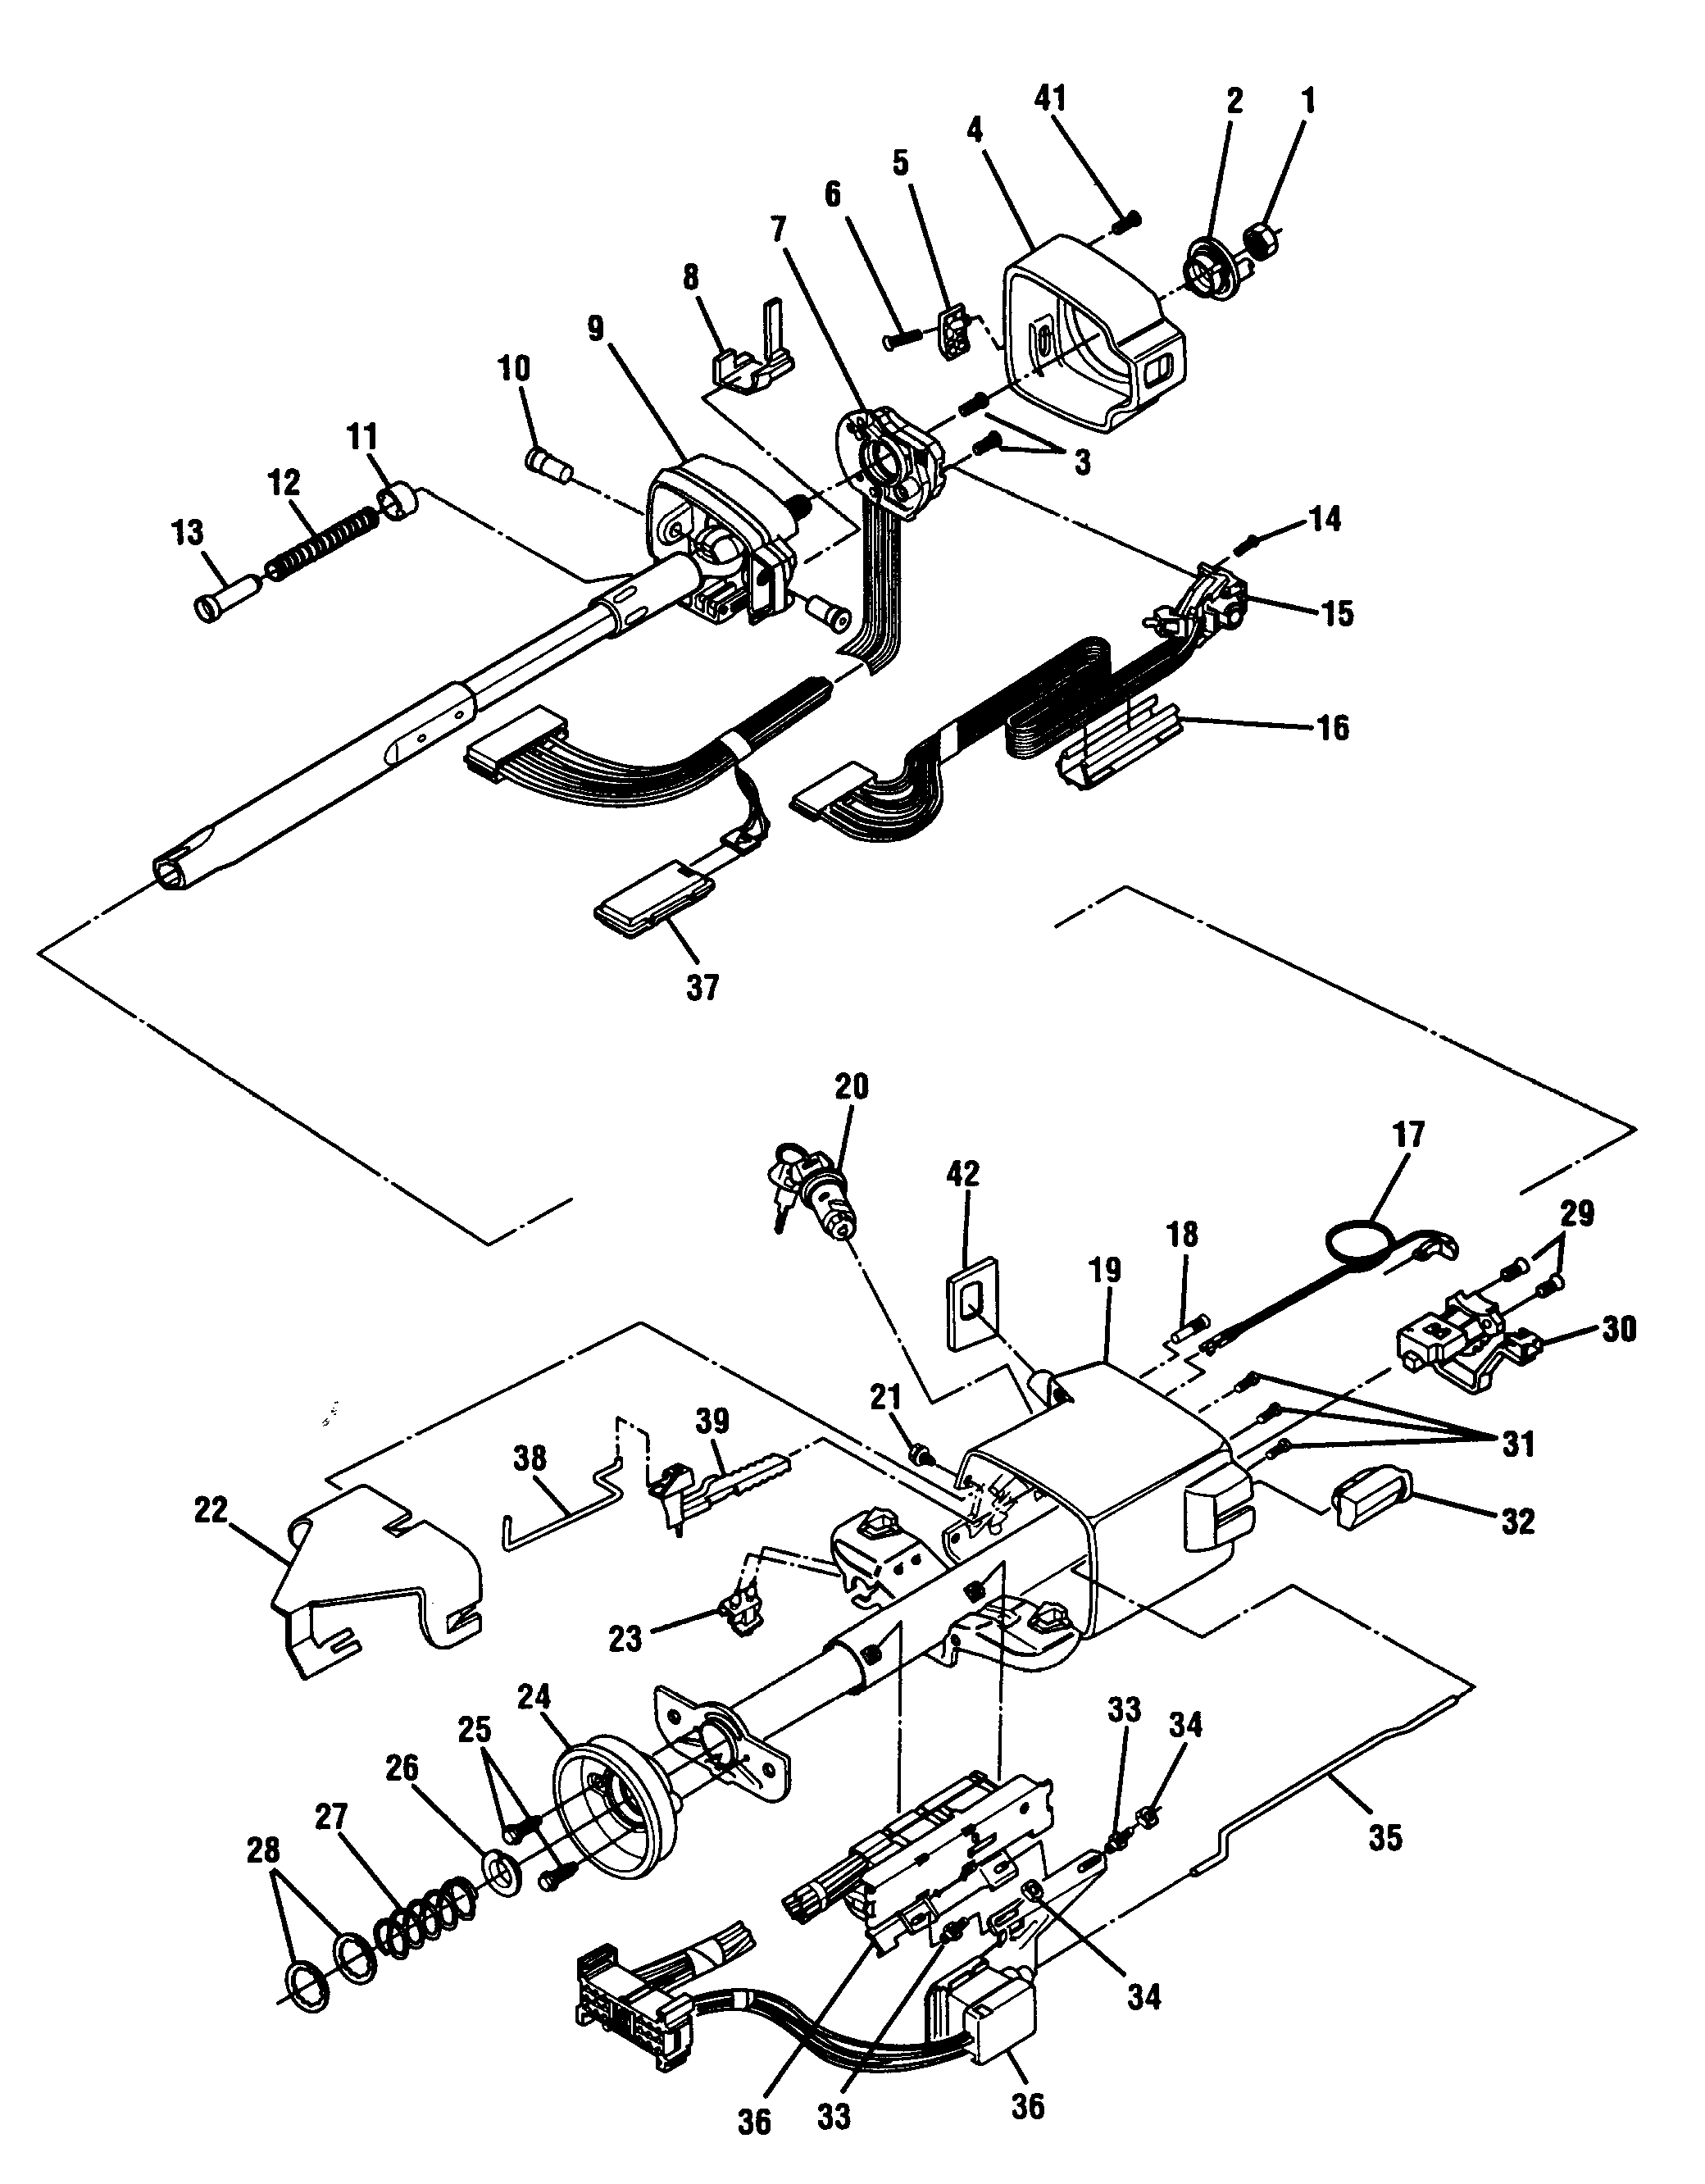
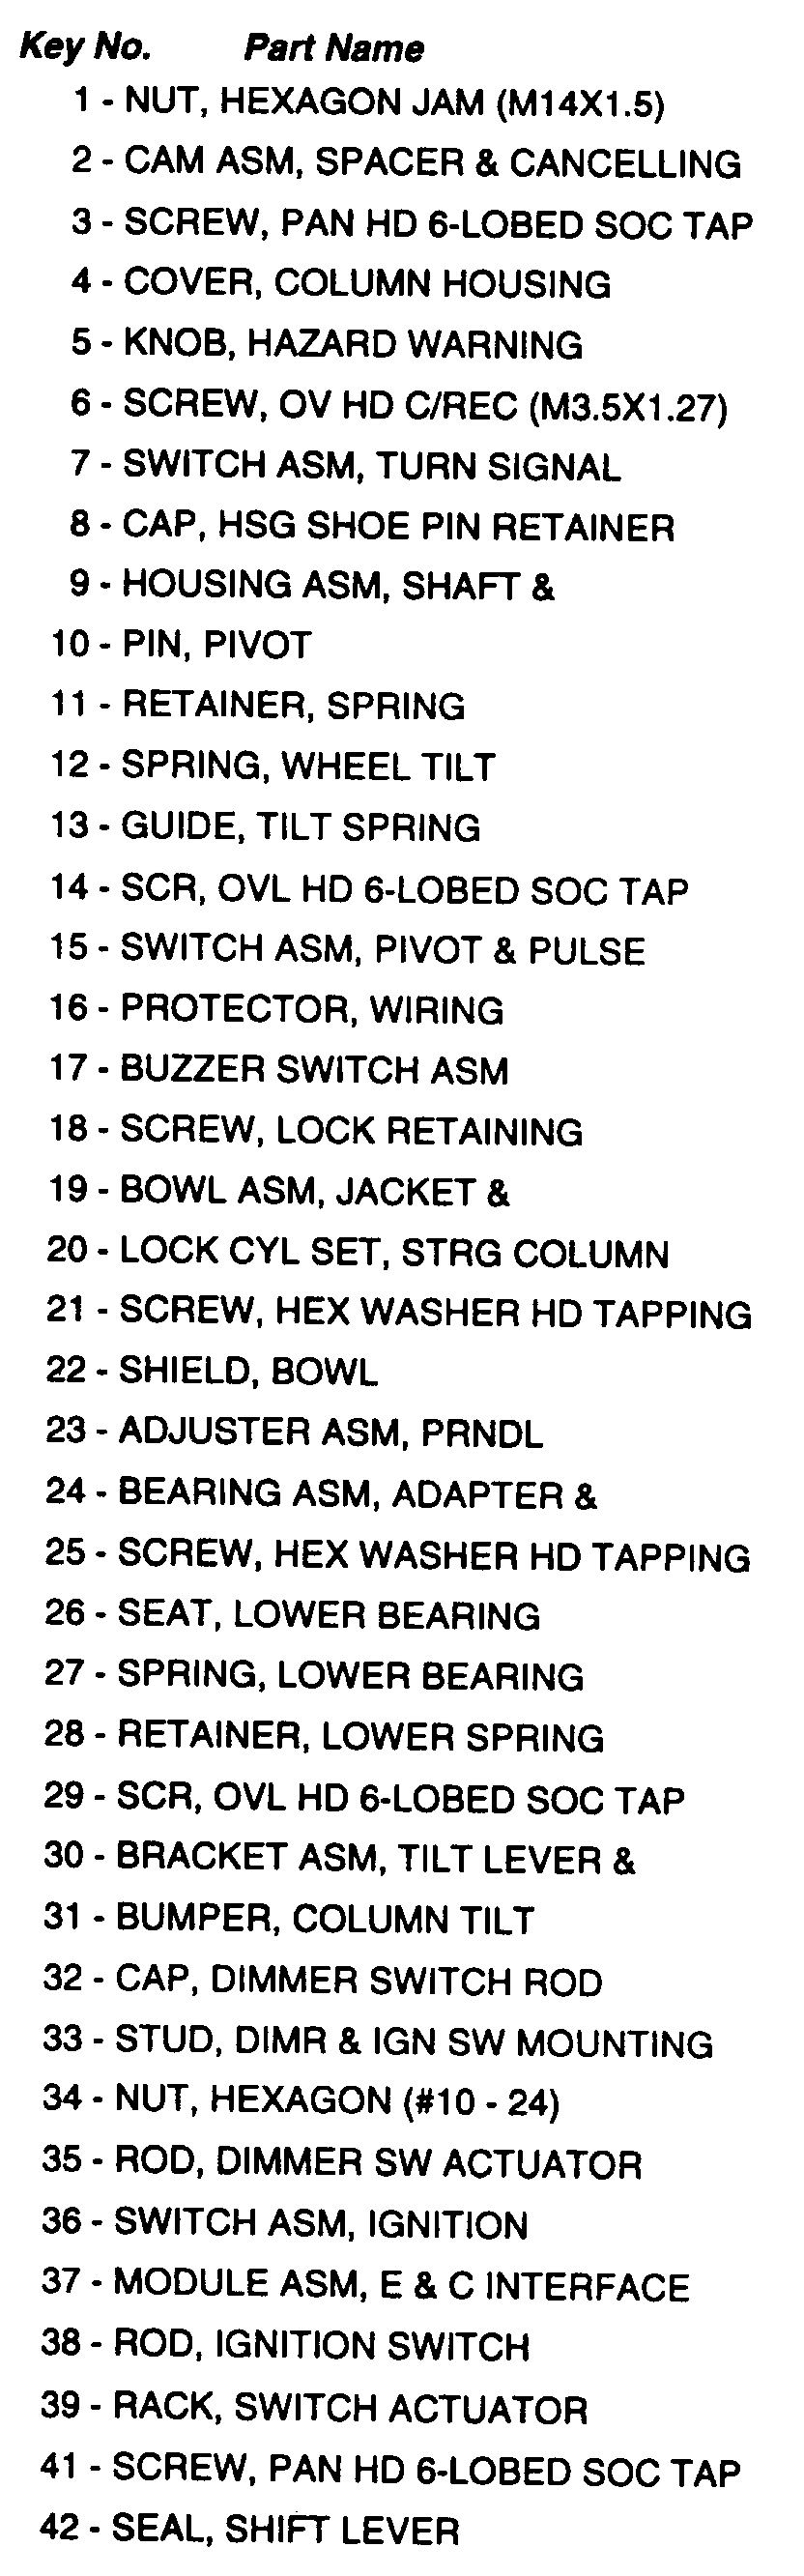
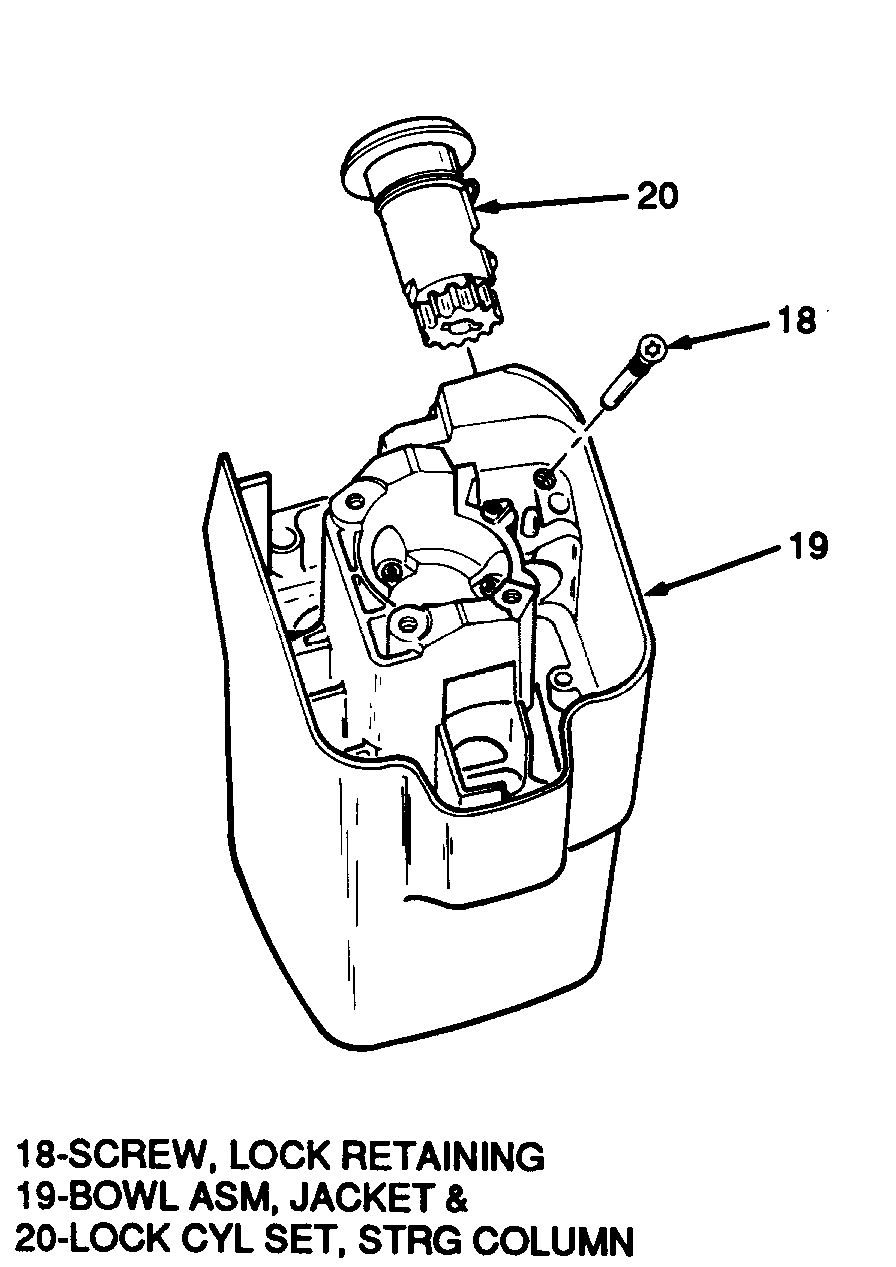
pic 1
Legend
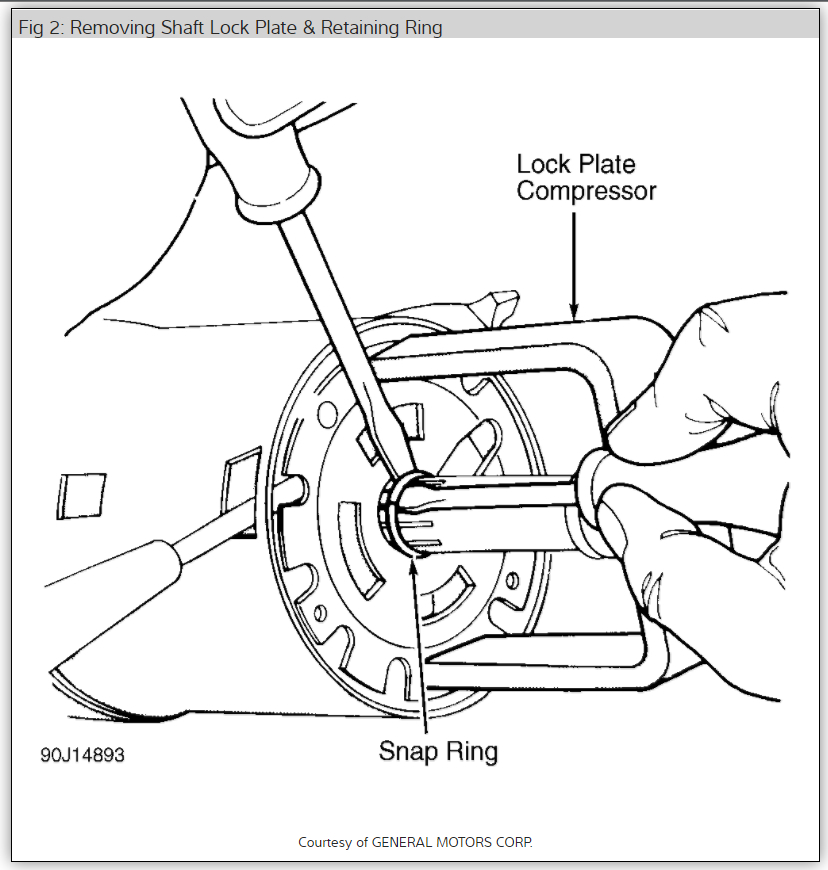
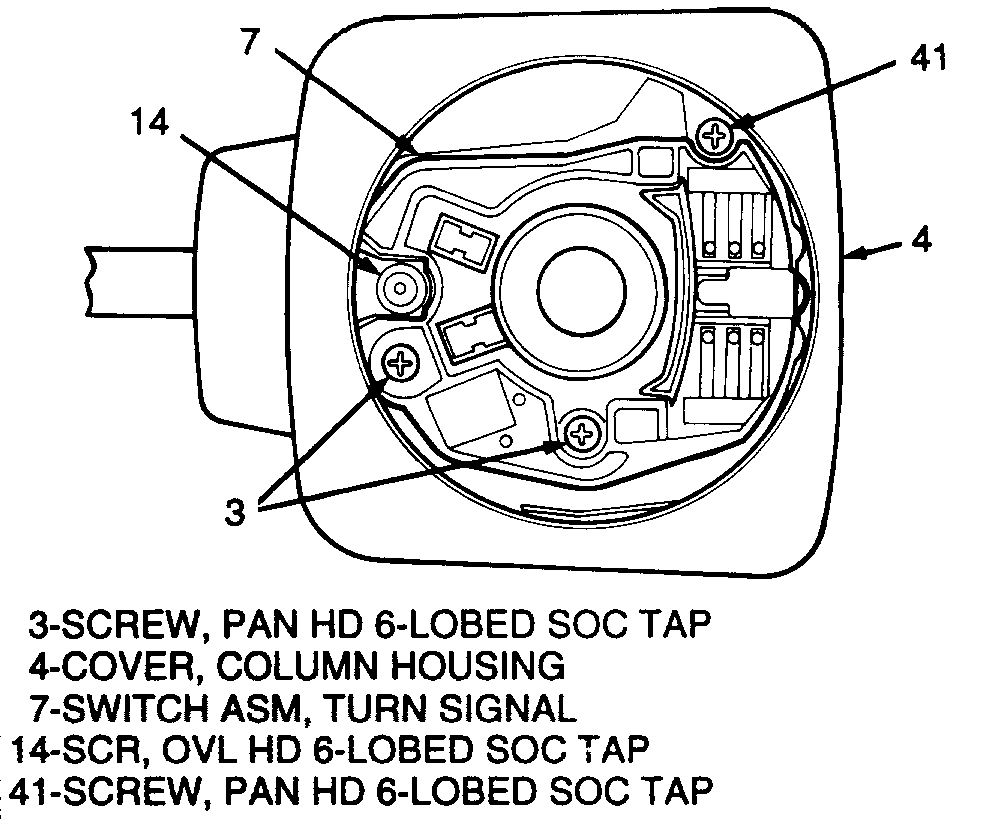
pic 2
Housing Cover And Turn Signal Switch Removal
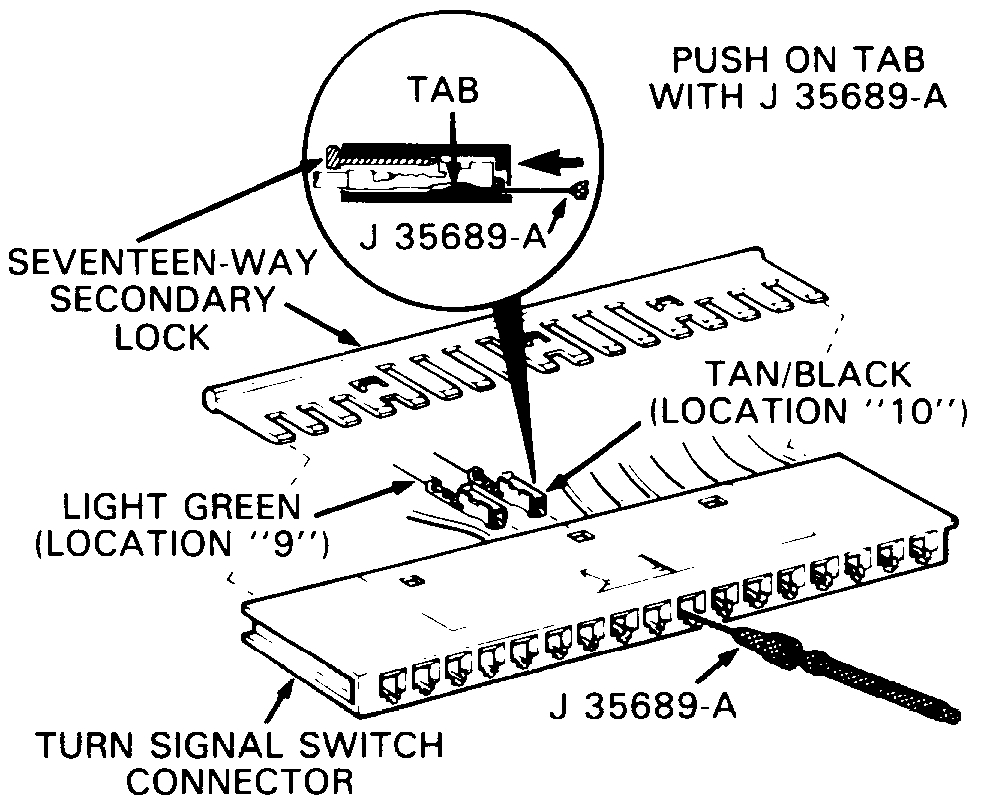
pic 3
Buzzer Switch Wires, Removal
pic 4
Pivot Pin Removal
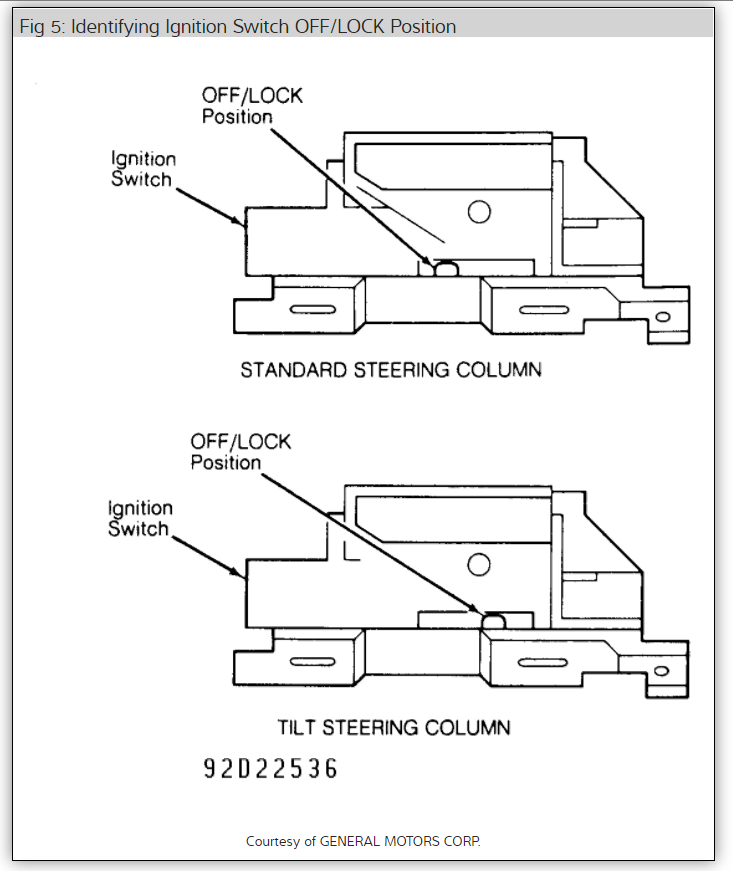
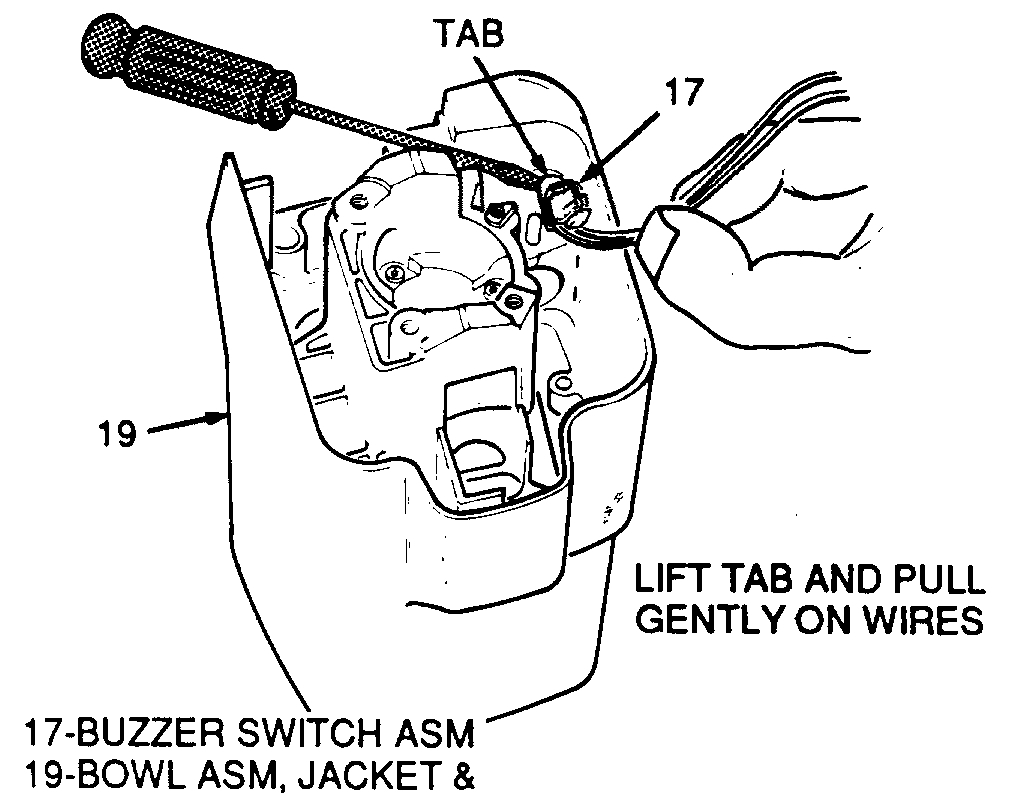
pic 5
Buzzer Switch Removal
pic 6
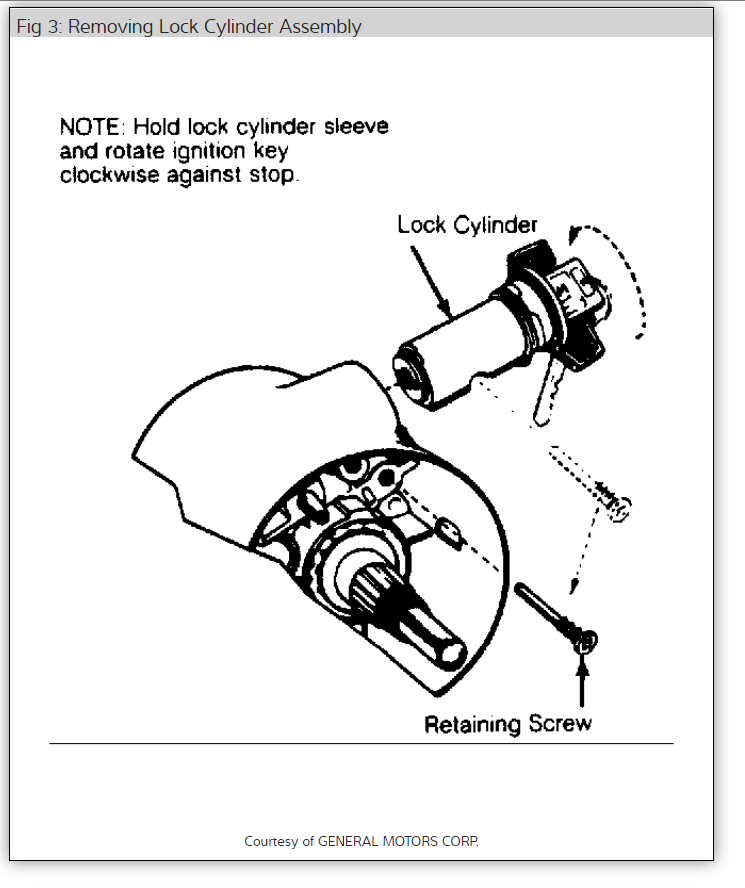
Lock Cylinder Set Removal
pic 7
Remove or Disconnect
Tools Required: J 35689-A Terminal Remover J 21854-01 Pivot Pin Remover.
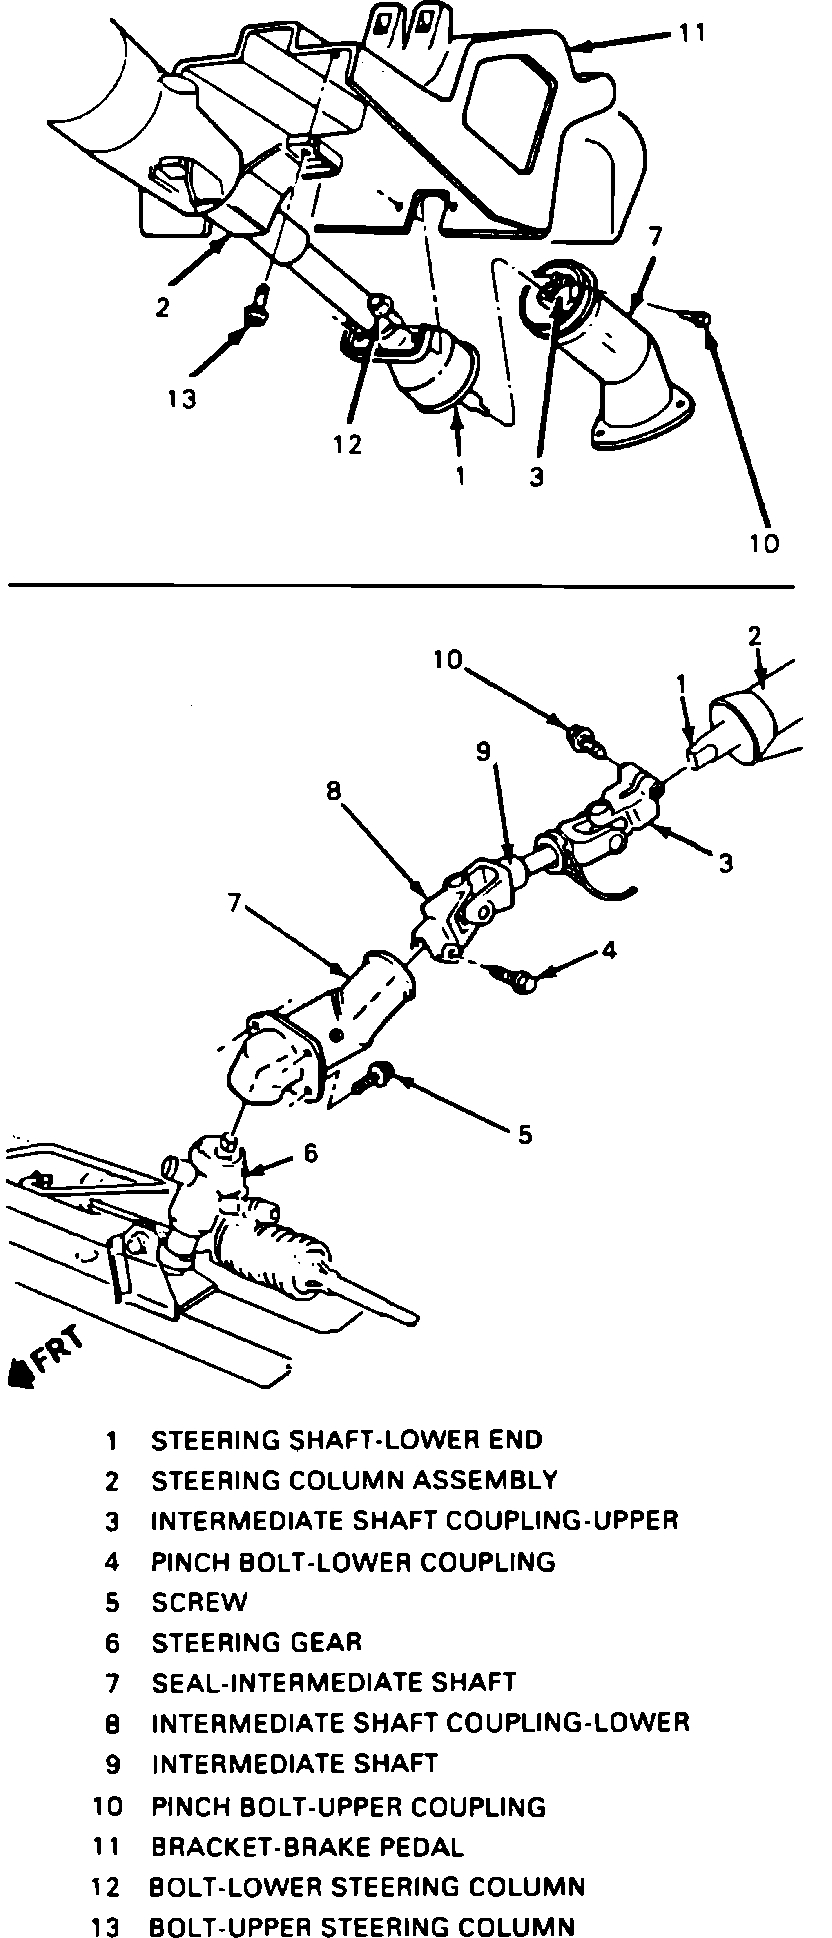
Important: Steering column must be removed from car before proceeding with the following steps.
1. Do steps 1 through 18 under Turn Signal Switch Assembly / Service and Repair / Remove or Disconnect. See: Turn Signal Switch > Procedures
2. Pull tilt lever (30) and tilt column all the way up.
3. Insert phillips head screwdriver into square opening in spring retainer (11), push down and turn left to release retainer (11) and wheel tilt spring (12).
4. Spring retainer (11), tilt spring (12) and tilt spring guide (13).
5. Two lower spring retainers (28) and discard.
6. Lower bearing spring (27) and lower bearing seat (26).
7. Adapter screws (25).
8. Adapter and lower bearing assembly (24).
9. Two pivot pins (10) with J 21854-01 as shown.
10. Place lock cylinder (20) in "Run" position.
11. Pull tilt lever (30) to release shaft and housing assembly (9).
12. Shaft and housing assembly (9) from jacket and bowl assembly (19).
13. Place lock cylinder (20) in "Off-Lock" position and remove key.
14. Buzzer switch (17). Use screwdriver to lift switch tab and pull gently on wires to remove.
15. Lock retaining screw (18).
16. Lock cylinder (20).
17. Column tilt bumpers (31) with vise grips. If bumper is broken off use a 5.9 mm (7/32 in.) Drill to remove remaining piece of bumper.
18. Tilt bracket screws (29).
19. Tilt lever and bracket assembly (30).
20. Rod cap (32) from dimmer switch rod (35).
21. Jacket and bowl assembly (19).
Install or Connect
Important: All fasteners in the following steps must be firmly seated before being tightened to specified torque.
1. Rod cap (32) into jacket and bowl assembly (19).
2. Tilt lever and bracket assembly (30) into jacket and bowl assembly (19).
3. Tilt bracket screws (29) and torque to 5.2 Nm (46 lb. In.).
4. Three tilt bumpers (31) into jacket and bowl assembly (19) until bottomed.
5. Steering column lock cylinder set (20) in "Off- Lock" position with key removed.
6. Lock retaining screw (18) and torque to 7.0 Nm (62 lb. In.).
7. Buzzer switch assembly (17). Push switch down into retaining bore until bottomed with plastic tab covering lock retaining screw (18).
8. Insert key and place lock cylinder (20) in "Run" position.
9. Shaft and housing assembly (9).
10. Lubricate pivot pins (10) with lithium grease.
Two pivot pins (10) into pivot holes in shaft and housing assembly (9) until bottomed.
11. Pull tilt lever (30) and tilt column all the way up.
12. Lubricate tilt spring guide (13) with lithium grease.
Tilt spring guide (13) into tilt spring (12).
13. Guide (13) and tilt spring (12) with spring retainer (11) as follows:
- Be sure that recess in spring guide (13) engages round locating tab in jacket and bowl assembly (19).
- Insert phillips head screwdriver into square opening in spring retainer (11), push down and turn right to lock in place.
14. Adapter and lower bearing assembly (24).
15. Adapter screws (25) and torque to 3 Nm (26 lb. In.).
16. Lower bearing seat (26) and lower bearing spring (27).
17. Two new lower spring retainers (28), compress spring (27) until retainers are positioned 29 mm (1.14 in.) From lower end of steering shaft.
18. Steering Column in car.
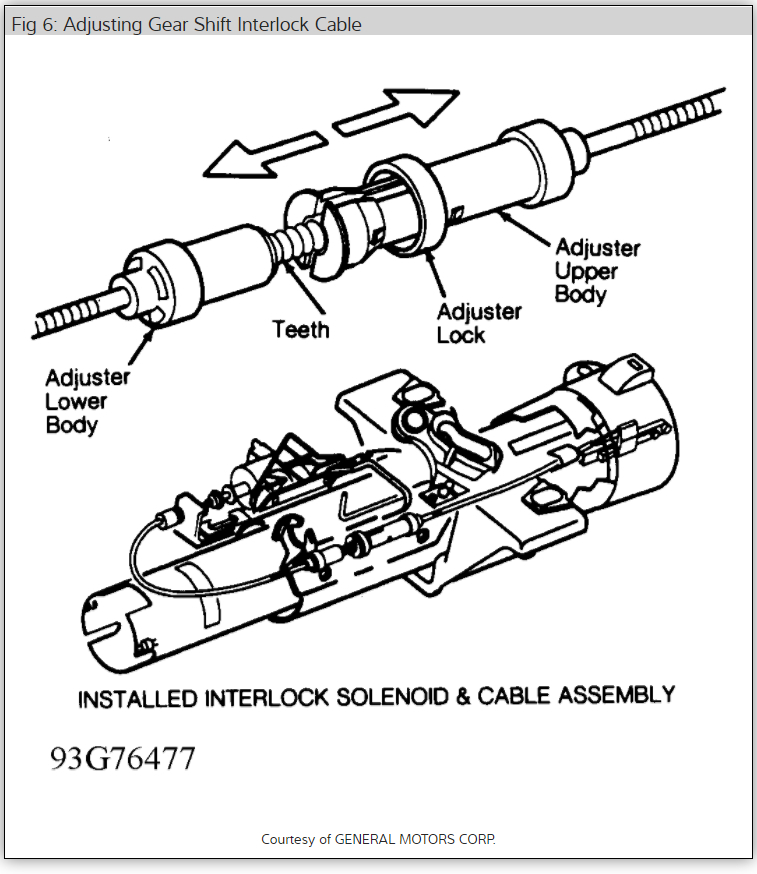
19. Park lock cable into ignition switch inhibiter and snap in place.
20. Do steps 1 through 18 under Turn Signal Switch Assembly / Service and Repair / Install or Connect. See: Turn Signal Switch > Procedures
_______________________
Let me know if you have questions or need help.
Take care,
Joe
Images (Click to make bigger)
Tuesday, July 23rd, 2019 AT 5:11 PM
(Merged)