Window motor?

Tiny
EGUNS80
  • MEMBER
  • 2000 BUICK CENTURY
  • 121,000 MILES
How do I check to see if my window motor is bad using a cen tech 7 function digital multi-meter?
Monday, April 24th, 2017 AT 9:19 PM

43 Replies

Tiny
CARADIODOC
  • MECHANIC
  • 33,729 POSTS
What and how to test depends on the symptom and what you have taken apart or are willing to take apart. The easiest to describe is to measure the voltages on the two wires right at the motor, but that means taking the door panel off. You can also take readings right at the wires on the window switch, but I will have to look up a wiring diagram to tell you the wire colors to test. We can do resistance tests, which can locate a problem, but take longer and are less accurate for some problems. Voltage readings are better, especially for this type of circuit.

Turn the meter's large red range switch three clicks counter-clockwise to the "20 Volt" scale. That means the meter will display any voltage between 0.00 and 19.99 volts. If you connect the test leads backward, the voltage reading will be correct, but it will have a minus sign in front of it. No big deal, and that will not hurt the meter.

To know where to start, you have to list the symptoms. A failed motor will only affect that one window, but that is by far the least common cause of a dead window. If the motor runs the window one way, it is okay. If you hear any sounds when the switch is activated, and the glass just moves a fraction of an inch, suspect cracked plastic pulleys and/or a frayed cable.
Was this
answer
helpful?
Yes
No
+2
Monday, April 24th, 2017 AT 10:20 PM
Tiny
EGUNS80
  • MEMBER
  • 78 POSTS
Neither of my rear windows work, when I press the button nothing happens, no sound coming from the motor.
Was this
answer
helpful?
Yes
No
+1
Tuesday, April 25th, 2017 AT 8:57 AM
Tiny
CARADIODOC
  • MECHANIC
  • 33,729 POSTS
I assume both front windows work from both switches, and neither rear window works from any switch. If that is correct, most likely there are two different problems. The clue would be each rear window stopped working at different times. I mentioned that window motors have a very low failure rate, but GM has some that have built-in thermal circuit breakers. Those cause more trouble than they prevent, and failures are common.

Do you know how to connect the meter? Remove one of the rear switch assemblies, then flip it over so you can poke a probe into the terminals. I am using the diagram for the left rear window. The right rear is the same except the dark green wire on the left is the light green wire on the right.

Check for twelve volts on the dark blue wire. That comes from the driver's master cutout switch. That switch is okay because it also affects the front right window, and that is working.

Press the switch one way, then check for voltage on the dark blue and brown wires. Tell me if you find twelve volts on neither, one wire, or both.
Was this
answer
helpful?
Yes
No
+1
Tuesday, April 25th, 2017 AT 1:33 PM
Tiny
EGUNS80
  • MEMBER
  • 78 POSTS
Neither window worked when I bought the car, so check green & blue then green & brown, and does it matter which probe I use on which color wire
Was this
answer
helpful?
Yes
No
Tuesday, April 25th, 2017 AT 9:01 PM
Tiny
CARADIODOC
  • MECHANIC
  • 33,729 POSTS
As I mentioned earlier, if you connect the test leads backward, you'll just get a minus sign in front of the numbers. Ignore that and just read the numbers.

One meter lead goes to ground, which is the car's metal body. Look for a rust and paint-free point such as a bolt head. I use a clip lead so I don't have to hold that probe all the time. You won't be taking enough readings to warrant investing the three bucks in a set of clip leads. Use the black lead, which is plugged into the meter's lowest "common" or "negative" jack. That is the standard connection and will insure you won't see the negative sign.

As an important comment of value, I spent a good two or three minutes showing my students how to verify that ground probe was making good contact. If it doesn't bite through a light film of corrosion, you'll get all readings of 0.00 volts. That COULD be the result of there really is 0.00 volts there, but if there's 12 volts, and the meter only sees 0.00 volts, you just made the wrong decision and went down the wrong diagnostic path. As the professional I claim to be, I've done that very often. For this discussion, if you find 12.0 volts on any terminal, the ground connection has to be good, so we can move on.

Whichever rear switch you're on, you have a dark blue wire and a brown wire. Probe either one with the red meter lead. Activate the switch one way, then the other way. Move the probe to the other wire and do the same thing. What you SHOULD see is only one of those wires becomes 12 volts when you push the switch one way, AND only the other wire has 12 volts when you push the switch the other way.

Given the symptom, you're going to either find 12 volts on BOTH wires when the switch is pressed either way, or you're going to continue to see 0.00 volts when the switch is pressed. Once you've made the observations, you are welcome to complicate the story by watching what you get when a helper presses the driver's switch either way.

I'll be out of town for the weekend at an old car show swap meet. I'll be back Monday night to see how you're doing.
Was this
answer
helpful?
Yes
No
+1
Wednesday, April 26th, 2017 AT 3:31 PM
Tiny
EGUNS80
  • MEMBER
  • 78 POSTS
Thanks I appreciate it ill let you know how I make out, sorry to be a pain have a great weekend
Was this
answer
helpful?
Yes
No
Wednesday, April 26th, 2017 AT 5:58 PM
Tiny
EGUNS80
  • MEMBER
  • 78 POSTS
I just checked my switches there was 2 blue wires the one had 12 volts without pressing the button (I assume that's coming from the master switch) the other blue wire I got a 12 volt reading when I pressed the switch to up position and I got 12 volts from the brown wire when pressed in the down position
Was this
answer
helpful?
Yes
No
Saturday, April 29th, 2017 AT 10:15 AM
Tiny
KEN L
  • MASTER CERTIFIED MECHANIC
  • 42,840 POSTS
Hello,

For this kind of testing a test light is easier to use. Here is a few guides and a wiring diagram to help you get the problem fixed.

https://www.2carpros.com/articles/electric-window-repair

and

https://www.2carpros.com/articles/how-to-use-a-voltmeter

and

https://www.2carpros.com/articles/how-to-use-a-test-light-circuit-tester

and

https://www.2carpros.com/articles/how-to-check-wiring

Please run some tests and get back to us so we can continue helping you.

Cheers, Ken
Was this
answer
helpful?
Yes
No
Monday, May 1st, 2017 AT 7:22 PM
Tiny
CARADIODOC
  • MECHANIC
  • 33,729 POSTS
Dandy. The secret is you must have 12 volts on only one motor wire at a time. Your results indicate you have the correct 12 volts and a good ground circuit. That leaves two defective window motors.

Switch your meter exactly half a revolution to where it's shown in your original photo, to the 200 ohms position. Now you must not activate a window switch because ohm meters provide their own testing voltage. They must be used in a non-powered circuit. Measure the resistance between the blue and brown wires going to the motor. You should find something in the order of, ... Oh, ... Six to maybe 20 ohms. The exact value is not that critical, but I suspect you're going to find it's much higher, like 100 ohms or more. If you get an over-range indication on the meter, switch to the next higher range.

A lot of GM window motors have a thermal circuit breaker built in. Problem is those cause a lot more trouble than they prevent. If you find that high resistance, the motors need to be replaced.
Was this
answer
helpful?
Yes
No
Monday, May 1st, 2017 AT 9:08 PM
Tiny
EGUNS80
  • MEMBER
  • 78 POSTS
Im sorry I know im being a pain, do I check both wires together or one at a time and if both wires together does it matter which probe goes to which wire
Was this
answer
helpful?
Yes
No
Tuesday, May 2nd, 2017 AT 11:12 AM
Tiny
CARADIODOC
  • MECHANIC
  • 33,729 POSTS
Both wires together. You want the current supplied by the meter to go through the motor, so connect one meter probe to the brown wire and the other probe to the blue wire.
Was this
answer
helpful?
Yes
No
Tuesday, May 2nd, 2017 AT 2:21 PM
Tiny
EGUNS80
  • MEMBER
  • 78 POSTS
I just did the ohm check I got 1.4 on drivers side and 1.8 on the passenger side
Was this
answer
helpful?
Yes
No
Wednesday, May 3rd, 2017 AT 11:16 AM
Tiny
CARADIODOC
  • MECHANIC
  • 33,729 POSTS
OOOOPS! I messed up big time, but I think you're going to have two bad motors. To start this impressive explanation, both motor wires go through their own part of the rear window switch, then over to and through their own part of the driver's switch, then to ground. When you activate either switch, you first break that ground connection to just one of the wires, then apply 12 volts to that wire. The other ground circuit is left alone. That is how they apply positive 12 volts to one motor terminal or the other terminal to change direction. The thing I overlooked is you have two good ground circuits, and by reading resistance between the blue and brown motor wires, you actually read the total of the two good ground circuits. (Smack my forehead)!

What you need to do is unplug the rear window switch, THEN read the resistance between the blue and brown wires in the plug. I'm pretty sure you're going to find a much higher resistance reading then.

I'm guessing the motor should draw about two amps. Using Ohm's Law, (Resistance equals volts divided by amps), R = 12 / 2 = 6 ohms. There will also be a few ohms of resistance in your meter's leads, so I'd expect you to get a reading of around four to maybe eight ohms. If the motor has a bad thermal circuit breaker, you're going to find considerably higher resistance than that.
Was this
answer
helpful?
Yes
No
Wednesday, May 3rd, 2017 AT 11:55 AM
Tiny
EGUNS80
  • MEMBER
  • 78 POSTS
Just tried this didn't get any readings after unplugging the switch, somebody told me the best way to check the motor is just run a 12 volt external power source to the motor
Was this
answer
helpful?
Yes
No
Wednesday, May 3rd, 2017 AT 2:03 PM
Tiny
SATURNTECH9
  • MECHANIC
  • 30,870 POSTS
Here's a trick is there room to tap on the window motor lightly while working the window switch?A lot of the time of you have a bad motor it will start working at least temporarily. Also check for battery voltage across the window motor connector while operating the window switch.
Was this
answer
helpful?
Yes
No
Wednesday, May 3rd, 2017 AT 10:02 PM
Tiny
CARADIODOC
  • MECHANIC
  • 33,729 POSTS
We're way past that. You already had 12 volts applied normally through the switch, and the motor didn't run. Applying 12 volts from another source won't change anything. Running external wires is done to verify the motor is okay after you found there is a switch or wiring problem, and you want to be sure to not overlook any other defects in the circuit before you calculate a repair estimate.

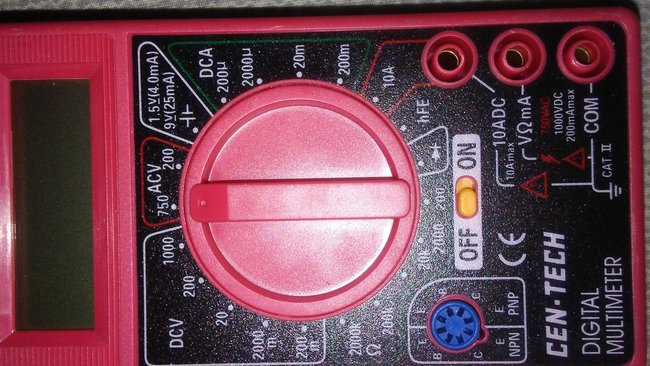
When you said you didn't get any reading, I take that to mean the meter continued to show an over-range condition, the same as when the probes are not connected to anything. As I recall, with this model of meter, that is a single "1". All that means is the meter is on, it's ready to take a reading, and what it's currently measuring is higher than the range you've selected. If you had the meter set to the 200 ohm position, it can read any resistance value up to 199.9 ohms. 200 ohms is WAY too much for a motor and will result in current flow that is much too small to make the motor work. You can switch to the 2000 ohm scale, (2k scale), or the 20k scale if you want to. At some point the meter will show a resistance value, but it's irrelevant at this point. You will be reading the excessive resistance caused by the arced contacts in the internal thermal circuit breaker. OR, if your motor doesn't have that circuit breaker, you'll be reading the excessive resistance caused by worn brushes in the motor. If the cause is worn brushes, you can sometimes get the motor working by tugging and poking at the window or motor. Worn brushes can just barely make good enough contact when irritating them to make the motor run for a little while.

If the circuit breaker is the culprit, you may be able to get the motor running by banging on it. The jarring might cause the contacts to move to a clean spot and work momentarily.

A former student showed me how his boss showed him how to take the motor apart and short out, (bypass), the thermal circuit breaker. I have mixed emotions about that. A window motor rarely runs for more than about five seconds at a time, so it is not likely to overheat and cause a fire. I've never seen a window motor short either, and draw excessive current. If it did, that circuit breaker could save the window switch from arcing at the contacts, but it won't save the switch if the wiring between the door hinges frays and shorts together.

The only value I see in that circuit breaker is if a switch were to stick on, the window would reach the end of its travel, lock up there, and the motor would continue to try to run. A stalled electric motor draws even higher current than normal, and that could overheat the motor if it weren't for that breaker. My concern is the liability issue if bypassing the circuit breaker led to a fire. I would be tempted to do this on my own car, but I would never attempt it on a customer's car. I wouldn't even tell a customer how to do that on their own time, at home, because you never know what some people will sue over.
Was this
answer
helpful?
Yes
No
Wednesday, May 3rd, 2017 AT 10:27 PM
Tiny
CARADIODOC
  • MECHANIC
  • 33,729 POSTS
Sorry SATURNTECH9. I didn't see your reply. My "we're way past that" didn't apply to your comment. I meant we're way past running external wires to the motor.
Was this
answer
helpful?
Yes
No
Wednesday, May 3rd, 2017 AT 10:50 PM
Tiny
SATURNTECH9
  • MECHANIC
  • 30,870 POSTS
I knew that lol I figured just go back to the basics do we have battery voltage at the motor connector across the two terminals while operating the switch. If so give the motor a tap while operating the switch.I sometimes just smack my hand on the inside door panel while operating the switch that sometimes makes the motor operate temporally as well. Then I know it's the motor that's bad.I always just get the whole window regulator assembly of that's the case. There reasonable rock auto dot com has good prices on them.I also have a 5 percent discount code if you need it for them.I buy a lot of parts from them.
Was this
answer
helpful?
Yes
No
Wednesday, May 3rd, 2017 AT 10:59 PM
Tiny
TROGERS1
  • MEMBER
  • 1 POST
  • 1999 BUICK CENTURY
  • 6 CYL
  • FWD
  • AUTOMATIC
  • 130,000 MILES
I can roll down my window using the one touch automatic switch and it goes all the way down without any problems. My problem is when I go to roll the window up. It gets about a 1/3 of the way up and it stops. I let it sit for a few minutes and it moves up a little further and so on until its all the way up. At this point I feel as if the I will have to replace that little motor. Would you say that's the appropriate solution, or could it be something simpler?

Also, can I take the door apart so that I can clearly see the mechanics of the window system. I've got the door striped down to where I see only 5-7 bolts, but I don't see any seams. Should I keep going or take it to Buick because there is some small spot welds which I wont be able to get past?
Was this
answer
helpful?
Yes
No
Monday, August 24th, 2020 AT 12:15 PM (Merged)
Tiny
DOCFIXIT
  • MECHANIC
  • 18,828 POSTS
With door panel off and plastic water shield removed your there. Look lower right door see a hole and motor. Loosen three screws not necessary to remove when motor comes free remove through hole. Be careful edge around hole can be sharp.
Was this
answer
helpful?
Yes
No
Monday, August 24th, 2020 AT 12:15 PM (Merged)

Please login or register to post a reply.

Sponsored links