Stalls When Hot

Tiny
WCA
  • MEMBER
  • 1985 JEEP CJ7
I recently pulled my Jeep out of storage of nine years. (Ran fine when it was stored.) Changed fluids, new battery, new fuel filter, new gas; started right up. First problem encountered was an overheating issue. Deposits did exist in the radiator, flushed twice with cleaner and appears to run in the normal temp. Range now. Current problem is, when driving, after about 20 minutes (from a cold start), engine will stall and die. After 1 or 2 minutes, I can re-start engine and run about 5+ minutes, stall and die. During the stalling period it gives an appearance of being starved for gas right before it dies. I can pump the gas peddle and almost keep it running.

I know little about the smog and air system/sensors (but know it is extensive). It runs great when cold and takes about 10 minutes to start warm up. It will idle when hot, but under way/higher rpm is when it stalls. Not sure if it could be a weak fuel pump, smog or sensor related, or still an overheating issue. Any help is greatly appreciated.
Tuesday, April 20th, 2010 AT 5:16 PM

14 Replies

Tiny
CJ MEDEVAC
  • MECHANIC
  • 11,004 POSTS
I will try to help you all the way thru this issue, See my profile.

If SMOG is not a real issue in your area, you may want to ELIMINATE those PESKY LINES (dry rotting crap, to be a potential vacuum leak) Also OLD non-working switches and components, why replace the lines, if the other componects may not work, either! (most are just there for the 1st, 5 minute warm-up anyway!)

You ONLY NEED 2 Vacuum lines to make your JEEP RUN GREAT, after a 5 minute (2 Mile) warm-up. I prefer a Manual Choke, I WANT TO BE IN COMMAND!....Less moving parts to go wrong, too!

SEE IN CJ 7 Forum below yours, "1985 CJ 7 IDLE".

You will see the 2 lines you need, and I want have to hunt and peck so much. (I have written many of the CJ 5/ 7 ANSWERS)

I really don't know your deal COMPLETELY, without more info,

Your radiator should be PROFESSIONALLY taken apart, rodded and cleaned....after this long, a new THERMOSTAT is in order.

May have other stuff, to tell about overheating

Carb is maybe, dryed out inside,I do not recommend rebuilding old stepper (with wires into rear) but better stillNew Rebuilt BBD ( I may can help you with your "BEST BUY, BEST TYPE BBD" to replace the old Stepper type carb, your old carb never turned out to be the perfect Jeep Carb)

Right now, maybe some help, Run some MARVEL MYSTERY OIL in your gas and maybe injector/ carb cleaner, too.

I may be able to help you adjust, what you have, if not too far gone.

Read post below yours/ above yours about clutch, you will see the extent I Can and Will, help you.

Do you have a Manual? Which one?

Do you understand any mechanics? Extent? (Pals?)

Dwell/ handheld tach meter?

Vacuum Gauge?

Voltmeter?

Some understanding and guages/ meters are necessary to PROPERLY TUNE your Baby!

ASK ME QUESTIONS, I KNOW CJs...Will try to keep cost down, do stuff correctly!

You must keep records and tell me all happening on your end.

Respond

Love, Turddog

1946 Willys, "WILLY" MY #2 BABY


https://www.2carpros.com/forum/automotive_pictures/411289_GOOD_OLE_WILLY_1.jpg

Was this
answer
helpful?
Yes
No
+1
Tuesday, April 20th, 2010 AT 7:39 PM
Tiny
WCA
  • MEMBER
  • 6 POSTS
Ok, here's where I stand.

I replaced the radiator and thermostat with new. Runs a little cooler by the gage, but I still have the stall problem.

Treated the gas to help clean the fuel system/carb. Not opposed to purchasing a new/different carb. Would want it to be better than what I have.

Not in a smog prone/restricted area, so I do believe it would be better to remove and cap what sensors and hoses which could be possibly omitted.

I do have a Chilton manual, but in my opinion it could use more pics and diagrams than just reading.
I do have limited mechanical knowledge. I do most all minor maintenance and repair work. Not afraid to get dirty!

Will add a few pics in hopes they may help in the direction I need to take. You will see there are many hosed and lines at the rear of the engine. I may need clear direction before removing any of them.
Let me know what you think.

Thanks.


https://www.2carpros.com/forum/automotive_pictures/519232_Jeep_001a_1.jpg


https://www.2carpros.com/forum/automotive_pictures/519232_Jeep_002a_1.jpg


https://www.2carpros.com/forum/automotive_pictures/519232_Jeep_003a_1.jpg


https://www.2carpros.com/forum/automotive_pictures/519232_Jeep_005a_1.jpg


https://www.2carpros.com/forum/automotive_pictures/519232_Jeep_007a_1.jpg

Was this
answer
helpful?
Yes
No
+2
Monday, April 26th, 2010 AT 4:21 PM
Tiny
CJ MEDEVAC
  • MECHANIC
  • 11,004 POSTS
"PERTTY JEEP"---Whats his name?----Sent you a PM
YOUR PICs

1) Kinda dark---can eliminate some vacuum stuff on top of "Aftermarket" Aluminum Valve Cover?

2) "T" w/ white cap is a "add on" Backflush port, to Back-flush cooling system---Walmart or parts store item (need the other components, in the kit, to use it!

3) EGR is the bell thingee in pic, yours looks decent (without testing) Probably keep it, it is not "necessary"----If you were running hedders, there would be NO WAY to hook it to hedder, therefore it is really not necessary to have.

4) Motorcraft distributor and fuel pump----you say its been sitting a while, pump diaphram may be stiff/dry etc.----This pump costs about $20--It has failed me several times in past. (Please have one extra, in Jeep, minimum tooling to change it!)

I go overboard (do not like, being helpless), in my 20mm ammo box, now a console w/ professional Pad on topI keep a new fuel pump, and 2 Salvage yard specials ($5 for both!) A used coil, and a used Ford Ignition module (blue code)--I (tested) ran both on my rig for a week, to be sure, I could trust them! All 3 have aided another Unprepared Jeep Guy, at one time or another!

5) Can't really say enough about it!

Love, Turddog
Was this
answer
helpful?
Yes
No
+1
Monday, April 26th, 2010 AT 9:34 PM
Tiny
CONSAKA
  • MEMBER
  • 31 POSTS
Nice looking jeep! Back when a jeep was a jeep. I think Turddog has you covered pretty good though if I was you id check the fuel filter as well. A number of times on different vehicles I have had fuel filters plug up partially and cause me enough misery that I now have a tendency to overdo it as a possible solution. BUT it cant hurt anything.
That being said if you have a carb it sounds like the old vapor lock.
Was this
answer
helpful?
Yes
No
Tuesday, April 27th, 2010 AT 1:22 PM
Tiny
CJ MEDEVAC
  • MECHANIC
  • 11,004 POSTS
OK Heres the deal,

I wrote, most all of this up for about 2 hours last night, Hit Submit, LOG IN popped up, I LOST IT ALL

I will keep submitting, and Editting this post, just so I do not, lose it all again.......THIS POST WILL GROW, for a while, probably not alert you, as I add to it, over and over........KEEP A CHECK, ON IT! ! !

Ron and his '83, just here....Dirty!...Stuff needs looms and tiedowns on wires!....But I was able to get GOOD PICS.....Labels I put on, are not all that great----some (I went too fast, labeling) I have to explain some, better....so don't jump ahead of the game!

We are going to keep the EGR system (replace any crappy lines, to it!)

PCV Vacuum---Rons location is where yours is, or is gonna be!

Distributor will now be hooked to MANIFOLD VAC---Not ported (cap off that ported T1T, originally hooked to.)

IF you still have an AUTOMATIC CHOKE---Dashpot and its vac line will remain

I will EXPLAIN each of these with a Separate, Dedicated Pic ! ! !

Any time you say (type) a wordy dird, on here, CYBER-CENSOR throws out a substitute, Sometimes the substitute will have you wondering (for hours), what does this sentence mean?.....$hit comes back----exaust!----don't remember othersT1T and N1PPLE are ones they censor out, you know, those dual female appendages, we, so adore!......This is the reason, I have to misspell Innocent stuff, so C-C does't have you scratching your head!

I want you, for peace of mind sake, put some masking tape (consecutively numbered), on each line, we remove....Shoot a pic, with the number visable, to its CARB or INTAKE MANIFOLD LOCATION!

After we're done, and you are happy, and most importantly, MR. JEEP is HAPPY, components and lines, can be permanently removed.

Do you need Mr. Jeep every day?....have extra transportation?

STOP ME AT ANY TIME YOU'RE LOST ! ! !

EGR...(4 o'clock) Hook up, like this, with new, tight fitting hose-use fuel line, better quality than a rubber vac hose. (note CTO switch in the line) Cut old rubber off of plastic T1Ts w/ a sharp knife (Old plastic stuff breaks if you snatch on it)


https://www.2carpros.com/forum/automotive_pictures/411289_VACUUM_LINES_AND_CAPS_003_1.jpg


These (this) Is/ Are VENTS FOR THE CARB AND BOWL (no vac to this) (one outlet, on Rons----went to canister, Now open air---Ok, but can be improved upon.

Don't need canister! will eliminate it too, later on!, THIS SET-UP NEEDS TO BREATH, DO NOT CAP THIS OFF, OR FUEL WILL BOIL EVERYWHERE, WHEN YOU SHUT HIM OFF (heat expansion)--FIRE HAZARD...Vapor lock/vacuum lock

Where I am pointing--I added a short peice of hose and I took a Cheap, 2 T1T, Clear fuel filter (to let Carb breathe), and rigged it on mine, (before I got the 4 barrel)---kept trash and DIRT DAUBERS OUT of my original type BBD----Ron will do that to his (this one) SOON!


https://www.2carpros.com/forum/automotive_pictures/411289_83_CJ_STEPPER_CARB_003_1.jpg


THIS IS GOING TO COME TO YOU IN CLOCK POSITIONS (Let me know if your T1Ts are different locations, or more than I have here)


https://www.2carpros.com/forum/automotive_pictures/411289_VACUUM_LINES_AND_CAPS_001_1.jpg


OK, with "12" we are going to cap it (previously ported vac for distributor)

In passenger side pic (below) Ron's dist is still hooked here, After photo session, we moved it to 5 o'clock...Readjested his timing, mixture and idle speed (about 25 minutes), I talked him through all---Made him do itSooo Smmoootthh NOW!

"2" Is Fat 3/8 PCV Hose (KEEPER--A HAVE TO HAVE!)---if pertty-leave it, If bad, BUY 2-3 feet 3/8 Fuel line, and replace it. (fuel line, costs cents more, but is better line than vac line)

"3" is under the stepper (thingee, the wires plug in) this is manifold vacuum, this feeds the bell dealee, up and left from stepper (has "Dashpot" taped on it in pic) (KEEPER NOW--COULD CAP)---replace with 3/16 or 1/4 fuel line if nastyfied.

"5" (red cap) NEW DISTRIBUTOR T1T, (manifold vac.) FROM DIST. TO "5 O'clock" (red cap location) Install about 3 feet long, 1/4 fuel line.(NEW, KEEPER--A HAVE TO HAVE!)

"6" this one is manifold vac----can't see in this pic, (low, red cap in 1st pic [up top], top of this answer block)---it is below the carb, on a long-looking nut ON THE MANIFOLDCAP IT

"7" is our EGR PORT (KEEPER NOW---COULD CAP)----From this port to a vac. switch on the block, out of switch to EGR----BIG BELL 6 O'clock on the intake (under cardboard) manifold......replace bad hoses, on this with 1/4 fuel line (you sent a pic of it)

VIEW WITHOUT CARDBOARD--DRIVER SIDE--RONs Wires Etc. Are slowly getting looms and organization! (please excuse, he is a procrastinator!)


https://www.2carpros.com/forum/automotive_pictures/411289_VACUUM_LINES_AND_CAPS_011_1.jpg


PASSENGER SIDE


https://www.2carpros.com/forum/automotive_pictures/411289_VACUUM_LINES_AND_CAPS_010_1.jpg


FRONT


https://www.2carpros.com/forum/automotive_pictures/411289_VACUUM_LINES_AND_CAPS_012_1.jpg


MATERIAL LIST

7 feet 1/4 fuel line (plenty to do all of above stuff)

3 feet 3/8 fuel line (PCV)

1-Kit Vinyl vacuum caps (if available) 3/16, 1/4, and 5/16 caps (or rubber ones) Make sure they fit real snug!

short fuel line with little bolts plugging them, will do in a pinch, instead of caps!

I count 2 "Vacuums" needing caps----12 o'clock and 6 o'clock

Only what we have talked about, need to be hooked up----no old surprizes need to be "T"eed into our setup.

the non working old stuff (we just eliminated) can be capped or plugged, they are completely dead, dangling lines....Just to keep dirt out

Is your air pump, and cooling lines fromStill there or removed?

Is your fuel filter system Still--EXACTLY LIKE THIS? 3 T1T (1 in, 1 out to carb, 1 little one on edge[out, return to tank] ) Disreguard extra stuff on mine (Bottom)


https://www.2carpros.com/forum/automotive_pictures/411289_VACUUM_LINES_AND_CAPS_004_1.jpg


https://www.2carpros.com/forum/automotive_pictures/411289_NELSOMATICHEATER_FIREWALL__ACCESS_PORTS_056_1.jpg


Want Pic of your Exaust manifold, well lit, close, entire manifold, as viewed from driver fender (no breather)......and pic of your catylitic converter, if air pump some how feed into it.

TUNING TOOLS YOU NEED

You need some tuning stuff, for next procedure to come. "Harbor Freight" has a small case, with Vacuum Gauge, Dwell/Tach meter, Timing Light, a Compression Gauge, and a Remote Starter---been a while$25-$35 ? A Pal of mine, bought one about 6 months ago, kinda nice---compact, great for novice, all in one place, beginner set!----I might get me one for a back-up or roadside fix!

1---- 4-6 1nch flat screwdriver 3/16--5/16 tip

small piece of white chalk

1/2 open-box wrench

I want you to tighten/check tightness of all intake /exaust manifold bolts (see your manual, ask if scared!)

Tighten 4 carb nuts (carb to intake)

Tighten all screws that hold the carb body together

EDIT IN---BORROWED THIS FROM CATHCART FOR THIS PIC!


https://www.2carpros.com/forum/automotive_pictures/411289_HARBOR_FREIGHT_1.jpg


Initiate, last nights, PM anytime tonight! I will be awake till 24:00 EST (Now will wait on you till 01:00, then I'm hitting sack!)

STILL DON'T KNOW HIS NAME! (I know you didn't name "HIM" a sissy "chevy type owner, weak, girly name.) C'MON, We're talking about a Very MANLY, TOUGH, "single handedly WON WWII RIG"(Maybe you know Women with these attributes!)

LOVE, TURDDOG!
Was this
answer
helpful?
Yes
No
+2
Tuesday, April 27th, 2010 AT 2:05 PM
Tiny
WCA
  • MEMBER
  • 6 POSTS
Todays Jeep work 4/2710

First: Turddog, sorry we did not get hooked from you PM. Got busy and Jeep was not close by to work on. Will PM you this evening.

Second: Even though its was a cool day (mid 50's) I drove Jeep for 45 minutes after adding the Marvel Oil to gas tank. Thought I would give it a chance on the fuel system/carb. Jeep NEVER stalled once. ---Appears I may need to drive a longer period of time?

To Consaka's post, the stalling I have does seem to me like a vapor lock, or fuel vapor somewhere. When I experience a stall, it only takes 1 minute, 2 at most to get restarted and get underway.

Third: As for changing vac lines, I need to get a supply of new lines (All current lines are original).
This evening, I am going to try to get more familiar with the lines and their respective ports. Label what I can identify and what I can't. Will take pics.

Bear with on replacing some of these lines, I just want to be sure I follow your instruction and not cut or pull the wrong line.

Thanks for the support.
Was this
answer
helpful?
Yes
No
Tuesday, April 27th, 2010 AT 4:28 PM
Tiny
CJ MEDEVAC
  • MECHANIC
  • 11,004 POSTS
Bear with me, Still more to come up top + will give you a SHORT-INEXPENSIVE MATERIAL LIST!

Love, Turddog
Was this
answer
helpful?
Yes
No
Tuesday, April 27th, 2010 AT 5:59 PM
Tiny
WCA
  • MEMBER
  • 6 POSTS
Sounds good.

Question: Aside from taking on the vacuum lines/smog stuff, if vapor locking is occurring, is this just a matter of changing carbs? Where does one look for the cause of this? Or is it related to vacuume?

Forum rules dictate no pm's until ten post. If we need to converse, tell me to call.

Thanks
Was this
answer
helpful?
Yes
No
Tuesday, April 27th, 2010 AT 6:17 PM
Tiny
CJ MEDEVAC
  • MECHANIC
  • 11,004 POSTS
LAND LINE COMMO TIME !NOW!

NO WORKY----JUST CONSULTY

SEE POST DOWN FORUM LIST....."1984 JEEP CJ 7 Turning the jeep on" (MAR 4, 2010) 2 pages

This feller was smart with PM......You already have 4

Before you get all Carb Happy, lets see if yours, just needs ADJUSTING!

The "No fuel, vapor lock deal", is really (not always) ---Sorta like grasping for straws, when YOUR WANNA BE MENTOR didn't stay at the Holiday Inn Express last night.

I have not Ever seen this (VL) in a Jeep CJ (YET!)..........A fuel line, getting too hot, maybe really close to manifold, etc.

It Vaporizes the fuel, at that spot in the line and it SUPPOSEDLY will not let the pump, etc. Push/Draw fuel to carb.(on CJ, FUEL IS ALWAYS MOVING FAST THRU THE LINES [How can it get HOT?], except MAYBE? from, filter to carb [VERY SHORT DISTANCE, YOU WOULD HAVE TO ENCIRCLE THE EXAUST TO DO THAT], THAT IS....If you still have 3 T1T Filter---Return to tank, Original system!)

Hog-Wash!, keep up with my SOUND/ PROVENCOUNTRY-BOY, JEEP EXPLANATIONS)----I am not a "Professional Mechanic" or a "Physicist" (sp) Nor a great spellerI just can't picture Vapor Deal, if you adhere to Explanations do the "work" correctly!

REAL JEEP FUEL PROBLEMS, I KNOW (already not discussed) for sure are:

A) None in tank

B) Bad fuel pump

C) Holes in lines---before pump...sucking air---After...squirting or dripping

D) Tank screen stopped up

E) CRIMPED HOSE OR STEEL LINE---pulling with chain, got hooked somehow on fuel line! (idiot factor!)----4x4ing rocks etc.----accidental under hood, moving stuff, mashed w/ wrench etc

F) Flat eccentric (sp), on engine cam for pump/pump arm broke.

G) Stuff hooked up wrong---Ex.---new fuel tank swapped feed and return lines (no fuel, can be drawn, because the vent is at the top of the tank, and the "Draw or Pick-up" goes to the bottom)

H) Gas Cap 100% seal (no vent/ vents plugged/ somebody messed with "liquid and rollover check valves" [near fuel tank]) Fuel will be "Suction locked"..(sucking a vacuum in tank)Bright green plastic hose is the "Vent for Tank" attached to canister, If it were cut off/capped off/ Melted or Crimped by "Vapor Lock Guy" (WRONG!) [we would get little or no fuel from the tank]

When I extended my tank vent, up high, I used a 2 T1T clear filter on it (just to breathe and keep foreign stuff out), when I eliminated the canister.

The "Nelsomatic" Fuel Filter Breather For Tank Vent Line (NFFBFTVL!), is barely seen EXTREME RIGHT on firewall, near top of cowl, Just right of the master cylinder.

No fuel should come out of this Vent, in a "rollover situation" BECAUSE the liquid and rollover checks near the tank SHOULD STOP IT!


https://www.2carpros.com/forum/automotive_pictures/411289_100_0327_1.jpg


I) 3 T1T FUEL FILTER not in use (Vapor Lock Idiot guy, took it off, replaced it with 2 T1T in/out FILTER...[DUMB] NOW THERE IS NO RETURN BACK TO THE TANK), Extra Fuel/Pressure cannot return to tank, PRESSURE over-rides Carb float, CARB gets TOO MUCH FUEL---sometimes while driving, you sorta use up the extra fuel--AT IDLE, you flood and die out!

J) Carb needs adjusting

K) Carb abused--mix screws over-tightened, accellerator pump dry-rot etc.----rebuild/ new carb

Could probably remember more, "Miles to go, before I sleep"....going to bed now!

Love, Turddog
Was this
answer
helpful?
Yes
No
Tuesday, April 27th, 2010 AT 9:19 PM
Tiny
WCA
  • MEMBER
  • 6 POSTS
Ok. Making progress.

Went ahead and changed the fuel pump (just in case). Glad I did. The hose leading up to the pump was old, drying out and cracking. The pump bolts were just snug also. All corrected.

This pic shows there is not/or ever was a air pump.


https://www.2carpros.com/forum/automotive_pictures/519232_jeep2_002a_1.jpg


I found the O2 sensor. The wire was dangling (not attached. The sensor is very tight in the exhaust. Not sure if I need to try to re-attach wire or just leave. Need advise here.


https://www.2carpros.com/forum/automotive_pictures/519232_jeep2_003a_1.jpg


1) Old hose from Distributor (now just unpluged and laying)
2) This port had hose from Air Breather attached. (now capped)
3) This port was already capped. I capped with new cap.
4) Bolt post has new Distributor line attached. (Distributor only)
5) Old hose. Capped this port.

Dash pot and PVC line were left alone and intact. New lines here also.


https://www.2carpros.com/forum/automotive_pictures/519232_jeep2_007a_1.jpg


I can take better pics if I need to be more specific on any point. Getting better at this stuff.

I do have a timing light, dwell and tach meter. Although, I've not used a dwell/tach meter in quite some time.

Will be putting air breather back on and will be ready to start to see results thus far.
Was this
answer
helpful?
Yes
No
Saturday, May 1st, 2010 AT 12:10 PM
Tiny
CJ MEDEVAC
  • MECHANIC
  • 11,004 POSTS
WCA, good job so far, with a mirror, insure there are no more OPEN/HIDDEN VAC. PORTS!

We have 3 keeper vacuum lines: PCV---original location, Dashpot---original location, and Distributor--now hooked to manifold vacuum. On intake manifold!

It will run better on man. Vac., With your engine configured like this, Cold idle will greatly improve.

The O2 system is useless now, and looks like it has been, for a while. (Leave it disconnected)

Later, you can install a Air/Fuel Ratio Gauge (tells you if you are "Combusting", with a correct mixture). It will need a O2 sensor to run it, Install a new sensor (hole is already there for it!) It minimum, it will be a new toy, or conversation piece!

Have you run all of the old fuel out, and refilled?

If not, you can get about a 6 ft. 1/4 inch, fuel line. Take the return loose, at the fuel filter (IT SHOULD BE---the out line, NOT GOING TO THE CARB, on the filter IT SHOULD BE---the smaller N1PPLE, on the "edge" of the side, w/ 2 N1PPLES)

In your pic, Red hose covers view, the center outlet, goes to the Carb!----The "edge" outlet should be stationed, in the up position (closest to the sky, center outlet, below it.)

Attach, 6 ft. Line to the "edge" N1PPLE, Throw the other end into a fuel can(s), crank up, it will pump it out for you. (Fast!---Don't leave it unattended!)

The next step I will send will be timing, and some hows and whys. In Country-Boy Lingo. Then we will move on to Carb Adjustment! (Its EZ!) I gotta get some pics, then I will submit it.

You do need to understand, a little bit about what you are doing, so that later, at minimum, your REPAIR MANUAL, will make better sense, when you have to do that Field Repair, in the middle of nowhere! KEEP MANUAL IN YOUR RIG!

While you are waiting on me, do a little Preventive Maintence or Scheduled Maintence, Stuff you understand and/ or Know how to do! You will find the charts in your REPAIR MANUAL!

You can get you a squeeze bulb, and suck out all of that Old Brake Juice, out of Mr. Master Cylinder, and replace it with DOT 3 or 4 Brake Fluid, (4 is the newest stuff out, supposed to be better) This will get you prepared to bleed your brakes later!

I will help you any way I can, with your Baby!

YOU SAID, HE HAS SAT DORMANT, FOR 9 YEARS!

Love, Turddog
Was this
answer
helpful?
Yes
No
Saturday, May 1st, 2010 AT 10:39 PM
Tiny
CJ MEDEVAC
  • MECHANIC
  • 11,004 POSTS
OK, JEEP GUY

WARNING---Your Harmonic Balancer is basically a ring pressed over a "Pulley" sorta dealee, with rubber filler between the 2 pieces. . .this dampens crank vibrations, your engine produces. UNFORTUNATLY, your timing mark is CUT into the outer RING. If the rubber filler deteriorates (age, heat) the outer ring could slip slightly, making your mark, not being "Calibrated" to the position of number one piston. If this has happened, it will be impossible to correctly set timing. You should replace the balancer, if it has the rubber falling out, or timing is erratic (while setting), and setting timing will only run the engine, at a WAY off the mark setting, the balancer can be tested, but is Very Involved, for a beginner!

THESE STEPS SHOULD WORK, IF-IF-IF YOUR ENGINE WAS RUNNING, BEFORE YOU START THESE ACTIONS!

Now that you have all necessary/or wanna keep vacuum lines, "updated", and any "open" vacuum ports capped. You have checked the manifold and carb for tight fasteners.

IF WE HAVE A PROBLEM. . .STOP. . ..LET ME HELP YOU, BEFORE SOMETHING BAD HAPPENS TO YOU OR MR. JEEP!

We are ready to Check and move the timing (if necessary). Then we will move on to "Tweaking" the Carburetor. I know you are concerned about maybe needing to replace this one, Lets try to make this one work, before we get another (if we do get another, lets get one for an older model Jeep, such as a 1979, it will be pretty much "GENERIC", and will not have the stepper motor and extra crap, yours has now!) (SIMPLICITY!)

HERE ARE STEPS TO TIMING ---my numbers are here for you to reference me, with something you do not understand.

1) Take the entire AIR CLEANER ASSEMBLY OFF. . .The only tube you should have to remove, is the "Fresh Air" to the valve cover (make up air, for the PCV [positive crankcase ventilation])

2) Let's stick our head under the frontend, find the harmonic balancer, and with a soapstone or piece of chalk, rub the timing mark (chalking the groove) and wiping off the access with your finger. It may be necessary to bump the starter to get the mark to the bottom; the mark is at the rear of the harmonic balancer, closest to the engine. It is a straight cut, perpendicular to the H.B. (see manual, 258 6 Cyl, for location)

3) Let's go to the driver side, front of the engine. We are looking IN-BETWEEN the Water pump pulley and Where the Lower Radiator Hose, hooks to the water pump. . ..you should see a "SCALE" (timing marks) Shoot some kinda spray (WD40-purple power etc.) on them, and wipe them off good!

Observe the scale, you will not be able to see it all (the water pump is in the way) but if you move toward the radiator, you will view enough to learn how it works. (You can maybe see it in your manual, too)(Make sure it's a 258, in the manual!) I will not go too far into: ATDC (after to dead center) or BTDC (BEFORE TOP DEAD CENTER) or TDC (TOP DEAD CENTER)

The later, BTDC, is what we are gonna deal with, SPARK BEING INITIATED, ---BEFORE THE PISTON REACHES THE TOP---, on COMPRESSION STROKE.

So just any "Scooby-Doo" can understand this, we're gonna refer to this stuff as: The very bottom mark is +2 degrees (ATDC). . .. . .up a mark, "0" (ZERO, TDC"”Number 1 piston is at very top of travel, When the Harmonic Balancer Mark CORROSPONDS to this mark).

In this Pic, My Harmonic Balancer is "servicable"----Timing (not running) is at "ZERO MARK" (Piston is Top Dead Center [TDC])......mark below this is "2 ATDC" ALL ABOVE CHALK MARK IS--BTDC


https://www.2carpros.com/forum/automotive_pictures/411289_555_002_1.jpg


YOU SHOULD BE ABLE TO SEE "0" and some other numbers, on the timing chain cover, from radiator vantage point!. . .. . .up a mark, -2 degrees (BTDC). . ...up a mark, -4 degrees (BTDC). . ..up a mark, -6 degrees (BTDC). . ..up a mark, -8 degrees (BTDC). . .. . .. . .. . ....UP A MARK!!!, -9 degrees (BTDC) ETC. ETC. [EACH MARK IS 2 DEGREES]

You'll see the marks, but maybe not all of the numbers. You're gonna have to count marks!

THIS IS BETWEEN MARKS!!! My manual says this is your mark! (9 degrees BTDC), To Time, to! WITH A FINE TIP MARKER (or white-out, gotta see it!)----draw a line in-between -8 and -10 MARKS----this is your EZ reference mark to see while timing!

CALL THIS, "PERFECT TIMING PICTURE". I marked my cover, "9 Degrees"JUST FOR YOU! (my timing is different than yours, because #1,manual says, and #2, I experiment!) This pic, not runningWhen timing light is used, it will sorta "STOP MOTION", and your view will look EXACTLY like this, when you are PERFECTLY TIMED!


https://www.2carpros.com/forum/automotive_pictures/411289_555_001_1.jpg


4) We now need to hook up the TACH/DWELL METER. We must time, at a slower engine speed (manual says your speed is 680 RPM----WE ARE GOING TO GO WITH 700 RPM, explain later!), otherwise the "centrifugal advance", inside the distributor, will ADVANCE your TIMING, because engine speed is high, and the spark must "SHOOT" SOONER to get the spark there at the right moment! (if you think about it, the engine runs: SLOW----GRADUATINGFAST!, ELECTRICITY moves at 200 MPH ONLY, you can't speed IT up, or slow It down----this is the reason for Timing, and advances; SHOOT THE SPARK SOONER AND SOONER as engine RPM climbs, so that the actual SPARK hits, just when the Piston is going down! (Basically, time it by the Specs, all will go fine!)

Attach your Tach/ Dwell meter by connecting the NEG wire to a ground, and the other "Sender Wire" to NEGATIVE SIDE OF COIL, in pics of RONs JEEP, if you are on passenger side, THE RIGHT SIDE OF THE COIL. (You will need to stick a paperclip or similar, into the plastic connector, to contact the metal!) Later you can do like Ron and I, and CUT the NEG Coil wire, and butt-spliced it back together w/ extra pigtail in the splice---sort of a Test Port.) You must INSURE your paperclip, stays connected, so that you meter will work!

(Your Battery may be in 180 degrees from mine, or the pos-neg posts swapped) METER GRD is just left of the meter on BATTERY NEG GRD, the sender is "GREEN" attached to the small SCREWDRIVER, I have inserted into "NEG COIL"Note---above dipstick ring, male/female bluish connectors, this is my "Add ON", "Test Port, ON NEG WIRE" [the female just loops off of the male, sorta like a lanyard and cap!] I clip onto the male connector (female "cap", is "live" as well)--instead of the screwdriver trick!


https://www.2carpros.com/forum/automotive_pictures/411289_555_006_1.jpg


When you are connected, place meter on drivers side of engine (mine will sit between Carb and valve cover) So that you can adjust carb speed, and see it too!

MAKE SURE IT IS SET IN THE "TACHOMETER" POSITION!

LET'S KEEP METER AND WIRES---AWAY FROM FAN!!!---AWAY FROM HOT, EXAUST MANIFOLD!!!

Fire Him up, read meter---GET FAMILIAR WITH METER! ---6 CYLINDER SCALE!

LINE TO BE USED.....Where 700 RPM IS----YOU MAY MARK THE FACE, WITH A SMALL SLIVER OF TAPE----PREFERRED ABOVE OR BELOW, THE SCALE YOU NEED TO USE----JUST TO "MAKE" YOU USE THE RIGHT "LINE" and RIGHT SPEED!

WE WILL NOT GET ACCURATE READING, UNTIL YOUR TEMPERATURE, REACHES NORMAL WARMED UP TEMP. WE WILL MAKE NO ADJUSTMENTS, UNTIL IT IS UP TO TEMP"”TIMING OR CARB!

INSURE THROTTLE IS AT REST, ON ITS STOP!

5) TEMP IS GOOD! You have "KICKED DOWN" the CHOKE HIGH IDLE...........Look in the CARB, the Choke Butterfly (plate) should be WIDE OPEN"”NO CHOKE!......You are running X?"”RPM, Go to the throttle arm on the Carb, there are 2 Adjustment screws, the one closer to you, IS OUR SCREW, the other is for your Chokes Idle Speed during warm-up (it will be adjusted later, but if its "engaged" now, we will need to disengage it), to make this IDLE SPEED ADJUSTMENT!

"OUR SCREW"--little screwdriver in it!My extra, somewhat, new '79 BBD (before the Weber and Holley), note everything is capped for storage, and there is no stepper motor, this type would be recommended if yours became TERMINAL! Sorta my 2carguy model for now!


https://www.2carpros.com/forum/automotive_pictures/411289_111_001_1.jpg


If all is Good, Screwing (OUR SCREW) in will increase idle, backing it out, decrease it---if not! Return spring for carb is messed up, orMaybe the screw beside "our screw"---- Choke step cam screw is out of adjustment (back that screw out, till its not touching plastic cam steps, then see if OUR SCREW works right)

GET US TO 700 RPM NOW!----AFTER WE TIME IT, GET US BACK TO 700 RPM, THEN CHECK IT, RE-ADJUST IF NECESSARY (when we are done, we will be at 9 Degrees @ 700 RPM)THEN WE WILL ADJUST CARB!

6) HOW TO HOOK UP THE TIMING LIGHT CORRECTLY! (EZ!)

WARM ENGINE TO TEMP / Leave Dwell/tach attached

We will call this the "COMBO PIC", 3 operations, I mention below can be found in this pic!


https://www.2carpros.com/forum/automotive_pictures/411289_555_005_1.jpg


Go to the distributor; remove the vacuum line and plug the line with a tight fitting bolt (SEE "COMBO PIC"), this will be hooked back up after timing is done. When you removed this line, while the Jeep is running, you would have noticed, a change in the sound, and with your finger, you should feel SUCTION, If not, we may not be hooked to manifold vacuum!(we want manifold vacuum on this line) (Since we are hooked to manifold vacuum, your distributer was advanced, about 10 Degrees; it must not be advanced, for initial [zeroing] timing)---that why we removed and temporarily plugged this line.

A CJ lacking all of the "EXTRA" stuff, will idle and run better using, manifold vacuum, instead of ported vacuum, to advance the distributor.

7) SHUT OFF THE ENGINE!

Heater hoses are close; you might wear a thin glove, in here. With a tape measure, just so YOU CAN GET IT BACK ORIGINAL, if things do not go well for you! Measure from the T1T on the distributor, to a point, I prefer to the block. If you move the distributor, you could measure it back in place. (SEE COMBO PIC)This is extremely helpful if your Harmonic Balancer "slipped" and is no longer showing accurate timing marks......always look at/ record your readings, before you start moving the distributor. This will also help you figure out whether you capped of the Vacuum Advance Line!...prior to you trying to time, and things seem "out of whack"....And you start calling me bad names!.....then you figure out you did not complete all of the steps!......And you forget to apologize to me for the bad names!

I ALSO INCORPORATE THIS MEASURING IN, WHEN I CHANGE OUT A DISTRIBUTOR, IT SAVES ON SEVERAL STEPS!.......If you want I can explain how to "Change Out" the distributor EZily, if it has not already been Removed (pulled out of the Cam Gears!)

Break loose the distributor-hold down clamp, with a inch, "boxed in" wrench (See Combo Pic), SLIGHTLY, enough so that moving the distributor, is a little hard to turn, NOT LOOSE AS A GOOSE! Measure it (the T1T) back to initial setting!(if real loose, when you do your final "lock down" your reading will move!) WHEN YOU START TIMING,......THIS: "SHOOT and LOOK", and then adjust the distributor"......ADJUSTING CAN BE DONE BY ONE MAN, 2 men makes it EZer, you will be moving from one side to the other, if by yourself! We'll move on!

8) CRANK BACK UP, REACH TEMP AGAIN!

Connect the POSITIVE to POSITIVE BATTERY

NEGATIVE TO NEGATIVE BATTERY (reversed"”light will not work)

I did not show this EZ step in a pic, if you cannot clip onto battery w/ 2 leads, this other stuff is WAY OVER YOUR HEAD!

CONNECT THE PICK-UP TO NUMBER 1 PLUG WIRE (below), Insure the "Notch or clamp" engulfs the wire circumference. (Keep it away from the other wires, fan, and exhaust!) SEND THE GUN TO THE DRIVERS SIDE, thats where you will need it! (NUMBER 1 WIRE IS THE CLOSEST SPARK-PLUG WIRE, TO THE RADIATOR!)


https://www.2carpros.com/forum/automotive_pictures/411289_555_010_1.jpg


We use number 1 plug wire because the timing marks on the timing cover correspond with the position of number 1 piston. (If you were to make a perfect mark, 180 degrees from factory mark, you could do timing off of #6 wire, just throwing stupid stuff to make you understand, engine operation!)

The other pistons, in their respective positions, on the crankshaft, follow along firing at 60 degree intervals. 1---1st, 60D...5, 60D...3, 60D...6, 60D. . .2, 60D. . .4 (Firing order 1-5-3-6-2-4) ONE CRANK REVOLUTION! Every moving, internal part is CALIBRATED TO NUMBER 1 PISTON AT "ZERO"! (Top of its travel)

9) We are going to stay out of the fan! (The timing light will give the ILLUSION, the fan is not moving!)---IT IS!---WATCH OUT!

MAKE A NOTE OF WHAT THE TIMING IS BEFORE YOU MOVE THE DISTRIBUTOR!YOUR DISTRIBUTOR T1T MEASUREMENT WILL GET YOU BACK (CLOSE) IF YOU MUST RETURN TO THIS STARTING POINT!

Go to the radiator vantage point; aim your timing light at the marks, PULL THE TRIGGER---AWAY FROM THE FAN, YOU CAN SEE THIS, WITHOUT GETTING SUPER CLOSE TO THE ENGINE! (SEE PIC BELOW!)

This is the spot, stay in the SHADE!, Trigger finger against the Grill Support RODs (mine have 3/8 fuel line over them to make them look "COOL") No need to get any closer to the fan, or timing scale!


https://www.2carpros.com/forum/automotive_pictures/411289_555_011_1.jpg


Search UP and DOWN the Balancer, with your eyes. You will see the WHITE CHALK MARK!

The T1T on the distributor, will probably only need to move, LESS THAN 3/4 OF AN INCH, EITHER WAYTO MAKE YOUR ADJUSTMENT!

Move the distributor T1T toward the engine slowly, the timing mark will go---UP--- the scale (engine speed will increase) THIS IS ADVANCING THE TIMING

Move the distributor T1T away from the engine slowly, the timing mark will go---DOWN----on the scale (engine speed will decrease) THIS IS RETARDING THE TIMING

THE WAY I REMEMBER THIS, IS: IN (toward engine) 'CREASE (speed) UP (mark moves up)

IN-CREASE UP! Stupid Huh?...Do it your way then!

"INCREASE" works with our Distributor because.....Our rotor button turns CLOCKWISE.

YOU WILL UNDERSTAND WHAT TO DO, TO HIT THE MARK, REAL QUICK!

HIT YOUR FELT MARKER MARK (or white-out mark), WITH THE CHALK MARK (on H.B.). . ...9 Degrees! (AS IN EARLIER PIC!)

Check your Tach! 700 RPM. . .or...make it happen (carb idle screw!)

Check/ adjust timing again. . ..continue until, 9 Degrees at 700 RPM

TIGHTEN HOLD DOWN on DISTRIBUTOR

VERIFY NOTHING MOVED

AT EVERY FLASH, IT SHOULD LOOK LIKE---"PERFECT TIMING PICTURE" (I now, show again, below)


https://www.2carpros.com/forum/automotive_pictures/411289_555_001_1.jpg


RE-ATTACH YOUR VACUUM ADVANCE VACUUM LINE TO THE DISTRIBUTOR (engine may speed up!)

MAKE 700 RPM HAPPEN AGAIN!

SHUT OFF ENGINE!

REMOVE TIMING LIGHT AND DWELL/ TACH

YOU ARE TIMED!READY TO ADJUST CARBURATOR!

Later you can play or "Experiment" with your timing, from about 6 degrees to 16 degrees, For POWER or MILEAGE, (alot of other factors could play in with this) you sorta got to know the limitations, such as "Detonation" or "Pinging" or "Spark Knock"---discuss later. (good thing for you to read up on, IN YOUR MANUAL, find definitions and causes!)

If you were lost, look for---Timing light on wrong PLUG WIRE---engine speed too high---did not mark the right stuff---dist. vac. was not detached and temporily plugged---HARMONIC BALANCER "SLIPPED" NO LONGER IS "CALIBRATED" TO THE PISTON.

Turddog gives, yet another wonderful answer,

Let me know if you need help!

Love, Turddog
Was this
answer
helpful?
Yes
No
+1
Sunday, May 2nd, 2010 AT 11:31 AM
Tiny
WCA
  • MEMBER
  • 6 POSTS
Turddog, Great instructions on the Jeep timing. I have not used a timing light in quite some time, but, along with your instructions, it came back to me. I did not have any real problems here. Thanks.

Jeep is timed -9, BTDC, @ 700 rpms.

I believe I may be ready to move on to tweeking the carb.
Was this
answer
helpful?
Yes
No
Friday, May 7th, 2010 AT 12:43 PM
Tiny
CJ MEDEVAC
  • MECHANIC
  • 11,004 POSTS
GOOD DEAL, WCA!!!

ARE YOU READY FOR YET ANOTHER TURDDOG NOVEL?

Glad you sent your Email.

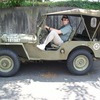
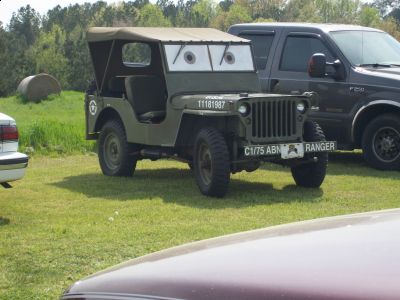
LIKE MY WALMART PHOTO SHARING "JEEP MODIFICATIONS", I sent to it?

Did you see : YOU TUBE--BROADCAST YOURSELF--"TURD DOG FLIGHT"?

HE IS, I BELIEVE, AIRWORTHY AGAIN AFTER THE LAST "INCIDENT".

LET ME KNOW HOW THIS GOES---HERE OR BY OTHER MEANS.

PEAKING OUT YOUR BBD CARBURETOR (and others)

Before we start, it's been a long time since Mr. Jeep was running (he was locked in the closet, by his owner [Jeep Abuse!])

I want to verify our "Accelerator Pump" is still providing, A good squirt into both barrels!
ENGINE IS OFF! Look into Carb.

With a flashlight (NOT a "BIC" lighter!), Slowly pull your throttle back, you should see 2 "PERTTY" squirt gun streams of fuel, shoot, one into each barrel---Equal size, to each other!

This fuel AIDS in your engine, getting a burst of energy, to "GO", Every time you push the gas pedal, WITHOUT THIS, YOUR JEEP WILL HESITATE and maybe die, EVERY TIME YOU ACCELLERATE! (This could maybe be one reason, for a hesitation)If we do not get 2 even squirts, Carb may/should be repaired (rebuild) or replaced.

Ready to tune Mr. Carburetor
!st thing we are going to do is figure out where we are set now, just in case we have to come back to this point.

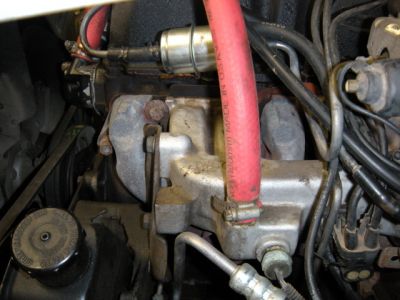
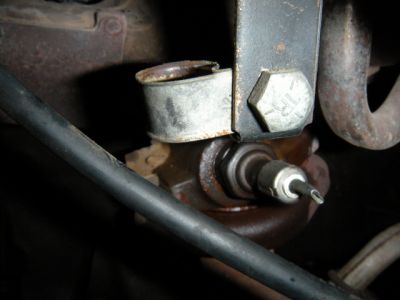
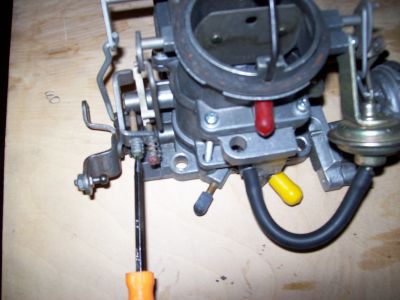
Go to the front of your Carb, there are 2 "Mixture" screws, they may be exposed, or they might be inside a little Tunnel.

When we move these screws, we are going to do it slow.

WHEN! we bottom out, we are going to GENTLY TOUCH BOTTOM (NO MORE THAN THAT)

If someone in the past has "Went Too Tight" our orifices may be "WOLLERED OUT" (one orifice may be larger than the other, air flow will be exponentially more than the other) and precise adjustment may not be achieved.

This is why we need to know our exact position NOW!. . .just so it will run (if we have to put it back)

IF adjusting correctly, ---"Just Ain't Happening"---(even if we cannot do this right, experimenting with your "Disaster", still may improve it a little!)

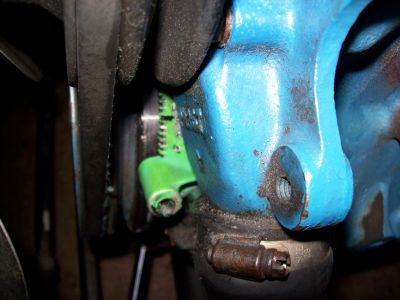
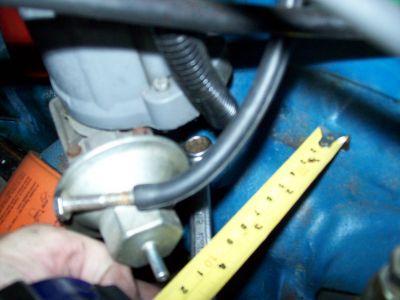
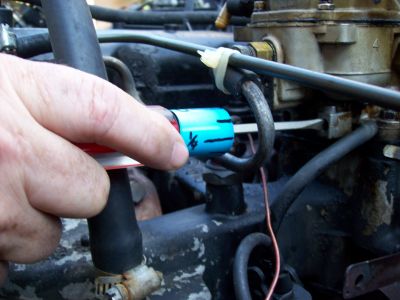
The next thing we need is a screwdriver; it must be LONG/SHORT ENOUGH to get to these screws, in your little "Obstacle Course" in front of the screws (stay away from the FAN!) It must fit the SCREW SLOTS WELL! (Slipping out, without knowing, means you lost your count!)

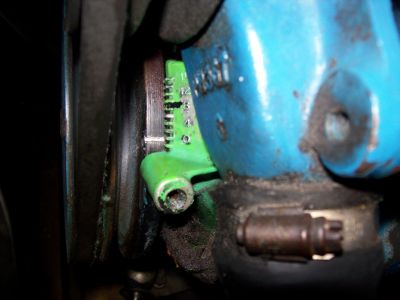
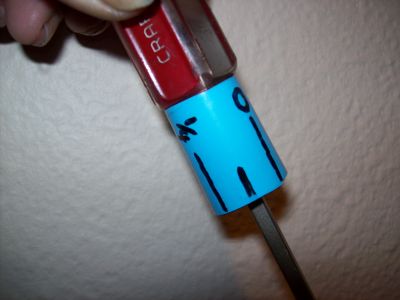
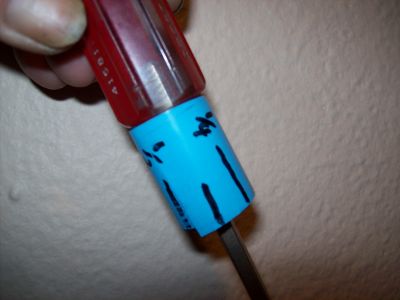
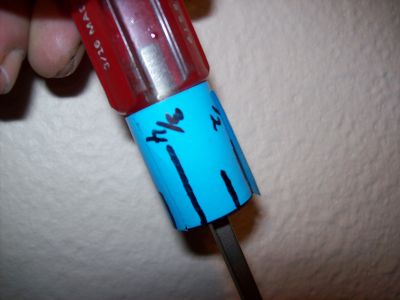
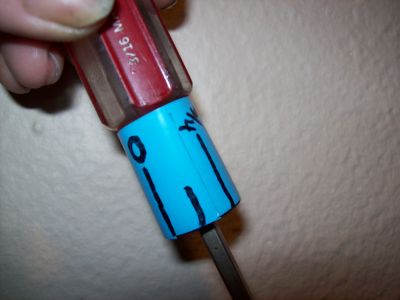
You may want to mark the Screwdriver handle with Tape ETC. so that you have 4 DIFFERENTLY MARKED increments (1/4 TURN MARKs for Reference! I PREFER 2, 180 degree marks line up with the screwdriver blade) we will be counting Turns, as you get better with this, you will graduate to 1/8 increments! You will be able to watch the flats of the screwdriver and have no need for marks!

I have whipped up a "Beginner Type" adjustment/counting screwdriver---with a piece of tape and a marker. MINE has 1/8 marks, But ONLY the increments are labeled.

As you rotate MINE, COUNTERCLOCKWISE---it reveals "0", then , then , then , then back to "0" (BACKING OUT ON A SCREW!)

MY "0" and , CORROSPOND WITH THE THIN PARTS OF THE SCREWDRIVERS BLADE (NOT THE FLATS, really makes no difference)

I MUST REMEMBER, GOING THE OTHER WAY (CW), I MUST TRANSLATE THE INCREMENTS "BACKWARDS"!

YOU CAN MARK IT ANYWAY YOU WANT! ! ! (RED MARKER "IN"---BLACK MARKER "OUT"---(in this scenerio, My BLACK "1/4" would also be my RED 3/4, My BLACK 3/4 would also be my RED 1/4.

AS LONG AS YOU AND YOUR ASSISTANT UNDERSTAND.


https://www.2carpros.com/forum/automotive_pictures/411289_1st_1.jpg


https://www.2carpros.com/forum/automotive_pictures/411289_2nd_1.jpg


https://www.2carpros.com/forum/automotive_pictures/411289_3rd_1.jpg


https://www.2carpros.com/forum/automotive_pictures/411289_4th_1.jpg


DURING THIS WHOLE PROCESS"”YOU MAY WANT TO PERIODICALLY, REMOVE THE SCREWDRIVER AND VERIFY THE POSITIONS OF THE ACTUAL SCREW SLOTS IN THE CARBURETOR!

NUMBER 1 (#1)


https://www.2carpros.com/forum/automotive_pictures/411289_83_258_CARB_003_1.jpg


We are going to call the screw closest to you NUMBER 1 SCREW the other will be NUMBER 2 SCREW, NUMBER 1 is the most important, because #2 is just going to be "ALONG FOR THE RIDE", during every adjustment.

NUMBER 2 (#2)


https://www.2carpros.com/forum/automotive_pictures/411289_83_258_CARB_004_1.jpg


If there are plastic limiter caps over the mixture screws, find a home for both, in the woods behind your house!

To see where we are now, Install screwdriver in #1 watching your reference marks, turn it CLOCKWISE IN, till it touches bottom, EVER SO GENTLY!

Your Too Wide Screwdriver, scraping the sides, is not FOOLING YOU! [get one that fits easily into the "Tunnel"], You will be counting the turns, ACCURATLY down to the 1/8th (yours will vary DRASTICALLY, from mine!) . . .. . .. . .. . ...42-1/8 Turns----RECORD THIS NOW. . .before you forget!..............Then Do #2 . . .. . .. . .. . ...356-1/4 TurnsRECORD IT TOO!

We want the Jeep to somewhat run decently, in order to adjust the mixture screws----so let's start with #1 at 3-1/2 Turns BACKED OUT#2 is along for the ride, Bring him out 3-1/2 turns too! (He will follow from here on out)

CRANK UP VERIFY IT WILL RUN

If the Jeep----WILL NOT--- stay running Initially, Try both at 3 turns OUT or both at 4 turns OUT,we just want to maintain an idle, this SHOULD improve as we adjust! (you may sorta back out to whatever your #1 "originally was close to [going in], such as 3-1/4 turns, but put #2 at same setting as #1)

TURN OFF NOW, SO WE CAN CONTINUE, if we are good!

LET ME KNOW IF THINGS ARE ---NOT--- GOING WELL AT THIS POINT!

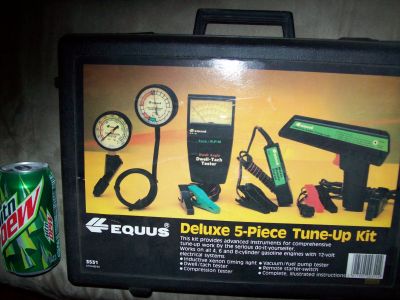
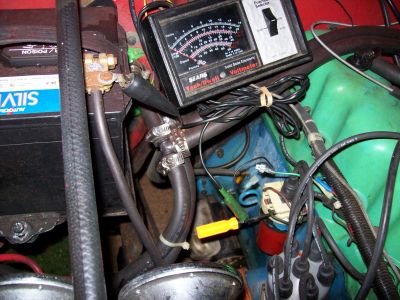
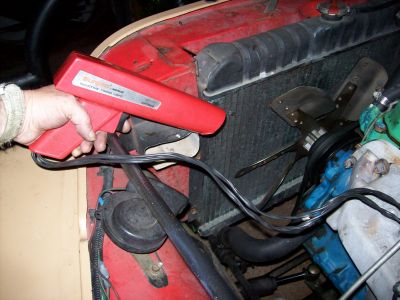
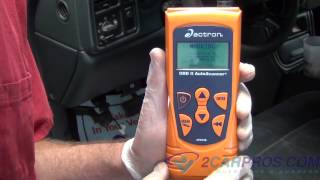
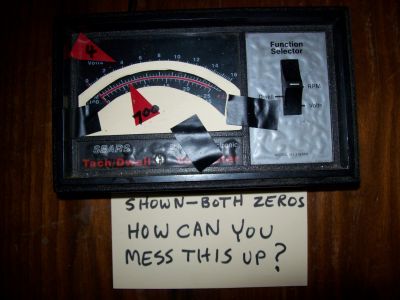
We have 2 ways to set the Carb, Vacuum Gauge or Dwell/Tach meter (Either way will work). For now we will use the DWELL/TACH METER. I like this method for several reasons: You can see "MICRO" movements of the needle, you can adjust Idle, up or down to RE-ZERO where you are at. . ..its a tool you already need!

Peak Vacuum should = Peak RPM

After you get good with the 6 cylinder scale, you can just watch the tip of the needle (more precise) on the "GENERIC" outer scale (on my meter, the voltmeter scale) to MAXIMIZE Precise, minute adjustments.

I have sorta rigged my meter so ONLY the 6 cylinder scale shows"”AND"”the top scale (voltmeter) shows. Basically: to find 700 RPM quickly, and maybe "Tweak off of 700 SLIGHTLY" to line up on a really CLOSE-BY voltmeter line [the up-most scale on my meter]. . ..(the most sensitive end of the needle)


https://www.2carpros.com/forum/automotive_pictures/411289_83_258_CARB_001_1.jpg


Regardless which you use, insure you have plenty of light on the front of the carb. And your meter is lit well from behind you. I usually SQUINT ONE EYE (like firing a weapon) to LINE UP ON MY "ZERO MARK" to watch needle changes UP or DOWN. . .. . ...we are shooting for UP!

This NEWLY AQUIRED LINE will now become our "ZERO MARK", to see if our adjustment, INCREASES RPM or DECREASES RPM (if you feel more comfortable, stay on the 6 cylinder scale, you can just use 700 RPM, and remain lower on the needle)

Just to see if this "Tach Method" was as good as using the vacuum gauge, we had a Job Going at work, (I'm a plumber) that had this real expensive vacuum gauge going in. The gauge was very sensitive, and was about a foot in diameter, lots of increments (mine is about 3", minute changes are FAINT and Hard to detect).

I sorta borrowed it, for a day, before it was installed. We hooked it to my Jeep, along with the Dwell/Tach, I adjusted my Carb. And maxed out with my meter. . .. . .then came up with nearly the same settings, when we tried to "Tweak" it better using
the Monster Vacuum Gauge. . .. . ..I'm sold with the TACH method!

ACTUAL TUNING

Insure no other device is touching, or will EVER, hold our throttle open (remove or adjust it so that it will never affect the throttle). . ...the only 3 exceptions being: "Our Screw ,and the one beside it (choke fast idle). . ..and if you have A/C, any high idle solenoid that jacks up idle, to compensate for A/C compressor load.

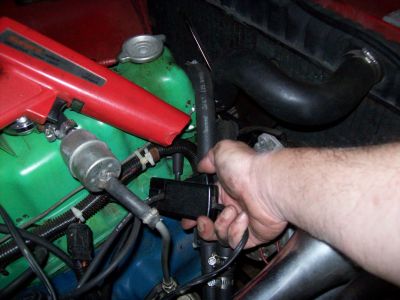
Remove your air cleaner assembly.

Hook up your Dwell/Tach meter.

CRANK and warm engine to operating temperature.

Now check to see if the choke is fully open. . .. . .. . . CHECK: NOT "OUR SCREW", but the other one beside it, it is "OPEN SPACED" and NOT CONTACTING ANYTHING.

You SHOULD be back to NORMAL IDLE!YOUR METER IS SET TO TACHOMETER (RPMs)

Insure the throttle arm is closed (by spring) and you cannot physically make it close any more. . .. "OUR SCREW" should be contacting the stop. . ... When you are warm, verify we are idling at 700 RPM, Or MAKE IT HAPPEN (environmental changes could slightly affect this from last adjustment, and FOR SURE, our moving the mixture screws to the new starting point!)

Its decision time, we must pick our meter ZERO POINT.

On my meter, at this speed (700 RPM), I am really close to a mark on the upper scale [tip end, sensitive part of the needle), If your meter is like mine, the "4" mark (4 VOLTS) is ever so slightly DOWN, from this original idle mark.(700 RPM)

On the "6 Cyl. Scale", Moving RPM down slightly (to use the "Needle Tip" for "ZERO" on "4" ), would back you down from 700 RPM slightly (great! Manual says your Idle was 680 RPM anyway.) (We may still put it back, when we are done adjusting). We can NOW be on the TIP END of the needle and use "4" as our Zero Mark!

Every time you re-zero your IDLE SPEED, for now, Will be "4" on voltmeter scale. You already know, it is really slightly under 700 RPMs---no need to look at 6 cylinder scale while adjusting and re-zeroing with "Our Screw"

We are running, and at temp,

We may be "stumbling" a bit,

"4" on meter is ZERO for Idle speed (or "700"),

The carb will NO longer be referred to as: 3-1/2 turns---out; on both screws. . ...It is now ZERO! (Unless we get confused and must start over)

OUT IS "RICH". . .. . .. . .. . .. . ...IN IS "LEAN"

CALL THIS: "WHICH WAY DO I GO?"We are going to play with NUMBER 1 mixture screw, Insert your screwdriver and

SIMULTANEOUSLY! (TURN, WATCH METER, and WATCH SCREWDRIVER INCREMENTS!)

Give the screw Turn Clockwise (slowly)

Did we improve on "4"?

NOW, RETURN TO ZERO with #1 (CCW Turn)

Now turn it CCW Turn [from zero]

Did "4" improve?

You must move slowly, allow engine several seconds (5-10) to fully react, when you adjust!

WHICH WAY MADE AN IMPROVEMENT?...... IN or OUT?

THIS NEXT, IS AN ASSUMPTION, and BASED ON RON'S JEEP----otherwise you should understand the process, going in!

WE (RON and I) HAD IMPROVEMENT BACKING #1 OUT, Turn from "ZERO" [actually #1 is now 3-3/4 off the bottom], NOW WE HAVE SORTA ESTABLISHEDBACKING OUT---IMPROVES RPM! (Or opposite)

WHAT WE DO TO #1WE DO TO #2! BACK HIM OUT TURN, TOO! ---RPM will probably improve with #2 (actually at 3-3/4 OUT, both screws)

OUR METER NEEDLE IS ABOVE THE "4" NOW [climbing] (improvement w/BOTH screws!)

RE-ZERO IDLE SPEED ["OUR SCREW"] TO "4" AGAIN (SO WE CAN DETECT IMPROVEMENT EASILY!)

We are going to say, EVERTHING IS BACK TO ZERO (forget 3-3/4. . .if you mess-up, you can always, rebottom the screws, counting the turns as you go. . ..set both screws the same, AND CALL THAT, YOUR NEW ZERO!)

NOTE: Most beginners get messed up trying to keep up with their turns.

Just remember----whatever you Finally "tweak" #1, reach over and do #2 the same increment.

Call it zero (each turn of #1, will be a fresh start!)

When we are COMPLETELY done. . ...we are going to count BOTH, down to the bottom and Verify they were the same, Then put them back where they belong. . .. . .. . .and record, in our manual, their FINAL, backed out setting!

CONTINUEING WITH ADJUSTMENT!

We are going to continue to back out, at a time as before, REMEMBER TO DO #2 EACH TIME!

We are finally going to HIT and Probably---BACK OUT PAST---Our "SWEET SPOT" (Meaning: PEAKED OUT! NO CHANGE IN, NO CHANGE OUT)

When our "4" Zero, does not improve or goes downhill (decreases in RPMs) WE WILL STOP MAKING THESE, "COARSE", CCW, Turn Adjustments!

We are TOO FAR OUT NOW (not by much, and we are TOO RICH!)

CALL THIS: "RE-TWEAKING"We are going to EASE back in Toward the "SWEET SPOT" (clockwise)[opposite what we were doing]----this time at 1/8 or 1/16 increments. . .. . .#2 will follow along. . ..each "Finished" process will be called ZERO, as before. . ... RE-ZERO OF THE METER [idle speed]

IT IS UP TO YOU, when we are this close to Finish, whether to keep moving idle down to 700 RPM (or back to "4"), WE JUST WANT TO DETECT SLIGHT IMPROVEMENTS NOW!

Watching the meter and FINE ADJUSTMENT amounts---IS REALLY CRITICAL AT THIS POINT!

When your RPM, MAXES OUT---you are sitting on the "SWEET SPOT"Stay there! (Both screws)

AT THIS POINT, YOU MAY WANT TO "MAKE SURE" ,as long as you keep #1 and #2" EVEN"----and BACKING-UP or GO FORWARD EVENLY. . ...as long as you approach the "Sweet Spot" from the "RICH" side [screw in to find it, NOT OUT], for the Final "Tweak"

PLAY ALL YOU WANT! (screws even at all zero points!, IN or OUT)Confused? Go back to a known start point!

This will really impress your friends later, when you "Show Out".

Re-zero "Our Screw" to "4" (last time) Throttle up a few times, insure, we "Settle back in" to our Zero "4" setting, when engine stabilizes.

SHUT HIM DOWN

Run #1 in count turns, record---Run #2 down record turns, was it same as #1 turns?----SHOULD BE!

BACK OUT BOTH SCREWS---to your LAST and ALMOST FINAL ZERO

Crank up, engine settles in, verify idle speed, "Tweak slightly", OUT then IN, both screws---INSURE "SWEET SPOT" IS STILL YOUR FRIEND! SAME SPOT!

DONE, AS FAR AS I AM CONCERNED, WITH THE "HOW TO" PART

IF YOU BEGAN THIS WHOLE PROCESS BY, SCREWING IN THE SCREWS FOR IMPROVEMENT, READ NOTE BELOW.

NOTE"”if you began this process in reverse (starting by screwing in, in the "WHICH WAY DO I GO?" PARAGRAPH) You will pass the "SWEET SPOT" and will wind up on its leaner side, WHEN RPM starts dropping.

AT THIS POINT! ---Back out to of a turn (both screws) and approach the "Sweet Spot" from the RICH SIDE ("SCREWING IN", Will eventually hit the "Sweet Spot") using small increments (AS WE DID, IN "RE-TWEAKING" PARAGRAPH)

Some people say you should "finish" by backing out, maybe a 1/8 turn [a tad rich, from sweet spot] (both screws) You can experiment all you want---I AM LEAVING THEM ALONE---I HAVE SEEN NO ADVANTAGE OF MOVING THEM [rich], DURING MY EXPERIMENTS!

ARE WE RUNNING SUPER NOW!Lets leave idle set at 700 RPM, just is sorta a good even speed![especially to help warm up]......If you get a lot of tailpipe "Rumbling" during DECELERATION (foot completely off of gas) you may want to drop idle slightly. I WOULD STAY ABOVE 650 RPM (won't cut off) and BELOW 750 RPM (STAY IN IDLE CIRCUIT, NOT ON PRIMARIES)!

LET ME KNOW HOW IT GOES, TELL ME YOUR/MY PROBLEM AREAS SO I CAN TRY TO GET IT/EDIT RIGHT, FOR THE NEXT POOR SOUL THAT MIGHT READ IT!

I HAVE ONE MORE THING YOU MAY WANT TO TRYIF YOU LET ME KNOW---HAVE PICS ON STAND-BY

SORT OF A FIELD, ON VEHICLE, CARBURATOR CLEAN-OUT, PROCEDURE! (May improve your "Sweet Spot")

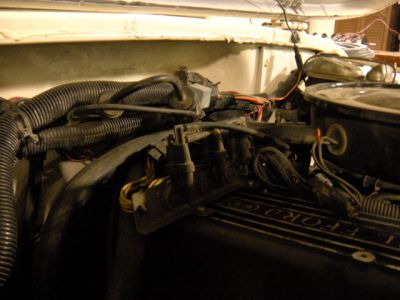
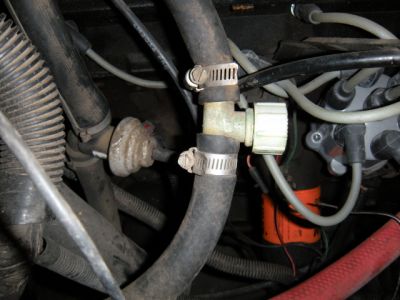
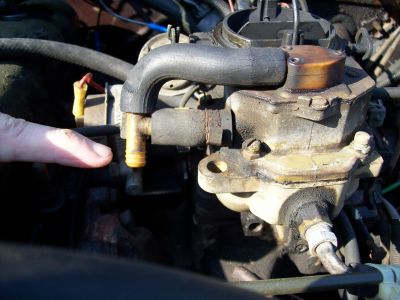
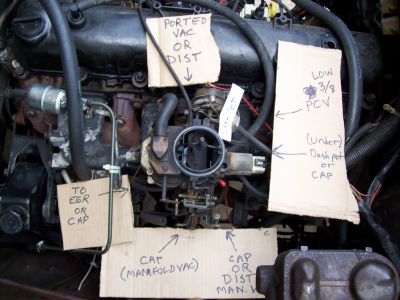
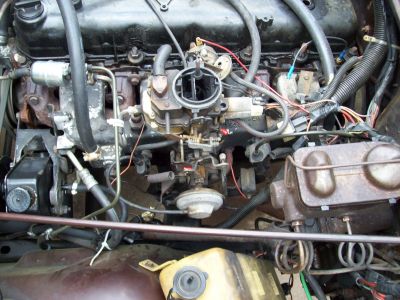
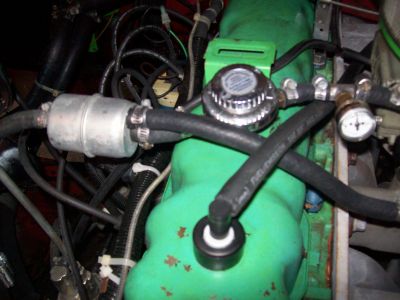
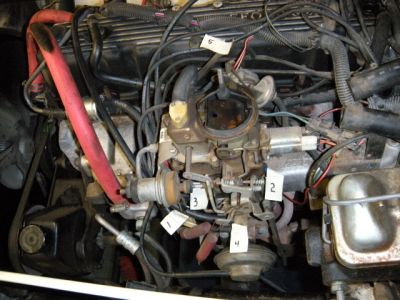
We have disabled many things on your rig, Carb. Replacement recommendation is: A 1979 ERA BBD, like the one in my pic, somewhere above. (If, you really need it.). . ..I also like a manual choke. Let you pick when you need it, there are fewer in-between mechanicals. . .. . .. (insure your choke is functioning"”take off the breather and inspect whether it goes closed, when the throttle arm is actuated, WHEN IT IS NOT RUNNING---COLD"”LIKE ON A COOL MORNING!)

I WANT ALL OF THE DRAMA AND ANY "SCRATCHING OF THE HEAD EXPERIENCES""”CAUSED BY MY ANSWERS"”SO I CAN IMPROVE---NEXT GUY MIGHT UNDERSTAND THE SITUATION!

Correct terminology for stuff, I sorta made a name up for----Can be found in your manual!
Wash your engine (inexpensively and well) with "Purple Power" Let it sit for about 5 minutes, KEEP IT OFF OF EXTERIOR PAINT! Rinse with a hard stream of water. . .. (Rinse body well too) if you soak dist. cap (a lot) and trouble cranking up, Remove cap and dry it out.

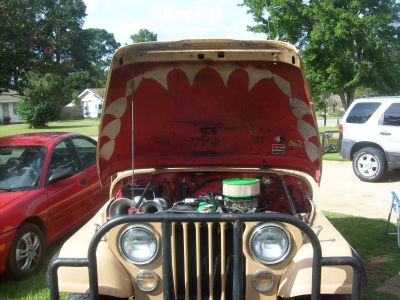
Close your hood----ONLY OPEN IT NOW, FOR YOUR FRIENDS TO ADMIRE IT!

I told you that I would help you all the way!

Love Turddog
Was this
answer
helpful?
Yes
No
+3
Friday, May 7th, 2010 AT 2:16 PM

Please login or register to post a reply.

Sponsored links