Struts

Tiny
CHERILTHOMAS
  • MEMBER
  • 2000 FORD TAURUS
  • 6 CYL
  • FWD
  • AUTOMATIC
  • 111,444 MILES
How much should it cost to replace the front struts assuming the left front strut broke a spring, fell off and the spring went through the left front tire
Tuesday, August 18th, 2009 AT 1:00 AM

13 Replies

Tiny
SERVICE WRITER
  • MECHANIC
  • 9,123 POSTS
There is a safety recall on the springs. Call the dealer and they will replace the springs at no charge.
See below

SAFETY RECALL 04S17 - FRONT COIL SPRINGS - REQUESTS FOR RECALL SERVICE ACTION
TSB 16-0068
SAFETY RECALL 04S17 - FRONT COIL SPRINGS - REQUESTS FOR RECALL SERVICE ACTION
Publication Date: April 21, 2016
FORD: 1999-2001 Taurus
MERCURY: 1999-2001 Sable
This article supersedes TSB 14-0165 to provide updated contact direction to the Special Service Support Center.

ISSUE:
For 1999-2001 Taurus or Sable vehicles Safety Recall 04S17 has been issued for vehicles that are operated in high corrosion areas for an extended period, where the front coil springs could potentially fracture. A fractured front coil spring could move past the spring seat and contact a front tire. If a front coil spring should fracture and come in contact with a tire, the tire may rupture resulting in rapid air loss, which could increase the risk of a crash without warning.
ACTION:
Follow the Service Procedure steps to correct the condition.
SERVICE PROCEDURE
For 1999-2001 Taurus or Sable vehicles that are not covered under Safety Recall 04S17 but exhibit front coil spring corrosion, dealers can submit a Non-Involved Vehicle type contact to the Special Service Support Center (SSSC) from the PTS website to request recall service action. Dealers should provide pictures of the VIN, Odometer and a picture of the coil spring corrosion. Dealers located in U.S. Federalized Territories (America Samoa, Guam, Northern Mariana Islands, Puerto Rico and U.S. Virgin Islands) must contact expcso@ford. Com to request recall service action. To qualify, the vehicles must still be equipped with original equipment front coil springs and struts.
If approved, follow Safety Recall 04S17. Dealers are to install protective shields on both front coil springs.
OTHER APPLICABLE ARTICLES
04S17

WARRANTY STATUS
Information Only - Not Warrantable

NOTE: The information in Technical Service Bulletins is intended for use by trained, professional technicians with the knowledge, tools, and equipment to do the job properly and safely. It informs these technicians of conditions that may occur on some vehicles, or provides information that could assist in proper vehicle service. The procedures should not be performed by "do-it-yourselfers". Do not assume that a condition described affects your car or truck. Contact a Ford or Lincoln dealership to determine whether the Bulletin applies to your vehicle. Warranty Policy and Extended Service Plan documentation determine Warranty and/or Extended Service Plan coverage unless stated otherwise in the TSB article. The information in this Technical Service Bulletin (TSB) was current at the time of printing. Ford Motor Company reserves the right to supercede this information with updates. The most recent information is available through Ford Motor Company's on-line technical resources.

Copyright © 2016 Ford Motor Company
Was this
answer
helpful?
Yes
No
Tuesday, August 18th, 2009 AT 5:40 AM
Tiny
RLEMP
  • MEMBER
  • 3 POSTS
Did this recall extend into the 2002 Taurus

Thanks
Was this
answer
helpful?
Yes
No
Thursday, July 14th, 2011 AT 7:56 AM
Tiny
LILDUKE
  • MEMBER
  • 21 POSTS
  • 1995 FORD TAURUS
Suspension problem
1995 Ford Taurus 6 cyl Automatic

When driving my car, my front passenger side tire shakes when I reach a certain speed. I checked the tire and found that I was able to move the tire forward and backwards. When I discovered this I decided to change the tension bar and bushing seeing that there seemed to be some space between the hole and bushing, but that still didnt help. I later learned that it wasn't the bar or the bushing, but it was the plastic inside the hole that the tension strut goes through. Some kind of way I have seemed to cause the plastic to deform in hole of the frame that the tension strut goes through (I believe I know how it happened.)
I was wondering is the plastic inside the hole that the tension strut goes through is able to be changed? If so, how may I go about changing it? When once observed, I had no idea how to take it out.
Was this
answer
helpful?
Yes
No
Friday, May 10th, 2019 AT 6:26 PM (Merged)
Tiny
BMRFIXIT
  • MECHANIC
  • 19,053 POSTS
TENSION STRUT-TO-SUBFRAME BUSHINGS
Removal & Installation
Remove lower control arm. See below .
Remove and discard nut.
Remove washer and bushing from front of tension strut. Pull strut rearward to remove from subframe.
Remove tension strut insulator. Install new bushing on tension strut end, and insert into subframe. Install new front bushing. Clean tension strut threads. Tighten to specification

CONTROL ARM
Removal
Raise and support vehicle. Remove wheel. Remove and discard nut. Pull large dished washer from tension strut. Remove ball joint pinch bolt and nut and discard. If necessary, use a drift punch to remove pinch bolt.
Spread steering knuckle pinch joint, and separate control arm from knuckle. Remove control arm inner pivot nut and bolt and discard. Remove control arm assembly from tension strut.
Installation
Insert tension strut into control arm bushing. Position control arm into subframe bracket. Install new nut and bolt, and tighten to specification.
Install ball joint into steering knuckle. Position ball joint stud groove so bolt can be installed without forcing. Insert new pinch bolt and nut, and tighten to specification. Clean tension strut threads. Install new nut, and position dished washer with dished side away from control arm bushing. Tighten nut to specification.


https://www.2carpros.com/forum/automotive_pictures/99387_Graphic_79.jpg

Was this
answer
helpful?
Yes
No
Friday, May 10th, 2019 AT 6:26 PM (Merged)
Tiny
LILDUKE
  • MEMBER
  • 21 POSTS
Thank you, but I already know how to all that. I was asking how does one remove/change the hard plastic in the hole that the tension strut goes through.
Was this
answer
helpful?
Yes
No
+1
Friday, May 10th, 2019 AT 6:26 PM (Merged)
Tiny
BMRFIXIT
  • MECHANIC
  • 19,053 POSTS
Once bar out kit fit on it
IM still not sure if we are on the same page
check the fig and let me know if that is the kit you are looking to replace


https://www.2carpros.com/forum/automotive_pictures/99387_Capture_16.jpg

Was this
answer
helpful?
Yes
No
+2
Friday, May 10th, 2019 AT 6:26 PM (Merged)
Tiny
LILDUKE
  • MEMBER
  • 21 POSTS
Oh ok, I have already changed the rubber bushing, now I am trying to change the hard plastic that is actually in the hole of the car frame. Its kind of part of the car frame. I hope I'm being understandable.
Was this
answer
helpful?
Yes
No
Friday, May 10th, 2019 AT 6:26 PM (Merged)
Tiny
AMPSKI
  • MEMBER
  • 1 POST
  • FORD TAURUS
HI - my son has a 98 Fort taurus with 3.0 V6 with 130,000 miles. They said he needed new struts because of what was happening to his tires, his allignment was fine. The cost was going to be a lot so we ordered these EZ struts that are supposed to fit right in. Well, they don't. Had a rough time getting one of the front ones in and can't figure out how to reach the back. Do you have to pull out the back seat? Remove the back of the car? How do you get to the bolts to remove the strut in the rear?
Thanks
amp
Was this
answer
helpful?
Yes
No
Friday, May 10th, 2019 AT 6:26 PM (Merged)
Tiny
BMRFIXIT
  • MECHANIC
  • 19,053 POSTS
I believe its metal and not hard plastic, its like outer shell of a bushing and it sit inside the frame
and if so you can weld it back on to the frame

try to get picture if you can
Was this
answer
helpful?
Yes
No
Friday, May 10th, 2019 AT 6:26 PM (Merged)
Tiny
BOOTDOG
  • MECHANIC
  • 665 POSTS
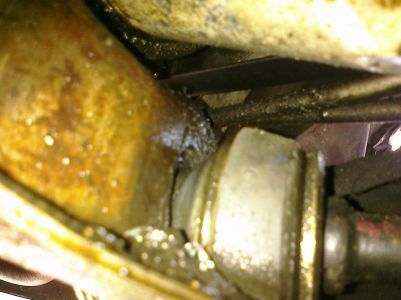
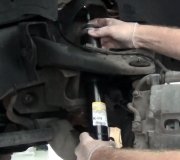
I couldn't find any info on access to the top of the strut. Just look around carefully and pull back any material that may be covering up the strut tower. Once the strut is removed be carefully when taking the strut apart and follow these steps. Good luck

Spring and Shock Absorber
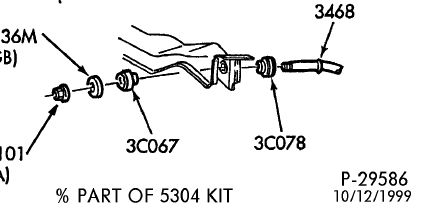
SPECIAL SERVICE TOOL(S) REQUIRED Description Tool Number
Oxygen Sensor Wrench 303-476 (T94P-9472-A)

Disassembly

1.

WARNING: DO NOT ATTEMPT TO REMOVE THE SPRING FROM THE STRUT WITHOUT FIRST COMPRESSING THE SPRING WITH A TOOL DESIGNED FOR THAT PURPOSE.

CAUTION: Do not attempt to remove strut rod nut by turning rod and holding nut. Nut must be turned and rod held stationary to avoid possible fracture of rod at base of hex.

NOTE: Before compressing rear spring (5560), mark location of rear spring to top mount using a grease pencil.

Remove the rear spring and shock absorber (18080) as described.

2.

Place shock absorber and rear spring assembly in a suitable spring compressor.

Item Part Number Description
1 †Mark before Disassembly
2 †Hook on Second Coil from Top
3 †Short Thrust Screw
4 †Long Thrust Screw
5 †Spring Compressor
6 †Hook on Top Coil

3.

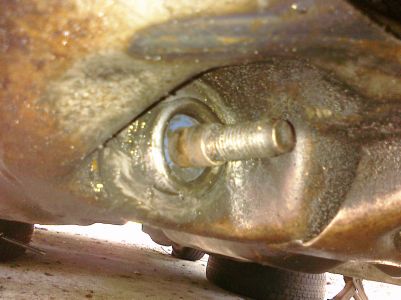
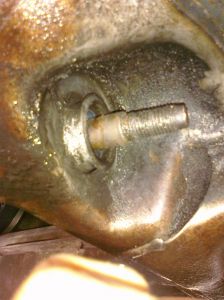
Place 10 mm six point deep well socket on top of shock absorber shaft and hold while removing top shaft mounting nut with a Oxygen Sensor Wrench 303-476 (T94P-9472-A) and ratchet.

4.

Loosen spring compressor tool, then remove top rear shock absorber bracket (18192) and rear spring.

Assembly

1.

Inspect rear spring to make sure rear spring damper (5A669) rear spring insulator retainer (5A545) are properly positioned.

2.

Using a spring compressor, install rear spring, bottom washer, if equipped, rear shock absorber bracket, upper washer and nut on rear shock absorber shaft.

Item Part Number Description
1 N801310-S100 Nut (3 Req'd)
2 N804608-S150 Nut
3 N804232-S100 Washer (2 Req'd)
4 18192 Rear Shock Absorber Bracket
5 5560 Rear Spring
6 18080 Shock Absorber
7 18A085 Rear Shock Absorber Jounce Bumper (Part of 18080)
8 5K617 Rear Spring Center Mounting Insulator (Part of 18080)
9 18K005 Dust Boot (Part of 18080)
A †Tighten to 25-34 Nm (19-25 Lb-Ft)
B †Tighten to 53-71 Nm (39-53 Lb-Ft)

3.

NOTE: Install rear spring with rear spring insulator retainer on the bottom as shown to prevent rear spring damper from sliding down the spring.

Make sure rear spring is properly located in upper mount and lower spring seat and that mount washers are positioned correctly.

4.

Tighten rod nut to 53-71 Nm (39-53 lb-ft). Use Oxygen Sensor Wrench 303-476 (T94P-9472-A) to turn the nut and a 10 mm six point deep well socket to hold shaft so it will not turn while tightening nut. Do not use pliers on strut rod as finished rod surface could be damaged.
Was this
answer
helpful?
Yes
No
Friday, May 10th, 2019 AT 6:26 PM (Merged)
Tiny
LILDUKE
  • MEMBER
  • 21 POSTS
Yeah, you are right (hardshell). It seems to be loose in my car and able to slide a little back and forth. I dont see a way to take it out so I might have to weld it like you said. I will take a picture when I get working on the car again.

Thank You
Was this
answer
helpful?
Yes
No
Friday, May 10th, 2019 AT 6:26 PM (Merged)
Tiny
BMRFIXIT
  • MECHANIC
  • 19,053 POSTS
Was this
answer
helpful?
Yes
No
Friday, May 10th, 2019 AT 6:26 PM (Merged)
Tiny
LILDUKE
  • MEMBER
  • 21 POSTS


https://www.2carpros.com/forum/automotive_pictures/377569_CIMG0004_1.jpg


https://www.2carpros.com/forum/automotive_pictures/377569_CIMG0006_1.jpg


In the first and second picture you can see that in the frame of the car is a metal or plastic hard shell that the rubber bushing and tension strut goes through


https://www.2carpros.com/forum/automotive_pictures/377569_CIMG0002_2.jpg


https://www.2carpros.com/forum/automotive_pictures/377569_CIMG0001_1.jpg


Some kind of way it has become deformed, and in the third and fourth pics you can see that there is a gap between the frame of the car and the metal hardshell, which allows the tire to move forward and backwards. As a result, my passenger tire axle is not sturdy and allows medium shaking, which can lead to barren and tire wear.
Was this
answer
helpful?
Yes
No
Friday, May 10th, 2019 AT 6:26 PM (Merged)

Please login or register to post a reply.

Sponsored links