Good afternoon.
This sounds like you still have air in the system.
https://www.2carpros.com/articles/brake-pedal-goes-to-the-floor
I posted the procedure below but the key is you need a scan tool that can perform the automated ABS bleed procedure. It sounds like you have in the lines and conventional bleeding will not work until you open the ABS valves. That is what the scan tool does to get rid of the air.
https://www.2carpros.com/articles/how-to-bleed-or-flush-a-car-brake-system
Roy
NOTE: This procedure only needs to be performed if the 4 wheel anti-lock brake (4WABS) hydraulic control unit (HCU) has been replaced.
NOTE: One conventional pressure bleed cycle consists of advancing the brake pedal to its extended position, opening the wheel cylinder bleeder screw, allowing fluid to be released into the waste container, closing the wheel cylinder bleeder screw and releasing the brake pedal to its full upright position.
NOTE: When any part of the hydraulic system has been disconnected for repair or replacement, air may get into the system arid cause spongy brake pedal action. This requires the bleeding of the hydraulic system after it has been properly connected. The hydraulic system can be bled manually or with pressure bleeding equipment Brake Bleeder.
NOTE: Performing the New Generation Star tester (NGS) program routine drives entrapped air from the otherwise inaccessible lower section of the 4WABS valve into the upper sections (accessible by bleeding the brakes). Subsequent bleedings remove the air from the system.
NOTE: Add recommended brake fluid as necessary throughout the procedure.
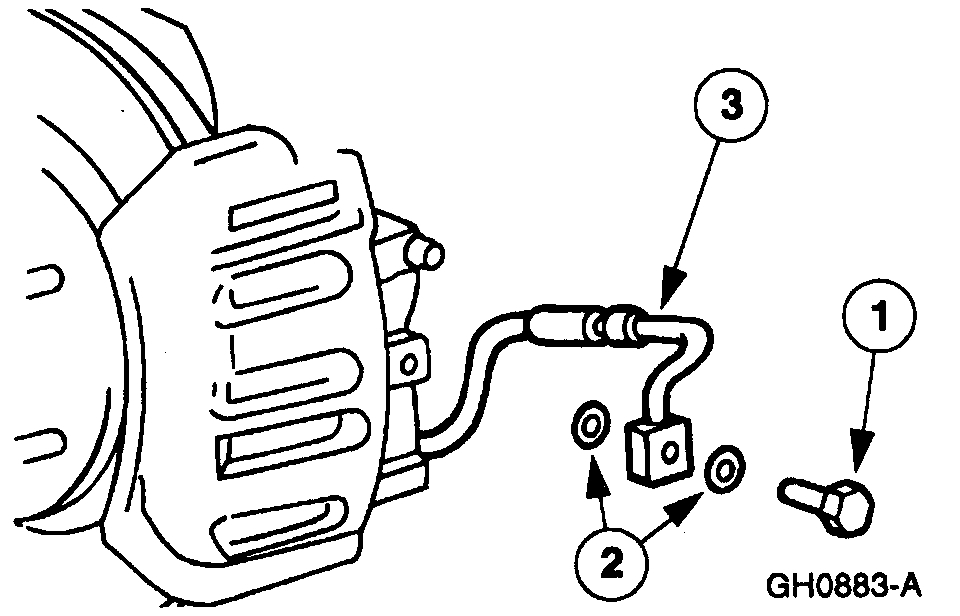
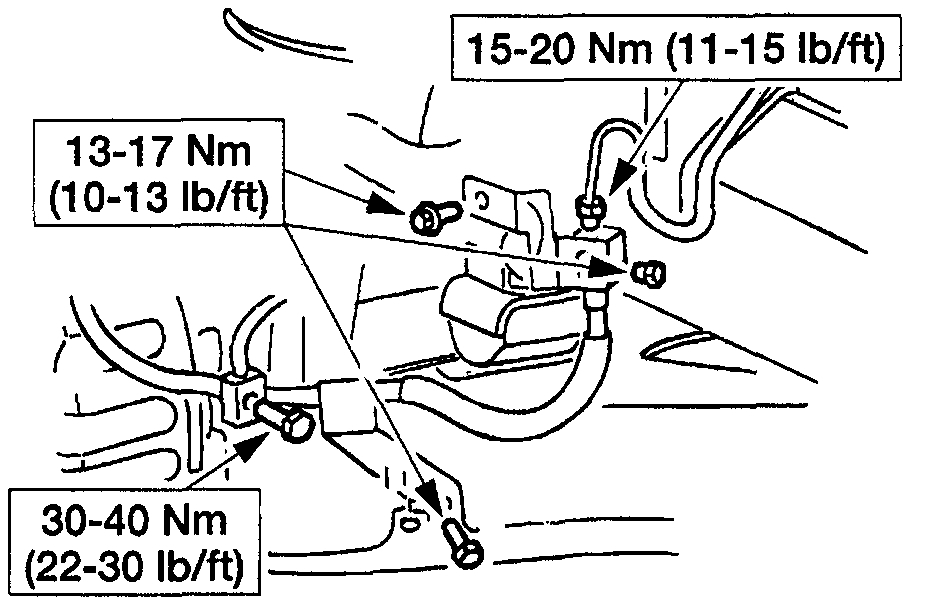
Wheel Cylinder Bleeder Screw
imageOpen In New TabZoom/Print
1. Connect a clear waste line to the RH rear wheel cylinder bleeder screw and the other end in a container partially filled with recommended brake fluid.
2. With the RH rear wheel cylinder bleeder screw open, cycle the brake pedal until no more air is seen in the waste line.
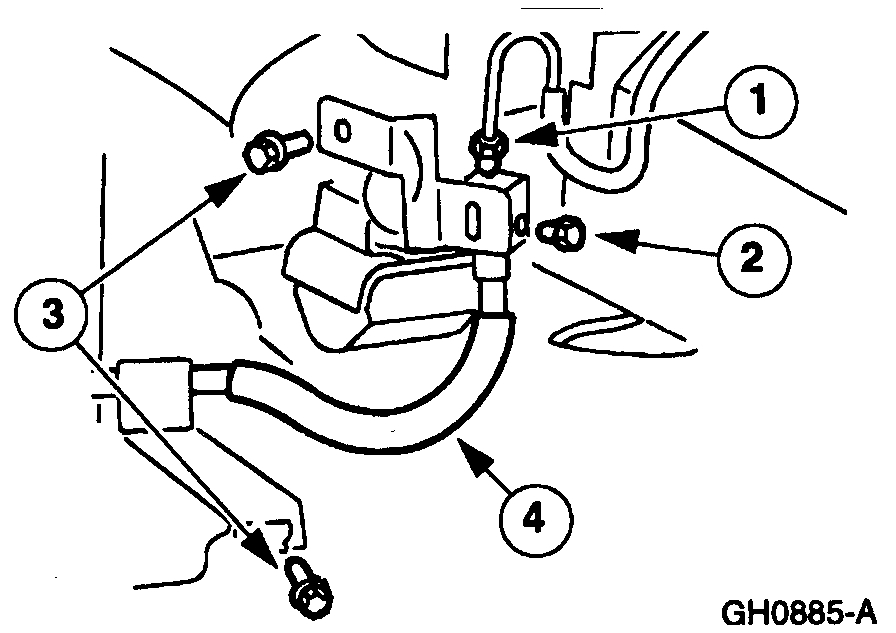
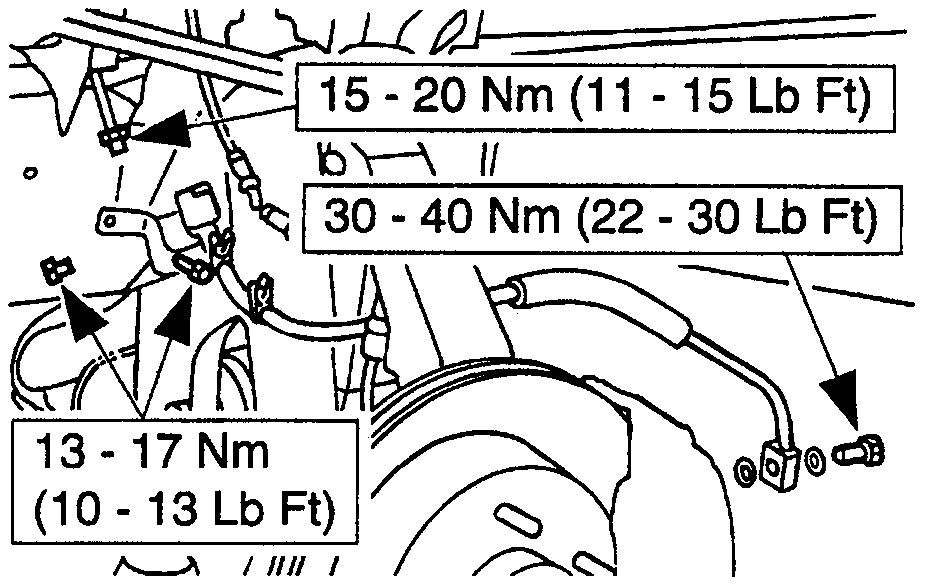
Wheel Cylinder Bleeder Screws Torque Specifications
imageOpen In New TabZoom/Print
3. Close the RH rear wheel cylinder bleeder screw and disconnect the waste line.
4. Repeat steps 1, 2, and 3 for the LH rear wheel cylinder bleeder screw, RH front disc brake caliper bleeder screw, and the LH front disc brake caliper breeder screw.
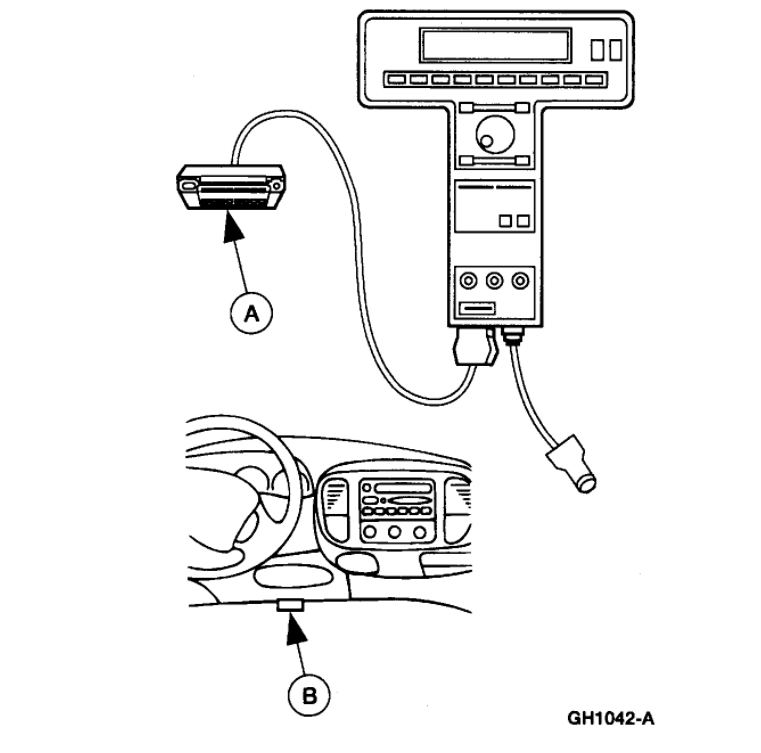
Connect Cable Adapter
imageOpen In New TabZoom/Print
5. Connect the (A) NGS DCL cable adapter into the (B) vehicle data link connector (DLC).
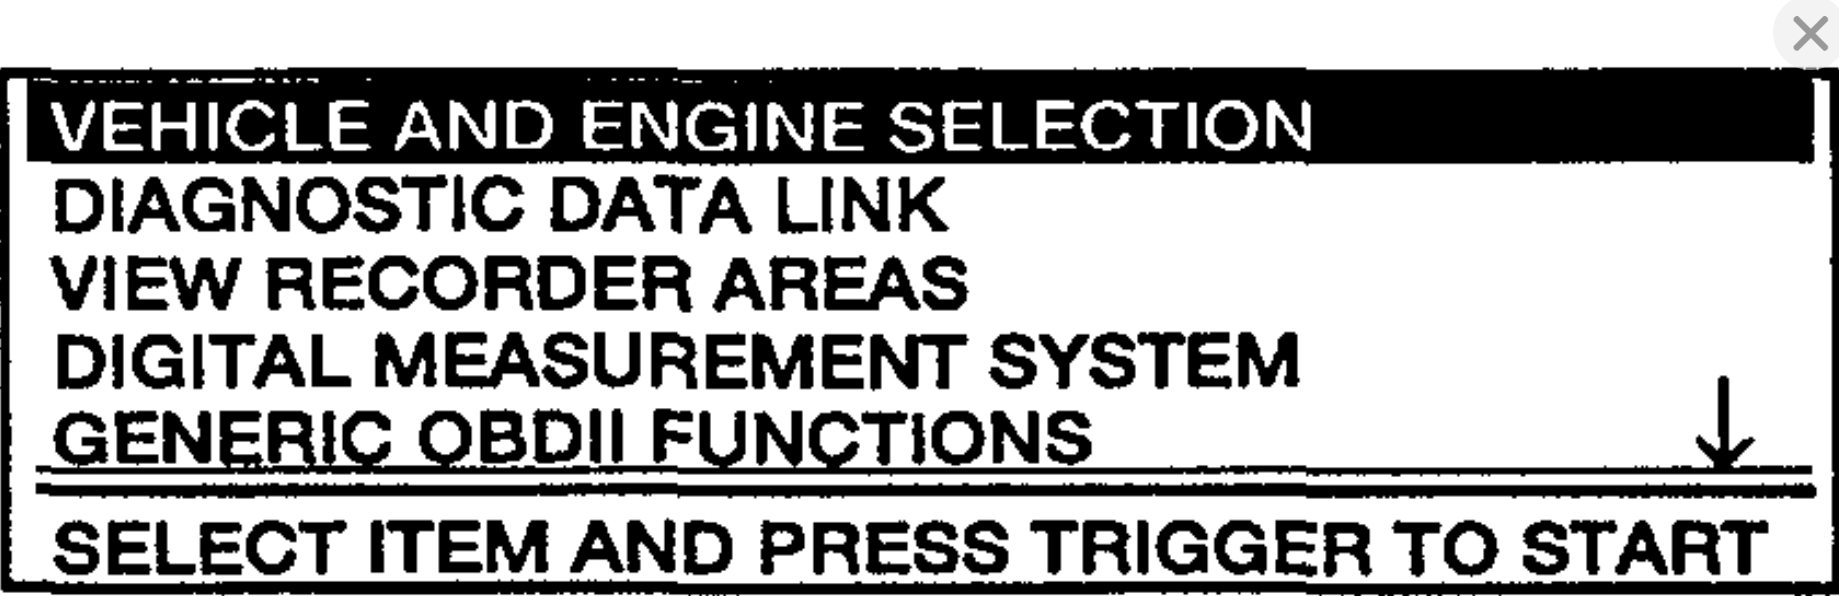
Vehicle And Engine Selection
imageOpen In New TabZoom/Print
6. Select VEHICLE AND ENGINE SELECTION and press trigger to start the NGS.
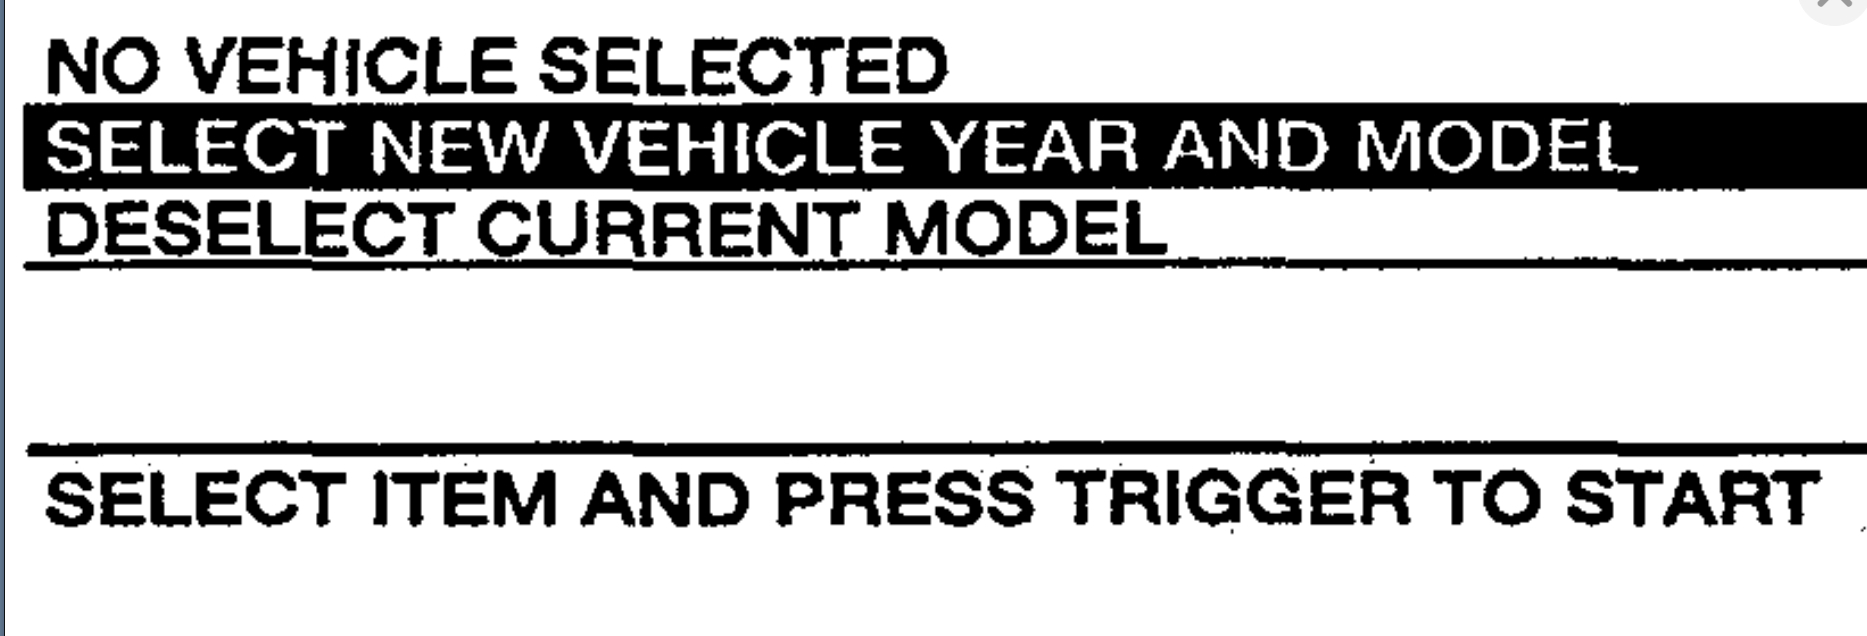
Select New Vehicle Year And Model
imageOpen In New TabZoom/Print
7. Select SELECT NEW VEHICLE YEAR AND MODEL and press trigger to start the NGS.
Vehicle Year Selection
imageOpen In New TabZoom/Print
8. Select the appropriate vehicle year application and press trigger to start the NGS.
Select New Vehicle Year And Model
imageOpen In New TabZoom/Print
9. Scroll down to the appropriate vehicle application and highlight and trigger to start:the NGS.
Verify Vehicle Application
imageOpen In New TabZoom/Print
10.The NGS will prompt you to verify correct application. Trigger the NGS if correct.
Select Diagnostic Data Link
imageOpen In New TabZoom/Print
11.Select DIAGNOSTIC DATA LINK and press trigger to start the NGS.
Trigger Or Cancel Display
imageOpen In New TabZoom/Print
12.Follow the NGS prompt PRESS TRIGGER TO CONTINUE or PRESS CANCEL TO BYPASS.
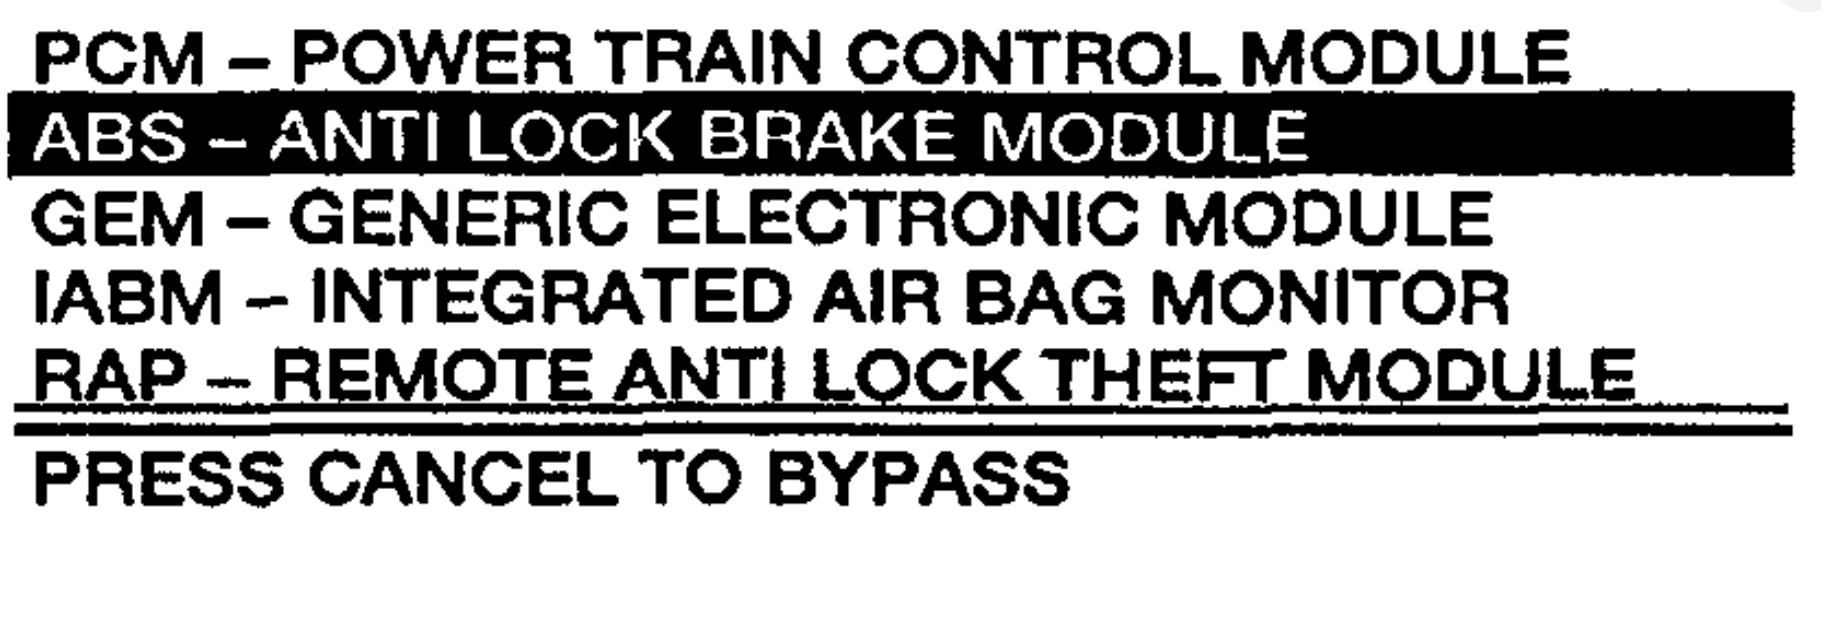
Select - Anti-Lock Brake Module
imageOpen In New TabZoom/Print
13.Select ABS ANTI-LOCK BRAKE MODULE and press trigger to start the NGS.
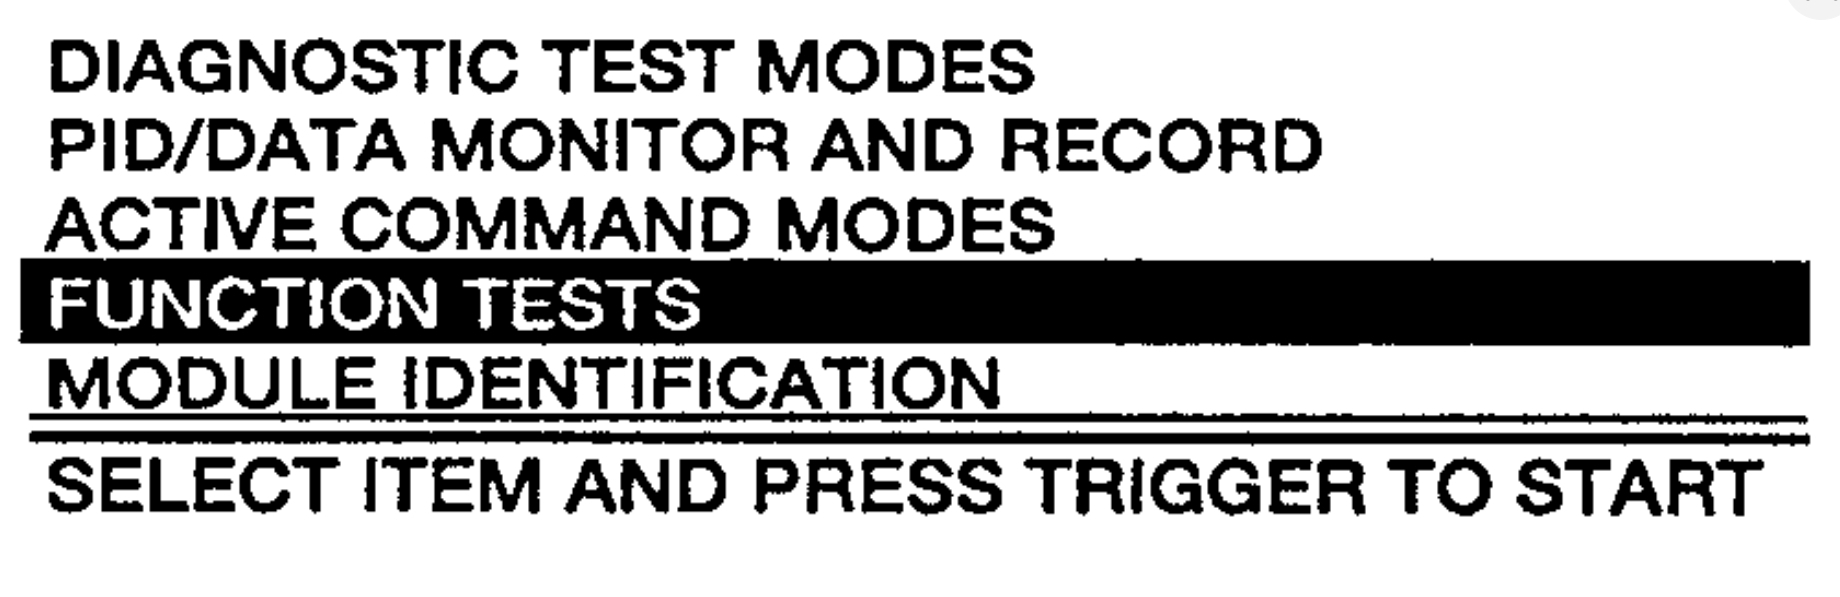
Function Tests
imageOpen In New TabZoom/Print
14.Select FUNCTION TESTS and press trigger to start the NGS.
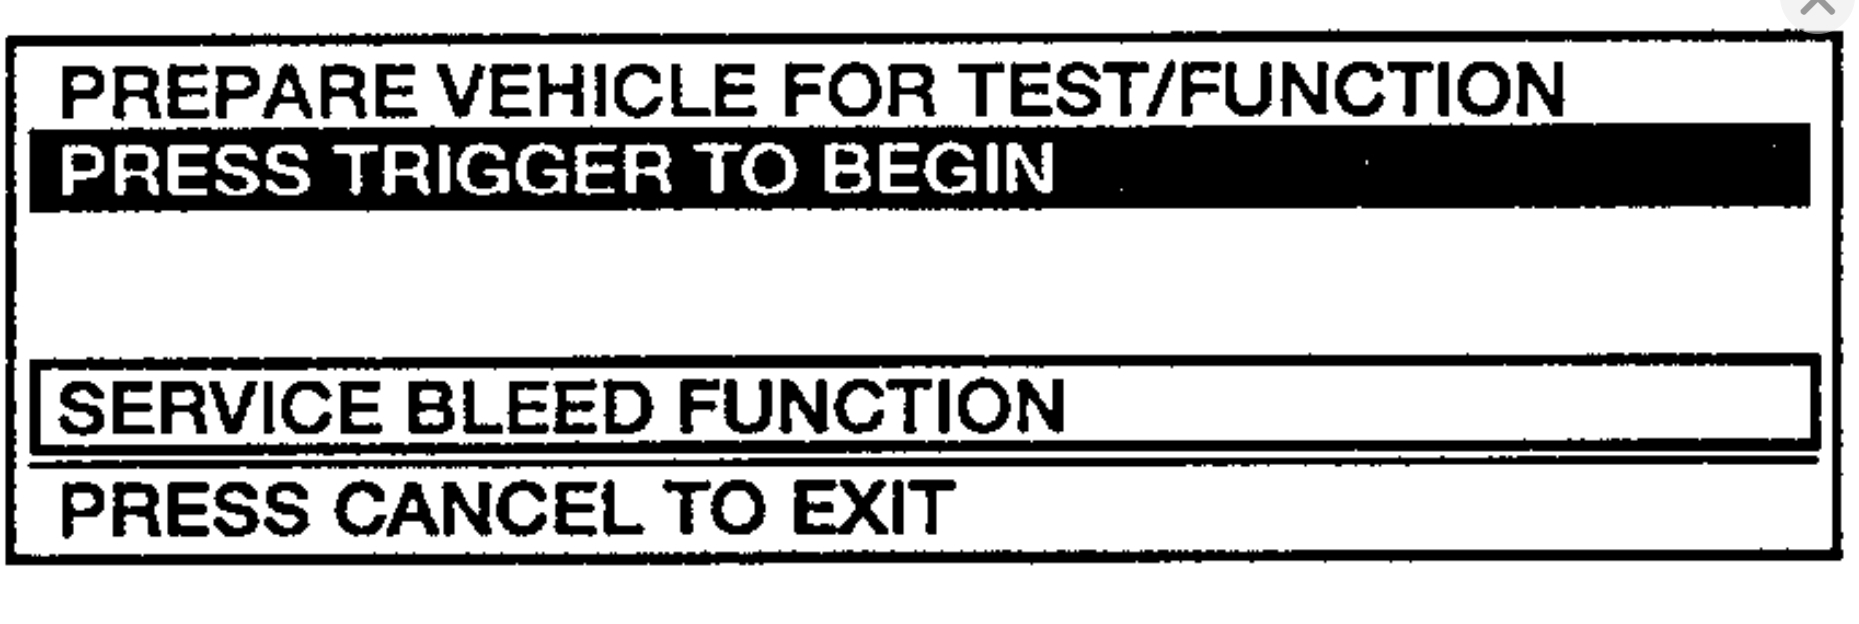
Service Bleed Function
imageOpen In New TabZoom/Print
15.Select SERVICE BLEED FUNCTION and press trigger to start the NGS.
Service Bleed Function
imageOpen In New TabZoom/Print
16.Select PRESS TRIGGER TO BEGIN.
NOTE: The brake pedal should be depressed while this procedure is functioning. Perform at least five service bleed procedures.
17.Repeat conventional bleed procedure as outlined in steps 1 through 4.
18.If brake pedal feels spongy, repeat NGS service bleed procedure as outlined in steps 5 through 16 and repeat conventional bleed steps 1 through 4.
Images (Click to make bigger)
Wednesday, March 10th, 2021 AT 11:20 AM
(Merged)