Okay, Let me check. That code indicates a wiring issue.
Roy
Possibilities
P0365
Descriptor
Probable Causes
Camshaft Position (CMP) Sensor B
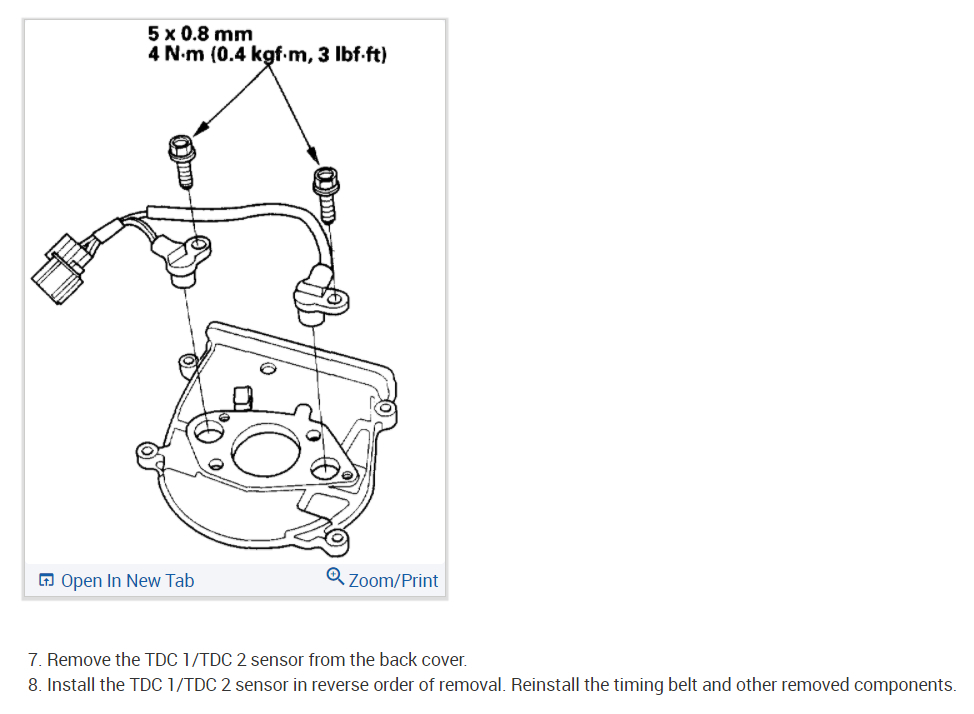
Camshaft Position (CMP) Sensor B Sensor Wires Shorted
Camshaft Position (CMP) Sensor B Wires Open
Poor Connections or Loose Terminals At Camshaft Position (CMP) Sensor B and At Powertrain Control Module (PCM)
Powertrain Control Module (PCM)
Flow chart that needs to be followed
DTC P0365: CMP Sensor B No Signal
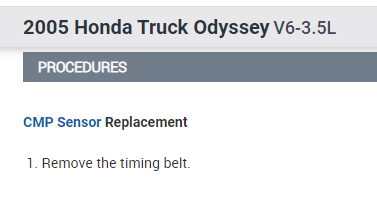
1. Reset the PCM.
2. Start the engine.
Is DTC P0340, P0341, P0365, P0366 indicated?
YES - Go to step 3.
NO - Intermittent failure, system is OK at this time. Check for poor connections or loose terminals at the CMP sensor A/B and at the PCM.
3. Turn the ignition switch OFF.
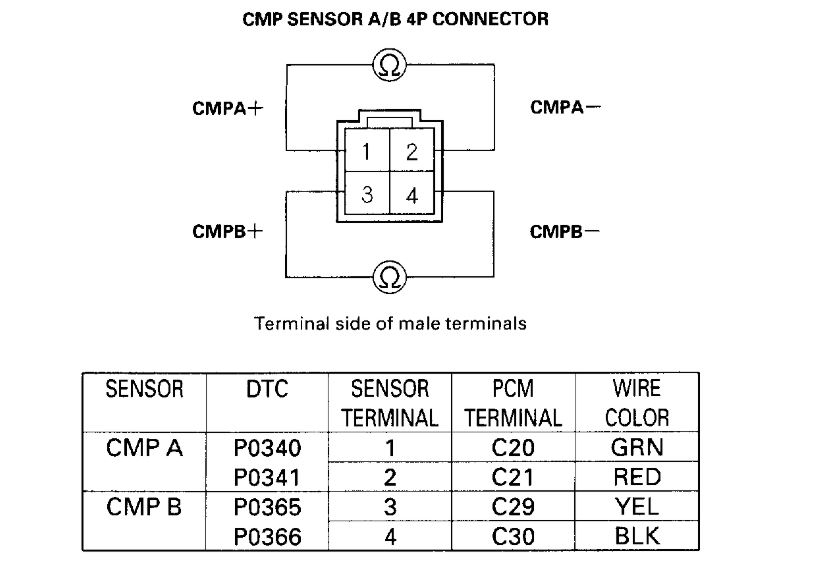
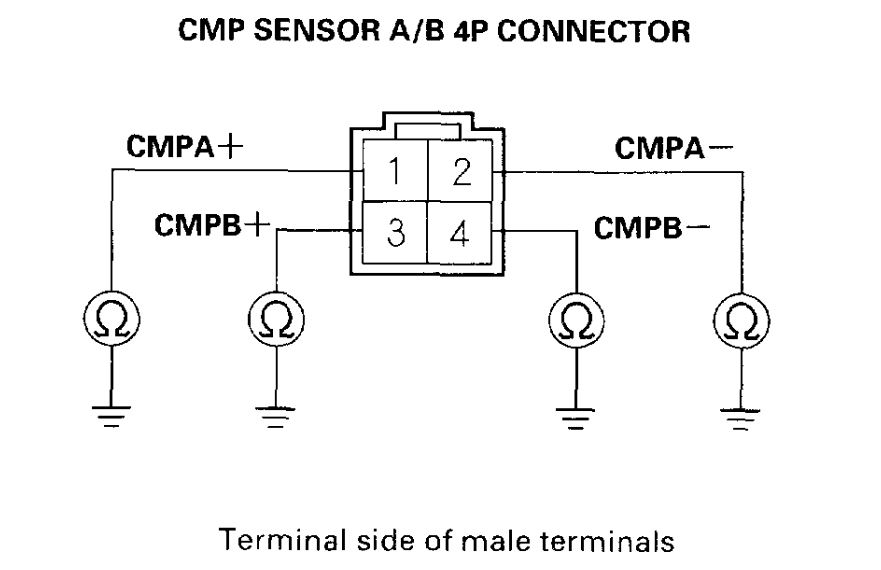
4. Disconnect the CMP sensor A/B 4P connector.
ImageOpen In New TabZoom/Print
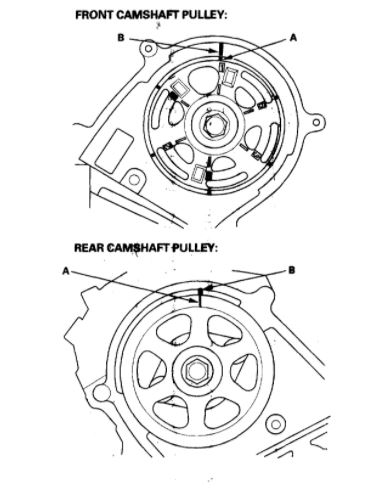
5. Measure resistance between the terminals of the indicated sensor (see table).
Is there 1,850 - 2,450 Ohms?
YES - Go to step 6.
NO - Replace the CMP sensor A/B.
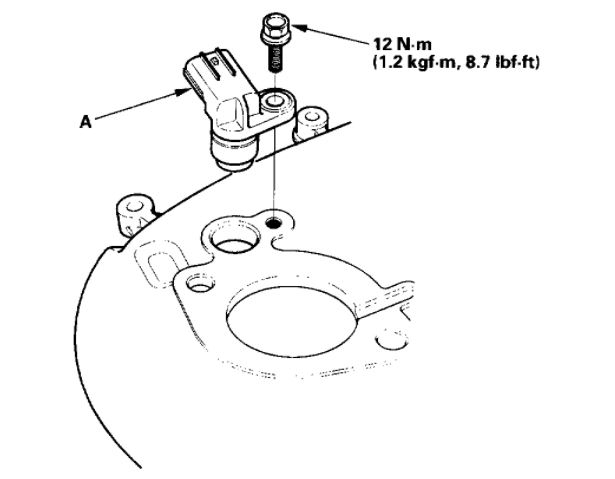
ImageOpen In New TabZoom/Print
6. Check for continuity to body ground on both terminals of the indicated sensor individually.
Is there continuity?
YES - Replace the CMP sensor A/B.
NO - Go to step 7.
7. Reconnect the CMP sensor A/B 4P connector.
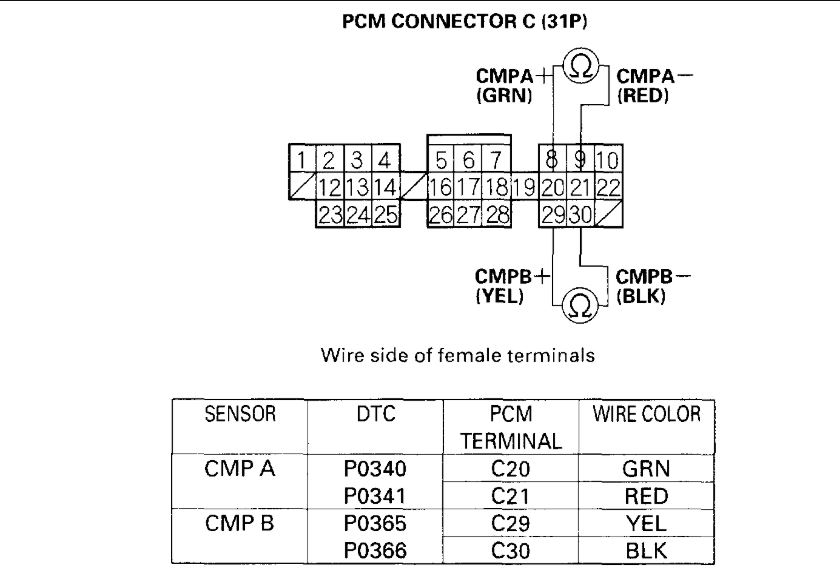
8. Disconnect PCM connector C (31P).
ImageOpen In New TabZoom/Print
9. Measure resistance between the terminals of the indicated sensor on the PCM connector (see table).
Is there 1,850 - 2,450 Ohms?
YES - Go to step 10.
NO - Repair open in the indicated sensor wires (see table).
ImageOpen In New TabZoom/Print
10. Check for continuity between body ground and PCM connector terminals C20 and/or C29 individually.
Is there continuity?
YES - Repair short in the indicated sensor wires.
NO - Substitute a known-good PCM and recheck. If the symptom/indication goes away, replace the original PCM.
Images (Click to make bigger)
Tuesday, January 26th, 2021 AT 11:23 AM
(Merged)