Freeze plug?

Tiny
SCOOTRWOOT
  • MEMBER
  • 2002 OLDSMOBILE ALERO
  • 75,000 MILES
How do you replace front freeze plug?
Friday, November 2nd, 2012 AT 5:28 PM

20 Replies

Tiny
HMAC300
  • MECHANIC
  • 48,601 POSTS
I fyou mean in cylinder head you take out all stuff in way drive plug and pull it out, put loctite on new one an ddrive it in place. If on block same procedure.
Was this
answer
helpful?
Yes
No
+1
Friday, November 2nd, 2012 AT 7:16 PM
Tiny
BRIANV
  • MEMBER
  • 4 POSTS
  • 1999 OLDSMOBILE ALERO
  • 6 CYL
  • FWD
  • AUTOMATIC
Where are the freeze plugs located on a 3.4 liter V6 engine? Where exactly is it located for my car? I looked and I see none on the block. Also, what is required to install the freeze plugs and install them?
Was this
answer
helpful?
Yes
No
+4
Monday, November 18th, 2019 AT 12:11 PM (Merged)
Tiny
RASMATAZ
  • MECHANIC
  • 75,992 POSTS
What is wrong here that you inquiring about the freeze plugs? Are you leaking coolant from the engine?
Was this
answer
helpful?
Yes
No
+24
Monday, November 18th, 2019 AT 12:11 PM (Merged)
Tiny
BRIANV
  • MEMBER
  • 4 POSTS
I had a diagnostics test and pressure test ran on my car and I was told one of my freeze plugs is leaking. My car keeps overheating and the water keeps disappearing.
Was this
answer
helpful?
Yes
No
+17
Monday, November 18th, 2019 AT 12:11 PM (Merged)
Tiny
RASMATAZ
  • MECHANIC
  • 75,992 POSTS
But is it actually leaking from the freeze plug? If not could be burning in the cylinders due to a blown head gasket, cracked head or block and an intake leak.
Was this
answer
helpful?
Yes
No
+4
Monday, November 18th, 2019 AT 12:11 PM (Merged)
Tiny
BRIANV
  • MEMBER
  • 4 POSTS
The head gasket has been replaced and I have had the heads checked and they are not cracked and the same with the block and they are not warped. I had the heads resurfaced also and the intake is fine I had that checked. Is there a diagram you could link me to so I can solve my problem?
Was this
answer
helpful?
Yes
No
+3
Monday, November 18th, 2019 AT 12:11 PM (Merged)
Tiny
RASMATAZ
  • MECHANIC
  • 75,992 POSTS
Yes, the freeze plugs are located on either side of the lower block portion two on each side.
Was this
answer
helpful?
Yes
No
+5
Monday, November 18th, 2019 AT 12:11 PM (Merged)
Tiny
BRIANV
  • MEMBER
  • 4 POSTS
Thanks you. But sorry to bother you again. But I checked the freeze plugs myself and it turns out the mechanic that did the diagnostics and pressure test was wrong. The car runs perfectly fine when I first start it then the surge tank shoots the water out then the car stalls. What would cause this? The car does not even get on the hot mark now.
Was this
answer
helpful?
Yes
No
+1
Monday, November 18th, 2019 AT 12:11 PM (Merged)
Tiny
RIVERMIKERAT
  • MECHANIC
  • 6,110 POSTS
Refill the radiator. Start the engine and let it warm up. Make sure there is coolant flowing. If not, remove and test the thermostat. Boil a pan of water on the stove and put the thermostat in the water. Use an accurate thermometer capable of reading at least to 215 degrees F (preferably a candy thermometer). The thermostat should open at 195 degrees F. If not, replace it and the gasket. If it does open, replace it and install a new gasket and then replace the water pump. You may also want to check the cooling system for the presence of combustion gases to make sure there is not a head gasket leak to the cooling system.
Was this
answer
helpful?
Yes
No
Monday, November 18th, 2019 AT 12:11 PM (Merged)
Tiny
NORMANRAMBOW
  • MEMBER
  • 5 POSTS
  • 1999 OLDSMOBILE ALERO
  • 175,000 MILES
For a short period of time I have notice some coolant leaking from under my car. Checked the level in the reservoir. Was low added some brought level back to normal. However leak continued to where I can see more coming out on a trickling effect that appeared to be in the middle of the engine. I crawled under car and looked up. Visually tried to locate leak when car was running and couldn't see any holes or spray. But it appeared it was above where I couldn't quite see from my position. So I kept water in the car in the reservoir. I kept the cap loose as to not allow too much loss of fluid from pressure. But For over a couple weeks now the fluid loss is more. I have driven anywhere from a few blocks or more. Oddly though I drove 10miles and the reservoir was full and the temperature gauge was normally in the middle. But I can actually put in more than a gallon at a time so this is not looking good. Any ideas.

Now that my heater is only lightly showing warm air this is alarming. Thermostat. Water pump who knows. But the leak I am worried about. Soft plug>? Please help me here

Currently I added water and then my red icon light came on along with my gauge rising up to the 3/4 mark. Then there was a loss of heat from my heater and then it heated up. Then there was a small tapping plastic type noise around the motor area. Not sure what that was but probably figured air or water bubbling or something. I am out of work and this doesnt help any.

S
Was this
answer
helpful?
Yes
No
Wednesday, July 29th, 2020 AT 5:58 PM (Merged)
Tiny
ASEMASTER6371
  • MECHANIC
  • 52,797 POSTS
You never specified an engine size for us so we have to generalize.

Get a pressure test to verify where it is going before you do engine damage. Tighten the rad cap to normal as that is a place of loss as well.

An engine size please?

Roy
Was this
answer
helpful?
Yes
No
Wednesday, July 29th, 2020 AT 5:58 PM (Merged)
Tiny
NORMANRAMBOW
  • MEMBER
  • 5 POSTS
4 cylinder engine. 2.4 L Twin cam

The only fluid is coming from the back side of passenger side view of the motor. Underneath the motor. The looks >> the engine is all dry and clean inside the hood area. No oil no water no steam. No water leakage around cap of the containment area or any of the fittings on block or hoses by radiator or block, no heater hose leaks at visual. Under running conditions no water or fluid. Then it starts on the back side under the exhaust close to block ( but I cant see there too close to no mirrors. But that would help. It is all clean the only leakage hits the exhaust pipe under the car from dripping or perhaps the engine block vapors from heat contacting the liquid when they meet. It is possible it trickles down and runs along the cover the bottom.
Was this
answer
helpful?
Yes
No
Wednesday, July 29th, 2020 AT 5:58 PM (Merged)
Tiny
HOMER1967
  • MECHANIC
  • 875 POSTS
We do need to know what size motor you have to really hwlp you. And as previously said you should keep your cap tight, not loose. It sounds like you already have air in the system, which has to be bled out after the leak is repaired. Do you have a 2.4 (4cyl) or a 3.4 (6 cyl) the 3.4 's had a huge amount of intake gasket failure and leaks.
Was this
answer
helpful?
Yes
No
+1
Wednesday, July 29th, 2020 AT 5:58 PM (Merged)
Tiny
NORMANRAMBOW
  • MEMBER
  • 5 POSTS
. It is a 4 cylinder. 2.4L Twin cam engine. Has air conditioning..
. Do to the amount of liquid loss I have had to use some water with the antifreeze. As I ran out of fluid on the road and had to use water. Is this going to cause problems too.? Do to cost I have added 50 50 and now that has kinda run out and is more like 20 20.
Was this
answer
helpful?
Yes
No
Wednesday, July 29th, 2020 AT 5:58 PM (Merged)
Tiny
ASEMASTER6371
  • MECHANIC
  • 52,797 POSTS
From your description, you have a leaking water pump. Have it verified at a shop to be sure since it is a big job to perform

Roy
Was this
answer
helpful?
Yes
No
Wednesday, July 29th, 2020 AT 5:58 PM (Merged)
Tiny
NORMANRAMBOW
  • MEMBER
  • 5 POSTS
Are you like saying big Job. Something like loosening the mounts up and taking off the cover shroud which there is hardly any room to move ones hands there?

And a few hour job to get done by chance? That was one thought of mine. The pump was hoping it was maybe a soft pug or something.
Was this
answer
helpful?
Yes
No
Wednesday, July 29th, 2020 AT 5:58 PM (Merged)
Tiny
HOMER1967
  • MECHANIC
  • 875 POSTS
It could be anything. You need to have the system pressure tested to find your leak. If you keep driving it you will probably do permanent engine damage.
Was this
answer
helpful?
Yes
No
Wednesday, July 29th, 2020 AT 5:58 PM (Merged)
Tiny
ASEMASTER6371
  • MECHANIC
  • 52,797 POSTS
It is a 7 hour job at a shop and more is you had to do it. I will include a procedure for you.

Removal Procedure

Caution: Refer to Battery Disconnect Caution in Service Precautions.

Notice: Refer to Use GM Goodwrench DEX-COOL Coolant in Service Precautions.

Disconnect the negative battery cable.
Drain the coolant. Recover the coolant. Refer to Service and Repair.
Disconnect the electrical connectors.
Remove the exhaust manifold heat shield.
Remove the heat wrap from the heater hose.

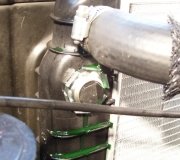
Remove the coolant inlet housing bolt through the exhaust manifold.
Raise the vehicle. Refer to Vehicle Lifting.
Remove the exhaust manifold brace-to-manifold bolt.
Remove the manifold-to-exhaust pipe studs.
Remove the heater outlet pipe bracket-to-transmission bolt.
Remove the coolant inlet housing assembly to-water pump cover bolt.
Disconnect the exhaust pipe from the exhaust manifold.

Important: Do not rotate flex coupling more than 4 degrees as damage may occur.

Pull down and back on the exhaust manifold pipe in order to disengage the pipe from the exhaust manifold.
Disconnect the coolant inlet pipe from the oil pan. Remove the pipe.
Lower the vehicle.
Remove the brake vacuum pipe from the cam housing.
Remove the exhaust manifold to cylinder head retaining nuts.
Remove the exhaust manifold.
Remove the seals and the gaskets of the exhaust manifold.
Disconnect the heater hose quick connect from the heater outlet pipe.
Remove the front timing chain cover.
Remove the timing chain tensioner.

Remove the water pump cover-to-cylinder block bolts.

Remove the 3 water pump-to-timing chain housing nuts.
Remove the water pump and cover assembly.
Remove the water pump cover-to-coolant pump assembly bolts.
Clean all sealing surfaces.

Installation Procedure

Important: Before you install the coolant pump, read the entire procedure. Follow the tightening sequences in order to avoid part damage and to provide proper sealing.

Install the water pump cover to the water pump assembly.
Install the pump cover bolts. Hand tighten the bolts.

Install the cover-to-block bolts. Hand tighten the bolts.
Install the coolant pump-to-timing chain housing nuts. Hand tighten the nuts.
Lubricate the O-ring on the coolant inlet pipe with an antifreeze solution.
Slide the pipe into the water pump cover.
Install the bolts. Hand tighten the bolts.

Notice: Refer to Fastener Notice in Service Precautions.

Torque in sequence as follows:

8.1. Tighten the pump assembly-to-timing chain housing nuts.

Tighten nuts to 26 Nm (19 ft. Lbs.).

8.2. Tighten the pump cover-to-pump assembly bolts.

Tighten the bolts to 14 Nm (124 inch lbs.).

8.3. Tighten the coolant pump cover-to-engine block bolts. Tighten the bottom bolt first.

Tighten bolts to 26 Nm (19 ft. Lbs.).

8.4. Tighten the coolant inlet pipe assembly-to-coolant pump cover bolts.

Tighten the bolts to 14 Nm (124 inch lbs.).

Install the exhaust manifold and install new gaskets.
Install the exhaust manifold-to-cylinder head retaining nuts.
Connect the brake vacuum pipe to the cam housing.
Raise the vehicle. Refer to Vehicle Lifting.
Index the exhaust manifold bolts into the exhaust pipe flange.
Install the exhaust pipe to the exhaust manifold.

Install the heater outlet pipe bracket to the transmission.
Turn exhaust both bolts in evenly in order to avoid cocking the exhaust pipe and binding the bolts. Turn in the bolts until the bolts are fully seated.
Install the coolant inlet pipe to the oil pan.

Tighten nuts to 26 Nm (19 ft. Lbs.).

Install the timing chain tensioner.
Install the timing chain cover.
Lower the vehicle.
Install the exhaust manifold brace to the manifold bolt.
Install the manifold to the exhaust pipe nuts.
Install the heater hose to the heater pipe.
Inspect the quick connect retainer. Pull on the heater hose in order to verify the connection.
Install the upper heat shield to the exhaust manifold.
Connect the oxygen sensor connector.
Fill the radiator with coolant. Refer to Service and Repair.
Connect the negative battery cable.
Inspect the system for leaks.
Was this
answer
helpful?
Yes
No
Wednesday, July 29th, 2020 AT 5:58 PM (Merged)
Tiny
NORMANRAMBOW
  • MEMBER
  • 5 POSTS
Awesome. Thank you for the how tos.

I appreciated this. Only one question is their any special tools needed to loosen any of the bolts or nuts?

I believe I can do this as long as the weather is good outside.

Thank you so much
Was this
answer
helpful?
Yes
No
Wednesday, July 29th, 2020 AT 5:59 PM (Merged)
Tiny
HOMER1967
  • MECHANIC
  • 875 POSTS
You will need a torque wrench that will do inch pounds and newton meters you can convert inch pounds into foot pounds by googleing the conversion chart. You will need scrapers to remove all old gaskets.I would suggest that you use 6 point sockets to avoid rounding of any nuts or bolts, especially the ones on the exhaust.
Was this
answer
helpful?
Yes
No
+1
Wednesday, July 29th, 2020 AT 5:59 PM (Merged)

Please login or register to post a reply.

Sponsored links