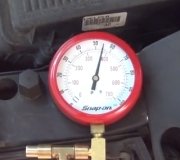
Check the fuel pressure: Keyon, engine running: 30-38 PSI
Key on, engine off:37-43 PSI. Injector resistance, out of the circuit, should be between 10 and 14 Ohms.
TEST HC: FUEL DELIVERY SYSTEM
Diagnostic Aids
Perform this test only when directed here. This test is intended to diagnose the following:
� Fuel supply system.
� Fuel pressure regulator and fuel return.
� Fuel filter.
� Engine vacuum.
� Fuel Injectors.
To prevent replacement of good components, be aware the following items may be the cause of
problem:
� Leaking fuel lines.
� Damaged vacuum lines.
� Leaking fuel injectors.
� Ensure sufficient fuel in tank.
� Inertia switch tripped.
� Blown 15-amp FUEL PUMP or 10-amp RELAYS fuse.
WARNING: Fuel may be under high pressure even when engine is not
running. To relieve fuel pressure, remove 15-amp FUEL PUMP
fuse located in interior fuse panel. Start engine and run until
stalling. If engine does not start, crank engine several times.
When disconnecting fuel lines, cover with shop towel.
NOTE: See SYMPTOM DIRECTORY table for proper starting diagnostic
step.
SYMPTOM DIRECTORY
Symptom Test Step
Fuel System Pressure Test Go To Step 1)
No Fuel Pressure Go To Step 3)
Low Fuel Pressure Go To Step 20)
High Fuel Pressure Go To Step 30)
Fuel Injector Test Go To Step 40)
1) Check System Integrity
Turn ignition off. Inspect fuel system for leaks, damaged, kinked or cracked hoses. Inspect
wiring harness for damage or loose connectors. Ensure battery is fully charged and fuses are
okay. If vehicle does not start, ensure vehicle has fuel in tank and inertia fuel shutoff switch is
not tripped. Repair or replace as necessary. If no faults are found, go to next step.
ENGINE CONTROLS - TESTS W/CODES -1999 Mercury Villager Page 1 of 8
11/7/2011
2) Check Fuel Pressure
Release fuel system pressure. See FUEL SYSTEM PRESSURE RELEASE in REMOVAL,
OVERHALL & INSTALLATION - TRUCKS article. Turn ignition off. Install fuel pressure
gauge. Turn ignition on and observe fuel pressure. Start engine and observe fuel pressure. If
fuel pressure is about 43 psi (294 kPa) with key on engine off and about 34 psi (234 kPa) with
engine running, go to step 40). If fuel pressure is zero, go to next step. If fuel pressure is low,
go to step 20). If fuel pressure is high, go to step 30).
3) Check Power To Fuel Pump Relay
Turn ignition off. Unplug fuel pump harness connector. Turn ignition on. Within 5 seconds of
turning ignition switch on, measure voltage at Light Green/Red wire at fuel pump harness
connector. If voltage is greater than 10 volts, go to step 9). If voltage is 10 volts or less, go to
next step.
4) Check Power To Fuel Pump Relay
Remove fuel pump relay from engine compartment left relay block. Turn ignition on. Measure
voltage on Black/Red wire at fuel pump relay connector. If voltage is greater than 10 volts, go
to next step. If voltage is 10 volts or less, check 15-amp FUEL PUMP fuse and 10-amp
RELAYS fuse. If fuse repeatedly blows, repair shorted circuit. See appropriate wiring diagram
in WIRING DIAGRAMS article.
5) Check Fuel Pump Relay
Turn ignition off. Remove fuel pump relay from engine compartment relay block. Apply
battery voltage between relay terminals "A" and "B". Measure resistance between relay
terminals "C" and "D". See Fig. 19. Resistance should be less than 5 ohms. Remove battery
voltage. Resistance between terminals "C" and "D" should be greater than 10 k/ohms. Replace
relay if resistance is not as specified. If resistance is okay, go to next step.
ENGINE CONTROLS - TESTS W/CODES -1999 Mercury Villager Page 2 of 8
11/7/2011
Fig. 19: Identifying Fuel Pump Relay Terminals
Courtesy of FORD MOTOR CO.
6) Check Relay Ground Circuit
Turn ignition off. Remove fuel pump relay from engine compartment relay block. Disconnect
PCM and inspect connector for damage. Measure resistance of FPR circuit (Blue/Red wire)
between fuel pump relay connector and PCM connector terminal No. 11. If resistance is less
than 5 ohms, go to next step. If resistance is 5 ohms or more, repair Blue/Red wire for open
circuit.
7) Check Fuel Pump Power Wire For Open
Turn ignition off. Remove fuel pump relay from engine compartment relay block. Disconnect
fuel pump harness connector. Measure resistance of Light Green/Red wire circuit between fuel
pump harness connector and relay harness connector. If resistance is less than 5 ohms, go to
next step. If resistance is greater than 5 ohms, repair open Light Green/Red wire. Restore all
electrical connections and repeat QUICK TEST.
8) Check Fuel Pump Power Wire For Short
ENGINE CONTROLS - TESTS W/CODES -1999 Mercury Villager Page 3 of 8
11/7/2011
Turn ignition off. Remove fuel pump relay from engine compartment relay block. Disconnect
fuel pump harness connector. Ensure inertia switch is not tripped. Measure resistance between
Light Green/Red wire at fuel pump relay connector and ground. Also measure resistance
between Blue/Red and Black/Red wires at fuel pump relay harness connector. See Fig. 20. If
resistances are greater than 10 k/ohms, go to next step. If resistance is less than 10 k/ohms,
repair shorted wire in question. Restore all electrical connections and repeat QUICK TEST.
Fig. 20: Identifying Fuel Pump Connector Terminals
Courtesy of FORD MOTOR CO.
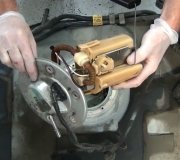
9) Check Fuel Pump
Turn ignition off. Disconnect fuel pump. Measure resistance between Black/White and Light
Green/Red wire terminals on fuel pump. If resistance is 0.2-5.0 ohms, go to next step. If
resistance is not 0.2-5.0 ohms, replace fuel pump. Restore all electrical connections and repeat
QUICK TEST.
10) Check Fuel Pump Ground
Turn ignition off. Remove fuel pump relay from engine compartment relay block. Disconnect
fuel pump harness connector. Measure resistance of Black/White wire between fuel pump
ENGINE CONTROLS - TESTS W/CODES -1999 Mercury Villager Page 4 of 8
11/7/2011
harness connector and ground. If resistance is less than 5 ohms, go to step 13). If resistance is
greater than 5 ohms, go to next step.
11) Check Inertia Fuel Shutoff Switch
Turn ignition off. Disconnect Inertia Fuel Shutoff (IFS) switch. If IFS switch is tripped, reset
switch. Vigorously shake IFS switch to ensure switch trips. Measure resistance of IFS switch
Black/White and Black terminals. See Fig. 21. See IFS SWITCH TESTING table. If
resistances are to specification and switch trips when shaken, go to next step. If resistances are
not to specification, replace IFS switch. Repeat QUICK TEST.
Fig. 21: Identifying Inertia Fuel Shutoff Switch Connector Terminals
Courtesy of FORD MOTOR CO.
IFS SWITCH TESTING
ENGINE CONTROLS - TESTS W/CODES -1999 Mercury Villager Page 5 of 8
11/7/2011
Switch Condition Resistance
Open (Tripped) More Than 10,000 Ohms
Closed (Set) Less Than 5 Ohms
12) Check Ground At IFS Switch
Turn ignition off. Disconnect IFS switch. Measure resistance of Black wire between IFS
harness connector and ground. If resistance is greater than 5 ohms, repair Black wire. Restore
electrical connections and repeat QUICK TEST. If resistance is less than 5 ohms, repair
Black/White wire between IFS switch and fuel pump.
13) Check Fuel Pump Deadhead Pressure
Restore all electrical connections. Relieve fuel system pressure. See FUEL SYSTEM
PRESSURE RELEASE in REMOVAL, OVERHAUL & INSTALLATION - TRUCKS article.
Connect a fuel pressure gauge to fuel filter. Close all valves on fuel pressure gauge to check
deadhead pressure (maximum fuel pump pressure). Turn ignition on and off 5 times to build
maximum pressure. If maximum fuel pressure is 43 psi (294 kPa), go to step 21). If fuel
pressure is less than 43 psi (294 kPa), replace fuel pump. Repeat QUICK TEST.
NOTE: A break in step numbering sequence occurs at this point.
Procedure skips from step 13) to step 20). No test procedures
have been omitted.
20) Check Fuel Pump Power Supply
Turn ignition off. Disconnect fuel pump harness connector. Turn ignition on. Measure voltage
at Light Green/Red wire at fuel pump harness connector. If voltage is greater than 10 volts, go
to next step. If voltage is 10 volts or less, go to step 3).
21) Check Fuel Filter
Relieve fuel pressure. Remove fuel filter. Check fuel filter for restriction. Replace if necessary.
If fuel filter is okay, go to next step.
22) Check Pressure Regulator Diaphragm
Relieve fuel pressure. Install fuel pressure gauge to fuel system service port. Start engine and
operate for 10 seconds. Turn ignition off and wait 10 seconds. Start engine again and operate
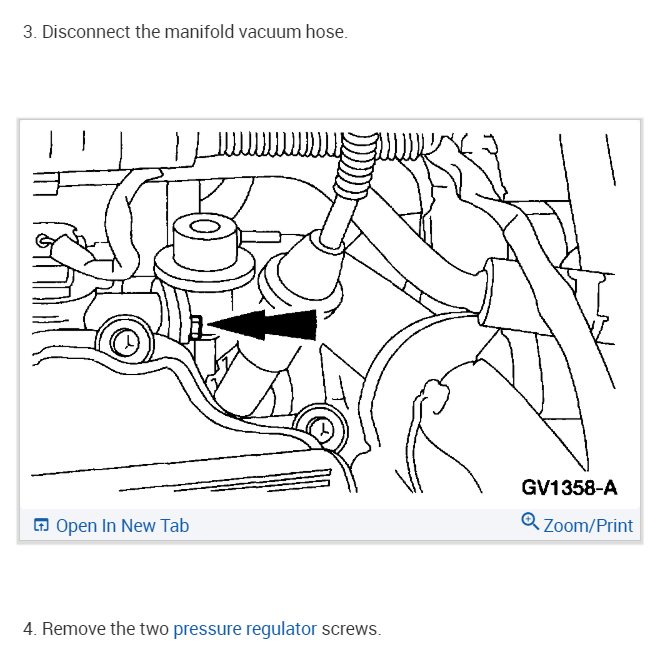
for 10 seconds. Turn ignition off. Disconnect and inspect vacuum hose from fuel pressure
regulator. If hose is wet with fuel, replace fuel pressure regulator. If hose is dry, connect a
vacuum pump to port on pressure regulator and apply vacuum. If fuel pressure decreases when
vacuum is applied, go to next step. If fuel pressure does not change, replace fuel pressure
regulator.
23) Check Fuel Pump Volume
Relieve fuel pressure. Install fuel pressure gauge to fuel system service port. Route fuel
pressure gauge by-pass hose into a measuring container. Turn ignition on. Fuel pump will run
for 5 seconds. Turn ignition off. Turn ignition on again and let pump run for 5 seconds. If
amount of fuel collected is 3-5 ounces (94-157 cc), go to next step. If amount of fuel collected
ENGINE CONTROLS - TESTS W/CODES -1999 Mercury Villager Page 6 of 8
11/7/2011
is less than 3 ounces (94 cc), clean fuel pump inlet screen and repeat this test. If fuel volume is
still not adequate, replace fuel pump and recheck fuel pressure and volume.
24) Check Fuel Pump Check Valve
Install fuel pressure gauge. Turn ignition on. Fuel pump will run for 5 seconds. Turn ignition
off. Note fuel pressure. Recheck fuel pressure after 3 minutes. If fuel pressure drops more than
8 psi (55 kPa) within 3 minutes, replace fuel pump. Recheck fuel pressure and repeat QUICK
TEST. If fuel pressure does not drop 8 psi (55 kPa) within 3 minutes, go to step 40).
NOTE: A break in step numbering sequence occurs at this point.
Procedure skips from step 24) to step 30). No test procedures
have been omitted.
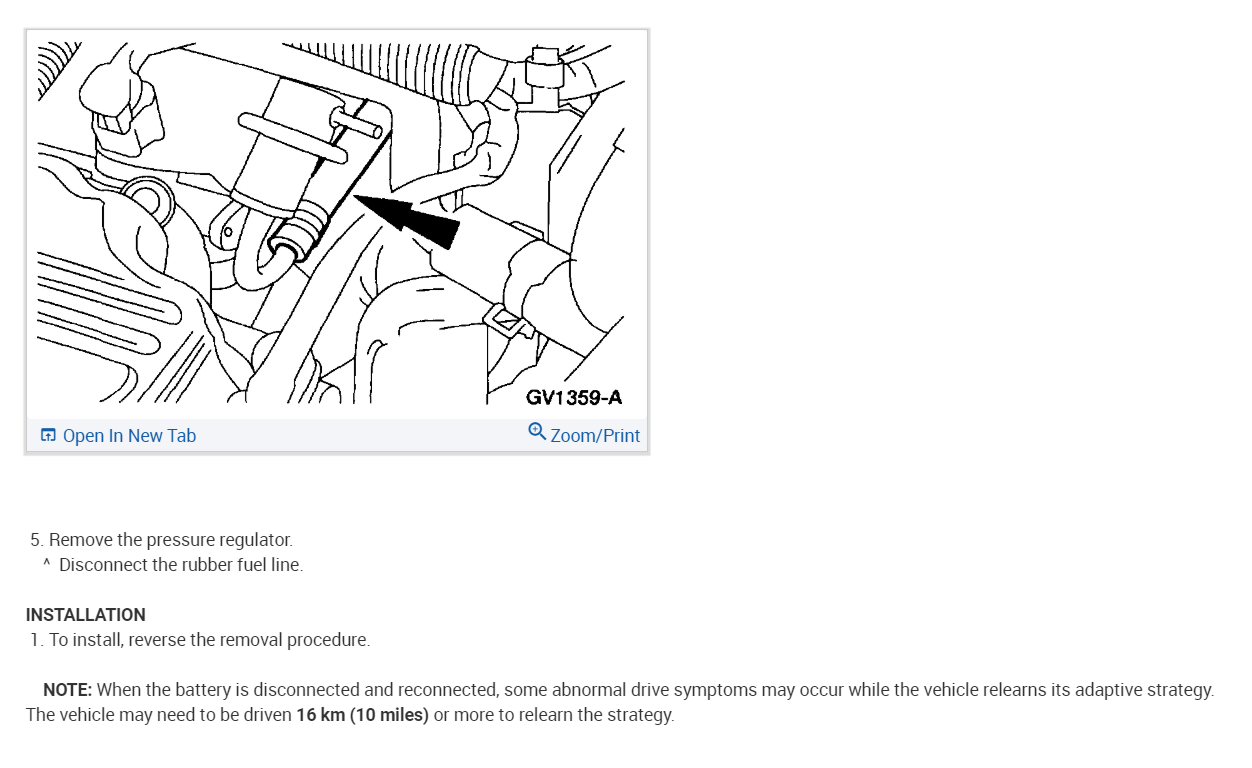
30) Check Regulator For Cause Of High Pressure
Inspect fuel pressure regulator for dents that could cause higher than normal spring tension on
pressure regulator valve. Remove vacuum hose from pressure regulator and inspect for fuel
leakage. Replace pressure regulator if necessary. If fuel pressure regulator is okay, go to next
step.
31) Check Fuel Return Line
Relieve fuel pressure. Disconnect fuel return line at pressure regulator and at fuel tank. Blow
through fuel return line with 5-10 psi (35-69 kPa) of regulated shop air. If return line is
restricted, repair or replace as necessary. If line is not restricted, replace fuel pressure regulator
and recheck fuel pressure.
NOTE: A break in step numbering sequence occurs at this point.
Procedure skips from step 31) to step 40). No test procedures
have been omitted.
40) Inspect Fuel Injectors
With engine idling (cranking if engine won't start) listen for a regular clicking sound from each
injector using a stethoscope. If a regular clicking sound can be heard from each injector, go to
step 43). If a regular clicking sound cannot be heard from each injector, go to next step.
41) Check Fuel Injector Resistance
Relieve fuel pressure. Disconnect fuel injector harness connectors. Measure resistance of each
fuel injector. If resistance is 10-14 ohms, go to next step. If resistance is not 10-14 ohms,
replace faulty injector(s) and return to step 40). If testing in step 40) shows components are
okay, go to step 43).
42) Check Fuel Injector Signal
Disconnect injector. Insert fuel injector checker noid light into injector harness connector. Start
or crank engine and observe noid light. Repeat procedure for all injectors. If all injector circuits
indicate continuity, go to next step. If any injector circuit does not indicate continuity, go to
TEST H, step 45).
ENGINE CONTROLS - TESTS W/CODES -1999 Mercury Villager Page 7 of 8
11/7/2011
43) Check Injectors For Leakage
Turn ignition off. Relieve fuel pressure. Remove fuel rail assembly from intake manifold (leave
hoses and injectors attached). Turn ignition on (do not crank engine). If any injector leakage is
observed, replace or clean leaky injector. Repeat QUICK TEST. If no injector leakage is
observed, the fuel delivery system is okay, proceed to TEST Z for intermittent diagnostics.
ENGINE CONTROLS - TESTS W/CODES -1999 Mercury Villager Page 8 of 8
11/7/2011
Monday, November 7th, 2011 AT 10:16 PM