REMOVAL:
Raise the front of the vehicle and support it safely using jackstands. Remove the wheel and splash shield.
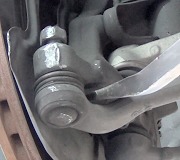
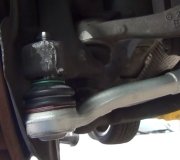
Remove and discard the cotter pin from the lower control arm ball joint stud. Back off the ball joint nut until the top of the nut is even with the top of the threads.
Use ball joint separator tool SA9132S or equivalent to separate the lower control arm from the steering knuckle, then remove the nut. Do not use a wedge tool or seal damage may occur.
((( Use only SA9132S or an equivalent tool to separate the lower control arm ball joint from the steering knuckle )))
WARNING
The outer CV-joint for vehicles equipped with an Anti-lock Brake System (ABS) contains a speed sensor ring. Use of an incorrect tool to separate the control arm from the knuckle may result in damage to and loss of the ABS.
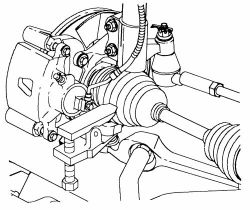
Remove the control arm-to-cradle bolt and nut, then remove the sway bar-to-control arm nut and remove the control arm from the vehicle.
INSTALLATION:
Position the control arm and install the arm onto the sway bar without the fastener, then place the end of the arm into the cradle. Install the cradle nut and bolt. Tighten the cradle bolt to 92 ft. lbs. (125 Nm), then tighten the cradle nut to 74 ft. lbs. (100 Nm).
Install the sway bar nut and tighten to 106 ft. lbs. (144 Nm).
Thoroughly clean and lubricate the ball joint stud threads, then install the lower control arm ball stud into the steering knuckle. Install the nut and tighten the lower control arm ball stud nut to 55 ft. lbs. (75 Nm); tighten additionally, if necessary to align the holes, and install a new cotter pin.
Install the splash shield and the wheel assembly.
Remove the supports and lower the vehicle. Check and adjust the front end alignment, as necessary.
Thanks for using 2CarPros.com!
Friday, March 20th, 2009 AT 5:50 PM