Welcome to 2CarPros.
I have to be honest, I'm not sure what a slotted end means. Are you referring to the friction material because different manufacturers make them differently. Most times there is a slot in the friction material in the center of the pad to help eliminate brake dust build up and squealing. Is that what you are referring to?
Take a look through this link. It explains in general how to replace pads.
https://www.2carpros.com/articles/how-to-replace-rear-brake-pads-and-rotors
Also, here are the directions specific to your vehicle for replacement. The attached pic correlates with the directions.
______________________
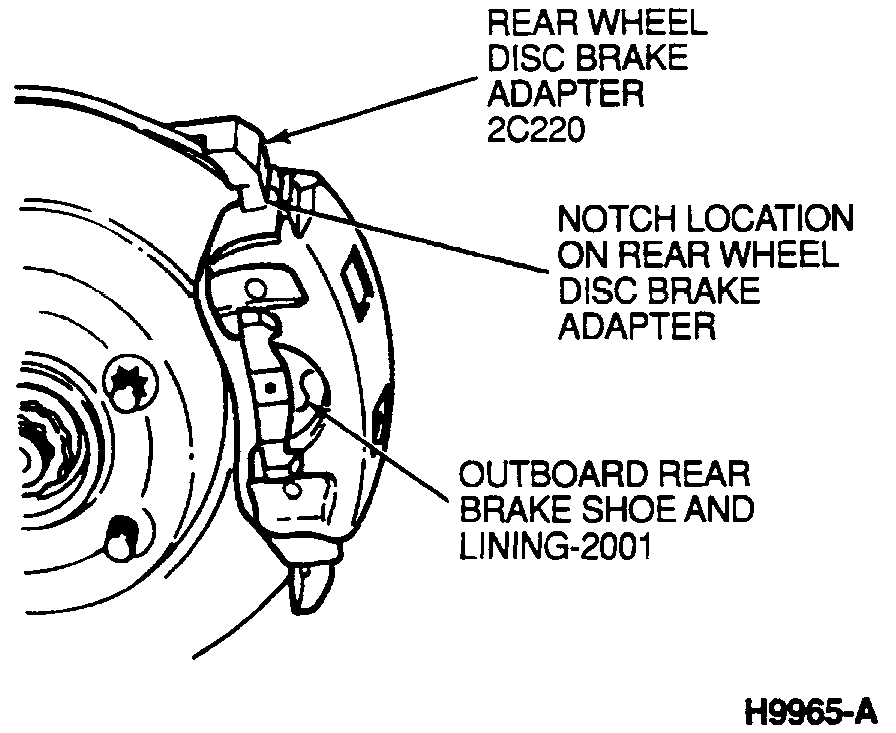
REAR
INSTALLATION
1. Inspect the rear disc brake caliper for wear, damage or leakage. Repair, replace or rebuild as necessary.
2. Position the inboard brake shoe and lining in the rear disc brake caliper and press the retainer spring fully into the caliper piston.
3. Start one end of the outboard brake shoe and lining on the rear disc brake caliper and rotate it down until the locating lugs and the retainer spring are fully seated.
NOTE: When installed, the locator notch on the brake shoe and lining will be located at the upper end of the rear disc brake caliper.
4. Install new shoe slippers on the rear wheel disc brake adapter.
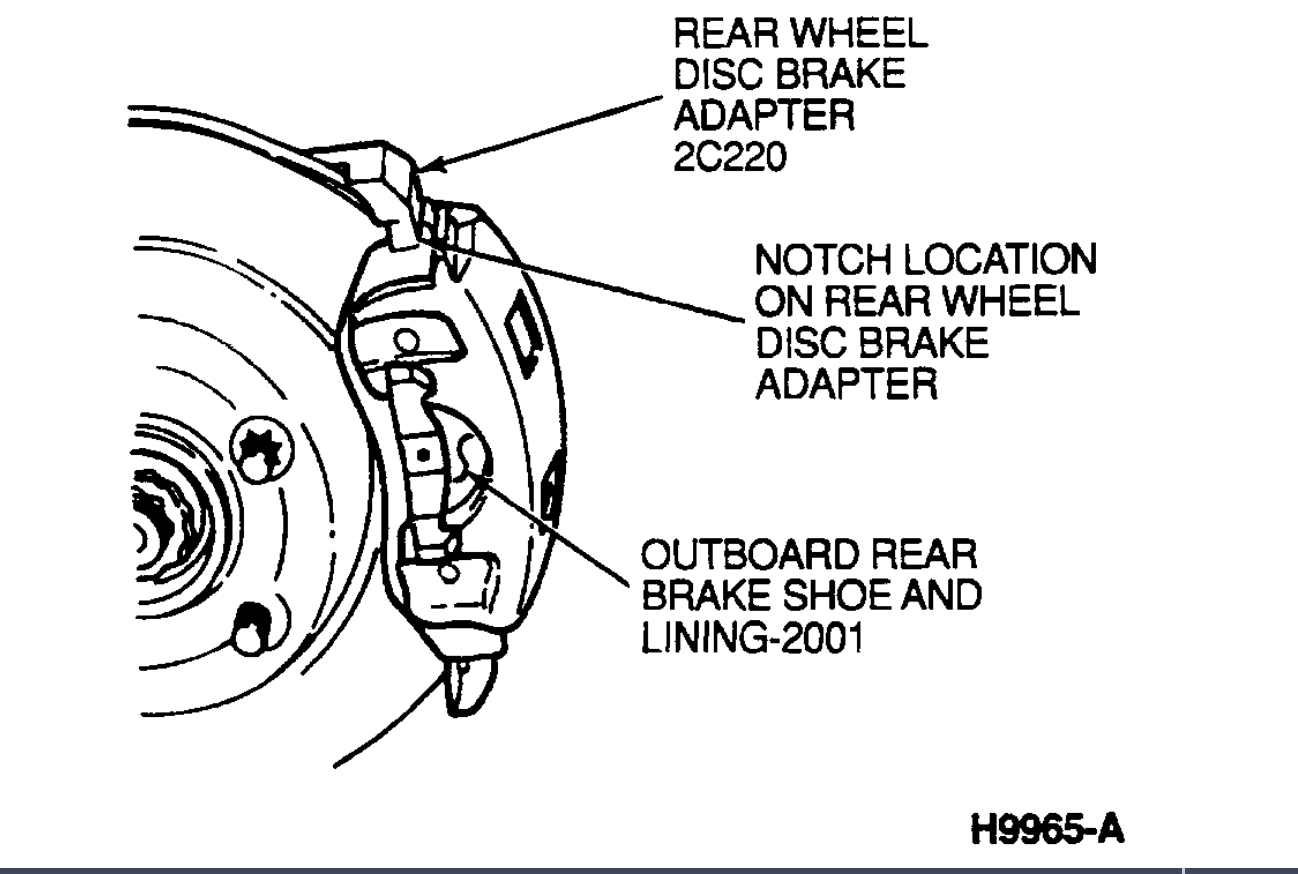
5. Install the rear disc brake caliper on the rear disc brake rotor and rear wheel disc brake adapter. Make sure the notches on the upper ends of the brake shoe and lining are seated over the lower ledge of the rear wheel disc brake adapter and the brake shoe and lining tabs are positioned on the lower ledge of the rear wheel disc brake adapter.
See Pic 1
6. Install and tighten the caliper bolts to 27 Nm (20 ft lb).
CAUTION: Do not use petroleum or mineral based service greases (such as Ford Disc Brake Caliper Slide Grease D7AZ-19590-A or equivalent) for this application. Such greases will cause rapid deterioration of the slide pin boots. Service life of the disc brakes could be reduced as a result.
NOTE: Do not remove the guide pins or guide pin boots unless a problem is suspected. For Ranger and Explorer disc brakes, the caliper guide pins are covered by a flexible boot and are intended to be lubed for life. At time of publication, there was no approved material or procedure for re-lubing the caliper slide pins. For routine service such as brake pad replacement, the slide pins, grease and boots should be reused as are, if not damaged. If damaged, new pins (with new boots and grease included) must be installed.
7. Install the wheel and tire assembly. Tighten the lugnuts to 85-105 ft lb.
8. Lower the vehicle and start the engine to activate the power brake system.
CAUTION: Do not move the vehicle until the brakes have been tested.
9. Pump the brakes until full brake pedal feel is achieved and the brake warning light goes out.
10. Test the brakes.
________________________
Let me know if this helps or if you have other questions.
Joe
Dec 26, 2020 at 2:29 PM