One piece trim panel is used on styles with standard trim. The custom trim has an upper metal trim panel. The one piece trim hangs over the door inner panel across the top and is secured by clips down the sides and across the bottom. It is retained by screws located in the areas of the top front of the panel assembly.
Remove all door inside handles.
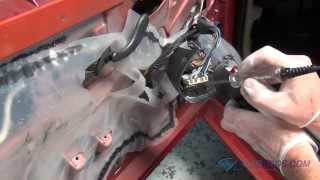
Removing a window crank handle (with a retaining clip inside the handle) without a special tool can be a problem. An alternative method is to take a clean shop towel and wedge it between the window crank handle and the door panel. Move it up, while pulling it from left to right, as in a sawing motion working the clean shop towel until the retaining clip comes free.
Remove the door inside locking rod knob.
Unfasten the screws inserted through the door armrest and pull the handle assembly into the door inner panel or armrest hanger support bracket.
On styles with remote control mirrors assemblies, disengage the end of the mirror control cable from the bezel on the standard trim, or from the upper trim panel on the custom trim. On custom trim, remove the upper trim panel.
On styles with power window or door lock controls located in the door trim panel, disconnect the wire harnesses at the switch assemblies. On the four door sedan and the two door hatchback, remove the switch cover by pushing down at the switch area and pulling down at the bottom of the cover. The switch and base may be removed from the trim with the cover removed.
Remove the remote control handle bezel screws.
Unfasten the screws used to hold the armrest to the inner panel.
Remove the screws and plastic retainers from the perimeter of the door trim using tool BT-7323A or equivalent and a screwdriver. To remove the trim panel, push the trim panel upward and outboard to disengage from the door inner panel at the beltline.
On styles with an insulator pad fastened to the door inner panel, use tool J-21104 or equivalent to remove the fasteners and the insulator pad.
On styles with the water defector held in place by fasteners, use tool BT-7323A or equivalent to remove the fasteners and the water deflector.
On styles with the armrest bracket riveted to the inner panel and installed over the water deflector, drill out the armrest bracket rivets using a 3 / 16 in. (5mm) drill bit.
Tilt the front edge of the glass downward to locate the glass in the door.
Apply pressure rearward and snap the glass rear guide into the rear run channel.
Lower the glass to about 3 in. (76mm) above the beltline and install the widow regulator roller to sash channel.
Run the glass to the full up position.
Place the front glass retainer in position and install the bolts.
Check the window to make sure it operates correctly, then install the remaining trim parts.
SPONSORED LINKS
Friday, January 22nd, 2010 AT 2:10 AM