Shakes at idle in drive

Tiny
GTZ411
  • MEMBER
  • 9 POSTS
Another one, when you jacked up the engine did you put your block under the edge of the oil pan to lift?
Was this
answer
helpful?
Yes
No
Friday, June 10th, 2011 AT 1:23 AM
Tiny
IMGUMBY
  • MEMBER
  • 11 POSTS
If the mounts are in good shape, just do the fix. The bolts did not have Locktite on them, but you could use it if it makes you feel safer. I would use the blue rather than the red. The red can be very hard to remove in the future. I am sure that somewhere there is a torque spec for every nut, bolt, and screw used in the car, but I do not have it available to me. I just put it about as tight as it was when I took it apart.
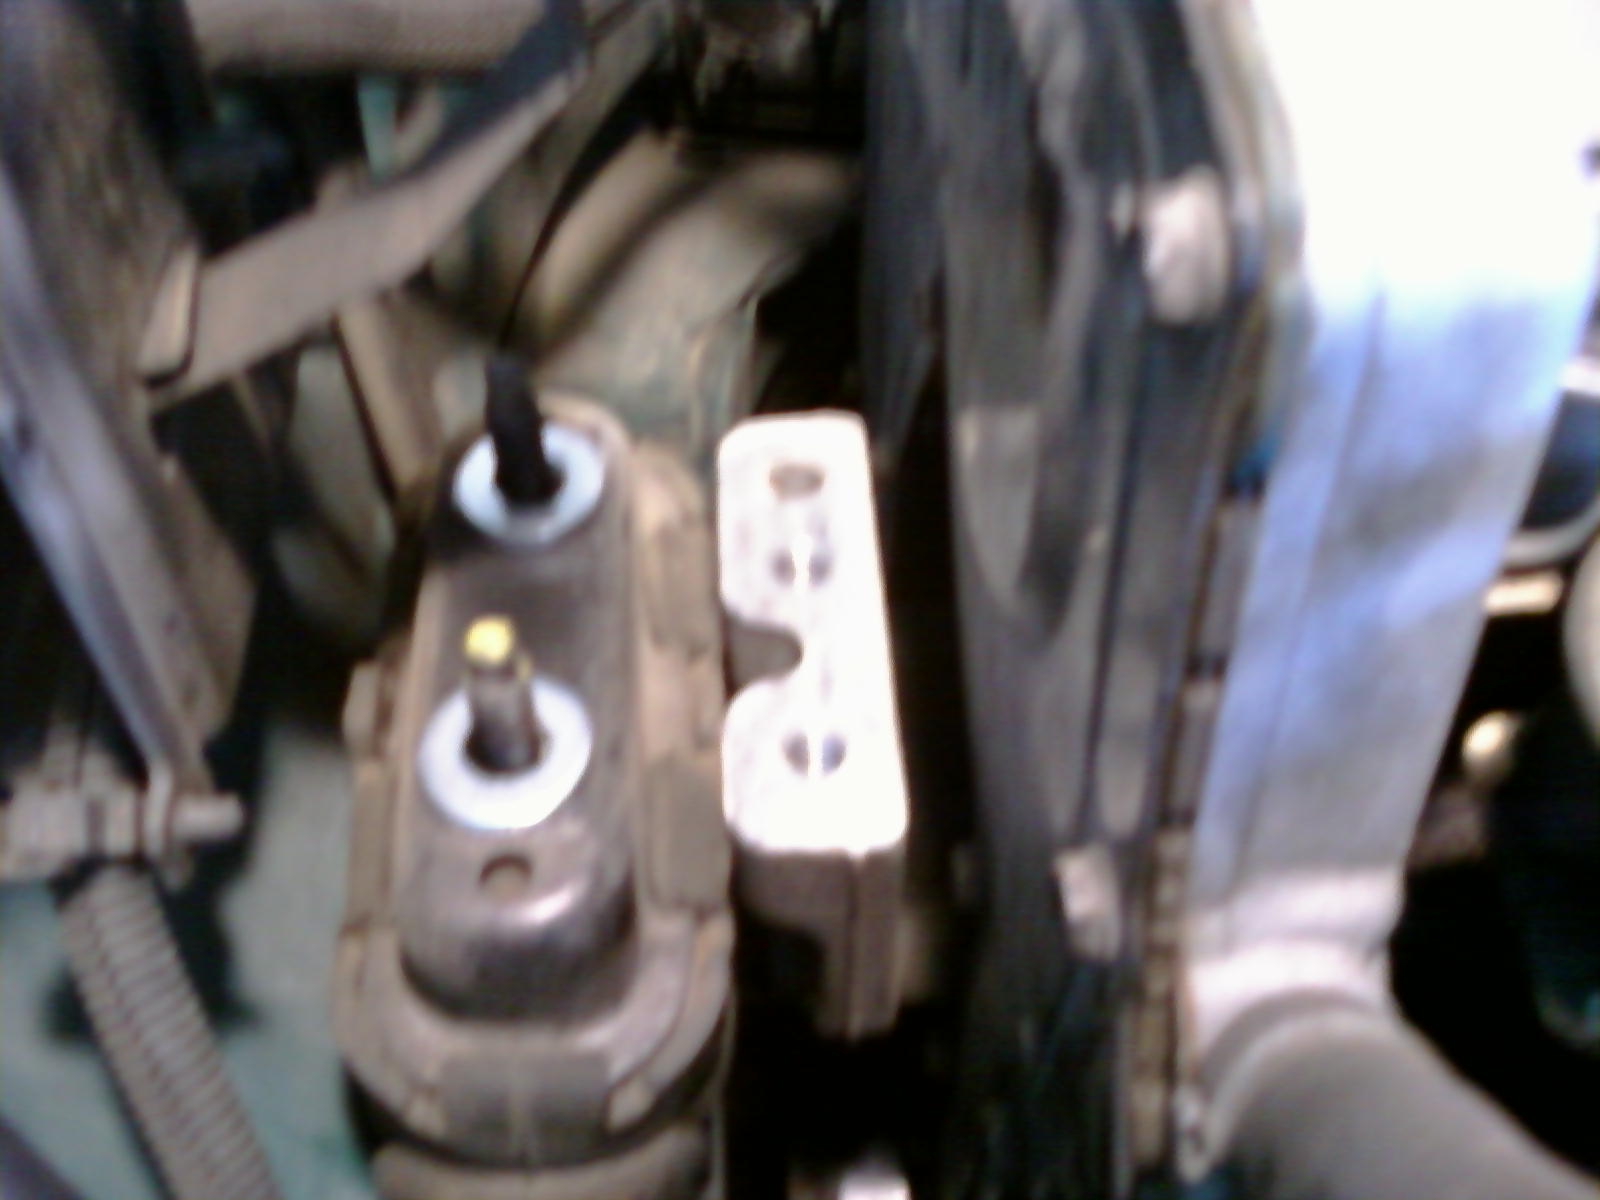
The top bracket does not contact the rubber. It sits on the metal inverted cup with the studs that is the top of the motor mount itself. Just follow the instructions step - by - step, and you cannot go wrong. It really is very simple.

1. Place the floor jack with the block of wood on top of it under the passenger side of the engine near the edge of the oil pan. Raise the jack until it supports the engine. Do nott get too carried away here. You do not want to raise the car with the jack, just support the engine.

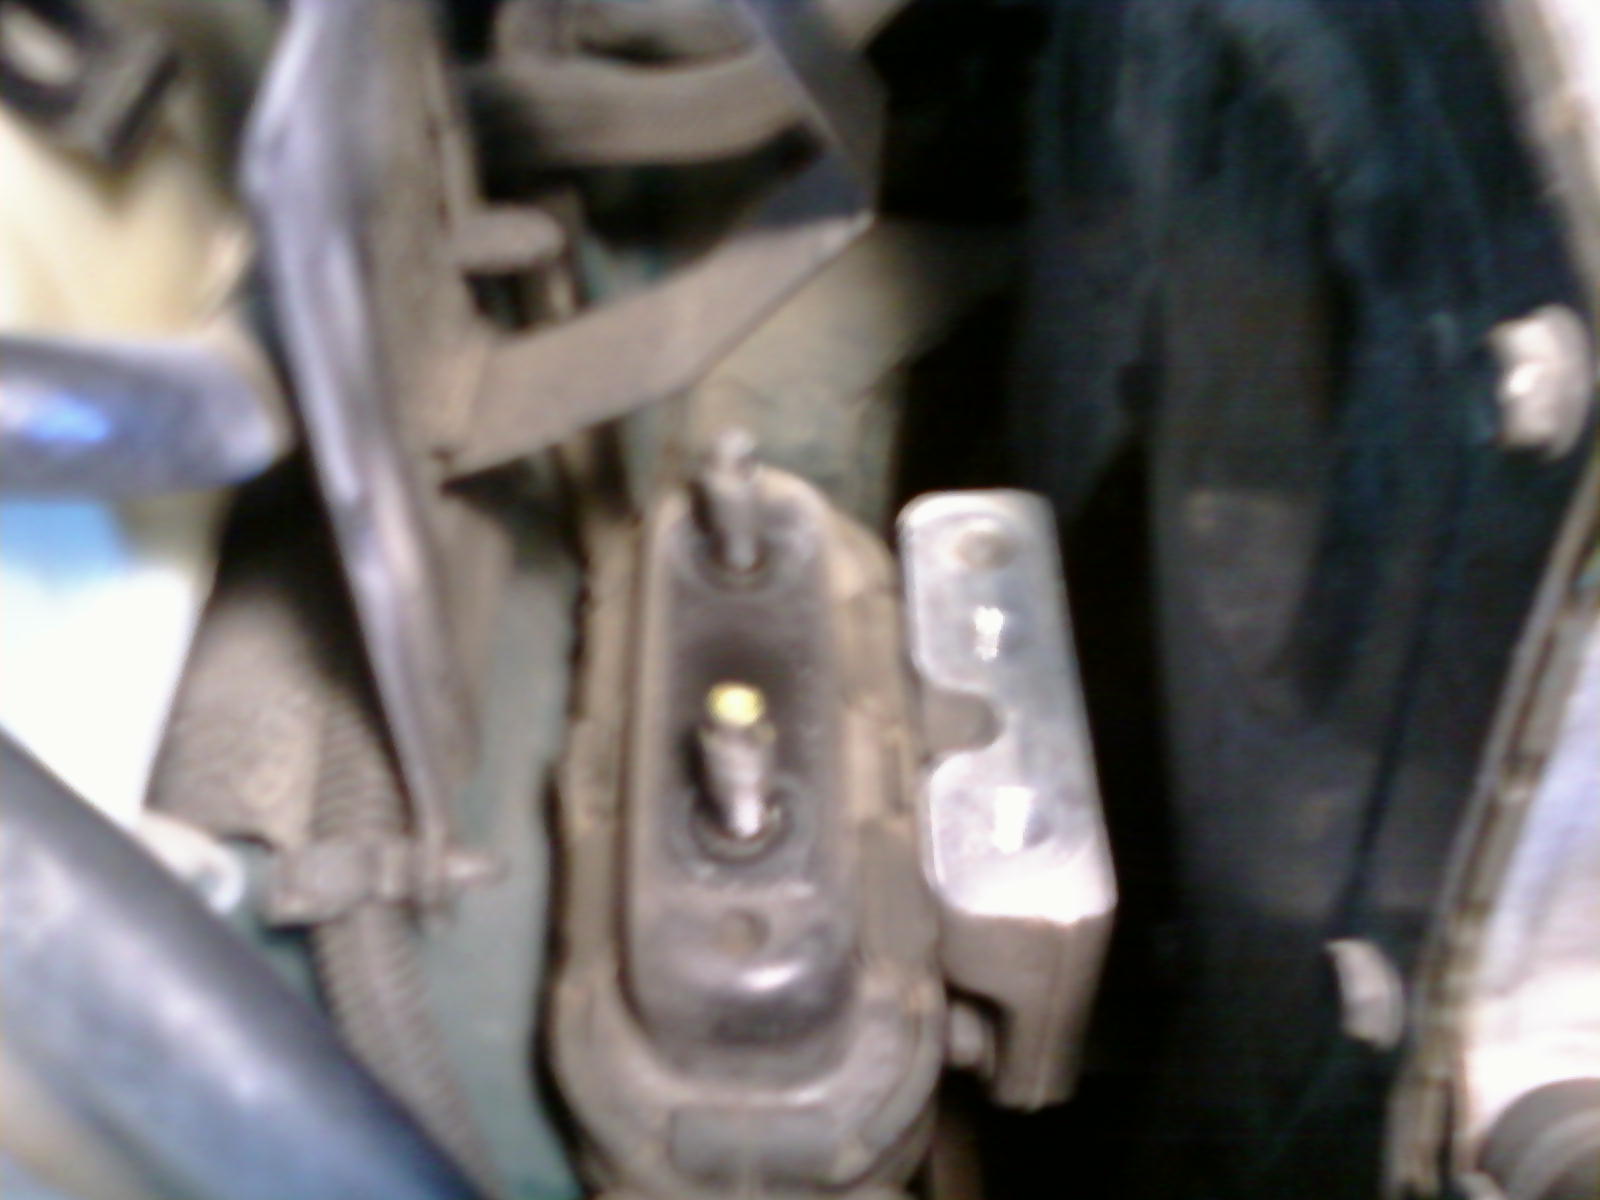
2. After jacking the engine, remove the two bolts indicated by the red arrows.

3. Then remove the two nuts on the other side of this bracket indicated by the yellow arrows. One is completely in the shadow, and the other is mostly exposed to the light in the picture.

4. Lift off the bracket, and place the washers on the studs sticking up from the vulcanized rubber bushing. (Where the yellow arrow nuts were removed)

5. Reinstall the bracket and the bolts indicated by the red arrows. Tighten the bolts.

6. Lower the engine making sure that the studs line up with the holes in the bracket.

7. Reinstall the nuts indicated by the yellow arrows, and tighten them.

8. Remove the floor jack and block of wood from under the car.

9. Start the engine and verify the repair is complete.

The washers should be half an inch flat washers about 1/8 to 3/16 inch thick. Depending on the thickness of the washers, you may need to put two or three on each stud to eliminate the noise.

If you take a picture of the mount after the bracket has been removed and post it to this article, it may make it easier for the next guy to understand exactly where to put the washers.
Imgumby
Was this
answer
helpful?
Yes
No
Friday, June 10th, 2011 AT 3:47 PM
Tiny
GTZ411
  • MEMBER
  • 9 POSTS
Alright, new pictures.
Was this
answer
helpful?
Yes
No
Saturday, June 11th, 2011 AT 10:55 PM
Tiny
GTZ411
  • MEMBER
  • 9 POSTS
Another where the washers go.
Was this
answer
helpful?
Yes
No
Saturday, June 11th, 2011 AT 10:56 PM
Tiny
GTZ411
  • MEMBER
  • 9 POSTS
Okay, after doing the job, which only took like fifteen minutes like you said, the vibration still exist and hard to tell if it is better. I just put one half an inch flat washer because when I put two I did not feel comfortable with the amount of threads for the bolt to catch. I also did assume you were talking about metal washers and not rubber. You may have mentioned that but that is where I stand as of now. Let me know if you have anymore feedback. Thanks
Was this
answer
helpful?
Yes
No
Saturday, June 11th, 2011 AT 11:20 PM
Tiny
IMGUMBY
  • MEMBER
  • 11 POSTS
I would try two, three, or even four washers on each stud, just to see if we are on the right track. Do this in progressive steps, one more pair at a time. What this fix does is to compensate for the natural age compression of the rubber in the motor mount. Years of having the weight of the engine sitting on the rubber causes it to eventually compress. Do not worry about the amount of threads for the nuts to engage for now. For example, if you find that three washers on each stud cures the vibration, you know that you have pinpointed the problem. At that point, you have basically three options.

1. Leave things as they are, and do not worry about the thread engagement. Locktite the nuts in place, and run it. The engine weight is pushing down on the mounts, not pulling up on it, so the nuts are not doing very much work anyway. (Unless you roll the car upside down, and then you have bigger things to worry about than the engine falling out.)
2. Replace that motor mount. However, this might not cure the problem, since the driver's side has probably compressed with age also. That one does not look to be very easy to replace. At that point, you could still go with the washers, and you might need less than before, since the new mount is not compressed.
3. You may be able to unbolt the mount from the body, and place the washers under the mount rather than on top of it. I have not removed that mount, so I am not sure how it is fastened to the body, or if the washers would work under it. It would probably be better to use a piece of flatstock steel of the right size and thickness instead of washers under the mount. The washers may concentrate all of the weight on too small of an area on the body under the mount, and eventually cause it to bend or crack. Remember the body subframe is just sheetmetal bent and welded together to give it structural strength. This is not a problem on the top of the mount, since the bracket is made from much thicker material.

Let me know what you find, and I will see if I can come up with any other alternatives.
Imgumby
Was this
answer
helpful?
Yes
No
+2
Sunday, June 12th, 2011 AT 6:22 PM
Tiny
ROUGHNECKRX
  • MEMBER
  • 1 POST
I went through this exercise of replacing all kinds of things trying to figure it out how to stop this torture of a vibration, until I paid a well know auto repair shop to do a analysis. They told me it was the front and rear transmounts. Cost to replace, about $500.00. So I bought the parts and went about find a place to do the work for a reasonable price. This guy that could barely speak English, expressed to me, it may be the mounts, but probably the passenger motor mount. I was reluctant to listen to him, but had him replace the passenger mount mount, and the rear transmission mount first. Well, it worked. He actually said, he felt it was just the passenger side motor mount and not the transmount at all. So I cant say what one it was, but I would suggest to replace the passenger side motor mount first. Oddly, it is the easiest to replace.
Was this
answer
helpful?
Yes
No
Saturday, December 14th, 2019 AT 11:44 AM

Please login or register to post a reply.

Sponsored links