Removal
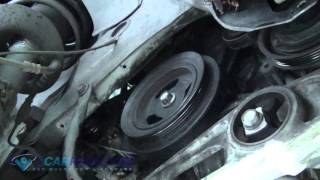
Disconnect negative battery cable. Remove under cover. remove A/C and power steering hose mounting bracket from upper engine mount at timing belt cover. Remove all accessory drive belts. Using End Yoke Holder (MB990767) and Crankshaft Pulley Holder (MD998718) or equivalent, remove crankshaft pulley bolt and pulley.
CAUTION:DO NOT rotate crankshaft counterclockwise (as viewed from timing belt end of engine).
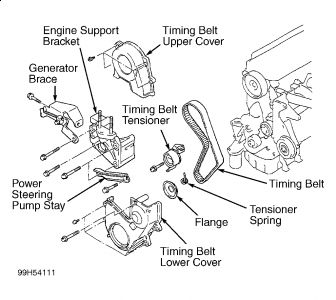
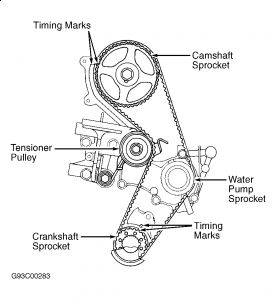
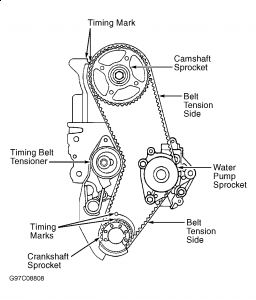
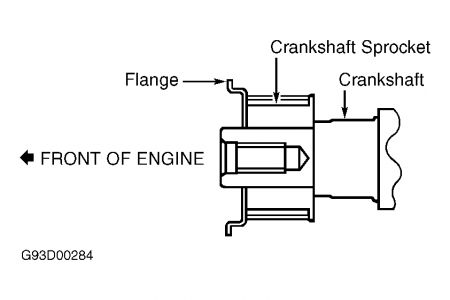
Remove upper and lower timing belt covers. Remove flange. If necessary, remove power steering pump bracket stay and engine support bracket. Rotate crankshaft clockwise (as viewed from timing belt end of engine) until cylinder No. 1 is at TDC of compression stroke, and timing mark on camshaft sprocket and crankshaft sprocket align with timing mark on engine.
If timing belt is to be reused, mark direction of rotation before removing. Loosen timing belt tensioner bolt. Using a screwdriver, move tensioner away from timing belt. Tighten bolt to secure tensioner. Remove timing belt.
Installation
Install timing belt tensioner, leaving bolt loose. Using a screwdriver, push tensioner toward engine mount. Tighten timing belt tensioner bolt.
Align camshaft sprocket and crankshaft sprocket timing marks with timing marks on engine. Keeping tension applied between camshaft, water pump and crankshaft sprockets, install timing belt in the following sequence: crankshaft sprocket, water pump sprocket, camshaft sprocket, then tensioner pulley.
Rotate camshaft in reverse direction and ensure that there is no slack in timing belt. Ensure timing marks are still aligned. Loosen timing belt tensioner to apply spring pressure to timing belt.
Rotate crankshaft 2 complete revolutions clockwise (as viewed from timing belt end of engine) and ensure timing marks are still aligned. Ensure timing belt teeth are properly seated in sprockets. Tighten timing belt tensioner bolt.
Install flange.
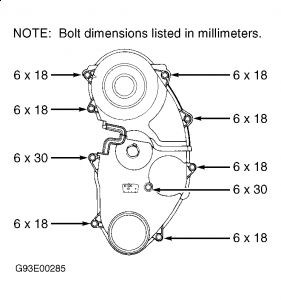
. To complete installation, reverse removal procedure. Ensure proper length bolts are installed in designated areas in timing belt covers. Adjust drive belts to proper tension.
SPONSORED LINKS
Tuesday, June 30th, 2009 AT 7:34 PM