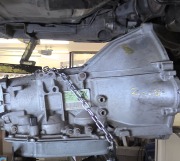
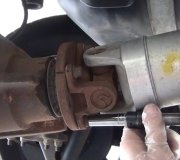
Removal (Sable & Taurus)
1. Remove air cleaner assembly. Disconnect battery cables, and remove battery. Remove battery tray. Disconnect harness connectors from engine. Remove main wiring harness retaining bolt. Remove shift lever.
2. Remove through bolt from left motor mount strut. Secure wiring harness aside. Remove radiator sight shield. Remove upper transaxle-to-engine bolts. On Sable and Taurus, attach Engine Lifting Bracket (D81L-6001-D) to left rear of cylinder head. Lifting bracket should already be installed on right front of cylinder head.
3. On all models, attach Engine Support Bar (D88L-6000-A) across shock towers. Attach engine to support bar. Raise engine to take pressure off engine mounts. Turn off air suspension switch located in trunk (if equipped). Remove dipstick. Disconnect power steering pump pressure and return line retaining bracket. 4. Remove 4 torque converter housing bolts from top of transaxle. Raise vehicle on hoist. Remove front wheels. Separate left tie rod end from steering knuckle. Remove suspension height sensor. Disconnect brake line support brackets. Remove retaining bolts from stabilizer bar. Disconnect lower control arm assemblies. Remove steering gear retaining nuts.
5. Remove front exhaust pipe, converter assembly and mounting bracket. Remove 2 transaxle mount bolts. Remove 4 left engine support bolts, and remove support. Remove power steering gear-to subframe retaining bolts, and tie gear assembly to rear of engine compartment. Remove all subframe-to-engine mount bolts. Support subframe. Remove remaining subframe-to-body bolts, and lower subframe.
6. Position transaxle jack under transaxle. Remove speedometer or vehicle speed sensor from transaxle. Remove transaxle-to-engine supports and transaxle mount. Remove starter and dust cover. Remove transaxle cooler retaining clips. Disconnect transaxle cooler lines using Cooler Line Disconnector (T86P-77265-AH).
7. Remove 4 flexplate-to-torque converter nuts. Pull CV joints from transaxle using a slide hammer, CV Joint Puller (T86P-3514-A1) and Extension (T86P-3514-A2). Remove remaining transaxle-to-engine bolts. Separate transaxle from engine, and lower it out of vehicle.
CAUTION:DO NOT let puller contact speed sensor or damage may result.
Installation
1. To install transaxle, reverse removal procedure. Install new circlip on axle shaft before installing shaft. Fill transaxle to correct level with ATF. See TRANSMISSION SERVICING - A/T article in this Section. 2. Slightly tighten mount bolts. Repeat procedure for right subframe assembly. After both sides are aligned, tighten subframe-to-body mount bolts. Check and adjust axle shaft positioning.
SPONSORED LINKS
Thursday, November 20th, 2008 AT 7:08 PM


