Hey Jeff,
I found this information for you.
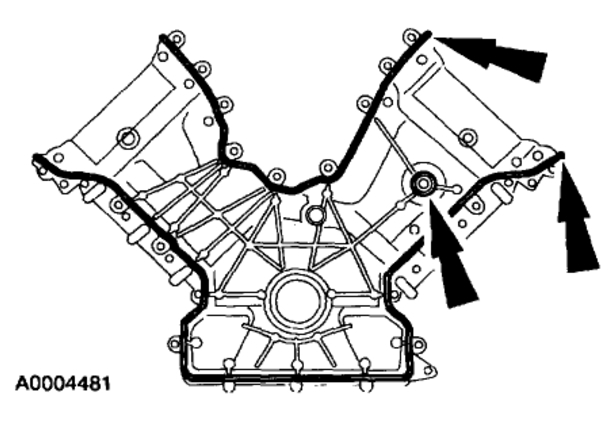
Remove the engine front cover. For additional information, see ENGINE FRONT COVER.
Raise the vehicle.
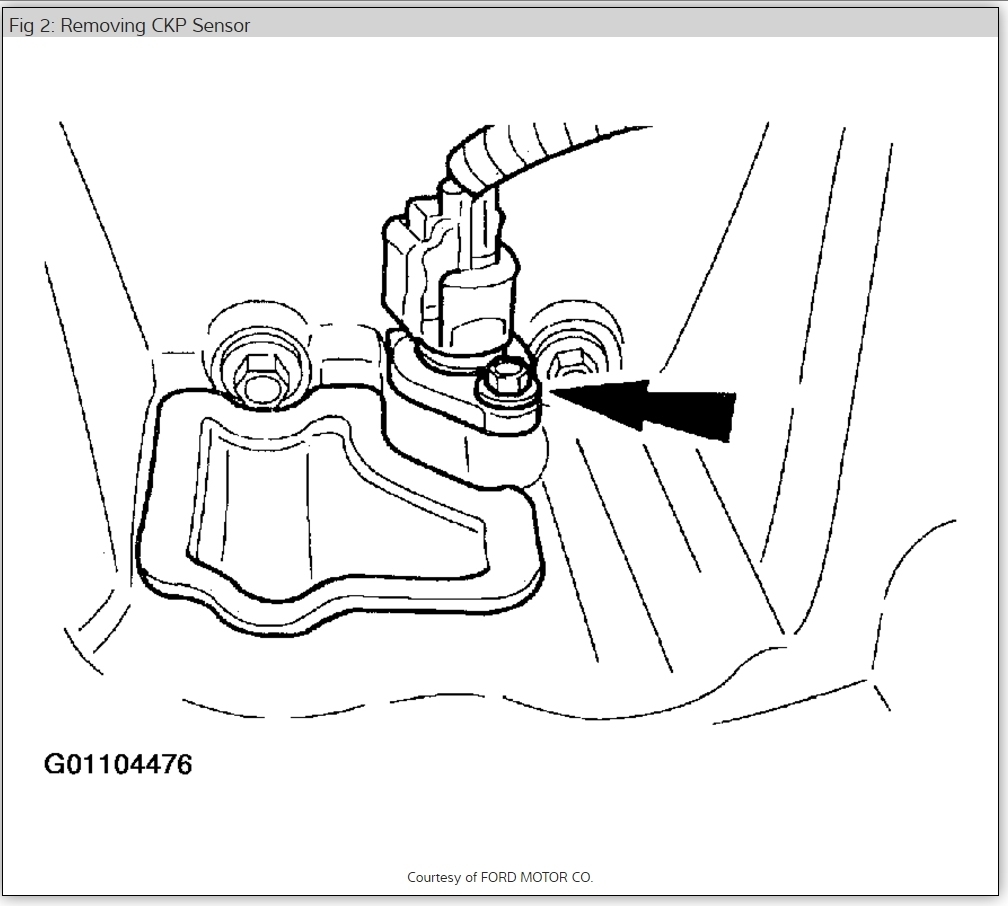
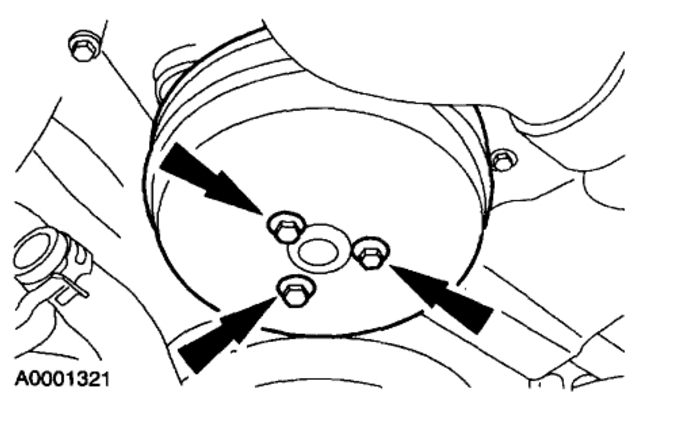
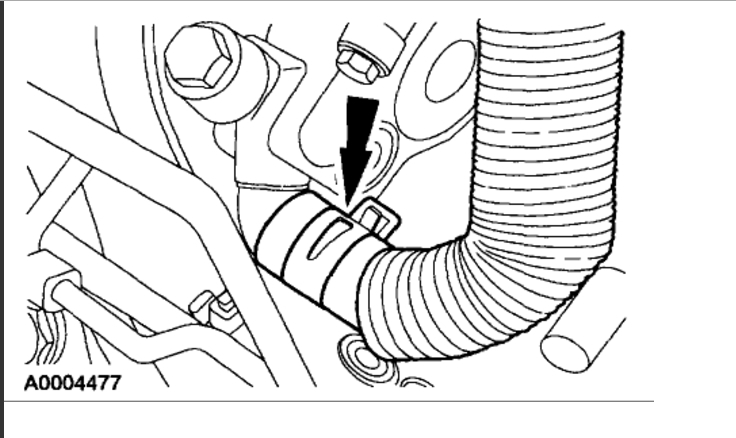
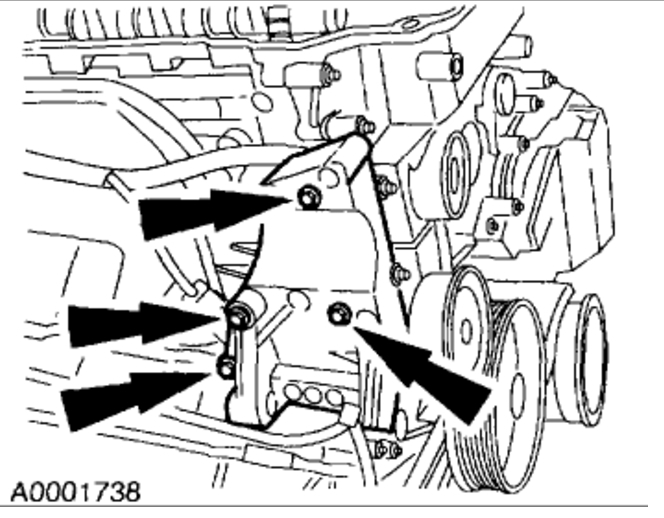
Remove the crankshaft position (CKP) sensor and the torque converter cover.
Fig 2: Removing CKP Sensor
NOTE: There is one window on the ignition pulse wheel that is unique to accept the special tool.
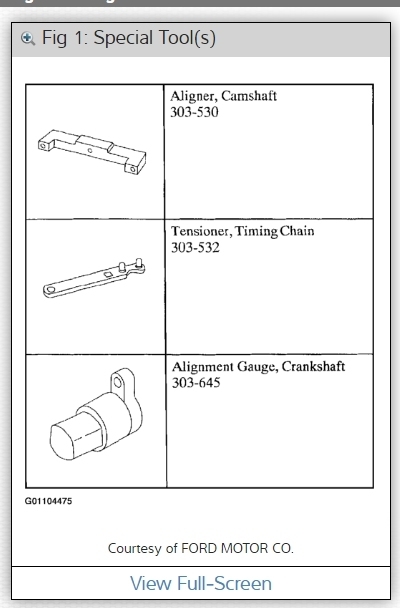
Install the special tool.
Turn the crankshaft to 45 degrees ATDC. The crankshaft keyway will be in the 6 o'clock position.
Install the special tool.
Fig 3: Installing Crankshaft Alignment Gauge
Lower the vehicle.
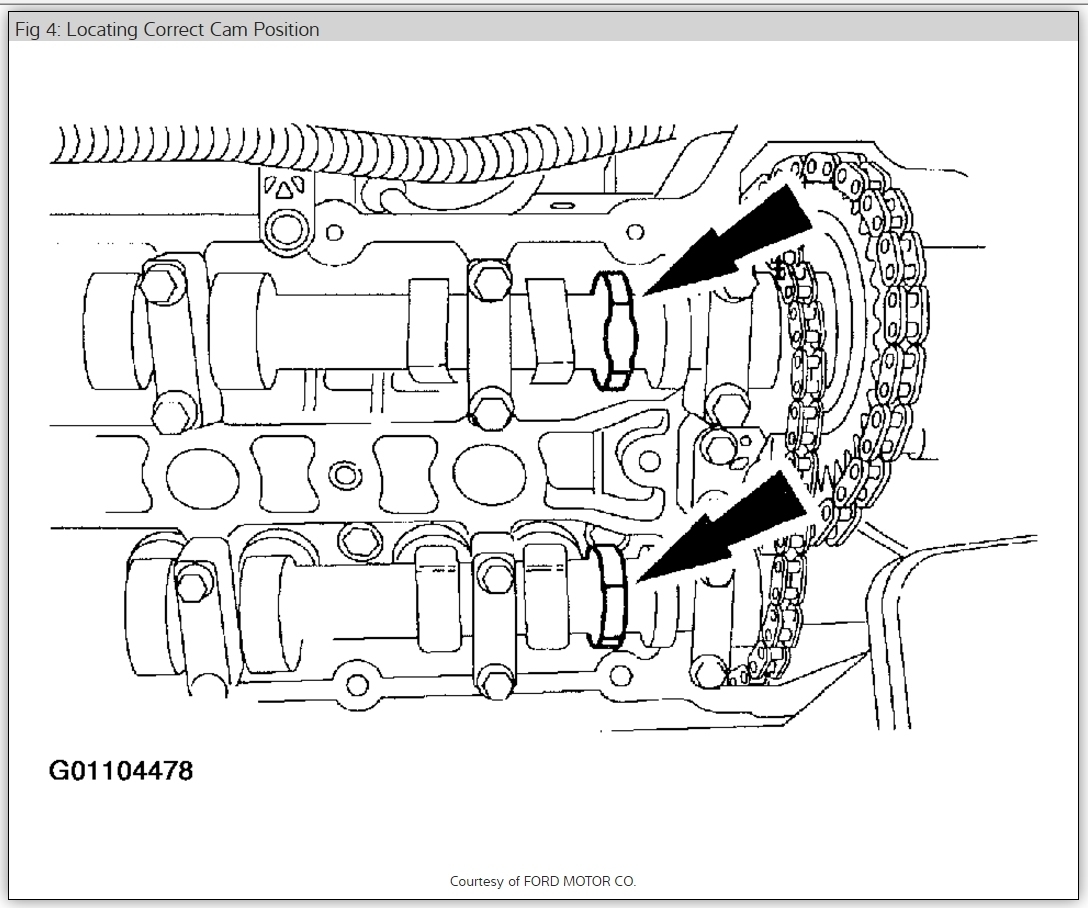
Make sure the lobes of the camshaft are facing upwards. If not, repeat Step 4.
Fig 4: Locating Correct Cam Position
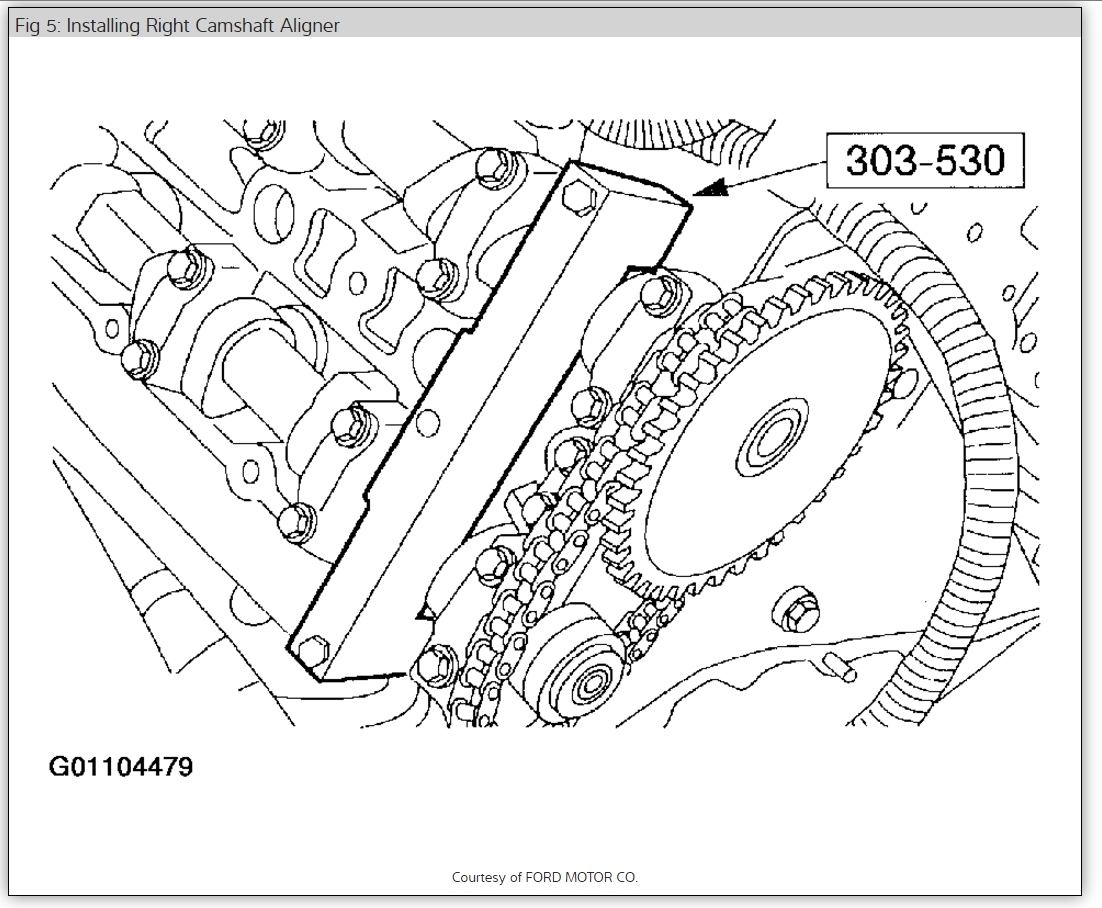
Install the special tool on the RH cylinder head.
Fig 5: Installing Right Camshaft Aligner
CAUTION: An open-end wrench must be used on the flats of the camshaft or damage to the head will occur.
Loosen the exhaust camshaft sprocket bolt.
Fig 6: Loosening Exhaust Camshaft Sprocket Bolt
CAUTION: An open-end wrench must be used on the flats of the camshaft or damage to the head will occur.
Loosen the intake camshaft sprocket bolt and slide the camshaft sprockets forward on the bolt.
Fig 7: Loosening Intake Camshaft Sprocket Bolt
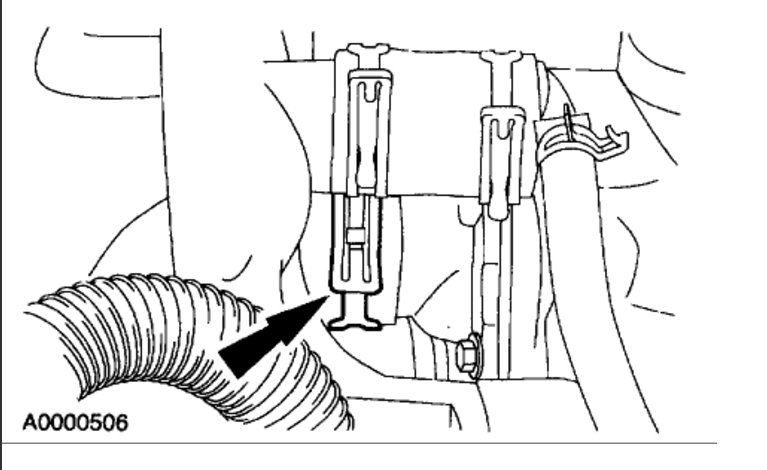
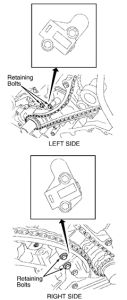
Remove the RH timing chain tensioner.
Fig 8: Removing Right Timing Chain Tensioner
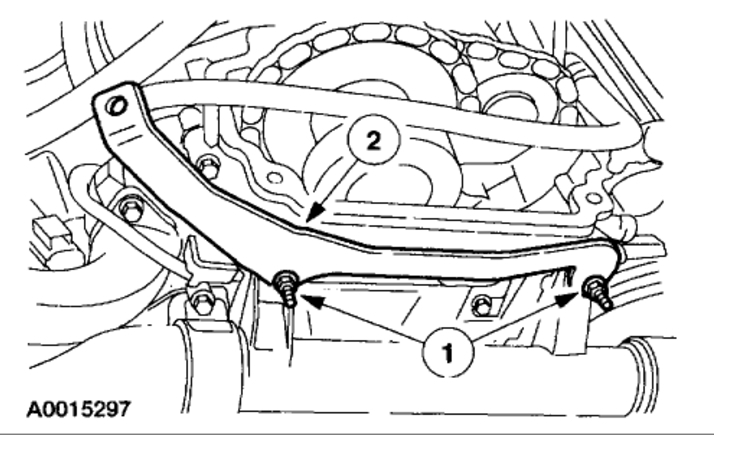
Remove the tensioner arm.
Fig 9: Removing Tensioner Arm
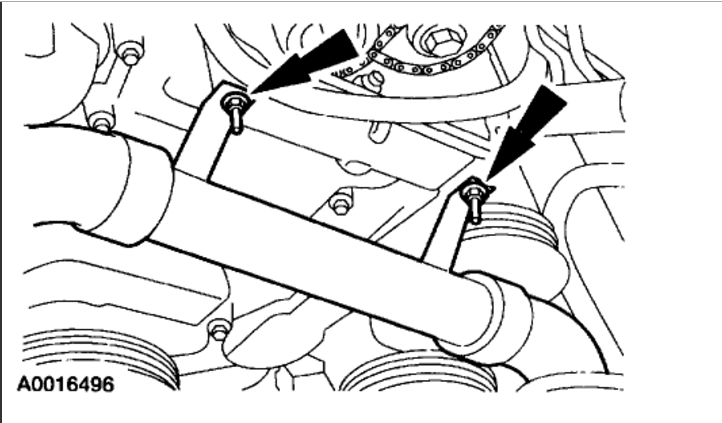
Remove the timing chain guide.
Fig 10: Removing Timing Chain Guide
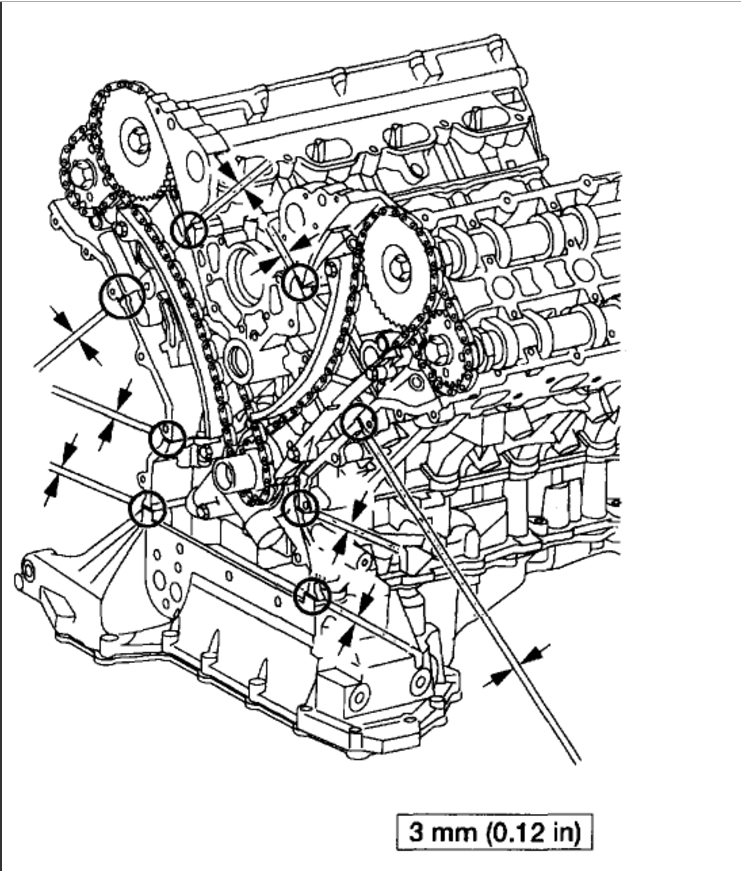
Remove the RH primary timing chain.
Remove the special tool from the RH head.
Fig 12: Removing Camshaft Aligner From Right Head
Install the special tool on the LH head.
Fig 13: Installing Camshaft Aligner On Left Head
CAUTION: An open-end wrench must be used on the flats of the camshaft or damage to the cylinder head will occur. Loosen the exhaust camshaft sprocket bolt.
Fig 14: Loosening Exhaust Camshaft Sprocket Bolt
CAUTION: An open-end wrench must be used on the flats of the camshaft or damage to the cylinder head will occur. Loosen the intake sprocket bolt and slide the camshaft sprockets forward on the bolts.
Fig 15: Loosening Intake Camshaft Sprocket Bolt
Remove the LH timing chain tensioner.
Fig 16: Removing Left Timing Chain Tensioner
Remove the tensioner arm.
Fig 17: Removing Tensioner Arm
Remove the timing chain guide.
Fig 18: Removing Timing Chain Guide
Remove the LH primary timing chain and crankshaft sprocket as an assembly.
Fig 19: Removing Left Primary Timing Chain
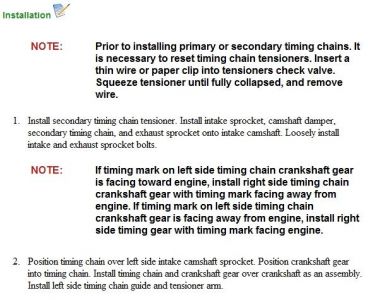
Installation
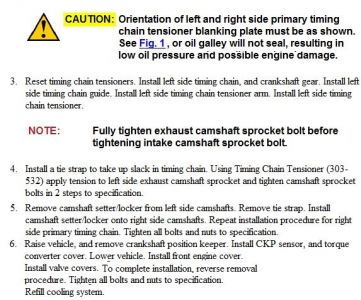
Reset the timing chain tensioners.
Hold the lever toward the tensioner piston.
Using finger pressure, compress the tensioner.
Push the lever down and install a drill rod to lock the piston.
Fig 20: Resetting Timing Chain Tensioners
NOTE: The camshaft holding tool should still be installed on the LH cylinder head.
Position the LH timing chain and crankshaft gear.
Position the timing chain over the LH intake camshaft sprocket.
Position the crankshaft gear in the timing chain.
Position the timing chain and crankshaft gear over the crankshaft as an assembly.
Fig 21: Installing Left Timing Chain
Install the LH timing chain guide.
Fig 22: Installing Left Timing Chain Guide
Install the LH timing chain tensioner arm.
Fig 23: Installing Left Timing Chain Tensioner Arm
Install the LH timing chain tensioner.
Install the timing chain tensioner and bolts.
Remove the drill rod.
Fig 24: Installing Left Timing Chain Tensioner
Install a tie strap to take up the slack in the timing chain.
Fig 25: Installing Tie Strap
NOTE: The exhaust camshaft sprocket bolt must be fully tightened before tightening the intake camshaft sprocket bolt.
Using the special tool, apply 10 Nm (89 lb-in) counterclockwise to the LH exhaust camshaft sprocket and tighten the camshaft sprocket bolts in two stages.
Stage 1: Tighten to 20 Nm (15 lb-ft).
Stage 2: Tighten an additional 90 degrees.
Fig 26: Tightening Camshaft Sprocket Bolts
Remove the special tool.
Fig 27: Removing Camshaft Aligner
Remove the tie strap.
Install the special tool on the right cylinder head.
Fig 28: Installing Camshaft Aligner On Right Cylinder Head
Position the RH timing chain over the RH intake camshaft sprocket and over the crankshaft gear.
Fig 29: Installing Right Timing Chain
Install the RH timing chain guide.
Fig 30: Installing Right Timing Chain Guide
Install the RH timing chain tensioner arm.
Fig 31: Installing Right Timing Chain Tensioner Arm
Install the RH timing chain tensioner.
Install the timing chain tensioner and bolts.
Remove the drill rod.
Fig 32: Installing Right Timing Chain Tensioner
Install a tie strap to take up the slack in the timing chain.
Fig 33: Installing Tie Strap
NOTE: The exhaust camshaft sprocket bolt must be fully tightened before tightening the intake camshaft sprocket bolt.
Using the special tool, apply 10 Nm (89 lb-in) counterclockwise to the RH exhaust camshaft sprocket and tighten the camshaft sprocket bolts in two stages.
Stage 1: Tighten to 20 Nm (15 lb-ft).
Stage 2: Tighten an additional 90 degrees.
Fig 34: Tightening Camshaft Sprocket Bolts
Remove the special tool.
Remove the tie strap.
Fig 35: Removing Camshaft Aligner
Raise the vehicle.
Remove the special tool.
Fig 36: Removing Crankshaft Alignment Gauge
Install the CKP sensor and the torque converter cover.
Fig 37: Installing CKP Sensor
Lower the vehicle.
See images below,
Please let us know happens so it will help others.
Best, Ken
Images (Click to make bigger)
SPONSORED LINKS
Thursday, December 1st, 2016 AT 1:05 PM