2003 Jaguar S-Type V6-3.0L
Oil Pan Removal
All Vehicles
1.Disconnect the battery ground cable.
2.Open the bonnet.
3.Raise the oil level indicator approximately 100mm.
4.Raise and support the vehicle.
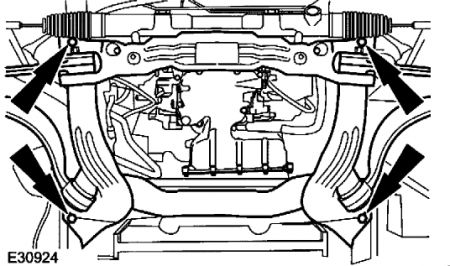
5.Remove the air deflector.
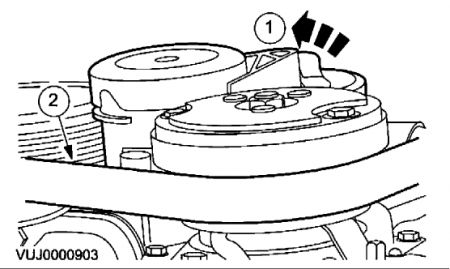
6.Detach the accessory drive belt from the air conditioning (A/C) compressor and generator pulleys.

7.Detach the A/C compressor. Using a suitable tie strap, tie the A/C compressor aside.
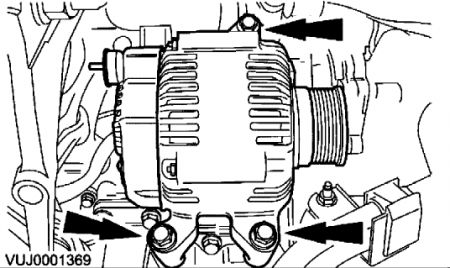
8.Detach the generator. Using a suitable tie strap, tie the generator aside.
9.Drain the engine oil.
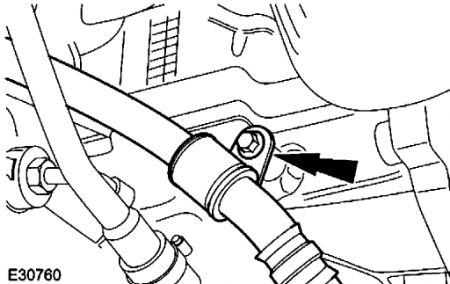
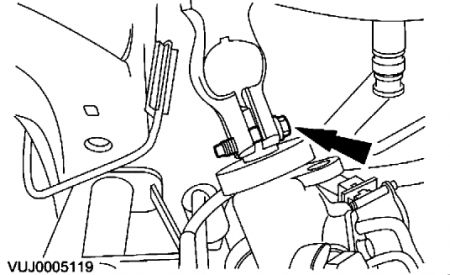
10.Detach the power steering hose.
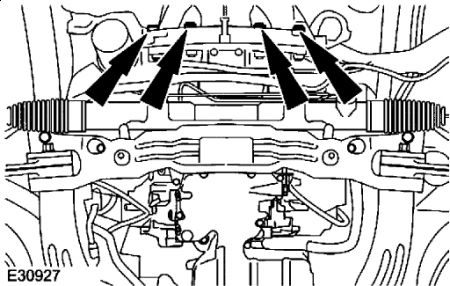
11.Detach the steering gear.

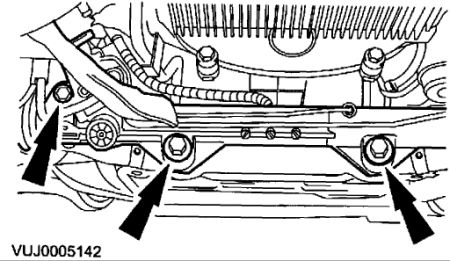
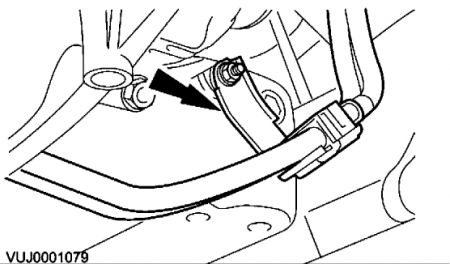
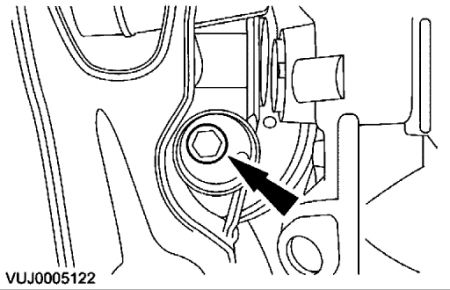
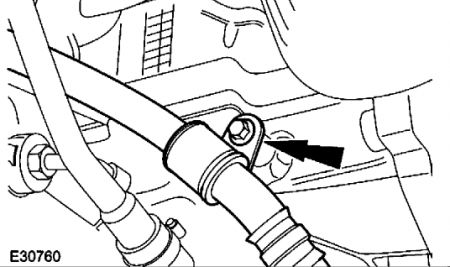
12.NOTE: Left-hand engine mount lower retaining bolt shown, right-hand similar.
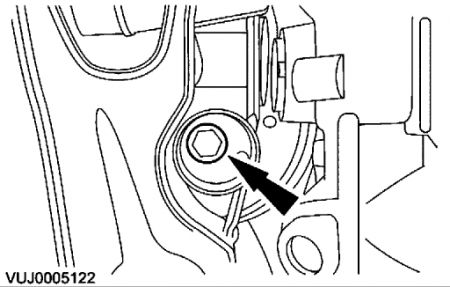
13.Remove the engine mounts lower retaining bolts. Vehicles with Automatic Transmission
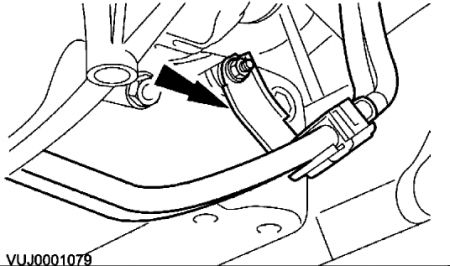
14.Detach the automatic transmission oil cooler tubes retaining bracket. All Vehicles
15.Support the engine and transmission using a suitable transmission jack or axle stand. Position the support on the transmission bell housing behind the oil pan.
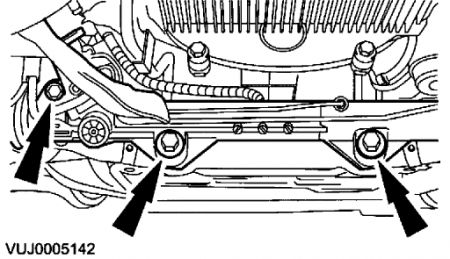
16.WARNING: DO NOT REMOVE THE FRONT SUBFRAME RETAINING BOLTS. FAILURE TO FOLLOW THIS PROCEDURE MAY RESULT IN PERSONAL INJURY. Loosen the front subframe retaining bolts to enable the oil pan to be removed.
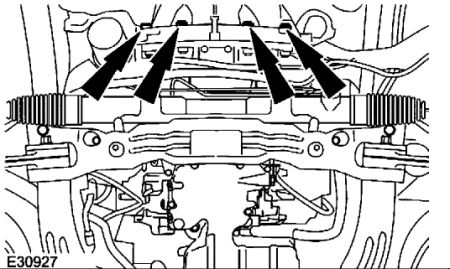
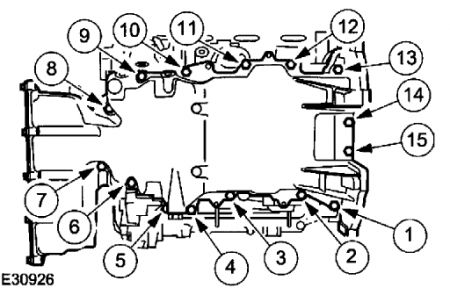
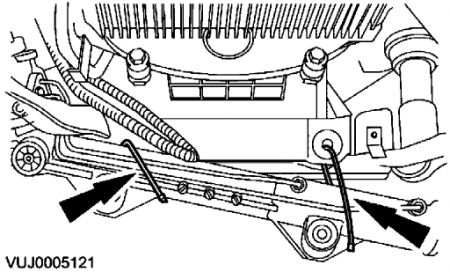
17.Remove the oil pan rear retaining bolts.
18.Remove the oil pan.
*Remove and discard the oil pan gasket.
*Clean and inspect the oil pan and cylinder block sealing surfaces using Metal surface cleaner or equivalent meeting Jaguar specification.
Installation
All Vehicles
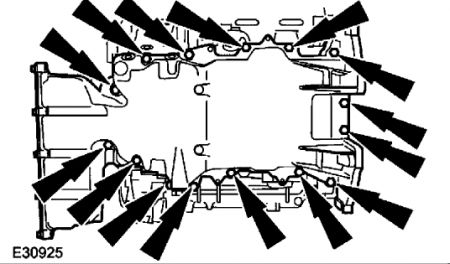
1.NOTE: Apply an 10 mm dot of silicone gasket and sealant meeting Jaguar specification to the engine block and front cover mating surface. NOTE: Loosely install the oil pan to transmission housing bolts. NOTE: Tighten all oil pan retaining bolts with in six minutes of applying the sealer. Install the oil pan rear retaining bolts.
*Complete the tightening sequence.
*Tighten to 25 Nm .
2.Install the oil pan rear retaining bolts.
*Tighten to 45 Nm .
3.Carry out the front subframe alignment procedure.
4.Lower the vehicle.
5.CAUTION: Make sure the engine mounts locate into the correct position when the engine is repositioned. Using the special tools, reposition the engine.
6.Raise the vehicle.
Vehicles with Automatic Transmission
7.Attach the automatic transmission oil cooler tubes retaining bracket
*Tighten to 10 Nm .
All Vehicles
8.NOTE: Left-hand engine mount lower retaining bolt shown, right-hand similar. Install the engine mounts lower retaining bolts.
*Tighten to 63 Nm .
9.Detach the steering gear.
10.Attach the steering gear.
*Tighten to 100 Nm .
11.Install the steering gear shaft pinch bolt.
*Tighten to 35 Nm .
12.Attach the power steering hose.
*Tighten to 10 Nm .
13.NOTE: Install a new sealing washer to oil pan drain plug Install the oil pan drain plug
*Tighten to 24 Nm .

14.To install, reverse the removal procedure.
*Tighten to 48 Nm .
15.Install the Air Conditioning (AC) compressor.
*Tighten to 25 Nm .

16.Atach the accessory drive belt to the air conditioning (A/C) compressor and generator pulleys.
17.Install the dipstick.
18.Install the air deflector.
19.Refill the engine with oil.
Jan 27, 2010 at 9:35 PM