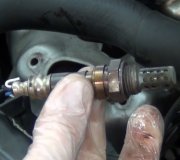
Here's something you might try. This is a copy of a reply for broken bolt, but the procedure is the same. Your remaining part is pretty big so you might be able to clamp a nut in position to weld it.
I had a broken bolt exactly like yours on my '88 Grand Caravan a few years ago. It created the perfect "teachable moment" for my students and especially the kid who felt bad for breaking it. You'll need a wire feed welder and an acetylene torch. Propane torch won't work. The flame is too large and not hot enough. Grab a nut with a center hole slightly larger than the bolt diameter. Center the nut over the broken bolt. Use a small torch tip with a nice blue flame with a sharp point. The tip of the blue flame is the hottest part of the flame. Touch that tip to the center of the bolt to warm it up. The goal is to get the bolt red hot but it never will get that hot because the heat is being sucked away by the intake manifold, (exhaust pipe in your case). Nevertheless, heat the bolt for at least a couple of minutes. Stay away from the nut as much as possible. You want it to stay cool. If you're careful and quick, you can heat the bolt first, then set the nut in place with a pliers just when you're ready to weld. When the bolt is as hot as it's going to get, hand the torch off to a helper and immediately grab the welder. Feed the wire onto the end of the bolt and start to build it up. Stay away from the nut as long as possible. Don't stop welding because you don't want the bolt to have a chance to cool down. As the weld builds, it will fill the hole in the nut and eventually you will also be welding TO the nut. The nut will turn orange. That's ok, but stop welding before the sides of the nut start to melt. You need those sides to be in good shape so a socket will fit on the nut.
Welding works, not by "sticking" to the metal, but by melting the surfaces of the two pieces of metal with a filler metal in between. That's called "penetration". If you don't preheat the bolt, the heat from the welder will be sucked away before the metal of the bolt melts. You'll end up building up the weld until it melts to the nut but it won't have penetrated the bolt. That would be like putting glue on the piece of wood you're using to build a bird house, then assembling the pieces after the glue dries. The preheating gets the bolt up to its melting temperature sooner. It has to reach that temperature from welding before the weld builds up to the nut.
Once the nut is welded to the bolt, let it cool by itself for, ... Oh, ... About ten seconds, then dribble a little water on the nut. Don't pour so much that it floods the surrounding area. You want to shrink the bolt but leave the intake manifold hot. The shock from the water will help break the bond between the bolt and intake manifold. Use a six point socket, ratchet, and extension on the nut to turn the bolt out. If the weld didn't stick to the bolt and you twist the nut off, just grab another nut and try again. I've already had to resort to as many as six attempts before this worked. Sometimes this works better with two people, one to run the torch and one to be standing ready with the welder. Use a high setting on the welder to insure good penetration into the bolt before the weld builds up to the nut.
Okay; back to a live person. You can also look at drilling through the remaining part, then using an Easy Out, although I've never had real good luck with them. They work by gripping the inside of the broken piece as you turn it counter-clockwise, but for me they seem to spread the part and make it even harder to turn.
Monday, September 12th, 2011 AT 10:07 AM


